Advertisement
Quick Links
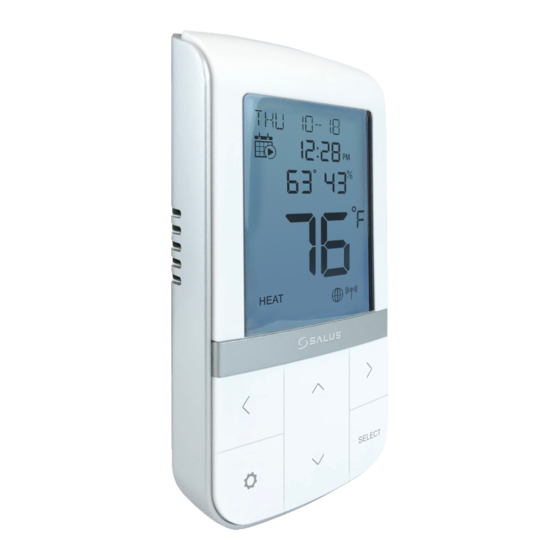
Wireless Radiant
Thermostat
AWRT10RF
Quick Start Guide
For other language versions,
please visit www.salusinc.com
Keys
(Left)
(Up)
(Down)
1. Power Up Device
Open the battery compartment on the
back of the remote and pull the battery
tab to power up the remote. Replace the
batter cover when done.
2. Joining and Pairing the
Thermostat
After the initial boot up process, the WRT
will ask what type of device it will be
paired with. Use the ^ (Up) and v (Down)
keys to select the device type.
Once the device type is selected, the
device will attempt to join a network, and
if a network is joined, the device will then
attempt to pair with a device of the
selected type. Additional selection criteria
may be required depending on the device
type. Below is a summary of the steps for
each device type.
Relay Controller
- join network
- scan for relay controller
- ask for controller and zone to pair with
- pair with controller and zone
- go to Parameter Setup
- go to home screen
Radiator Valve
- join network
- pair with radiator valve actuators
looking for thermostats
- go to Parameter Setup
- go to home screen
Introduction
The Wireless Radiant Thermostat (WRT) creates a comfortable room environment by
accurately controlling your radiant heat system. Besides the intuitive device
interface, you can control the device from anywhere in the world when connected to
the Salus Smart Home service via the Basic Gateway (sold separately) and the Salus
Smart Home app for iOS and Android smartphones and tablets.
Notices:
Wireless Radiant Thermostat.
• Do not cover any of the vents on the thermostat.
• Do not place the unit in a bathroom or area of excessive moisture.
• Do not allow the unit to get wet. This device serves as a temperature control
system only in dry, closed living and office spaces.
• Do not use solvents or aggressive cleaning agents. A dry, soft cloth is
recommended.
The manufacturer does not accept responsibility for any damage caused by not
following these instructions.
In the Box
Make sure you have the following items:
v 2
Thermostat with
Batteries and Wall Mount
Receiver 1 or 2
- join network
- pair with receiver if on network
- go to Parameter Setup
- go to home screen
Press the Settings key at any time to cancel
(Right)
the joining or pairing activity and skip
straight to the Parameter Setup activity.
Change the parameters by pressing ^ or v
to change values and SELECT, < or > to
(SELECT)
move through the parameters. Confirm
the changes by pressing Settings to go to
the home screen.
Once
the
confirmed, future power ups will skip the
Parameter Setup activity. Parameters can
be changed by going to the Parameter
Setup function in the Settings menu.
3. Decide on Location
The Wireless Radiant Thermostat can be
mounted on a wall so that it is out of the
way, or it can be placed in a desk stand
(sold
separately)
temperature at a specific location.
For mounting on
a wall, remove
the Wall Mount
from the back of
the remote and
attach the Wall
Mount
to
desired location
on the wall using
the
provided
anchors and screws.
Then slip the thermostat onto the Wall
Mount until it latches.
To remove the thermostat from the wall
mount, use a small screwdriver to push the
latch at the top of the wall mount to
release the thermostat. Then lift the
thermostat from the wall mount.
4. External Sensor (optional)
If using an external floor
or
air
separately), locate the
ends of the sensor wires
and insert each end into
one of the terminals
located on the
Mount. Using a Philips
Please read these instructions carefully before installing and using the
Screws and
Anchors
parameters
have
been
to
control
the
sensor
(sold
Wall
Tools Required:
• #1 Phillips or flathead
screwdriver
•
Drill with 3/16" bit
(only if you need to use
anchors)
Quick Start
Guide
screwdriver, rotate the
screws clockwise until
the wires are snug.
Then, attach the Wall
Mount to the desired
location on the wall
using
the
provided
anchors and screws,
and slip the thermostat
onto the Wall Mount.
NOTE: The Wireless Radiant Thermostat is
intended only for use with 10k NTC
Thermistor sensors.
To complete the setup of the thermostat
for use with the external sensor, set the
following parameters in Parameter Setup
as appropriate:
P15 EXT SENSOR = ON
P16 XSNSR FNCT = FLR or AIR
If operating as a floor (FLR) sensor, set the
following trip points:
P17 FLOOR TEMP MAX
the
P18 FLOOR TEMP MIN
5. Normal Operation
After installation and setup is complete,
the device will go to the Home Screen. The
keys have the following functions on the
home screen.
Key
Function
SELECT
No function
SETTINGS
Enter/Exit Settings Mode
for the following settings:
• C/F temperature units
• Set Clock and Calendar
• Enter Change Schedule
• Enter Special Functions
• Initiate Identify mode
< or >
Move between Heat/Cool
and OFF.
(Cool is only available when
paired with a relay controller
and is selected by the relay
controller)
^ or v
Enter Set Point Change
mode if not OFF
^ and v
Lock or Unlock the keys if
(hold for 5s)
local locking is enabled.
selection
options
mode
mode
Advertisement

Related Manuals for Salus AWRT10RF


Summary of Contents for Salus AWRT10RF
-
Page 1: Tools Required
Wireless Radiant the Salus Smart Home service via the Basic Gateway (sold separately) and the Salus Smart Home app for iOS and Android smartphones and tablets. -
Page 2: Temperature Sensor
When functions are not confirmed, or there is no input within 3 minutes, the device will return to the Home Screen. No oral or written information or advice given by Salus or a Salus- FCC and Industry Canada INDUSTRY CANADA authorized representative shall modify or extend this warranty.