Table of Contents
Advertisement
Advertisement
Table of Contents

Related Manuals for Zeiss Colibri 7


Summary of Contents for Zeiss Colibri 7
- Page 2 Third party products are cited for information purposes only. This does not represent approval or recommendation of these products. Carl Zeiss Microscopy GmbH accepts no liability for the performance or use of these products. Editor: Carl Zeiss Microscopy GmbH...
-
Page 3: Table Of Contents
3.1.2 Terminal diagram with PC and motorized microscope ............18 Unpacking Colibri 7 ......................19 Attaching Colibri 7 to the microscope and connecting it ............ 19 Configuring Colibri 7 with MicroToolBox (MTB) ..............21 OPERATION ........................23 Starting operation of Colibri 7 for the first time ..............23 Controlling the Colibri 7 solid-state light source.............. - Page 4 Fig. 4 Connection panel on the lamp module ................13 Fig. 5 LED Trigger Box for Colibri 7 (front and rear side) ............... 14 Fig. 6 Control panel for Colibri 7 – operating and function controls ..........15 Fig. 7 Terminal diagram for stand-alone operation ...............
-
Page 5: Introduction
INTRODUCTION Notes on device safety The Colibri 7 solid-sate light source has been designed, produced and tested in compliance with the European standard DIN EN 61010-1 (IEC 61010-1), "Safety requirements for electrical equipment for measurement, control and laboratory use", meets the requirements set forth in the RoHS Directive 2011/65/EC and carries the mark. - Page 6 Depending on the design of the microscope, the risk for the user must be assessed as being markedly lower. When it comes to the intended use of the Axio Observer microscope with Colibri 7, for example, the risk status of the overall system is downgraded to LED risk group 2 according to DIN EN 62471:2009.
- Page 7 The desktop power supply unit should not be brought into contact with moisture. If the housing is damaged, the desktop power supply unit should be taken out of use. Colibri 7 must only be operated with the desktop power supply unit contained in the scope of delivery.
-
Page 8: Warning Labels
INTRODUCTION ZEISS Warning labels Colibri 7 Placing objects against or covering ventilation slats of the control unit may lead to heat build-up that may damage the device and, in extreme cases, cause a fire. Always keep the ventilation slots clear and ensure that no objects enter or fall into the instrument through the ventilation slats. -
Page 9: Warranty Notes
Repairs may only be carried out by ZEISS Service or individuals specially authorized by ZEISS Service. In the event of a problem occurring with the instrument, please contact the ZEISS Service in Germany (see page 33) or your local ZEISS overseas representative. -
Page 10: Description Of The Device
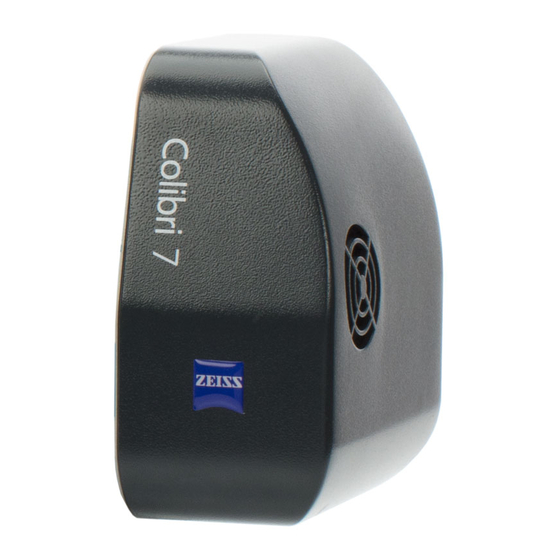
DESCRIPTION OF THE DEVICE Name, intended use, and main features Manufacturer’s designation: Colibri 7 Colibri 7 is designed to be used as a light source for reflected light fluorescence applications. It can be used in connection with the following upright microscopes: Axio Imager −... -
Page 11: Components Overview
DESCRIPTION OF THE DEVICE Colibri 7 Components overview ZEISS Components overview Fig. 3 Components overview of the Colibri 7 solid-state light source 02/2017 423052-7344-001... -
Page 12: Technical Data
Solid-state light source Colibri 7, type RYB-UV ............. 630, 590, 475, 385 nm Solid-state light source Colibri 7, type R[G/Y]B-UV .........630, 590, 555, 475, 385 nm Solid-state light source Colibri 7, type R[G/Y]CBV-UV ....630, 590, 555, 511, 475, 430, 385 nm Ambient conditions Transport (in packaging): Permissible ambient temperature ................ -
Page 13: Operating And Function Controls
Colibri 7 overall LED classification ......LED risk group 3 according to DIN EN 62471:2009 Solid-state light source Colibri 7, type RGB-UV ..... LED risk group 3 according to DIN EN 62471:2009 Solid-state light source Colibri 7, type RYB-UV ....LED risk group 3 according to DIN EN 62471:2009 Solid-state light source Colibri 7, type R[G/Y]B-UV .. -
Page 14: Led Trigger Box For Colibri 7 (Optional)
Colibri 7 2.4.2 LED Trigger Box for Colibri 7 (optional) The LED Trigger Box is only needed if Colibri 7 is to be controlled via a third-party software. The front of the LED Trigger Box contains the following elements (Fig. 5):... -
Page 15: Control Panel For Colibri 7 (Optional)
LED button for wavelength 475 nm LED button for wavelength 511 nm LED button for wavelength 555 nm Fig. 6 Control panel for Colibri 7 – LED button for wavelength 590 nm operating and function controls LED button for wavelength 630 nm... - Page 16 − Turn the control dial Exit feature: − Press Settings button Standby button Colibri 7 standby Activate standby: Press Standby button − In standby mode, the backlighting of all buttons will be switched off, only the standby button will light up.
-
Page 17: Start-Up
LED Trigger Box for Colibri 7 (optional) − The device can be commissioned by the customer. The lamp module of the Colibri 7 solid-state light source is delivered completely assembled in accordance with the equipment ordered (e.g. RGB-UV variation with 4 excitation lines). Terminal diagrams 3.1.1... -
Page 18: Terminal Diagram With Pc And Motorized Microscope
SVB 1 signal distribution box optional, only for fast acquisition CAN / USB optional: for control via ZEN 2.3 (blue edition) ZEISS software for control via third-party software Fig. 8 Terminal diagram with PC and motorized microscope for fast acquisition... -
Page 19: Unpacking Colibri 7
In case of microscope systems with laser application, the clamping screw (Fig. 9/4) on the reflected light mount for fastening the lamp module to the microscope is a safety screw and may only be removed by ZEISS Service (not a customer interface). Otherwise there is a risk of eye damage upon laser coupling. -
Page 20: Fig. 10 Connecting The Lamp Module And Components
• module via the CAN cable to the microscope stand. If Colibri 7 is to be controlled via a third-party software on the PC, connect the USB connection socket • (Fig. 10/6) of the lamp module via USB cable to the PC. -
Page 21: Configuring Colibri 7 With Microtoolbox (Mtb)
Auto Configuration function. If Colibri 7 is connected directly to a PC via USB, the connection type and the lamp module type must be selected manually in the MTB and transferred to the hardware configuration. -
Page 22: Fig. 12 Mtb - Configuring The Lamp Module Type
START-UP ZEISS Configuring Colibri 7 with MicroToolBox (MTB) Colibri 7 • Click on the lamp module entry in the Colibri directory (Fig. 12/1) • Select the name of the installed lamp module in the selection window of lamp modules (Fig. 12/2). -
Page 23: Operation
• Start the control software used (from ZEN 2.3 (blue edition) or third-party software). If the control panel or the LED Trigger Box are connected, they will be powered via Colibri 7 and are also ready for use. Controlling the Colibri 7 solid-state light source... -
Page 24: Control Via Tft Display Of The Microscope
OPERATION ZEISS Controlling the Colibri 7 solid-state light source Colibri 7 4.2.1 Control via TFT display of the microscope Colibri 7 has been mounted on the microscope, connected via CAN and powered via the desktop power supply unit. The microscope has been switched on. -
Page 25: Control Via The Control Panel For Colibri 7
OPERATION Colibri 7 Controlling the Colibri 7 solid-state light source ZEISS If the brightness of several LEDs is controlled simultaneously, the LEDs which are switched on are controlled relative to each other. Thus, various adjustment values may be displayed for the LEDs. - Page 26 OPERATION ZEISS Controlling the Colibri 7 solid-state light source Colibri 7 • Use the control dial to set the brightness for the activated LEDs simultaneously. If the brightness adjustment of several LEDs is controlled simultaneously, the LEDs which are switched on are controlled relative to each other.
-
Page 27: Operation With Pc Via The Zen 2.3 (Blue Edition) Software
OPERATION Colibri 7 Controlling the Colibri 7 solid-state light source ZEISS 4.2.3 Operation with PC via the ZEN 2.3 (blue edition) software Colibri 7 has been mounted on the microscope, connected via CAN and powered via the desktop power supply unit. -
Page 28: Fig. 18 "Locate" Tab - "Camera" Tool
Image acquisition in "Continuous" mode in the "Locate" tab Continuous is the default setting for Colibri 7 in the ZEN 2.3 (blue edition) control software. When acquiring images with a camera mounted to the microscope system, the corresponding LEDs must be manually switched on in the Locate tab and switched off again after acquisition. -
Page 29: Fig. 19 Colibri 7 Control Via "Channels" Tool
Alternatively, you can load a saved experiment. If required, activate the Show All option. • • If required, select Colibri 7 as light source in Selected Lightsource. • Switch the LEDs on or off by activating / deactivating the respective checkbox, e.g. -
Page 30: Fig. 20 "Acquisition" Tab - "Acquisition Mode" Tool
ZEN. The bleaching impact on the probe will be reduced by synchronizing the exposure time of Colibri 7 with that of the camera. In an experiment, the Gated mode is typically faster than the Continuous mode. -
Page 31: Fig. 21 Colibri 7 Control Via "Imaging Setup" Tool
Setup" tool and including of hardware settings into the "Acquisition" tab The control of Colibri 7 in the Imaging Setup tool of the Acquisition tab is analogous to the Microscope Control tool. Additionally, the switching states of LEDs and the... -
Page 32: Care And Service
CARE AND SERVICE ZEISS Care Colibri 7 CARE AND SERVICE Care Disconnect the power plug of the desktop power supply unit prior to cleaning! Clean labels and desktop power supply unit only dry. • Clean lamp module, control panel and LED Trigger Box only with a slightly moist cloth (not dripping wet). -
Page 33: Service
Any repairs to optical components or moving parts inside the instrument or any work on the power supply may only be carried out by service technicians or specially authorized personnel. If servicing is required, please contact your local representative or Carl Zeiss Microscopy GmbH Carl-Zeiss-Promenade 10 07745 Jena, Germany microscopy@zeiss.com... -
Page 34: Annex
ANNEX ZEISS Property rights Colibri 7 ANNEX Property rights Devices, parts of devices or any procedures described in this manual are protected by the following patents: US 6154282 A1 Semiconductor based excitation illuminator for fluorescence and phosphorescence microscopy. 423052-7344-001 02/2017...