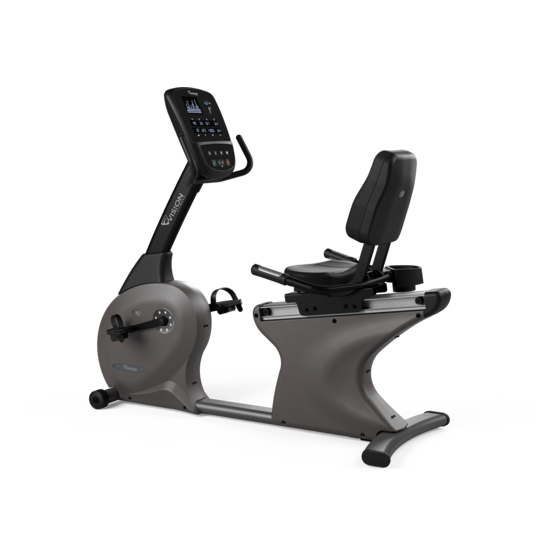
Vision Fitness R60 Owner's Manual
Commercial fitness bike
Hide thumbs
Also See for R60:
- Manual (58 pages) ,
- Assembly manual (2 pages) ,
- Owner's manual (102 pages)
Table of Contents
Advertisement
Advertisement
Table of Contents

Related Manuals for Vision Fitness R60


Summary of Contents for Vision Fitness R60
- Page 1 OWNER’S GUIDE Commercial Fitness Bike...
- Page 4 Bike will be an important tool in helping your members achieve this exercise habit. This Owner’s Guide provides you with basic information on using this VISION FITNESS Bike. A more complete knowledge of your new Bike will assist you in helping your members achieve their goals.
-
Page 5: Table Of Contents
Table of Contents I N T R O G E N E R A L SAFETY INSTRUCTIONS ..... 4 PREVENTATIVE MAINTENANCE ..22 ASSEMBLY & MOVING THE BIKE ..6 TROUBLESHOOTING ......23 STABILIZING THE BIKE, PEDAL STRAP TROUBLESHOOTING HEART RATE ADJUSTMENT ........ - Page 7 HANDLEBARS CONSOLE CONSOLE MAST SEAT HANDLEBARS FRONT FOOT & TRANSPORT WHEELS SEAT ADJUSTMENT ACCESSORY REAR FOOT TRAY R 6 0 C O M M E R C I A L F I T N E S S B I K E...
-
Page 8: Safety Instructions
When using an electrical product, basic precautions should always be followed, including the following: Read all instructions before using this exercise product. Your VISION FITNESS Bike is self-generating (requiring no external power source) and must be pedaled to power-up the console. WARNING! - Page 9 OTHER SAFETY TIPS FOR YOUR VISION FITNESS BIKE CAUTION! If you experience chest pains, nausea, dizziness or shortness of breath, stop exercising immediately and consult your physician before continuing. Bike • Do not wear loose clothing that might catch on any part of the Bike •...
-
Page 10: Assembly & Moving The Bike
ASSEMBLY It is recommended, when possible, that an authorized VISION FITNESS retailer assemble your Bike. If you have elected to assemble this product yourself, for your safety please read and follow each of the steps in the enclosed assembly instructions. If you have any questions regarding any part or function of your Bike, contact your retailer. -
Page 11: Adjustment
STABILIZING THE BIKE After positioning the Bike in its intended location, check its stability by attempting to rock it side to side. Rocking or wobbling indicates that your Bike needs to be leveled. Determine which leveler is not resting completely on the floor. -
Page 12: Seat Positioning
SEAT POSITIONING To determine proper seat position, sit on the seat and position the ball of your foot on the center of the pedal. Your knee should bend slightly at the furthest pedal position. You should be able to pedal without locking your knees or shifting your weight from side to side. -
Page 13: Adjustment
SEAT ADJUSTMENT While seated on the Bike, lift the spring-loaded seat lever on the right side of the seat to make adjustments. Slide the seat forward or backward to desired location. Release the spring-loaded seat lever and gently attempt to rock forward and backward to assure it is locked in place, Maximum seat adjustment position is 28, when... -
Page 14: Self-Powered Feature
SELF-POWERED FEATURE The R60 is a self-powered unit, requiring no external power source. When a user pedals at a speed above 25 revolutions per minute (RPM), the power is generated to allow the Bike to function properly. Because of this self-generating feature, the console feedback will fade away when you cease pedaling. -
Page 15: Contact Heart Rate
CONTACT HEART RATE HAND PULSE HEART RATE SENSORS The Contact Hand Pulse Sensors are included on each product to monitor your heart rate. To use, grasp both of the sensors with a comfortable grip during your workout. The console will display your heart rate. Although your signal will be displayed immediately, it may take the system a few seconds to zero in on your actual heart rate. -
Page 16: Display Console
DISPLAY CONSOLE DISPLAY CONSOLE OVERVIEW The computerized display allows the user to select a workout that meets their desired fitness goals. It also allows the user to monitor the progress and feedback of each workout so they can track improvements in overall fitness over time. -
Page 17: Display Console Descriptions
DISPLAY CONSOLE DESCRIPTIONS A. GO/ENTER/HOLD TO SCAN Press the GO key to begin a MANUAL workout immediately without having to set individual information. When the program begins, you have the ability to adjust resistance levels with the ARROW keys. Feedback information will be calculated using default settings. ENTER: This key is used after entering each piece of information in setup such as age, weight, or level. - Page 18 DISPLAY CONSOLE DESCRIPTIONS (continued) E. PROFILE DISPLAY This window provides a dot matrix profile of the workout segments you are about to complete, as well as those you have already completed, and the level of resistance for each segment. F. MESSAGE/FEEDBACK WINDOWS These windows provide step-by-step instructions in the setup mode, instructions, feedback and motivational messages during your workout.
-
Page 19: Battery
9V Battery BATTERY : Your console is equipped with a 9V battery to maintain workout information. -
Page 20: Program Overviews
PROGRAM OVERVIEWS CLASSICS MANUAL is a user-controlled program in which the resistance remains at a set level unless you decide to change it. INTERVAL is an efficient workout that strengthens your cardiovascular system by alternating work intervals and recovery intervals. Be sure to challenge yourself with intense work intervals. - Page 21 GOAL PROGRAMS TIME GOAL allows you to set your target workout time. This program can help users to manage the time when they workout. DISTANCE GOAL allows you to choose the workout distance. This program can help users to do self-challenge. CALORIES GOAL allows you to set the calories you want to consume during workout.
-
Page 22: Using The Programs
SPEED DISTANCE CALORIES RESISTANCE WATTS TIME METS USING THE PROGRAMS WARNING Heart rate monitoring systems may be inaccurate. Over exercising may result in serious injury or death. If you feel faint stop exercising immediately. SELECTING EASY START Heart Rate Zone Start pedaling to begin The easiest way to begin exercising is to simply press the GO key. - Page 23 Heart Rate Zone RESISTANCE WATTS TIME METS Heart Rate WARNING Max H.R. Heart rate monitoring systems may be inaccurate. Over exercising may result in serious injury or death. If you feel faint stop exercising immediately. Target H.R. The heart rate displayed may be inaccurate and should be used for reference only.
-
Page 24: Using Heart Rate Training
Heart Rate Training means exercising at an intensity that keeps you in your ideal heart rate zone. Your personal heart rate training zone depends on your fitness goal, such as weight loss, cardiovascular endurance, or strength building. VISION FITNESS HRT programs are set up to keep ®... -
Page 25: Telemetric Heart Rate
TELEMETRIC HEART RATE CHEST STRAP The wireless Telemetric Chest Strap uses a pair of electrodes on the underside of the strap to send your heart rate signal to the console. Prior to wearing the chest strap, moisten the two rubber electrode pads with several drops of water. -
Page 26: Preventative Maintenance
SERVICE AND TROUBLESHOOTING PREVENTATIVE MAINTENANCE TIPS • Locate Bike in a cool, dry place. • Clean the top surface of the pedals regularly. • Make sure pedals are kept tight to crank arms. • Keep the display console free from fingerprints and salt buildup caused by sweat. -
Page 27: Troubleshooting
TROUBLESHOOTING Our Bikes are designed to be reliable and easy to use. If, however, you have a problem, these troubleshooting steps may reveal the cause. PROBLEM: The console does not light up. SOLUTION: Make sure you are pedaling the Bike. SOLUTION: Make sure the wire harness is plugged into the back of the console. - Page 28 Do not attempt to service this Bike yourself except for the maintenance tasks described in this manual. For information on service to your VISION FITNESS Bike, contact the local retailer from whom you purchased the Bike. To expedite service, please make sure to have your serial number available.
-
Page 29: Monitor Chest Strap
TROUBLESHOOTING YOUR HEART RATE MONITOR CHEST STRAP PROBLEM: No pulse reading appears. SOLUTION: There may be a poor connection between the contact pads and skin; remoisten the electrode pads. SOLUTION: Transmitter is not properly positioned; reposition the chest strap. SOLUTION: Verify that the distance between the transmitter and receiver is not beyond the recommended range of 36 inches. -
Page 30: Developing A Fitness Program
DEVELOPING A FITNESS PROGRAM By purchasing this piece of VISION FITNESS exercise equipment, you have made a commitment to exercise and now have the convenience of exercising in your own home. Your new equipment offers the flexibility to exercise at whatever time suits you best. It will be easier to maintain a consistent exercise program that will help you achieve your fitness goals. -
Page 31: Exercise Guidelines
EXERCISE GUIDELINES EXERCISE DURATION A common question asked is, “how much exercise do I need?” We recommend following the guidelines set up by the American College of Sports Medicine (ACSM) for healthy aerobic activity. • Exercise three to five days per week. •... -
Page 32: Balanced Fitness
BALANCED FITNESS While cardiovascular exercise has been the primary method of fitness for many programs over the years, it should not be the only method. Strength Training and Flexibility Training have become more popular as exercise has developed. Incorporating Strength and Flexibility Training into your current exercise program will give you the balance you need to improve your athletic performance, reduce susceptibility to injury, increase metabolic rate, increase bone density, and reach your goals faster. - Page 36 MOVE WITH CONFIDENCE 1600 Landmark Drive • Cottage Grove, WI 53527 toll free 800.335.4348 • fax 608.839.8731 www.visionfitness.com ©2019 Vision Fitness. All Rights Reserved. Comfort Arc, ECB-Plus, HRT, Quiet-Glide, and SPRINT 8 are Trademarks of Vision Fitness. 07.19 REV 2...