Table of Contents
Advertisement
We advise you to read this manual carefully, which contains all the instructions for
maintaining the appliance's aesthetic and functional qualities.
For further information on the product: www.smeg.com
Contents
4
4
5
5
5
6
6
6
7
7
8
8
9
10
10
10
10
11
11
19
20
24
28
28
28
28
28
28
29
29
30
31
34
35
35
36
36
3
Advertisement
Table of Contents

Related Manuals for Smeg DOSPA38X


Summary of Contents for Smeg DOSPA38X
-
Page 1: Table Of Contents
4.10 Extraordinary maintenance 5 Installation 5.1 Electrical connection 5.2 Cable replacement 5.3 Positioning We advise you to read this manual carefully, which contains all the instructions for maintaining the appliance's aesthetic and functional qualities. For further information on the product: www.smeg.com... -
Page 2: Instructions
Instructions 1 Instructions • Do not modify this appliance. • Do not insert pointed metal objects 1.1 General safety instructions (cutlery or utensils) into the slots in the appliance. Risk of personal injury • Do not try to repair the appliance •... -
Page 3: Manufacturer Liability
Instructions For this appliance 1.4 Disposal This appliance must be disposed of • Ensure that the appliance is switched off separately from other waste before replacing the bulb. (Directives 2002/95/EC, 2002/ • Do not rest any weight or sit on the open 96/EC, 2003/108/EC). -
Page 4: Identification Plate
Instructions Our appliances are packed in non- 1.7 How to read the user manual polluting and recyclable materials. This user manual uses the following reading • Consign the packing materials to the conventions: appropriate selective collection centres. Instructions Plastic packaging General information on this user Danger of suffocation manual, on safety and final... -
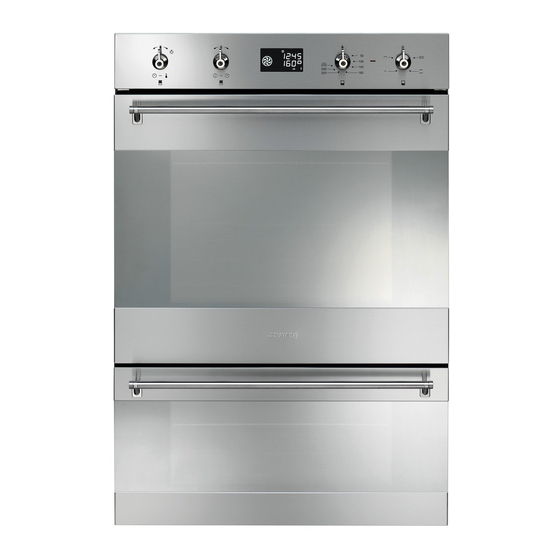
Page 5: Description
Description 2 Description 2.1 General Description 1 Control panel 6 Rack/tray support frames 2 Main oven light Frame shelf 3 Main oven seal 7 Auxiliary oven light 4 Main oven door 8 Auxiliary oven seal 5 Fan 9 Auxiliary oven door... -
Page 6: Control Panel
Description 2.2 Control panel 1 Main oven temperature knob 6 Auxiliary oven function knob This knob allows you to select the cooking The oven's various functions are suitable for time and temperature, set programmed different cooking modes. After selecting the cooking and the current time as well as turn required function, set the cooking the light inside the oven on and off. -
Page 7: Available Accessories
Description The fan causes a steady outflow of air from Tray rack above the door which may continue for a brief period of time even after the appliance has been turned off. Interior lighting The oven light comes on when the door is opened or any function is selected, except Turn the temperature knob briefly to the right To be placed over the top of the oven tray;... -
Page 8: Use
3 Use Improper use Risk of damage to enamelled 3.1 Instructions surfaces High temperature inside the oven • Do not cover the bottom of the cooking during use compartment with aluminium or tin foil Danger of burns sheets. • If you wish to use greaseproof paper, •... -
Page 9: Auxiliary Oven
3.4 Auxiliary oven The two ovens can be used at the same time, except for the Pyrolytic function. To switch the auxiliary oven on: 1. Select the cooking function using the function knob. 2. Select the temperature using the temperature knob. 3.5 Main oven with display The display only refers to the main oven. - Page 10 Operating modes Stand-by: When no function is selected, the display shows the current time and the 1. Temperature symbol 2. Minute minder timer duration 3. Function duration 4. Programmed cooking duration (if timed cooking has been selected) 5. Time display Setting the time On the first use, or after a power failure, ON: When a function is activated, the...
- Page 11 Cooking functions Functions list The combination of the fan and the circulaire heating element, in ECO mode, is particularly indicated for cooking on a single shelf, with reduced power consumption. 1. Select a traditional cooking function with Static the function knob. As the heat comes from above and 2.
- Page 12 Fan assisted Circulaire The operation of the fan, combined The combination of the fan and the with traditional cooking, ensures circulaire heating element consistent cooking even with (incorporated in the rear of the complex recipes. Perfect for biscuits oven) allows you to cook different and cakes, even when foods on several levels, as long as simultaneously cooked on several...
- Page 13 Minute minder Small grill Using only the heat released from This function only activates the the central element, this function buzzer, without stopping cooking. allows you to grill small portions of meat and fish for making kebabs, The minute minder can be toasted sandwiches and any types activated both during cooking and of grilled vegetable side dishes.
- Page 14 4. At the end of the cooking time STOP Timed cooking appears on the display and a buzzer Timed cooking is the function sounds that can be deactivated by which allows a cooking operation pressing the temperature knob. to be started and then ended after a specific length of time set by the user.
- Page 15 Modifying the data set during timed 2. Turn the knob right or left to set the cooking cooking duration from 00:01 to 12:59. Keep the knob turned for a fast increase During operation, it is possible to modify or decrease. timed cooking duration: 1.
- Page 16 5. At the end of the cooking time STOP Modifying the data set during programmed cooking appears on the display and a buzzer sounds that can be deactivated by After modifying the cooking pressing the temperature knob. duration, the end of cooking time must be re-set.
-
Page 17: Cooking Advice
3.6 Cooking advice Advice for cooking desserts/pastries and biscuits General advice • Use dark metal moulds: They help to • Use a fan assisted function to achieve absorb the heat better. consistent cooking at several levels. • The temperature and the cooking time •... -
Page 18: Special Functions And Automatic Programs
To save energy Proving • Stop cooking a few minutes before the time normally used. Cooking will continue for the remaining minutes with the heat which has accumulated inside the oven. • Reduce any opening of the door to a minimum to avoid heat dispersal. - Page 19 Shabbat After activating the Shabbat function the settings cannot be altered. Any action on the knobs will produce no effect; only the function knob remains active to allow the appliance to be turned off. This function allows food to be 1.
- Page 20 Defrosting by weight Preset parameters: Type Weight (g) Time (min) Meat Fish Fruit This function defrosts foods on the Bread basis of the type and weight of the frozen product. 1. Place the food inside the oven. Automatic programs 2. Press the function knob to select defrosting by weight, marked by “dE00”...
- Page 21 Automatic programs table The times indicated in the tables do not include the preheating times. MEATS (01 - 05) Weight Time Subcategory Level Function Temp. (°C) (minutes) Roast beef 1000 Circulaire Pork loin 1000 Turbo Lamb 1000 Turbo Veal 1000 Fan assisted Roast chicken 1000...
-
Page 22: Secondary Menu
BREAD - PIZZA - PASTA (14-20) Weight Time Subcategory Level Function Temp. (°C) (minutes) Leavened bread 1000 Circulaire Pan baked pizza 1000 Fan assisted Stone baked pizza Fan assisted Pasta bake Static Lasagne Static Paella Fan assisted Quiche 1000 Static 3.8 Secondary menu With the appliance in Stand-By status 1. - Page 23 Child Lock mode: This mode allows the Showroom mode (for exhibitors only): appliance to lock the controls automatically This mode allows the appliance to after one minute of normal operation deactivate all heating elements, while without any intervention from the user. keeping the control panel active.
- Page 24 Light timing mode LO: low power. For greater energy savings, the light is automatically deactivated one minute from the start of cooking. Activating low power mode means that preheating and cooking times may be extended. To stop the appliance from automatically deactivating the light after one minute, set If the mode is active, the this mode to OFF.
- Page 25 Auxiliary oven cooking information table Runner Temperature Food Weight (Kg) Function position from Time (minutes) (°C) the bottom Lasagne 3 / 4 Static 1 or 2 220 - 230 50 - 60 Pasta bake Static 1 or 2 220 - 230 Roast veal Static 180 - 190...
-
Page 26: Cleaning And Maintenance
Cleaning and maintenance 4 Cleaning and maintenance 4.4 Food stains or residues Do not use metallic sponges or sharp 4.1 Instructions scrapers as they will damage the surfaces. Use ordinary non-abrasive products with Improper use the aid of wooden or plastic utensils if Risk of damage to surfaces necessary. -
Page 27: Cleaning The Door Glazing
Cleaning and maintenance 2. Grasp the door on both sides with both 4.6 Cleaning the door glazing hands, lift it forming an angle of around The glass in the door should always be kept 30° and remove it. thoroughly clean. Use absorbent kitchen roll. -
Page 28: Cleaning The Inside Of The Oven
Cleaning and maintenance 4.8 Cleaning the inside of the oven For the best oven upkeep, clean it regularly after having allowed it to cool. Take out all removable parts. 5. Clean the external glass panel and the panels previously removed. Use absorbent kitchen roll. -
Page 29: Pyrolytic: Automatic Main Oven Cleaning
Cleaning and maintenance Removing racks/trays support frames 4.9 Pyrolytic: automatic main oven cleaning Removing the guide frames enables the sides to be cleaned more easily. This Pyrolytic is an automatic high- operation should be performed each time temperature cleaning procedure the automatic cleaning cycle is used (on which causes dirt to dissolve. - Page 30 Cleaning and maintenance Preliminary operations Pyrolytic cycle Before starting the pyrolytic cycle: • Clean the internal glass pane following the usual cleaning instructions. • For very stubborn encrustations spray an oven cleaning product onto the glass (read the warnings on the product); leave for 60 minutes, then rinse and dry the glass using kitchen roll or a microfibre 1.
- Page 31 Cleaning and maintenance Setting of programmed pyrolytic cycle During the pyrolytic cycle the fans produce a more intense level of It is possible to program the pyrolytic cycle noise due to a greater rotation start time like all other cooking functions. speed.
-
Page 32: Extraordinary Maintenance
Cleaning and maintenance 4.10 Extraordinary maintenance 5. Replace the lamp with one of the same type (40W). Live parts 6. Refit the cover correctly, so that the Danger of electrocution moulded part of the glass is facing the door. • Disconnect the oven power supply. 7. -
Page 33: Installation
Installation 5 Installation Connection modes: • 220-240 V 1N~ 5.1 Electrical connection Power voltage Danger of electrocution • Have the electrical connection Use a 3 x 4 mm² three-core cable. performed by authorised technical • 380-415 V 2N~ personnel. • The appliance must be connected to earth in compliance with electrical system safety standards. -
Page 34: Cable Replacement
Installation 5.2 Cable replacement 5.3 Positioning Power voltage Heavy appliance Danger of electrocution Danger of crush injuries • Disconnect the main power supply. • Place the appliance into the piece of furniture with the aid of a second person. 1. Unscrew the fastening screws 2 of the Pressure on the open door terminal board cover. - Page 35 Installation Fixing Mounting (mm) To secure the appliance to the counter, The oven is designed for mounting into any screw in 6 screws through the holes in the piece of furniture as long as it is heat- frame. resistant. Respect the unit dimensions and the oven overall dimensions for positioning.
- Page 36 Installation Create an opening with a total Create an opening 35-40 mm deep in the top rear part of the unit. surface area of at least 200 cm² in the bottom front part of the unit.