Table of Contents
Advertisement
Quick Links
This .pdf document is bookmarked
Operating Instructions and Parts Manual
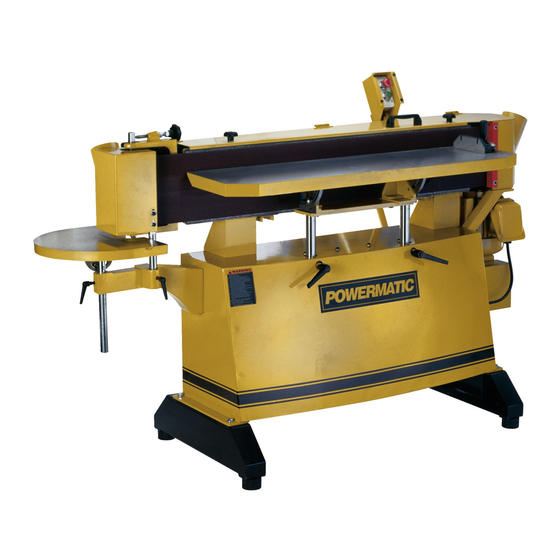
Oscillating Edge Sander
Model OES9138
For machines with serial no. 1711OES91380280 and higher.
Powermatic
427 New Sanford Rd.
LaVergne, TN 37086
Part No. M-0460268
Ph.: 800-274-6848
Revision F1 10/2018
www.powermatic.com
Copyright © 2018 Powermatic
Advertisement
Table of Contents

Related Manuals for Powermatic OES9138


Summary of Contents for Powermatic OES9138
- Page 1 This .pdf document is bookmarked Operating Instructions and Parts Manual Oscillating Edge Sander Model OES9138 For machines with serial no. 1711OES91380280 and higher. Powermatic 427 New Sanford Rd. LaVergne, TN 37086 Part No. M-0460268 Ph.: 800-274-6848 Revision F1 10/2018 www.powermatic.com Copyright © 2018 Powermatic...
-
Page 2: Warranty And Service
Powermatic sells through distributors only. The specifications listed in Powermatic printed materials and on the official Powermatic website are given as general information and are not binding. Powermatic reserves the right to effect at any time, without prior notice, those alterations to parts, fittings, and accessory equipment which they may deem necessary for any reason whatsoever. -
Page 3: Table Of Contents
Warranty and Service ............................ 2 Table of Contents ............................3 Warning ................................. 4 Introduction..............................6 Specifications ..............................6 Features of the OES9138 Edge Sander ....................... 7 Unpacking ..............................8 Contents of the Shipping Container ......................8 Assembly ............................... 8 Control Switch Bracket ..........................9 Dust Collection ............................ -
Page 4: Warning
5. Do not use this edge sander for other than its intended use. If used for other purposes, Powermatic disclaims any real or implied warranty and holds itself harmless from any injury that may result from that use. - Page 5 27. Never leave the machine running unattended. Turn the power off and do not leave the machine until it comes to a complete stop. 28. Remove loose items and unnecessary work pieces from the area before starting the machine. WARNING: This product can expose you to chemicals including lead and cadmium which are known to the State of California to cause cancer and birth defects or other reproductive harm, and phthalates which are known to the State of California to cause birth defects or other reproductive harm.
-
Page 6: Introduction
Introduction This manual is provided by Powermatic covering the safe operation and maintenance procedures for a Model OES9138 Oscillating Edge Sander. This manual contains instructions on installation, safety precautions, general operating procedures, maintenance instructions and parts breakdown. This machine has been designed and constructed to provide consistent, long-term operation if used in accordance with instructions set forth in this manual. -
Page 7: Features Of The Oes9138 Edge Sander
Features of the OES9138 Edge Sander Read and understand the entire contents of this manual before attempting set-up or operation! Failure to comply may cause serious injury. -
Page 8: Unpacking
Unpacking Open shipping container and check for shipping damage. Report any damage immediately to your distributor and shipping agent. Do not discard any shipping material until the Edge Sander is assembled and running properly. Compare the contents of your container with the following parts list to make sure all parts are intact. -
Page 9: Control Switch Bracket
7. The Edge Sander should be located in a dry, well-lighted area, on a solid and level surface, preferably a concrete floor. Leave plenty of space around the machine for operations and routine maintenance work. 8. Exposed metal areas of the Edge Sander have been factory coated with a protectant. -
Page 10: 230 Volt Operation
Edge Sander. 230 Volt Operation The Model OES9138 Edge Sander single phase unit is designed to run on 230 volt power only. The three phase unit is pre-wired for 230 volt power, but can be converted to 460 volt if so desired (see “Converting to 460 Volt”... -
Page 11: Test Run After Wiring
Test Run After Wiring On the three-phase unit, after wiring has been completed, you should check that the wires are connected properly: 1. Connect machine to power source and press the start button (A, Figure 8). 2. The sanding belt should move left to right, as viewed from the front of the machine. -
Page 12: Main Table Tilting
Main Table Tilting The main table can be tilted up to 5 in and 45 out, to match the angle of your workpiece. 1. Loosen the locking handle (B, Figure 11) on both sides beneath the table. 2. With the workpiece on the table, swivel the table into the desired position with the workpiece, or use the indicator scale (C, Figure 11). -
Page 13: End Guard
End Guard The end guard (A, Figure 15) on the right side of the machine can be swung out of the way for sanding long workpieces. (The miter gauge will need to be removed for such a procedure.) Loosen the hand knob (B, Figure 15) and swing open the end guard all the way until it catches the latch behind it. -
Page 14: Operating Controls
To adjust tracking, proceed as follows: 1. Loosen the nut (A, Figure 18). 2. Turn the adjustment knob (B, Figure 18) counter-clockwise to shift the belt upward; clockwise to shift the belt downward. 3. When the belt is centered and tracking properly, tighten nut (A, Figure 18). -
Page 15: Maintenance
The table should be kept clean and free of rust. If rust appears on the table, use 000 steel wool Maintenance with a paste mixture of household ammonia and good commercial detergent Before doing maintenance on commercial rust remover available from most the machine, disconnect it from the electrical hardware and tool supply stores). - Page 16 Troubleshooting the OES9138 Edge Sander Trouble Probable Cause Remedy Machine will not Machine not connected to Verify machine is connected to power. start/restart or power source. repeatedly trips Fuse blown, or circuit circuit breakers or Replace fuse, or reset circuit breaker.
- Page 17 Trouble Probable Cause Remedy Machine will not Check to make certain all electrical connections start/restart or are correct and properly tight. The electrical repeatedly trips connections other than the motor are circuit breakers or Miswiring of the unit. preassembled and tested at the factory. Therefore, blows fuses.
- Page 18 Trouble Probable Cause Remedy Work burns. Wrong sanding belt Use coarser grit for stock removal. surface. Feed pressure too great. Never force workpiece into steel platen. Use just enough pressure, and let the sanding belt do the work. Sanding belt Biting too deep.
-
Page 19: Replacement Parts
Serial Number of your machine available when you call will allow us to serve you quickly and accurately. Non-proprietary parts, such as fasteners, can be found at local hardware stores, or may be ordered from Powermatic. Some parts are shown for reference only, and may not be available individually. -
Page 20: Parts List: Base Assembly
Parts List: Base Assembly Index No. Part No. Description Size 1 ....OES-001 ....Machine Base ..................1 2 ....OES-002 ....Magnetic Motor Starter ........1Ph, 230V ....1 ....OES-002C ....Contactor (not shown) .......... 1Ph, 230V ....1 .... -
Page 21: Base Assembly
Base Assembly... -
Page 22: Parts List: Drive Unit
Parts List: Drive Unit Index No. Part No. Description Size 1 ....OES-020 ....Ball Bearing Assembly ................2 2 ....TS-2360121 ..... Flat Washer ............M12 ........ 4 3 ....TS-1551081 ..... Lock Washer ............. M12 ........ 6 4 .... -
Page 23: Drive Unit
Drive Unit... -
Page 24: Parts List: Tracking And Belt Release Unit
Parts List: Tracking and Belt Release Unit Index No. Part No. Description Size 1 ....OES-036 ....Belt Release Post ..................2 2 ....OES-037 ....Bushing ....................4 3 ....OES-038 ....Stop Collar ....................2 4 .... -
Page 25: Tracking And Belt Release Unit
Tracking and Belt Release Unit... -
Page 26: Parts List: Table Assembly
Parts List: Table Assembly Index No. Part No. Description Size 1 ....OES-056 ....Elevation Casting ..................1 2 ....OES-057 ....DU Bushing ............3025 ......4 3 ....OES-058 ....Seal ..............35 x 50 x 8 ....4 4 .... - Page 27 Table Assembly...
-
Page 28: Parts List: Contour Sanding Unit
Parts List: Contour Sanding Unit Index No. Part No. Description Size 1 ....OES-077A ....Sanding Arm Casting ................1 2 ....TS-1550071 ..... Flat Washer ............M10 ......4 3 ....TS-1551071 ..... Lock Washer ............M10 ......6 4 .... -
Page 29: Contour Sanding Unit
Contour Sanding Unit... -
Page 30: Electrical Connections - 1 Phase, 230V
Electrical Connections – 1 Phase, 230V... -
Page 31: Electrical Connections - 3 Phase, 230V
Electrical Connections – 3 Phase, 230V... -
Page 32: Electrical Connections - 3 Phase, 460V
Electrical Connections – 3 Phase, 460V...