Table of Contents
Advertisement
Advertisement
Table of Contents

Related Manuals for Powermatic 1632


Summary of Contents for Powermatic 1632
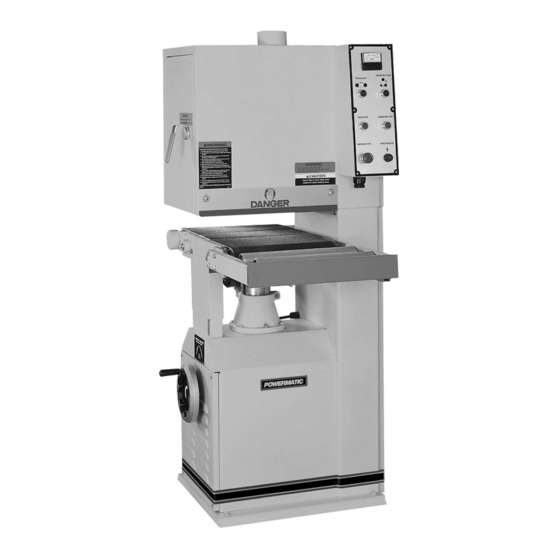
- Page 1 This Manual is Bookmarked Operating Instructions and Parts Manual 16-inch Open-End Belt Sander Model 1632 WMH TOOL GROUP 2420 Vantage Drive Elgin, Illinois 60123 Part No. M-0460219 Ph.: 800-274-6848 Revision G1 1/06 www.wmhtoolgroup.com Copyright © WMH Tool Group...
-
Page 2: Warranty And Service
This manual has been prepared for the owner and operators of a Powermatic Model 1632 Sander. Its purpose, aside from machine operation, is to promote safety using accepted operating and maintenance procedures. To obtain maximum life and efficiency from your Sander and to aid in using it safely, please read this manual thoroughly and follow the instructions carefully. -
Page 3: Table Of Contents
TABLE OF CONTENTS Safety Rules... 4-5 Specifications ...6 Receiving the Sander ...7 Installation ...7 Electrical Connections...7 Switching Voltage...7 Assembly...8 Adjustments...8 Air Control...8 Sanding Belt Tracking & Oscillation ...8 Feed Belt Tracking & Tension ...9 Adjusting Table Parallel to Sanding Surface...9 Feed Speed Adjustment ...9... -
Page 4: Safety Rules
Make certain the work area is well lighted and that a proper exhaust system is used to minimize dust. Powermatic recommends the use of anti-skid floor strips on the floor area where the operator normally stands and that each machine’s work area be marked off. - Page 5 Misuse. Do not use this Powermatic open-end sander for other than its intended use. If used for other purposes, Powermatic disclaims any real or implied warranty and holds itself harmless for any injury or damage which may result from that use.
-
Page 6: Specifications
Dust collection minimum CFM required... 800 Dust port diameter... 4" Overall dimensions ...40" L x 29" W x 66" H Main motor (1632-3)... 7-1/2 HP, 3 Ph, 230/460V (prewired 230V) Main motor (1632-1)... 5 HP, 1 Ph, 230V only Net weight ... 996 lbs. -
Page 7: Receiving The Sander
RECEIVING THE SANDER Remove the sander from its crate and inspect for damage to ensure all parts are intact. Any damage should be reported to your distributor and shipping agent immediately upon discovery. Before proceeding with installation, read your instruction manual thoroughly. Familiarize yourself... -
Page 8: Switching Voltage
75 psi, which can be read on the pressure gauge. SANDING BELT TRACKING & OSCILLATION The tracking and oscillation of your sander are pre- adjusted factory. adjustment be required, do the following: Adjust the air valve (A), Figure 3, to control the tracking sensitivity. -
Page 9: Feed Belt Tracking & Tension
Adjust the parallelism using the four hex. screws (A), under the table base. See Figure 5. FEED SPEED ADJUSTMENT The Model 1632 has two speeds that feed the workpiece at 15 feet per minute (FPM) finished surface sanding, and 32.5 FPM for faster, lighter sanding. -
Page 10: Operation
NOTE: The orange bar on the front of the infeed roller acts as a safety stop. pressed, the brakes are applied. Connect the air line to the sander. Adjust the pressure gauge to 75 psi. Engage the upper roller by turning the knob (A), Figure 8, to the upper position. -
Page 11: Optional Accessories
Turn on the power to the machine. Start the sanding belt. Start the feeding conveyor. NOTE: If you are sanding a workpiece greater than 16 inches, pull out the support extension, and tighten the wing nuts. After the first pass, workpiece can be spun around and fed back through the machine, for a maximum sanding width of 32 inches. -
Page 12: Trouble-Shooting
TROUBLE-SHOOTING for 1632 Open-End Sander PROBLEM POSSIBLE CAUSE The sanding belt clogs 1. Sandpaper grit too small. quickly. 2. Too much material is being sanded off. 3. The wood is too dirty or oily. 4. Suction is insufficient. Edges round when sanding. -
Page 13: Air Control Assembly
PARTS LIST: Air Control Assembly (1632 Sander) Part No. Description 6293482 Filter ... 1 6293483 Solenoid Valve ... 1 6293484 Brake Cylinder ... 1 6293485 Multi-Hole Connector ... 1 6293486 Air Valve... 1 6293487 Air Sensor Assembly... 1 6293488 Air Sensor... 1 6293489 Switching Valve ... -
Page 14: Electricity Control & Upper Adj. Roller
PARTS LIST: Electricity Control & Upper Adj. Roller (1632 Sander) Part No. Description 6293203 Upper Door (L) ...1 6293204 Pin for Upper Door ...2 6293205 Upper Cabinet ...1 6293206 Door Knob...2 6293207 Door Latch (L) ...1 6293208 Upper Door (R)...1 6293209 Pan Head Screw, 1/4 X 1/2...2... -
Page 15: Electricity Control & Upper Adj. Roller
Electricity Control & Upper Adj. Roller (1632 Sander) - Page 16 PARTS LIST: Sanding Drum Assembly (1632 Sander) Part No. Description 6293240 Ring ...2 6293241 Ball Bearing...2 6293242 Shaft ...1 6293243 Upper Roller...1 6293244 Upper Roller Base (L)...1 6293245 Column ...1 6293246 Switch Valve ...1 6293247 Eccentric Shaft Base ...1 6293248 Eccentric Shaft...1...
- Page 17 PARTS LIST: Sanding Drum Assembly (1632 Sander) Part No. Description 6293294 Pad... 1 6293218 Flat Washer, 3/8 ... 2 6293295 Pressing Bar ... 2 6293296 Graphite Canvas... 1 6293297 Pulley (5 HP) ... 1 6293298 Pulley (7-1/2 HP) ... 1 6293299 Flat Washer, 5/16 ...
-
Page 18: Sanding Drum Assembly
Sanding Drum Assembly (1632 Sander) - Page 19 PARTS LIST: Base & Table Adjust Assembly (1632 Sander) Part No. Description 6293240 Ring... 2 6293415 Door ... 1 6293416 Crosspiece... 1 6293417 Door Knob ... 1 6293418 Cover... 1 6293419 Hex Head Screw, 1/4 X 1... 4 6293420 Base ... 1 6293421 Cover...
- Page 20 PARTS LIST: Base & Table Adjust Assembly (1632 Sander) Part No. Description 6293218 Flat Washer, 3/8...4 6293463 Shaft ...1 6293267 Set Screw, 1/4 X 1/4...2 6293464 Set Screw, 1/4 X 1...1 6293450 Hex Nut, 1/4 ...1 6293465 Wheel, 8" ...1 6293466 Handle ...1...
-
Page 21: Base & Table Adjust Assembly
Base & Table Adjust Assembly (1632 Sander) -
Page 22: Conveyor Belt & Table; Reduction Motor
PARTS LIST: Conveyor Belt & Table; Reduction Motor (1632 Sander) Part No. Description 6293351 Hex Socket Cap Screw, 1/4 X 1/4...6 6293352 Bearing Cover ...2 6293353 Ball Bearing...2 6293354 Back Conveyor Roller Base (L) ...1 6293355 Roller ...1 6293356 Key, 6 X 6 X 20 ...1 6293357 Back Conveyor Roller &... - Page 23 PARTS LIST: Conveyor Belt & Table; Reduction Motor (1632 Sander) Part No. Description 6293289 Hex Nut, 5/16... 2 6293394 Spring Washer, 5/16 ... 8 6293300 Hex Head Screw, 5/16 X 1 ... 8 6293395 Stop Plate Annex ... 2 6293396 PVC Roller...
- Page 24 Conveyor Belt & Table (1632 Sander)
- Page 25 Reduction Motor (1632 Sander)
-
Page 26: Electrical Schematics
ELECTRICAL SCHEMATIC (1632 Sander) 460V – 3 Phase... -
Page 27: 230V - 1 Phase / 3 Phase
ELECTRICAL SCHEMATIC (1632 Sander) 230V – 1 Phase / 3 Phase... - Page 28 WMH Tool Group 2420 Vantage Drive Elgin, Illinois 60123 Phone: 800-274-6848 www.wmhtoolgroup.com...