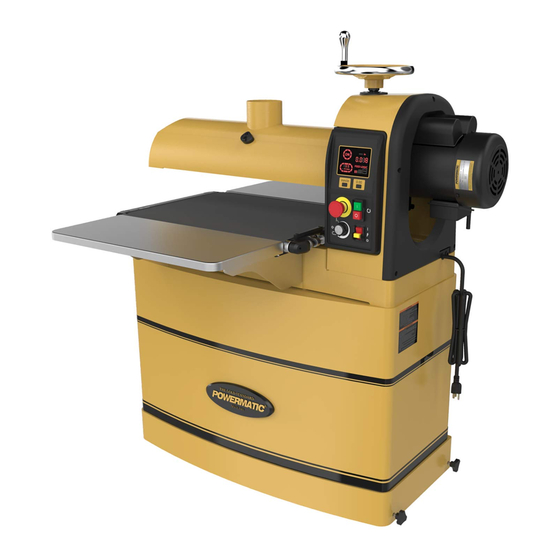
Powermatic PM2244 Operating Instructions Manual
Drum sander
Hide thumbs
Also See for PM2244:
- Operating instructions and parts manual (100 pages) ,
- Operating instructions and parts manual (32 pages)

Related Manuals for Powermatic PM2244


Summary of Contents for Powermatic PM2244
- Page 1 Drum Sander PM2244 Operating Instructions JPW (Tool) AG Tämperlistrasse 5 CH-8117 Fällanden Switzerland Phone +41 44 806 47 48 +41 44 806 47 58 M-1792244MP 2016-10...
- Page 2 CE-Conformity Declaration Product Drum sander PM2244 (1792244MP) Brand POWERMATIC Manufacturer JPW (Tool) AG, Tämperlistrasse 5, CH-8117 Fällanden Schweiz / Suisse / Switzerland We hereby declare that this product complies with the regulations 2006/42/EC Machinery Directive 2014/30/EU electromagnetic compatibility designed in consideration of the standards...
-
Page 3: Table Of Contents
Many thanks for the confidence you have shown in us with the purchase of your new POWERMATIC-machine. This manual has been prepared for the owner and operators of a POWERMATIC PM2244 drum sander to promote safety during installation, operation and maintenance procedures. Please read and understand the information contained in these operating instructions and the accompanying documents. -
Page 4: Declaration Of Conformity
responsibility is transferred exclusively to the 1. Declaration of conformity operator. On our own responsibility we hereby declare that 3.2 General safety notes this product complies with the regulations* listed on page 2. Designed in consideration with the Woodworking machines can be dangerous if not standards**. -
Page 5: Remaining Hazards
Use common sense. Do not operate the machine when you are tired. Keep an ergonomic body position. Maintain a balanced stance at all times. Do not operate the machine under the influence of drugs, alcohol or any medication. Be aware that Protect the environment, dispose of the packing in medication can change your behaviour. -
Page 6: Specifications
4.0 Specifications Model number ............................. PM2244 Stock number............................1792244MP Motor and electricals: Drum motor: Motor type ..........................induction motor Motor power ..........................1kW (1.3 HP) Voltage ............................ 1~230V, PE, 50Hz Listed full load amps............................7A Motor speed ............................1400 1/min Starting amps ............................... 38 A Running amps (no load) .......................... -
Page 7: Setup And Assembly
The specifications in this manual were current at time of publication, but because of our policy of continuous improvement, Powermatic reserves the right to change specifications at any time and without prior notice, without incurring obligations. 5.0 Setup and assembly Figure 2 5.2 Tools required for assembly... -
Page 8: Handwheel
4. Continue to wrap abrasive in spiral fashion by rotating drum with one hand and guiding strip Dust collection is mandatory for a safe work with the other. See Figure 6. environment and extended abrasive life. The PM2244 is equipped with a 100mm dust collection... -
Page 9: Electrical Connections
Failure to Figure 7). comply may result in serious injury. The PM2244 Sander is rated at 230-volt power only. The sander comes with a plug designed for use on a circuit with a grounded outlet. Before connecting to power source, be sure switch is in off position. -
Page 10: Adjustments
Adjust take-up screw nuts (Figure 11) with a 7.0 Adjustments 17mm wrench. Do this on both sides of conveyor to obtain approximately equal tension Disconnect sander from power on both sides of sanding belt. source before making adjustments. 7.1 Depth scale NOTE: Insufficient belt tension will cause slippage of conveyor belt on drive roller during The depth scale indicates distance between bottom... -
Page 11: Inspecting Drum Alignment
reversed by turning it over. See sect. 11.0 Tracker 7.4.1 Verifying drum alignment Kit for more information about re-setting trackers. Note: This is an operational test. Perform this procedure only after you have become familiar with sander operation. When sanding boards wider than the drum, table alignment is critical and table must be adjusted exactly level to slightly lower on the outboard end. -
Page 12: Storage Cabinet
side of machine to receive and control board as it exits. 8.2 Controls and LED display Figure 16 shows control panel functions. Figure 14 Too much tension roller pressure can result in a “snipe” mark, which is a visible line running across the width of the board and located approximately 60mm from end of board. -
Page 13: Feed Logic Activation
6. Turn off drum motor switch (B). – “ON” will go The E-stop is designed for emergency shut-off. dark. Circle (J) will continue running for 5 Under normal circumstances, use the other seconds while drum slows to a stop. Then circle switches on the control panel to turn off machine (J) will stop running. -
Page 14: Selecting Conveyor Rate
For sanding with grits coarser than 80, you can optimum feed rate. If problems occur, first inspect lower the drum slightly. and adjust feed rate, referring to sect. 12.0 “Troubleshooting.” Always maintain control of stock. Through practice you will learn the proper depth of cut considering 8.13 Maximum performance tips the variables above. -
Page 15: Maintenance
more than 50mm high, it is good procedure to stack 9.1 Cleaning and lubrication and clamp several pieces together to prevent them For best results, make cleaning the sander a regular from slipping or tipping on the conveyor belt. shop procedure. Allowing excess build-up of dust 8.13.5 Sanding imperfect stock and debris can adversely affect performance through loading of the abrasives, slippage on the... -
Page 16: Conveyor Belt Replacement
Do not allow the Trackers to drop, as they may break. 10.0 Abrasive dimensions Use this diagram to cut after-market abrasive strips to fit (or use a new Powermatic-supplied strip as a template). Figure 20... -
Page 17: Tracker Kit
7. With first tracker installed, slide conveyor belt 11.0 Tracker kit into bottom slot of tracker. Note: When installed properly, only bottom lip of tracker Stock No.: PM2244-213 will be visible. The top slot can be used if Trackers dramatically reduce tracking adjustments bottom slot wears out. -
Page 18: Abrasives
12.2 Cleaning abrasive strips Figure 22 – Underside of Regularly clean the abrasive strip on the drum with conveyor shown12.0 commercially available cleaning sticks, following the manufacturer’s directions. When cleaning, also Abrasives brush the stick crumbs from the drum while it is still rotating. -
Page 19: Troubleshooting The Pm2244 Drum Sander
13.0 Troubleshooting the PM2244 Drum Sander Symptom Possible Cause Correction * Drum motor won’t start No incoming current. Check connections at plug or circuit panel. when ON button is Safety key missing from switch. Install safety key. pushed. E-stop still engaged (racetrack is Disengage E-stop by rotating clockwise.