Table of Contents

Summary of Contents for Neilsen CT4542
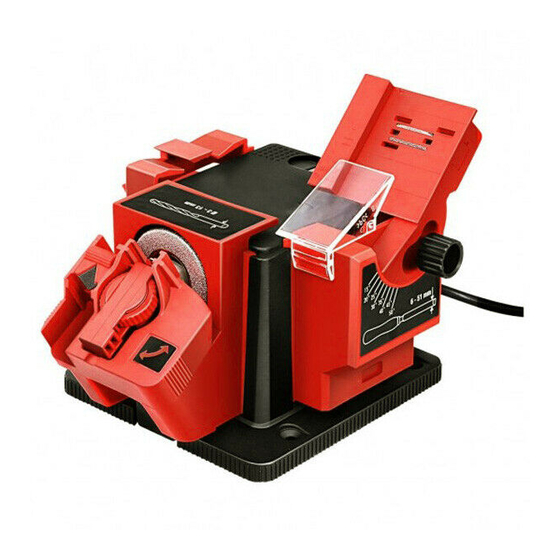
- Page 1 MULTI PURPOSE POWER SHARPENER CT4542 ORIGINAL INSTRUCTIONS Read the operating instructions thoroughly before work and keep it for future reference. Cannon Tools Limited Address: 20 Station Road, Rowley Regis, West Midlands, B65 0JU.U.K.
-
Page 3: Ec Declaration Of Conformity
EC Directive based on its design and type, as brought into circulation by In case of alteration of the machine, not agreed upon by us, this declaration will lose its validity. Product description: MULTI PURPOSE POWER SHARPENER Model: CT4542 Applicable EC Directives: EC-Machinery Directive 2006/42/EC... -
Page 4: Electrical Safety
ELECTRICAL SAFETY WARNING! When using mains-powered tools, basic safety precautions, including the following, should always be followed to reduce risk of fire, electric shock, personal injury and material damage. Read the whole manual carefully and make sure you know how to switch the tool off in an emergency, before operating the tool. - Page 5 b. Avoid body contact with earthed or grounded surfaces, such as pipes, radiators, ranges and refrigerators. There is an increased risk of electric shock if your body is earthed or grounded. c. Do not expose power tools to rain or wet conditions. Water entering a power tool will increase the risk of electric shock.
- Page 6 e. Maintain power tools. Check for misalignment or binding of moving parts, breakage of parts and any other condition that may affect the power tool’s operation. If damaged, have the power tool repaired before use. Many accidents are caused by poorly maintained power tools.
-
Page 7: Description Of Symbols
DESCRIPTION OF SYMBOLS SPECIFICATIONS Volt/Frequency: 220-240V~50HZ Input Power: 65W (S2 10 min) Max Speed: 6700RPM (No load) -
Page 8: Know Your Product
KNOW YOUR PRODUCT 1 Bench Mounting Holes 8 Narrow Tool Guide 2 On/Off Switch 9 Magnets 3 Guide Rails 10 Knife Sharpening Slo 4 Sharpening Wheel 11 Scissor Sharpening Slot 12 “V” Guide 5 Module Locking Clip 6 Protective Guard 13 Drill Bit Clamp Assembly 7 Adjustable Angle Knob... -
Page 9: Setup & Preparation
SETUP & PREPARATION 1. CHANGING MODULES CAUTION: ENSURE THE TOOL IS DISCONNECTEDFROM THE POWER SUPPLY BEFORE PERFORMING ANY OF THE FOLLOWING OPERATIONS. It is recommended that the Multi Function Sharpener be bolted to a secure bench prior to operating. Removing a Module Press and hold down the module locking clip. - Page 10 2. CHISEL AND BLADE SHARPENER CAUTION: THE TOOL IS RECOMMENDED FOR THE USE WITH A RESIDUAL CURRENT DEVICE WITH A RATED CURRENT OF 30mA OR LESS. Install the chisel and blade Position the chisel or blade on the blade sharpener module. rest.
-
Page 11: Sharpening Knives
3. SHARPENING KNIVES Install the knife and scissor Switch the sharpener on by pressing the on/off switch into the on position “I”. sharpener module. Lower the handle end of the knife into Once the blade touches the the sharpening slot. sharpening wheel, draw the blade lightly across the grinding wheel until completely removed. -
Page 12: Sharpening Scissors
4. SHARPENING SCISSORS Note: Before sharpening any scissors make sure that they are suitable for sharpening. Most exchangeable blade scissors are not suitable for sharpening. Install the knife and scissor Switch the sharpener on by pressing the on/off switch into the on position “I”. sharpener module. - Page 13 5. DRILL BIT SHARPENER Install the drill bit sharpener module. Remove the clamp assembly and insert a drill bit. Tighten the clamp assembly lightly so that the drill bit can still move. Rotate the drill bit while pushing the “V” Place the clamp assembly with the drill bit into the “V”...
-
Page 14: Maintenance
My drill bit is broken (rather than blunt) The CT4542 is not suitable for sharpening broken drill bits. A drill bit in this condition will take a substantial amount of time to sharpen. Rough the drill bit into shape first using a bench grinder. - Page 16 CANNON TOOLS LTD Add: 20 station road, Rowley Regis, west midlands,B65 0JU.U.K. Made in China...


