Table of Contents
Advertisement
Quick Links
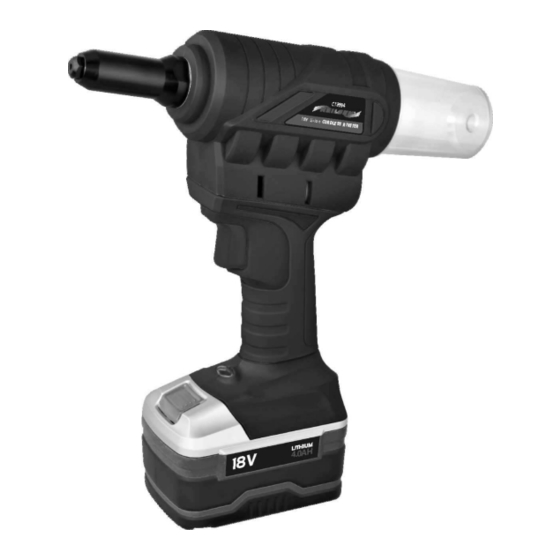
18V Li-ion CORDLESS RIVETER
Please read the entire instruction manual before using the product and then save it for future reference. We reserve the right for any
errors in text or images and any necessary changes made to technical data. If you have any questions regarding technical problems
please contact our Customer Services.
Cannon Tools Limited
Address: 20 Station Road, Rowley Regis, West Midlands, B65 0JU.UNITED KINGDOM
SAVE THESE INSTRUCTIONS FOR REFERENCE
ORIGINAL INSTRUCTIONS
CT3994
Advertisement
Table of Contents

Related Manuals for Neilsen CT3994


Summary of Contents for Neilsen CT3994
- Page 1 18V Li-ion CORDLESS RIVETER CT3994 ORIGINAL INSTRUCTIONS Please read the entire instruction manual before using the product and then save it for future reference. We reserve the right for any errors in text or images and any necessary changes made to technical data. If you have any questions regarding technical problems please contact our Customer Services.
-
Page 2: Ec Declaration Of Conformity
In case of alteration of the machine, not agreed upon by us, this declaration will lose its validity. CORDLESS RIVETER Product description: Model: CT3994 Applicable EC Directives: EC Machinery Directive 2006/42/EC EC Directive of Electromagnetic Compatibility 2014/30/EU 20 Station Road, Rowley Regis, West Midlands, B65 0JU.U.K. -
Page 3: General Power Tool Safety Warnings
instructions carefully before using the appliance. Your power tool should only be given to other users together with these instructions. SYMBOLS The following symbols are used in this manual and/or on the machine: WARNING – To Denotes risk of reduce the risk personal injury or of injury, user damage to the tool... - Page 4 Distractions can cause you to lose control. 2) Electrical safety a) Power tool plugs must match the outlet. Never modify the plug in any way. Do not use any adapter plugs with earthed (grounded) power tools. Unmodified plugs and matching outlets will reduce risk of electric shock. b) Avoid body contact with earthed or grounded surfaces, such as pipes, radiators, ranges and refrigerators.
- Page 5 that have the switch on invites accidents. d) Remove any adjusting key or wrench before turning the power tool on. A wrench or a key left attached to a rotating part of the power tool may result in personal injury. e) Do not overreach.
-
Page 6: Technical Data
these instructions, taking into account the working conditions and the work to be performed. Use of the power tool for operations different from those intended could result in a hazardous situation. 5) Battery tool use and care a) Recharge only with the charger specified by the manufacturer. A charger that is suitable for one type of battery pack may create a risk of fire when used with another battery pack. -
Page 7: Functional Description
Rated Voltage 18V d.c Stroke 0.83” / 19mm Max working force 9000Nm Max diameter of mandrel 5.0mm Nosepiece 3/32” (2.4mm) 1/8” (3.2mm) 5/32” (4.0mm) 3/16”(5.0mm) Weight 1.59kgs(without battery pack) Noise level LpA: 74.1 dB (A) K= 3dB(A)) LwA: 85.1 dB (A) K= 3dB(A)) a h : 0.678 m/s²... - Page 8 OPERATING INSTRUCTIONS CT3994 SHOW Switching ON / OFF To switch ON: Pull the trigger (E) To switch OFF: Release the trigger 4.1 Putting the device into operation Insert the battery. Only use original Products Li- on batteries with the voltage depicted on the type label of your Rivet Gun.
- Page 9 4.3 Changing nosepieces The nosepieces A) are marked with numbers corresponding to the rivet size. Hold the power switch(E) pressed, that will lead to the clamping mechanism moving into the rear position. Use the wrench to change the nosepiece (A) and release the power switch.
- Page 10 4.6 Changing the clamping jaw The clamping jaws are wear parts. If you are un- able to rivet in a single working stroke you should change the clamping jaws: (1) Front sleeve Clamping sleeve (3) Riveting mechanism (4) C lamping jaws (3 parts) Remove the front sleeve (1) and the clamping sleeve (2) from the device (3) and remove the clamping jaws (4) from the clamping sleeve (2).
-
Page 11: Battery Pack And Battery Charger
BATTERY PACK AND BATTERY CHARGER Safety Correct handing of battery pack and battery chargers Ensure that the power tool is switched OFF before you insert the battery pack. Inserting a battery pack into a power tool that is the switch can be locked in on position can cause accidents. - Page 12 Keep the battery charger away from rain or moisture. Exposure of an electrical device to water increases the risk of an electric shock. Before each use, check the battery charger, battery pack, cable and plug for signs of damage. Do not use the battery charger if damage is detected.
- Page 13 battery into the handle until it engages. To remove the battery, hold down the battery pack release button (A) and pull the battery pack out of the handle. 2. Charging the battery pack Slide the battery pack onto the charger. Connect the charger to a suitable mains socket.
- Page 14 Maintenance and cleaning Maintenance The contacts on the battery pack and the charger must be kept clean. All replacement parts must be replaced by a trained electrician or an authorized service centre unless stated otherwise in this manual Cleaning Clean the battery charger housing using a soft, dry cloth. Disconnect the charger from the mains before cleaning.
-
Page 15: Parts Diagram & List
PARTS DIAGRAM & LIST... - Page 16 Add: 20 station road, Rowley Regis, west midlands,B65 OJU.U.K. Made in china...