Table of Contents
Advertisement
Quick Links
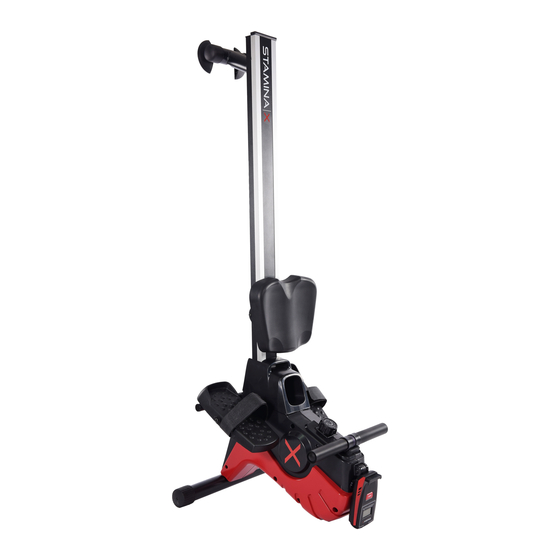
Owner's Manual
Product May Vary Slightly From Pictured.
CAUTION:
Weight on this product should not exceed 250 lbs.
This Product is Distributed Exclusively by
2040 N. Alliance, Springfield, MO 65803
Customer Care
1 (800) 375-7520
www.staminaproducts.com
WARNING
!
Exercise can present a
h e a l t h r i s k . C o n s u l t a
physician before beginning
any exercise program with
this equipment. If you feel
faint or dizzy, immediately
d i s c o n t i n u e u s e o f t h i s
equipment. Serious bodily
i n j u r y c a n o c c u r i f t h i s
equipment is not assembled
and used correctly. Serious
bodily injury can also occur
if all instructions are not
followed. Keep others and
pets away from equipment
when in use. Always make
sure all bolts and nuts are
securely tightened prior to
each use. Follow all safety
instructions in this manual.
When calling for parts or
service, please specify
the following numbers :
Model#: 35-1102A
S/N: _____________
STAMINA PRODUCTS
MADE IN CHINA
© 2017 Stamina Products, Inc.
2018, 02
Advertisement
Table of Contents

Related Manuals for Stamina Stamina X 35-1102A


Summary of Contents for Stamina Stamina X 35-1102A
- Page 1 S/N: _____________ Weight on this product should not exceed 250 lbs. This Product is Distributed Exclusively by STAMINA PRODUCTS MADE IN CHINA 2040 N. Alliance, Springfield, MO 65803 Customer Care © 2017 Stamina Products, Inc. 1 (800) 375-7520 2018, 02 www.staminaproducts.com...
-
Page 2: Table Of Contents
17. The STAMINA│X Magnetic Rower should not be used by persons weighing over 250 pounds. 18. The STAMINA│X Magnetic Rower should be used by only one person at a time. 19. The STAMINA│X Magnetic Rower is for consumer use only. It is not for use in public or semipublic facilities. - Page 3 1 (800) 375-7520 customer.care@staminaproducts.com Hi! From all of us here at Stamina Products, thank you for your purchase. We know that you have big fitness goals in mind and we are here to help you along. Call us, email us, or send us a message on Facebook. Be sure to contact us if you have any questions on your new product.
-
Page 4: Before You Begin
If you have any questions or problems with Too often, our busy lifestyles limit our time and the parts included with your STAMINA│X Magnetic opportunity to exercise. The STAMINA│X Magnetic Rower, please do not return the product. Contact... -
Page 5: Equipment Warning, Caution & Notice Labels
EQUIPMENT WARNING, CAUTION & NOTICE LABELS This chart is provided to help identify the warning, caution, and notice labels on the STAMINA│X Magnetic Rower. Please take a moment to familiarize yourself with all of the warning, caution, and notice labels. -
Page 6: Hardware Identification Chart
HARDWARE IDENTIFICATION CHART This chart is provided to help identify the fasteners used in the assembly process. Place the washers or the ends of the bolts or screws on the circles to check for the correct diameter. Use the small scale to check the length of the bolts and screws. -
Page 7: Assembly Instructions
Time) Monday through Thursday and 8:00 A.M. to 3:00 P.M. (Central Time) on Friday. STEP 1 Position the main assembly of the STAMINA│X Magnetic Rower as shown in the illustration below. Attach the FRONT STABILIZER(3) to the MAIN FRAME(1) with BUTTON HEAD BOLTS(M8x1.25x60mm)(65) and ARC WASHERS(M8)(66). - Page 8 ASSEMBLY INSTRUCTIONS STEP 3 Refer to the illustration below. Unfold the RAIL FRAME(2), and then attach to the MAIN FRAME(1) with BUTTON HEAD BOLTS(M8x1.25x45mm)(97), LOCK WASHERS(M8)(63), and WASHERS(M8)(62). STEP 4 Attach the SEAT(38) to the SEAT CARRIAGE(94) with ROUND HEAD BOLTS(M6x1x15mm)(67) and WASHERS(M6)(68).
- Page 9 ASSEMBLY INSTRUCTIONS STEP 5 Insert the HANDLEBAR(5) through the HANDLEBAR SLEEVE(41). Slide the FOAM GRIP(39) onto the protruding end of the HANDLEBAR(5). NOTE: Lubricate the HANDLEBAR(5) with a small amount of liquid soap or water for easier installation of the FOAM GRIP(39). STEP 6 To help install the BOTTLE HOLDER(35), loosen the ROUND HEAD SCREW(ST4.2x16mm)(72) on the RIGHT COVER(34).
- Page 10 ASSEMBLY INSTRUCTIONS STEP 8 There is an “L” decal on the left PEDAL CAP(101L), and an “R” decal on the right PEDAL CAP(101R). Insert the PEDAL SHAFT(10) through the tube located on the MAIN FRAME(1). Slide the left PEDAL CAP(36L) onto the left side of the PEDAL SHAFT(10).
-
Page 11: Operational Instructions
OPERATIONAL INSTRUCTIONS USING THE FITNESS METER POWER ON : Handlebar movement or press the button. POWER OFF : Automatically shuts off after four minutes of inactivity. SCAN TIME COUNT DIST CALORIES TOTCNT THE MODE BUTTON: MODE Press to select the function value displays of TIME, COUNT, DISTANCE, CALORIES, and TOTAL COUNT. - Page 12 OPERATIONAL INSTRUCTIONS LOAD ADJUSTMENT To increase the load, turn the TENSION KNOB(47) clockwise. To decrease the load, turn the TENSION KNOB(47) counterclockwise. There are eight levels for the load adjustment. NOTE: The load will increase as you pull faster. PEDAL STRAP ADJUSTMENT If you feel it is more comfortable for your workout, you can attach the PEDAL STRAP(37) to the lower position in the PEDAL CAP(101) as shown in illustration 1 below.
-
Page 13: Storage
3. To avoid damage to the meter, remove the batteries before storing the STAMINA│X Magnetic Rower for one year or more. 4. Refer to the illustration below. You can stand the STAMINA│X Magnetic Rower on end for storage. MAINTENANCE The safety and integrity designed into the STAMINA│X Magnetic Rower can only be maintained when the STAMINA│X Magnetic Rower is regularly examined for damage and wear. -
Page 14: Conditioning Guidelines
CONDITIONING GUIDELINES How you begin your exercise program depends on your physical condition. If you have been inactive for several years or are severely overweight, start slowly and increase your workout time gradually. Increase your workout intensity gradually by monitoring your heart rate while you exercise. Remember to follow these essentials: Have your doctor review your training and diet programs. -
Page 15: Warm-Up And Cool-Down
WARM-UP and COOL-DOWN Warm-Up The purpose of warming up is to prepare your body for exercise and to minimize injuries. Warm up for two to five minutes before strength training or aerobic exercising. Perform activities that raise your heart rate and warm the working muscles. Activities may include brisk walking, jogging, jumping jacks, jump rope, and running in place. -
Page 16: Product Parts Drawing
PRODUCT PARTS DRAWING FRONT 53 93 BACK... -
Page 17: Parts List
PARTS LIST PART# PART NAME Main Frame Rail Frame Front Stabilizer Pedal Stopper Bar Handlebar Magnetic Brake Secondary Magnetic Brake Spacer (ø8.2 x ø12 x 3.2mm) Long Spacer (ø8.2 x ø12 x 93.5mm) Pedal Shaft Spacer (ø8 x ø10 x 7mm) Spacer (ø8 x ø12.8 x 38.5mm) Meter Sensor Clip... - Page 18 PARTS LIST PART# PART NAME Rail Retainer Seat Stopper Rail Cap Round Plug (ø25mm) Retaining Plug Support Bumper Bolt, Button Head (M8 x 1.25 x 15mm) Fender Washer (M8) Washer (M8) Lock Washer (M8) Bolt, Button Head (M8 x 1.25 x 35mm) Bolt, Button Head (M8 x 1.25 x 60mm) Arc Washer (M8) Bolt, Round Head (M6 x 1 x 15mm)
-
Page 19: Warranty
To implement this limited warranty, send a written notice stating your name, date, and place of purchase and a brief description of the defect along with your receipt to Stamina Products, Inc. P.O. Box 1071, Springfield Missouri, USA, 65801-1071, or email us at customer.care@staminaproducts.com, or call us at 1-800-375-7520. -
Page 20: Notes
NOTES... - Page 21 NOTES...
-
Page 22: Fax/Mail Ordering Form
P.O. Box 1071 Springfield, MO. 65801-1071 Would you like to recieve email information or special offers from Stamina Products? Register at contact.staminaproducts.com TO REGISTER YOUR PRODUCT To enact your warranty, please register your product by going to register.staminaproducts.com. Please have your product model number (printed on the cover of this owner’s manual) and the serial number (printed on the black and white sticker on your...