Table of Contents
Advertisement
Quick Links
Advertisement
Table of Contents

Related Manuals for Kodak Apex 7015


Summary of Contents for Kodak Apex 7015
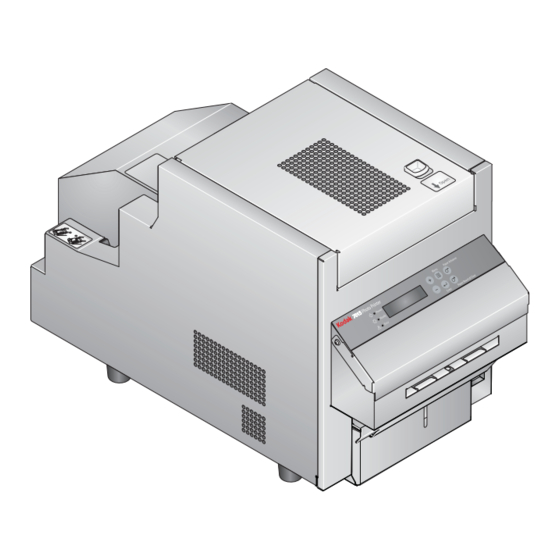
- Page 1 KODAK 7015 Photo Printer 7015 Photo Printer User’s Guide...
- Page 2 TM/MC/MR Licensed from Eastman Kodak Company: Kodak Kodak Alaris Inc. 2400 Mount Read Blvd., Rochester, N.Y. 14615 © 2014 Kodak Alaris Inc. All rights reserved. Printed in U.S.A. P/N 4J6747...
-
Page 3: Table Of Contents
Table of Contents 1 Setting Up the Printer Package Contents............................1-1 Preparing the Printer for Use ........................1-2 Connecting the Cables ..........................1-4 Connecting the Power Cable......................... 1-4 Connecting the USB Cable........................1-4 Turning On the Printer ...........................1-5 Handling and Storing the Paper and Ribbons...................1-5 Loading the Ribbons............................1-5 Loading the Photo Ribbon ........................1-5 Loading the Backprinter Ribbon Cartridge..................1-7... - Page 4 Table of Contents Recovering from a Power Interruption ..................... 4-5 Appendix A: Additional Information System Requirements............................A-1 Printer Specifications .............................A-1 Printer Supplies ..............................A-2 Paper and Ribbon.............................A-2 Thermal Printer Cleaning Kit ........................A-2 Packing and Transporting the Printer.......................A-3 Getting Help ..............................A-3 Appendix B: Safety and Regulatory Information Important Safety Information ........................
-
Page 5: Setting Up The Printer
Setting Up the Printer Setting Up the Printer Package Contents The KODAK 7015 Photo Printer is packaged with the following items: 1. Printer 2. Trim tray (not installed) 3. Paper flange without gear (gray) 4. Spacer (gray) 5. Spacer (green) -
Page 6: Preparing The Printer For Use
Setting Up the Printer Preparing the Printer for Use The printer weighs approximately 63 lbs (29 kg) and is IMPORTANT: heavier at the front than at the back. Use caution when lifting or moving the printer. NOTE: Keep the carton and packaging in case you ever need to transport the printer. - Page 7 Setting Up the Printer 4. Check to make sure the paper guide is securely in place by pressing down on each of the knobs. For steps on removing and reinstalling the paper guide, see “Cleaning the Paper Guide” on page 3-3.
-
Page 8: Connecting The Cables
Setting Up the Printer Connecting the Cables Connecting the Power If you received more than one power cable with your printer, make Cable sure to use the correct power cable for your country. 1. Check that the power switch is turned off ( ). CAUTION: The power outlet must be grounded. -
Page 9: Turning On The Printer
• Store the paper and ribbons away from direct sunlight. Loading the Ribbons Loading the Photo Ribbon Make sure you have a KODAK 7000 Print Kit 5R (sold separately) available. This kit contains the correct photo ribbon for your printer (see “Printer Supplies”... - Page 10 Setting Up the Printer 3. Insert your fingers into the holes in the plastic wrapper on the end of the photo ribbon. Remove the plastic wrapper from the ribbon. Do not remove the label from the ribbon at this time. IMPORTANT: Label Plastic wrapper...
-
Page 11: Loading The Backprinter Ribbon Cartridge
Slack in the ribbon can cause a paper jam. IMPORTANT: 12. Close the top cover. Loading the Backprinter Make sure you have a Backprinter Media Kit for KODAK 701X Ribbon Cartridge Photo Printers (sold separately) available. This kit contains the correct ribbon cartridge for your printer (see “Printer Supplies”... - Page 12 Setting Up the Printer 2. Use the lever on the backprinter cover to release the cover from the magnets that hold it in place. Carefully, allow the cover to swing open.
- Page 13 Setting Up the Printer 3. Pull the carriage link downward and outward to move the carriage to the loading position.
- Page 14 Setting Up the Printer 4. Carefully remove the installed cartridge: a. Grasp the cartridge by the edges, near the bottom. b. Remove the cartridge, lifting the bottom end first. Pull the cartridge the rest of the way out, making sure the ribbon clears the print head.
- Page 15 Setting Up the Printer 6. Carefully install the new cartridge: a. Insert the cartridge into the carriage as shown, ribbon end first. Slide the ribbon between the guide plate and the print head. If necessary, use the tension knob on the cartridge to maintain tension on the ribbon.
- Page 16 Setting Up the Printer 7. Press the carriage inward then upward back into the printer position. The carriage locks into place when it is in the correct position. Allow the carriage to follow the guide slots along the IMPORTANT: carriage plate. Do not force. 1-12...
- Page 17 Setting Up the Printer 8. Close the backprinter cover, making sure it is seated against the magnets. (If the cover is not fully closed, the trim tray cannot be inserted or removed, and the backprinter will not print.) 1-13...
-
Page 18: Loading The Paper
NOTE: If space is limited, the trim tray can be installed by tilting then inserting it into the printer. Loading the Paper Make sure you have a KODAK 7000 Print Kit 5R (sold separately) available. This kit contains the correct paper for your printer (see “Printer Supplies” on page A-2). - Page 19 Setting Up the Printer 4. Attach the paper flanges and spacers to each end of the paper roll: a. Locate the green flange and the green spacer. b. Orient the flange and spacer so that the labels face the same direction. c.
- Page 20 Setting Up the Printer 7. Feed the paper into the rear printer slot until the red LED light turns off and the green LED light turns on. 8. Gently close the paper door. NOTE: The photo ribbon must be loaded in the printer (see page 1-5) before the paper automatically advances.
-
Page 21: Making A Test Print
Setting Up the Printer Making a Test Print Make a test print to check that the printer is installed and set up correctly. 1. Press Menu twice until Test Print Mode appears. 2. Press Enter to start printing the test print. For more information on using the operator panel in Setup mode, “Printer Settings”... -
Page 23: Operating The Printer
Operating the Printer Making Prints You make prints using photo printing software applications. For application-specific printing information, see the user’s guide or online Help for the software application. Handling and Storing Prints For best results: • Make sure hands are clean and free of food, oil, and grease. •... -
Page 24: Operator Panel Buttons
Operating the Printer Operator Panel Buttons Button Menu To enter Setup Mode. Menu scroll To scroll through printer settings. Setting To scroll forward or backward through options scroll setting options. Enter To initiate an action or accept a change. Paper To advance paper. -
Page 25: Printer Settings
Operating the Printer Printer Settings Use the operator panel buttons to review and change printer settings. Printer settings are displayed here 7015 Photo Printer 1. Press Menu to enter Setup Mode. 2. Press Menu repeatedly to scroll through the printer settings. 3. - Page 26 Operating the Printer Display Description Wait Time The length of time (from 0 to 100 seconds) the printer waits after receiving a 4R print command before it starts printing. Depending on the setting, the wait time allows the printer to receive a second 4R print that prints at the same time as the first 4R print.
-
Page 27: Maintaining The Printer
Maintaining the Printer To ensure good printer performance and high-quality prints, make sure the KODAK 7015 Photo Printer and its environment are clean and dust free. Performing Routine Maintenance To maintain good print quality, clean the exterior of the printer and... -
Page 28: Cleaning The Thermal Print Head And The Peel Roller
Maintaining the Printer Cleaning the Thermal Print 1. Make sure the power switch is turned off ( ). Head and the Peel Roller 2. Carefully open the top cover. CAUTION: The thermal print head becomes extremely hot during normal operation. Wait approximately five minutes after you open the top cover before cleaning it. -
Page 29: Cleaning The Paper Guide
Maintaining the Printer Cleaning the Paper Guide 1. Make sure the power switch is turned off ( ). 2. Carefully open the top cover. CAUTION: The thermal head becomes extremely hot during normal operation. Do not touch it. There are sharp cutter blades inside the printer. Follow instructions carefully to avoid touching any areas that may be hazardous. -
Page 30: Cleaning The Platen Roller
Maintaining the Printer Cleaning the Platen Roller 1. Make sure the power switch is turned off ( ). 2. Carefully open the top cover. CAUTION: The thermal head becomes extremely hot during normal operation. Do not touch it. There are sharp cutter blades inside the printer. Follow instructions carefully to avoid touching any areas that may be hazardous. -
Page 31: Cleaning The Cleaning Rollers
Maintaining the Printer Cleaning the Cleaning It is essential to keep the cleaning rollers clean to prevent dirt Rollers from transferring back onto the prints and to keep the printer operating correctly. 1. Make sure the power switch is turned off ( ). 2. - Page 32 Maintaining the Printer 6. Repeat steps 1-3 to remove, clean and reinstall the front cleaning roller. CAUTION: The thermal head becomes extremely hot during normal operation. Do not touch it. There are sharp cutter blades inside the printer. Follow instructions carefully to avoid touching any areas that may be hazardous.
-
Page 33: Troubleshooting
Troubleshooting Problem Description or Cause Possible Solution Paper jam; error light is on, Paper is jammed in the Clear the paper jam (see page 4-3). printer does not operate printer Prints have vertical streaks Thermal print head is dirty. Clean the thermal print head (see page 3-2). -
Page 34: Resolving Operator Panel Error Messages
Troubleshooting Resolving Operator Panel Error Messages Photo Printer 7015 Refer to the following table to resolve errors reported on the operator panel. If the error persists, contact Service and Support. Error Message Description or Cause Possible Solution Paper Empty The paper is empty or is not installed Load (or reload) the paper (see correctly. -
Page 35: Clearing A Paper Jam
Troubleshooting Clearing a Paper Jam 1. Press the Paper Rewind button twice. 2. Open the paper door. 3. If the paper is not fully rewound, manually rewind the paper onto the roll. CAUTION: To prevent damage to the printer, do not pull abruptly on the paper. - Page 36 Troubleshooting 2. Look inside the front compartment and carefully remove any paper or obstructions. 3. Close the front cover. If the Paper Jam message is still displayed on the operator panel: 1. Turn off the printer. A161_4510AA 2. Carefully open the top cover. CAUTION: The thermal head becomes extremely hot during normal operation.
-
Page 37: Recovering From A Power Interruption
Troubleshooting 5. Look inside the ribbon compartment and carefully remove any pieces of paper. 6. Reinstall the paper guide. Press down on each knob until each side of the paper guide clicks into place. 7. Load the ribbon (see page 1-5). -
Page 39: Appendix A: Additional Information
Appendix A: Additional Information System Requirements • Computer with MICROSOFT WINDOWS XP, WINDOWS 2003 Server, WINDOWS VISTA Operating System • Minimum 1.0 GHz Celeron Microprocessor • Minimum memory requirement is determined by your operating system • Minimum 2 GB of available hard disk space •... -
Page 40: Printer Supplies
86° F (30° C) or lower specifications 60% relative humidity or lower Thermal Printer Cleaning Use the KODAK Thermal Printer Cleaning Kit when performing routine maintenance on the printer (see page 3-1). One Thermal Printer Cleaning Kit is included with your printer. -
Page 41: Packing And Transporting The Printer
Additional Information Packing and Transporting the Printer CAUTION: Shipping the printer with paper and ribbon installed can cause damage to the printer. 1. Remove the paper and ribbon from the printer. 2. Reinstall the packing materials (see page 1-2). 3. Repack the printer in the original packing box. See the packing/unpacking instructions included with the box. -
Page 43: Appendix B: Safety And Regulatory Information
Appendix B: Safety and Regulatory Information Important Safety Information CAUTION: Use of controls or adjustments or performance of procedures other than those specified in this manual may result in injury and/or damage to the printer. • The power outlet should be easily accessible and installed near the printer. -
Page 44: Safety Labels
Safety and Regulatory Information Safety Labels Please observe the important safety warnings that are posted on the printer. P/N 2J5451 1641132182 CAUTION HOT SURFACE To prevent burns, avoid touching the thermal print head. P/N 2J5452 1641132183 CAUTION SHARP OBJECTS The metal edges of the printer may be sharp. P/N 2J5439 1641132233 CAUTION SHARP CUTTER BLADE... -
Page 45: Regulatory And Safety Compliance
Safety and Regulatory Information Regulatory and Safety Compliance Safety Complies with UL 60950-1: 2006 CAN/CSA C22.2 No. 60950-1-03 EN 60950-1: 2001 IEC 60950-1: 2001 Tested for Norwegian IT Power systems 240V phase to phase Electromagnetic NOTE: This equipment has been tested and found to comply with the limits for a Class A digital device, pursuant to part 15 Compatibility (EMC) of the FCC rules. - Page 46 Safety and Regulatory Information CAUTION: This is a class A product. In a domestic environment this product may cause radio interference in which case the user may be required to take adequate measures. “Changes or modifications not expressly approved by the party responsible for compliance could void the user’s authority to operate the equipment.”...
-
Page 47: Noise Emission
Contact Service and Support or refer www.kodak.com/go/recycle for additional information on the collection and recovery programs available for this product. -
Page 48: China Rohs
This value is assigned based on normal use of the product as described in the operating instructions. Table of hazardous substance's name and concentration Model Name: KODAK 7015 Photo Printer...