Mitel MiVoice 6920 User Manual
Hide thumbs
Also See for MiVoice 6920:
- User manual (214 pages) ,
- Quick reference manual (21 pages) ,
- Installation manual (8 pages)

Related Manuals for Mitel MiVoice 6920


Summary of Contents for Mitel MiVoice 6920
- Page 1 Poste A6863i Systèmes de communications A5000 MiVoice 6920 IP phone with MiVoice 5000 AMT/PUD/TR/0149/0/2/EN 08/2017 User’s Guide ...
-
Page 3: Table Of Contents
Contents Description of the terminal ......1 Description of the others keys .......2 . - Page 4 Table des matières Calls logs ......... 19 Quick access to the logs .
- Page 5 Contents Communicating with the supervision function ....34 Filter function ........36 Communicating with the filter function .
- Page 6 Table des matières...
-
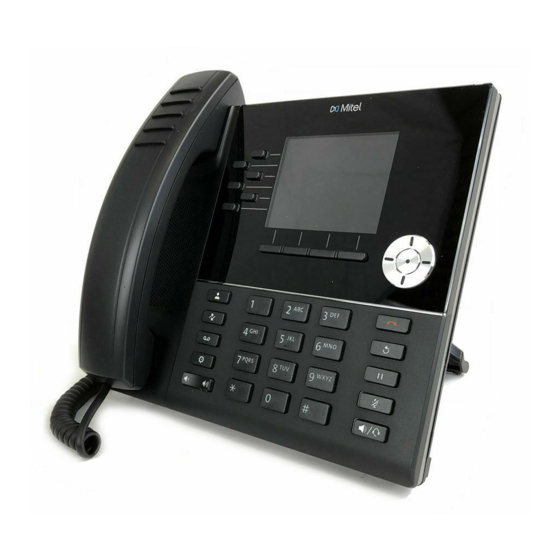
Page 7: Description Of The Terminal
Description of the terminal Goodbye key: Ends an active call. The Goodbye key also exits an open list (such as Call History) Handset and menus (such as the Static Settings menu) without saving changes. Redial key: Displays a list of your Speaker previously outgoing dialed calls. -
Page 8: Description Of The Others Keys
Description of the terminal Mute key: Mutes the microphone Directory Key: Display a list of so that your caller cannot hear you your contacts (the LED beside the key turns on when the microphone is on mute). Speaker/Headset key: Transfers Call history key: Displays a list of the active call to the speaker or... -
Page 9: The Menu/Ident Key
Keys Description Top softkeys: Six programmable, multi-function that allow you to use up to 20 specific functions. The Menu/Ident key This key gives access to the functions offered by the operating system. They differ according to the terminal status. • Terminal idle: see the summary in “Configuration options”, page 40. •... -
Page 10: Alphanumeric Keypad
Alphanumeric keypad The alphanumeric keypad is used to fill in the name and number columns in the private directory and information directory. The input is based on key correspondence with letters or signs. When a text input is proposed: • Select the character you want by pressing the corresponding key successively. -
Page 11: The Screen
The screen The screen comprises 3 information lines depending of the context. The keys of the browser allow to navigate through the menus. In idle mode, the screen indicates: • the default line and the terminal ID, • A message line: if several messages concern the terminal status, each message is displayed alternatively. -
Page 12: Call Modes
Call modes Your telephone proposes various call modes suited to your activities. These features complete the standard handset mode (or discreet mode): lifting the handset to answer or make a call and replacing the handset to end a call. Using the hands-free mode Handsfree mode lets you make or answer a call without lifting the handset. -
Page 13: Adjusting The Listening Volume Level
Call modes Switching from handset mode to hands-free mode You are discussing in handset mode: • Press the handsfree key then hang up. -> The conversation continues in handsfree mode. The handsfree key indicator light goes on. At the end of the conversation, press the End key. Adjusting the listening volume level No matter the mode used (handset mode, handsfree mode, or headset mode), the listening volume is adjustable (8 levels). -
Page 14: Making A Call
Making a call There are several ways to make a call, depending on whether the called party's number is new or has already been stored by the terminal. The procedures for calling the parties whose numbers have been stored in the directories or logs are explained in the chapters dedicated to these features. -
Page 15: Calling An Operator (Switchboard)
Making a call Calling an operator (switchboard) To reach the person in charge of call distribution: 1 - Dial on the keypad. Dial 2 - Press Dial to validate. Calling an internal party by name If you do not know your internal party's number, you can access it by entering their name on the alphanumeric keypad. -
Page 16: Using The Automatic Call Back Function
Making a call Using the automatic call back function You are calling an internal correspondent but he is busy and does not answer. You can ask that he be called back automatically. Enabling automatic call back Menu/Ident 1 - Press the system Menu key. 2 - Select Call back pressing... -
Page 17: Receiving A Call
Receiving a call During an incoming call, the terminal rings and the message indicator light blinks. If the caller is stored in any of the directories (internal or external ), the display indicates the associated name. Adjusting the ringer volume You can adjust the ringer volume during the ringing phase. -
Page 18: During A Call
During a call Using the mute function A call has been set up with a correspondent and you wish to have a confidential conversation without the correspondent hearing you: Deactivate the microphone: Press Mute. -> The handset microphone is deactivated; the indicator light associated with the key flashes. -
Page 19: Swapping A Call Between Two Terminals In The Same Association
During a call other terminal or if the correspondent ends the call. On the second, idle terminal (A6xxxi series): Menu/Ident 1 - Press the system Menu key. Recover parking 2 - Press to display Recover parking and press Enter validate. 3 - Dial the number of the terminal on which you have selected the Parking function then click to confirm. -
Page 20: Transferring A Call
During a call Transferring a call You wish to transfer an on-going call to another terminal: 1 - Press the Transfer key. 2 - Dial the extension number. 3 - Press Dial. Dial You can wait for your correspondent to answer or hang up immediately. -
Page 21: Calling A Second Correspondent
During a call Calling a second correspondent You are in the middle of a call with a party and you want to call a second party, inside or outside the company. 1 - Press the free line key. -> Your first correspondent is put on hold and hears an audible signal. -
Page 22: Answering A Second Call
During a call Answering a second call You are on line with a correspondent and receive a second call (a new line key flashes). • Press the flashing line key to take the second call (the first correspondent is put on hold). You can switch from one call to the other or set up a three-way conference. -
Page 23: Setting Up A Conference Call During An Enquiry Call
During a call Setting up a conference call during an enquiry call You are engaged in an enquiry call (with one correspondent online and another on hold). You wish to set up a three-way conference. 1 - Press the Conference key. 2 - Press the line key who was blinking before you have pressed the Conference key. -
Page 24: Calls Logs
Calls logs To access the calls logs, press the system key Menu/Ident then select Calls logs. Four lists are then available: • Missed Calls Log: unanswered calls • Incoming Calls Log: answered calls • Outgoing Calls Log: calls made • All Calls Log: all incoming and outgoing calls. When consulting a log, you can automatically call back the stored number. -
Page 25: The Missed Calls Log
Calls logs Note: on a multi-line terminal, the line concerned by the call is in- dicated in the details. The missed calls log When you fail to answer your calls, a message on the screen informs you about the number of missed calls. -
Page 26: Direct Dialling
Direct dialling This function is used to save a number on a numeric key. You can call your correspondent by pressing the programmed key. Saving a number on a key With the keypad: 1 - Press a long time (3 seconds) on a not already programmed key. -
Page 27: Call Forwarding
Call forwarding Call forwarding If absent or busy, you can forward your calls to another terminal, an external number (GSM number, for instance) or to your voice mailbox This function can also be programmed through feature codes. They are described in Section “Forwarding your calls through feature codes”, page Forwarding a call... -
Page 28: Cancelling All Forwardings
Choose the forward destination You will now choose the forward destination. • To forward calls to a subscriber: 5 - Select To subscriber and press Enter to confirm. To subscriber 6 - Dial the extension number. In case of error, correct it with 7 - Press Enter to confirm. -
Page 29: Forwarding Your Calls Through Feature Codes
Call forwarding 4 - Confirm by pressing Done. Forwarding your calls through feature codes If the system key Menu/Ident is not proposed, you can forward your calls to another terminal or to your voicemail. mmediate forward to another terminal * 2 1 1 - Press successively the keys * 2 1 or . -
Page 30: Overriding Call Forwarding
Call forwarding voicemail. Cancelling all forwarding operations # 2 0 Overriding call forwarding* You are trying to reach a party and you know that their set is forwarded. You can force this forwarding and ring the desired set. * 2 9 1 - Press successively the keys * 2 9 or 2 - Dial the extension number you want. - Page 31 Call forwarding - 26 -...
-
Page 32: Personal Directory
Personal directory You can save in your personal directory your most frequently used internal or external numbers (up to 200 names). The records are classed in alphabetical order. Creating a record in the personal directory 1 - Press the system key Private Dir. (Voir “Description of the Private Dir. -
Page 33: Modifying Directory Display And Sorting Options
Modifying directory display and sorting options 1 - Press the Options key. Directory 2 - Press ( ) to select Directory and press Entrer to confirm. Display name order 3 - Press ( ) to select Display name order and press Entrer to confirm. -
Page 34: Voicemail
Voicemail Voicemail The voicemail helps you to manage your calls when you are absent or simply when you do not want to be disturbed. For the voicemail system to record your messages, you must configure and personalise your voicemail box. You must activate call forwarding to voicemail so your calls can be forwarded to it. -
Page 35: Activating Call Forwarding To Your Voicemail
Activating call forwarding to your voicemail To activate call forwarding to your voicemail, see Chapter “Forwarding a call”, page Consulting new messages On terminal idle, the blinking message lamp and the icon alert you to the fact that you have received a new message. -
Page 36: Multi-Key Function
Multi-key function Multi-key function A terminal programmed in multi-key mode can have only one directory number, but has personalised keys to enable it to process several calls at the same time. Therefore, you can answer your parties as the calls arrive and display the calls on hold. The number of personalised keys programmed corresponds to the number of calls which you want to have at the same time. - Page 37 programmed key. Switching between parties: To switch successively from one correspondent to the other, press the blinking line key. Releasing one of the correspondents: To release one of the correspondents (the one with whom you are talking): Sortir • Press End to release the call in progress then the flashing line key to resume the call on hold.
-
Page 38: Multi-Line Function
Multi-line function Multi-line function A multi-line terminal has several has several directory numbers*. Each directory number is stored on a programmed key. This function is mainly used to program on the same terminal: - a standard number that you give to everyone. - a private number that you only give to some people;... -
Page 39: Communicating With The Multi-Line Function
Communicating with the multi-line function The multi-line function has been stored on at least two programmable keys on your terminal (one key per line). To answer a call: When a call arrives on your terminal that is multi-line programmed, the indicator associated with the line key flashes and the display shows the calling party’s identity. -
Page 40: The Supervision Function
The supervision function The supervision function Programming on your terminal the supervision of a set of terminals enables you to: • Know the status of supervised terminals (free, called, busy) • Quickly pick up calls on these terminals • Call these terminals directly. Note: this function will be programmed by your system operator. - Page 41 Transferring an incoming call to the supervised terminal You are in communication with a party and you want to transfer the call to the supervised terminal: 1 - Press the Transfer key. 2 - Press the supervised programmed key then hang up. Superv.
-
Page 42: Filter Function
Filter function Filter function Filtering enables a "filtered" terminal to forward calls to a "filtering" terminal while monitoring the forwarded calls. It requires the use of two programmable keys on each of the terminals: • A key for activating and deactivating filtering, •... - Page 43 Filter function you hear a beep: • Press the new line key which flashes. To transfer the inbound call to the filtered terminal: You want to transfer an intercepted call to the filtered terminal. 1 - Press a free line key. 2 - Press the supervision key corresponding to the filtered Superv.
- Page 44 Filter function key lignts up. 3 - Once in communication with the filtered terminal, press Transfer key. 4 - Press the line key which was flashing before you have pressed the Transfer key. This is the correspondent who was put on hold. Before transferring, you can switch from one correspondent to the other by pressing the line keys.
- Page 45 Filter function - 39 -...
-
Page 46: Login/Logout Function
Login/Logout function At the moment, you are occupying an office equipped with a general-purpose terminal (not assigned to a subscriber). You can take your calls, programmed forwards as well as the language associated with your subscriber number from there. When you get back to your office, you will use the same procedure to retrieve your calls on your own terminal, as well as its configuration (forwards, programmable keys, terminal settings, etc.). -
Page 47: Configuration Options
Configuration options You will find in the appendix the list of all the options offered by the system (Voir “Menu options”, page 49), as well as links to the chapters handling the item. The present chapter describes in detail the configuration options offered by the system. For terminals without Menu/Ident key, the feature code allowing the use of these options is also described. - Page 48 Configuration options Note: to lock your terminal, you must have customized your personal password, for it will be required to unlock it (See “Changing the subscription password”, page 43). Via feature code: * 0 5 Unlocking the terminal* Menu/Ident 1 - Press Menu 2 - Enter your subscription password (4 characters) then press Enter to confirm.
- Page 49 Configuration options General standby * You wish to step out whereas some colleagues have activated call forwarding or filtering to your terminal. This function allows these calls to be temporarily forwarded to the owners so callers are not penalised. If you are part of a hunt group, your terminal will be excluded from this.
-
Page 50: General Settings
Configuration options General settings In the Settings menu, select General. Viewing the terminal ID This option displays the subscriber's directory number and Own ID identity. It also indicates the system to which the terminal is attached. Changing the subscription password This option is used to modify the password saved in the system. -
Page 51: Terminal Settings
Terminal settings Your terminal offers some settings options which you can use to personalise it. Accessing settings options 1 - Press the options key to access the terminal options. 2 - Select menu 1 - Preferences then press Enter. 1 - Preferences 3 - Select any of the settings options using the browser then press Enter. -
Page 52: Audio Settings
Terminal settings Audio settings Used to make the following settings: 5 - Set Audio Audio mode: depending on the selected audio mode: -> Speaker: This is the default setting. Calls can be made or received using the handset or handsfree speakerphone. In handset audio mode, pressing the button on the phone switches to handsfree speakerphone. -
Page 53: Other Settings
Terminal settings Other settings After the Preferences menu, other menus can be used to obtain some information or change the terminal status. Phone status This menu gives information about the terminal's computer configuration. User password (terminal password) This option is used to modify the password saved in the terminal. This is the one to be used in the setting options of the terminal on which a password is required. -
Page 54: Appendices
Appendices Menu options The table below shows the menu tree structure, accessible via the system key Menu/Ident when the terminal is idle. The available options are used to deploy the functions offered by the system. All the functions are described in the table below: Some of them are not accessible from your terminal. - Page 55 Appendices Settings • Calls • Forwarding Same as forwarding • Alarm “Configuration options”, page 40 • Lock • Do not disturb • General standby • Group deactivation • Remote forward • General • Own ID “Configuration options”, page 40 • Password •...
-
Page 56: Glossary (Terms You Need To Know)
Appendices Glossary (terms you need to know) Conference call Three-way call from a call with two parties. Filtering Used to forward calls meant for a "filtered" terminal to a "filterer" terminal. Intercept group Group of sets associated to the same group and authorised to intercept calls intended for this group. -
Page 57: Troubleshooting Check
Appendices Troubleshooting Check... Fault detected Possible causes No display Check that the set is connected to the line (dial tone in the earpiece). Check the cord to connect to the line. Check that the other sets in the installation are working. Check the screen contrast setting. - Page 58 Appendices...