Table of Contents
Advertisement
Quick Links
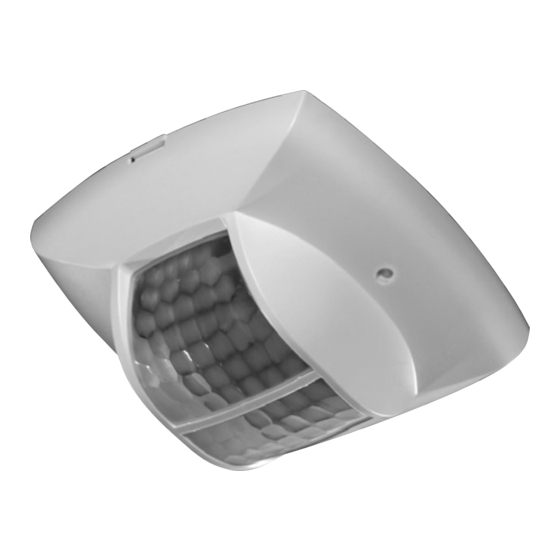
Presence detector
compact passage KNX
Art. Nr. 201 9 290
D
Bedienungsanleitung
F
Notice d´utilisation
GB
Installation manual
Manual de instrucciones
E
Istruzioni per l'uso
I
Gebruikershandleiding
NL
Bruksanvisning
S
Bruksanvisning
N
Käyttöohje
FIN
Betjeningsvejledning
DK
2
24
46
68
90
112
134
156
178
200
Advertisement
Table of Contents

Related Manuals for Theben 201 9 290


Summary of Contents for Theben 201 9 290
- Page 1 Presence detector compact passage KNX Art. Nr. 201 9 290 Bedienungsanleitung Notice d´utilisation Installation manual Manual de instrucciones Istruzioni per l'uso Gebruikershandleiding Bruksanvisning Bruksanvisning Käyttöohje Betjeningsvejledning...
-
Page 2: Table Of Contents
Installation manual English Presence detector compact passage KNX Table of contents 1. Safety ..........47 2. -
Page 3: Safety
Thank you for purchasing an Theben HTS presence detector and putting your trust in us. 1. Safety Familiarise yourself with the compact passage KNX before assembly and start-up by reading this operating instructions. IMPORTANT! The unit requires no maintenance. Opening the unit or inserting foreign bodies into it will invalidate the warranty. -
Page 4: Function And Performance Characteristics
2. Function and performance characteristics The presence detector compact passage KNX detects persons within a corri- dor. Simultaneously, its light sensor measures the brightness in the room and compares it to the pre-set brightness threshold. ● Control of one or two lighting groups ●... - Page 5 2.1 Switching Mode The lighting switches on in case of presence and insufficient brightness, and off in case of absence or sufficient brightness 2.2 Constant Light Control Mode In Constant Light Control mode, the brightness is constantly maintained at th pre-set value. It can be started fully automatically or manually using the push button or remote control.
-
Page 6: Fitting And Connection
3. Fitting and connection 3.1 Presence detection The ideal mounting height is 2 m – 3,5 m. The sensitivity of the detector decreases with increasing mounting height. The detection ranges of multiple detectors should overlap in their fringe zone. Ensure the horizontal installation of the detector. At installation heights between 3.5 and 6 m, the extent and distance between the active and passive zones increase. - Page 7 Detection range (mounting height 3,0 m) Please note: because of the virtually horizontal detection of compact passa- ge to both directions, the detection range of tangential (t) movements of per- sons is different to the range of radial (r) movements towards the detector. 3.2 Light measurement The detector measures artificial light and daylight reflected directly...
-
Page 8: Start-Up Procedure
Constant light control mode The detector must be positioned so that it only receives artificial light that it controls itself. Artificial light controlled by other detectors or manually ope- rated work lights affect the brightness measurement of the detector. Direct artificial light on the detector should be avoided 3.3 Connection A concealed housing should be used for flush-mounted fitting of the compact... - Page 9 4.3 Lighting Settings (recommended) Brightness value Setting the desired brightness (Lux) scale ● Transfer zones (non-working area) approx. 2 ● Bright transer zones approx. 3 ● Deactivation of brightness measurement «on» Depending on the installation location, natural light intensity, furniture, re- flection characteristics of the room and the furniture, an adjustment of the setting by 1 or 2 steps may be necessary.
- Page 10 If setting values for switch-off delay time light <= 2 min and brightness <= 2.5: faster response to changes in actual brightness when in operating mode switching of one lighting row. Stand-by time If stand-by time is activated, the light- ing is not switched off on expiry of the switch-off delay time but remains in the stand-by mode (approx.
- Page 11 4.5 Switch-on behaviour After every time the bus voltage is switched or the parameters are downloa- ded by ETS, the detector runs through its start-up phase (indicated by LED). 1. Start-up phase (30 s) ● LED blinks once per second ●...
-
Page 12: Setting The Brightness Value
5. Setting the Brightness Value Using the management remote control „Sendo Pro 868 A, the desired bright- ness can be easily set. ● Set the brightness by adjusting the artificial light and blinds until the brightness in the corridor corresponds to the desired value. Example: 400 Lux is required in the corri- 200 Lux dor. -
Page 13: Test Operation
● If the value sent is too small, the LED will blink briefly (error blinking), if the value is too large, the LED will flicker for one second. ● A value which makes the detector flicker straight away rather than show the error blinking, (e.g. -
Page 14: Examples
● The LED shows the movement signal immediately without switch-off delay time. ● The lighting is switched on if motion is detected. ● If no presence is detected, the lighting is switched off after 10 s. ● On completion of the test, set the detector to “Normal Operation” using the Sendo Pro 868 A or ETS. - Page 15 ● The mounting location should be chosen so that the master receives as near as possible the same amount of light from both lighting rows. ● Further detectors can be used as slaves to extend the detection area. 7.2 Two Detectors, One Lighting Row Master: ●...
- Page 16 7.3 Two Detectors, Two Lighting Rows Both Detectors: ● Each detector must be positioned so that only the light it controls itself falls on it. ● Operation: master with parallel switching ● Output light A active ● Set operation as required: switched or constant light control ●...
-
Page 17: Technical Specifications
Size of concealed housing (flush mounting) Size 1, (NIS,PMI) Ambient temperature 0°– 50°C Degree of protection installed IP 40 Article numbers compact passage 201 9 290 Surface frame for compact 907 0 514 Management remote control „Sendo 907 0 675 Pro 868 A Ceiling flush-mounting box 73A... -
Page 18: Warranty Declaration
Theben HTS therefore guarantees perfect function, provided the detectors are used as intended. However, should a defect oc- cur, Theben HTS offers the following warranty within the scope of its General Terms and Conditions of Business: Please bear in mind the following points: ●... -
Page 19: Troubleshooting
10. Troubleshooting Fault Cause Lighting does not switch on Lux value setting is too low;Detector is in semi-au- or switches off in case of tomatic mode; Lighting was switched off manually; presence and darkness Person is outside the detection range; Detection is disturbed by obstacle(s);... - Page 20 Dimensions compact passage KNX 102.5 17.5 Ø76 Ø66 Subject to change without prior notice. Errors and omissions excepted.
- Page 22 Fax +49 (0) 74 74 692 - 207 hotline@theben.de Switzerland Theben HTS AG Im Langhag 7b, CH - 8307 Effretikon Tel. +41 (0)52 355 17 00 Fax +41 (0)52 355 17 01 www.theben-hts.ch Please find the contact addresses for additional countries on www.theben.de...