Table of Contents
Advertisement
Quick Links
Advertisement
Table of Contents

Related Manuals for Rangemaster U108910-01


Summary of Contents for Rangemaster U108910-01
-
Page 1: Users Guide
Users Guide & Installation & Service Instructions U108910 - 01... -
Page 2: Peculiar Smells
Be safe Warning Accessible parts will become hot in use. To avoid burns and scalds children should be kept away. During use, and afterwards, the appliance will be warm, so be careful with little children. If the younger members of your family are allowed into the kitchen we strongly advise that they are kept under supervision at all times. -
Page 3: Table Of Contents
Contents The Ovens Storage Multi-function Oven cooking guide Cooking chart - Conventional and full Fan oven functions Cleaning your cooker Troubleshooting General Safety Instructions Installation Circuit Diagram Technical Data The Clock Cooking using the timer Multi-function ovens Using your Handigrill Oven shelves Oven light Cleaning Table... -
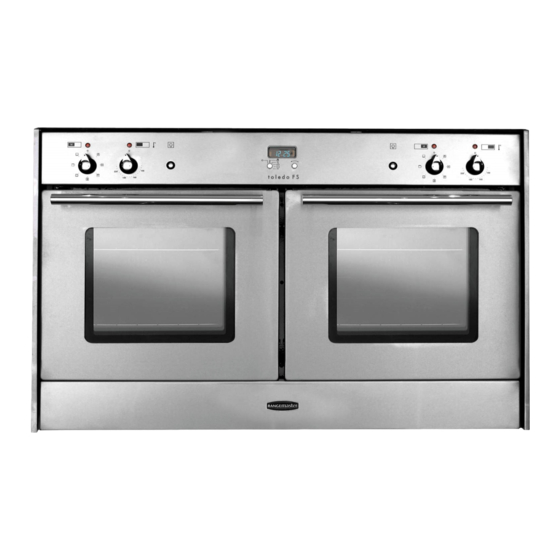
Page 4: The Ovens
The Ovens During use the appliance becomes hot. Care should be taken to avoid touching the heating elements inside the ovens. Before using for the first time, to dispel manufacturing odours turn the ovens to 240°C and run for an hour. To clear the smell make sure the room is well ventilated to the outside air, by opening windows for example. -
Page 5: The Clock
• To reduce fat splashing when you add vegetables to hot fat around a roast, dry them thoroughly or brush lightly with cooking oil. • If you want to brown the base of a pastry dish, preheat a baking tray for 15 minutes before placing the dish in the centre of the tray. -
Page 6: Cooking Using The Timer
Turn the Timer knob to the ( ) position. The display will show the current time of day plus the ‘cook period’ you just set. Use the Adjusting knob to set the ‘Stop time’ you need as below. ‘Stop Time’ shows. AUTO will show in the display. Set the oven(s) to the cooking temperature you need (don’t forget to set a function). -
Page 7: Multi-Function Ovens
Very perishable foods such as pork or fish should be avoided if a long delay period is planned, especially in hot weather. Don’t place warm food in the oven. Don’t use an oven already warm. Don’t use if an adjoining oven is warm. Avoid using wine or beer if there is a delay period, as fermentation may take place. -
Page 8: The Handygrill
Fanned grilling This function operates the fan whilst the top element is on. It produces a more even, less fierce heat than a conventional grill. For best results, place the food to be grilled, on a grid over a roasting tin, which should be smaller than a conventional grill pan. -
Page 9: Oven Shelves
The second level from the top is the most useful for normal grilling. Only use the top position for toast or very quick cook items such as minute steak. These timings are recommendations only Food Temperature Cooking Time Minutes Sausages 200-Max Bacon 200-Max... -
Page 10: Oven Light
the shelf stops, and then lower the front so that the shelf is level and push it fully back. Steam When cooking foods with high water content (e.g. oven chips) there may be some steam visible at the top of the oven doors .This is perfectly normal. Oven light Press the appropriate button to turn on the oven light. -
Page 11: Multi-Function Oven Cooking Guide
Multi-function Oven cooking guide Remember - not all functions will be suitable for all food types. The oven control settings and cooking times given are intended to be used only as a guide. Individual tastes may require the temperature to be altered to provide a preferred result. -
Page 12: Cooking Chart - Conventional And Full Fan Oven Functions
Cooking chart - Multi-function oven Conventional Function Food Temperature FISH ROAST MEATS Beef with bone Beef without bone Lamb Pork Stuffed and rolled - Add approx. 10 mins. per 500g to above cooking times or cook at 200°C for 20mins. then 160°C for remainder. -
Page 13: Cleaning Your Cooker
Cleaning your cooker Essential information Before thorough cleaning isolate the electricity supply. Remember to switch on the electricity supply before use. Never use paint solvents, washing soda, caustic cleaners, biological powders, bleach, chlorine based bleach cleaners, coarse abrasives or salt. Don’t mix different cleaning products - they may react together with hazardous results. -
Page 14: Cleaning Table
Cleaning Table Outside of ovens Part Door, Door surround and Storage Drawer exterior. Control panel Control Knobs/Handles Oven Door Glass/Glass Lid Inside Ovens Part Sides, floor & roof of oven - NOT COOK & CLEAN OVEN PANELS (see below) Cook & Clean Oven Panels (some models only) Oven Shelves, Handyrack, Grill Trivet, Handygrill rack... -
Page 15: Troubleshooting
Troubleshooting Steam is coming from the oven When cooking foods with a high water content (e.g. oven chips) there may be some steam visible at the top of the door. Take care when opening the oven door, as there may be a momentary puff of steam when the oven door is opened. -
Page 16: General Safety Instructions
Make sure the oven is cool. Open the oven door and remove the oven shelves. Unscrew the bulb cover by turning anticlockwise. It may be very stiff. Taking care to protect your fingers in case the bulb should shatter, unscrew the old bulb. Screw in the new bulb, screw back the bulb cover. -
Page 17: Installation
Installation Ovens Installation Dear Installer Before you start your installation, please complete the details BELOW. If your customer has a problem relating to your installation they will be able to contact you easily. Installer’s Name Installer’s Company Installer’s Telephone number You must be aware of the following safety requirements &... -
Page 18: Unpacking The Appliance
resistant. Certain types of vinyl or laminate kitchen furniture are particularly prone to heat damage and discolouration. We cannot accept responsibility for damage caused by normal use of the appliance to any material that de-laminates or discolours at temperatures less than 65°C above room temperature. - Page 19 A left rear roller, B right rear roller, C centre roller LOWER THE FRONT ROLLER until the front of the appliance starts to rise using the Allen key supplied. Now LOWER THE TWO REAR ROLLERS so that they contact the floor, by fitting the levelling tool (or 8mm socket) on the hexagonal adjusting nut as shown below and turning clockwise.
-
Page 20: Fitting The Stability Bracket
the 8mm socket or levelling tool until it is roughly level. Fitting the stability bracket The appliance is front heavy when the doors are opened so the rear needs to be fixed to the floor. A stability bracket is included with the appliance for this purpose. -
Page 21: Customer Care
3) Ensure the stability bracket top arm is above the rear channel. See diagram. 4) Jack up the front roller until the appliance unit just touches the worktop and screw down the two front adjusting screws using a 7mmm socket until the top of the appliance is in contact all along the underside of the worktop. -
Page 22: Circuit Diagram
Circuit Diagram L1 L2 L3 Connection shown in circuit diagram is for single phase. Ratings are for 230V 50Hz A Multifunction oven thermostat B Multifunction oven function control C Clock D Light switch E Cooling fan F Multifunction oven base element G Multifunction oven top element (outer pair) H Multifunction oven browning element (inner pair) Multifunction oven fan element... -
Page 23: Technical Data
Technical Data INSTALLER: Please leave these instructions with the User. DATA BADGE LOCATION : DATA BADGE LOCATION : Lower right hand base (Remove storage drawer) Country of Destination: GB/IE Ratings Total Load At 230V 50Hz 13.6kW (approximate total including oven lights, oven fan etc.) Ovens Fan element Top element... - Page 24 U108910 230407...