Konica Minolta bizhub C3350 User Manual
Hide thumbs
Also See for bizhub C3350:
- User manual (168 pages) ,
- Quick start manual (68 pages) ,
- User's manual print functions (118 pages)
Table of Contents
Advertisement
Quick Links
Advertisement
Table of Contents

Related Manuals for Konica Minolta bizhub C3350


Summary of Contents for Konica Minolta bizhub C3350
- Page 1 User’s Guide: Introduction...
-
Page 2: Table Of Contents
Table of contents Introduction Welcome ............................1-2 User's Guides ..........................1-3 Booklet manuals ..........................1-3 User's guides included in User's Guide CD-ROM................1-3 Notations and symbols used in this manual................. 1-4 Procedural instruction.........................1-4 Symbols used in this manual ......................1-4 Product and key names ........................1-4 Notations of application names ......................1-4 Safety information........................... - Page 3 When using bizhub C3850FS ......................6-12 Loading letterheads in portrait orientation..................6-12 Loading letterheads in landscape orientation...................6-12 6.5.2 When using bizhub C3850/bizhub C3350 ..................6-13 Loading letterheads in portrait orientation..................6-13 Loading letterheads in landscape orientation...................6-13 Control Panel Names and functions of Control Panel keys ................7-2 Changing the angle of the Control Panel..................
- Page 4 Checking the specifications of this machine ................10-2 10.1.1 bizhub C3850FS ..........................10-2 Main Unit............................10-2 Finisher..............................10-3 10.1.2 bizhub C3850/bizhub C3350 ......................10-3 10.2 Checking the specifications of optional devices ............... 10-5 Paper Feed Unit PF-P13 ........................10-5 Fax Kit FK-512 ..........................10-5 Finisher FS-P03 ..........................10-6 Authentication Unit AU-201 ......................10-6...
-
Page 5: Introduction
Introduction... -
Page 6: Welcome
Welcome Introduction Welcome Thank you for purchasing this machine. To obtain maximum performance from this product and to learn how to use it effectively, please read this User's Guide as necessary. [Introduction]... -
Page 7: User's Guides
User's Guides User's Guides Booklet manuals Manual title Overview [Quick Start Guide] This guide describes how to perform basic operations of this machine and configure initial settings. [Safety Information Guide] This guide describes notes and precautions that should be fol- lowed to use this machine. -
Page 8: Notations And Symbols Used In This Manual
Notations and symbols used in this manual Notations and symbols used in this manual Procedural instruction This check mark symbol shows a precondition of a procedure. This format number "1" represents the first step. This format number represents the order of consecutive steps. % This symbol indicates a supplementary explanation of a procedural instruction. -
Page 9: Safety Information
Safety information Safety information This section contains detailed instructions on the operation and maintenance of this machine. To achieve op- timum utility of this device, all operators should carefully read and follow the instructions in this manual. Please read the following section before connecting the machine to the supply. It contains important infor- mation related to user safety and preventing equipment problems. - Page 10 Safety information Power cord • Do not scratch, abrade, place a heavy object on, heat, twist, bend, pull on, or damage the power cord. Use of a damaged power cord (exposed core wire, broken wire, etc.) could result in a fire or breakdown. Should any of these conditions be found, immediately turn OFF the power switch, unplug the power cord from the power outlet, and then call your authorized service representative.
- Page 11 Safety information Grounding WARNING • Make sure to ground this product. (Connect the power cord to an electri- cal outlet that is equipped with a grounding terminal.) Failure to do so and an unlikely event of leakage could result in a fire or electrical shock. Installation WARNING •...
- Page 12 Safety information Actions in response to troubles WARNING • Do not keep using this product, if this product becomes inordinately hot or emits smoke, or unusual odor or noise. Immediately turn OFF the pow- er switch, unplug the power cord from the power outlet, and then call your authorized service representative.
- Page 13 Safety information When moving the machine CAUTION • Whenever moving this product, be sure to disconnect the power cord and other cables. Failure to do this could damage the cord or cable, resulting in a fire, electrical shock, or breakdown. •...
-
Page 14: Legal Restrictions On Reproduction
Legal restrictions on reproduction Legal restrictions on reproduction Certain types of originals must never be reproduced with the purpose or intent to pass reproductions of such originals off as the originals. The following is not a complete list, but is meant to be used as a guide to responsible reproduction. <Financial Instruments>... -
Page 15: Regulation Notices
Regulation notices Regulation notices For EU member states only This symbol means: Do not dispose of this product together with your household waste! Please contact the Local Authority for appropriate disposal instructions. In the case of a new device being purchased, the used one can also be given to our dealer for appropriate disposal. -
Page 16: Before Using This Function
Before Using This Function... -
Page 17: Cd-Rom Supplied With This Machine
CD-ROM supplied with this machine Before Using This Function CD-ROM supplied with this machine Driver & Utilities CD-ROM Item Overview [Printer/FAX] Allows you to install the printer driver and fax driver. For details, refer to [User's Guide: Print Functions] and [User's Guide: PC-FAX Functions]. -
Page 18: Installation Location And Environment
To simplify tasks such as operations, consumable replacement, or inspection, create an installation environ- ment as shown below. Unit: Inch (mm) Front view bizhub C3850FS 32-11/16 (830) 1-13/16 (46) 21-7/8 (555) (229) bizhub C3850/bizhub C3350 30-7/8 (784) 21-7/8 (555) (229) [Introduction]... -
Page 19: Right View
Installation location and environment Right view bizhub C3850FS 1-3/4 (44) 23 (584) 36-11/16 (932) bizhub C3850/bizhub C3350 23 (584) 36-11/16 (932) Right view (with optional devices installed) The hatched parts indicate optional devices in this figure. 23 (584) 36-11/16 (932) -
Page 20: Installation Environment
C3850FS: Approx. 114 lb (51.7 kg) er Bottle) bizhub C3850: Approx. 102-1/16 lb (46.3 kg) bizhub C3350: Approx. 101-7/8 lb (46.2 kg) Main unit (including Imaging Unit, Toner Car- bizhub C3850FS: Approx. 116-7/8 lb (53.0 kg) tridge, and Waste Toner Bottle) bizhub C3850: Approx. -
Page 21: About This Machine
About This Machine... -
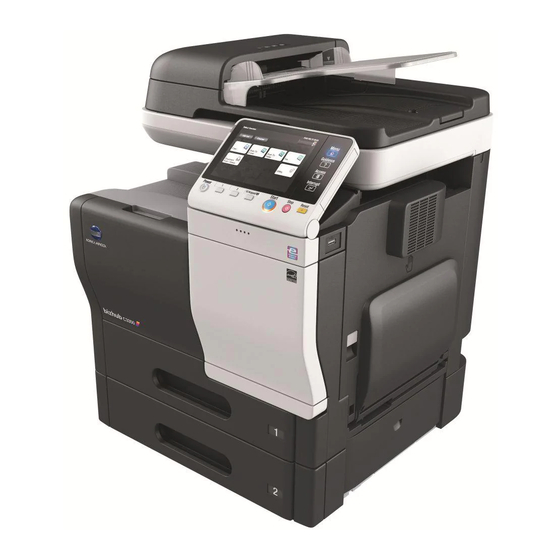
Page 22: Checking The Name Of Each Part
Checking the name of each part Front side Name Control Panel Automatic Document Feeder (ADF) ADF Feed Cover Document Guide Document Feed Tray Document Output Tray Document Stopper USB Host Port Manual Feed Tray Tray 1 Data Indicator Output Tray (bizhub C3850/bizhub C3350 only) [Introduction]... - Page 23 Checking the name of each part bizhub C3850FS finisher section Name Main Tray Processing Tray View with Automatic Document Feeder (ADF) opened Name Scanner Lock Lever Original Glass Original Cover Pad Scanner Unit [Introduction]...
- Page 24 Checking the name of each part View with Front Cover and Right Door opened Name Fusing Unit Right Door Transfer Roller Transfer Belt Unit Laser Lens Cleaning Tool Front Cover Waste Toner Bottle Imaging Unit Toner Cartridge [Introduction]...
-
Page 25: Rear Side
Checking the name of each part Rear side This view shows the machine with the optional Fax Kit FK-512 and Mount Kit MK-738 installed. These are provided as standard on the bizhub C3850FS and bizhub C3850 models sold in North America. Name Power Switch Power Connection... -
Page 26: Checking The Option Configuration
Checking the option configuration Checking the option configuration List of optional components Name Description Authentication Unit Performs user authentication by scanning information recorded on AU-201/AU-201S the IC card or the NFC-compatible mobile terminal (Android terminal). Working Table WT- Provides an area to temporarily place an original or other materials. This is also used when the Authentication Unit or Finisher FS-P03 is installed. -
Page 27: Front View (With Optional Devices Installed)
Checking the option configuration Name Description Local Interface Kit Used to add an RS-232C port. EK-P01 i-Option LK-101 v3 Supports the web browser function that is one of the advanced func- tions. The Extended Memory is required to use the Web browser function. For details on Extended Memory, contact your service representa- tive. -
Page 28: How To Use Finisher Fs-P03
How to use Finisher FS-P03 How to use Finisher FS-P03 By using an optional Finisher FS-P03, you can easily staple printed sheets in a corner. This function is useful when preparing a project proposal or other booklet materials. To staple sheets, align their corners to Finisher FS-P03. NOTICE When repeating stapling, wait for three seconds or more after the first stapling has been completed to load the next sheets in order to prevent the internal temperature of Finisher FS-P03 rising excessively. -
Page 29: Extending The Output Tray Of The Finisher (Bizhub C3850Fs Only)
Extending the output tray of the finisher (bizhub C3850FS only) Extending the output tray of the finisher (bizhub C3850FS only) When using bizhub C3850FS, you can extend the output tray of the finisher to prevent printed materials from falling off. Hold the handle on the front of the main tray, then pull the extension tray out toward the front side. - Page 30 Extending the output tray of the finisher (bizhub C3850FS only) Lift the tray extension on the left of the processing tray. Preparations are then complete. [Introduction] 3-10...
-
Page 31: Turning The Power On Or Off
Turning the Power On or Off... -
Page 32: About Power Supply
About power supply Turning the Power On or Off About power supply This machine has two power switches: Power Switch outside the machine and Power key on the Control Panel. Name Description Power Switch Press this switch when turning the main power of this machine on or off, or when restarting this machine. -
Page 33: Turning The Power Switch On Or Off
Turning the Power Switch ON or OFF Turning the Power Switch ON or OFF Connect the Power Cord to this machine. Connect the Power Cord to the power outlet. When turning the main power on, press n of the Power Switch. A screen appears to show that this machine is in the process of start-up. -
Page 34: Using The Power Key
Using the Power key Using the Power key Press the Power key to switch this machine to Power Save mode. You can select [Power Save] or [Sub Power OFF] as Power Save mode that is activated when the Power key is pressed. -
Page 35: When Using The Power Key As A Sub Power Off Key
Using the Power key When using the Power key as a Sub Power OFF key When the Power key is pressed, the status of this machine changes as shown below. Depending on how long the Power key is pressed, the state of the power saving mode to be activated will differ. Power key Status of Status of... -
Page 36: Loading The Original
Loading the Original... -
Page 37: Loading The Original Into The Adf
Loading the original into the ADF Loading the Original Loading the original into the ADF Original available for ADF Item Specifications Original types Plain paper (13-5/16 lb to 34-1/16 lb (50 g/m to 128 g/m Max. original size A4 or Legal 8-1/2 inches e 14 inches (216 mm e 356 mm) (Fax only: 8-1/2 inches e 39-3/8 inches (216 mm e 1000 mm)) Original loading capaci-... - Page 38 Loading the original into the ADF Loading the original into the ADF The ADF feeds original sheets one by one in order from the top, and automatically loads them. It also loads a 2-sided original automatically. The ADF is helpful when loading a large number of original. Put the first page of an original at the top, and load the original into the Document Feed Tray with the side to be photocopied facing upward.
-
Page 39: Loading The Original Onto The Original Glass
Loading the original onto the Original Glass Loading the original onto the Original Glass Original available on the Original Glass Item Specifications Original types Sheets, books (two-page spread), cards, three-dimensional objects Max. original size A4 or Legal Original loading capaci- Max. -
Page 40: Loading Paper
Loading Paper... -
Page 41: Paper
Paper Loading Paper Paper 6.1.1 Checking the available paper types Paper type Paper weight Paper capacity Plain paper 15-15/16 lb to 23-15/16 lb Manual Feed Tray: 100 sheets Recycled paper (60 g/m to 90 g/m Tray 1: 550 sheets Single Side Only Paper Feed Unit (Tray 2/3): 500 sheets Special Paper Colored Paper... -
Page 42: Checking The Available Paper Sizes
Paper 6.1.2 Checking the available paper sizes Paper feed port Allowable sizes Manual Feed Tray A4, A5, A6, B5 (JIS), B6 Legal (8-1/2 e 14), Letter (8-1/2 e 11), SP Folio (8-1/2 e 12-11/16), Executive (7-1/4 e 10-1/2), Statement/Invoice (5-1/2 e 8-1/2) Foolscap (8 e 13), 8-1/8 e 13-1/4, F4:Folio (8-1/4 e 13), Government Legal (8- 1/2 e 13), 8-1/2 e 13-1/2, 16K, Kai 16, Kai 32 Postcard (100 mm e 148 mm), Reply postal card (148 mm e 200 mm) -
Page 43: Precautions For Correct Operations
Paper 6.1.3 Precautions for correct operations Unavailable paper Do not load the following types of paper into the tray. Not observing these precautions may lead to reduced print quality, a paper jam, or machine damage. Paper that has been printed on using a heat-transfer printer or an inkjet printer Folded, curled, wrinkled, or torn paper Paper that has been left unwrapped for a long period of time Paper that is damp, perforated, or that has been hole punched... -
Page 44: Loading Paper Into The Manual Feed Tray
Loading paper into the Manual Feed Tray Loading paper into the Manual Feed Tray How to load paper into the Manual Feed Tray When selecting a paper size other than for paper trays, use the Manual Feed Tray. To use the Manual Feed Tray, load paper and specify the paper size and paper type. Open the Manual Feed Tray. -
Page 45: Loading Postcards
Loading paper into the Manual Feed Tray With the side to be printed on facing down, insert the paper as far as possible into the feed slot. % For details on the available paper sizes, refer to page 6-2. % For details on how to load postcards, refer to page 6-6. % For details on how to load envelopes, refer to page 6-7. -
Page 46: Loading Envelopes
Loading paper into the Manual Feed Tray Loading envelopes Up to 10 envelopes can be loaded into the tray at a time. NOTICE Before loading, remove air from the envelope(s), and securely press along the flap fold line. Otherwise, it will result in wrinkles or a paper jam. -
Page 47: Loading Paper Into Tray 1
Loading paper into Tray 1 Loading paper into Tray 1 Pull out Tray 1. Press the flip-top plate down until it is locked. Spread out the paper guide. [Introduction]... - Page 48 Loading paper into Tray 1 Load paper into the tray with the print side facing up. % For details on the available paper sizes, refer to page 6-2. % Load a postcard or reply postal card, turning the short side to the right side of the tray. NOTICE Do not load the sheets up to the point where the top of the stack is higher than the mark.
-
Page 49: Loading Paper Into Tray 2/3
Loading paper into Tray 2/3 Loading paper into Tray 2/3 Tray 2/3 is available when the optional Paper Feed Unit is installed. Pull out Tray 2/3. Press the flip-top plate down until it is locked. Spread out the paper guide. [Introduction] 6-10... - Page 50 Loading paper into Tray 2/3 Load paper into the tray with the print side facing up. % For details on the available paper sizes, refer to page 6-2. NOTICE Do not load the sheets up to the point where the top of the stack is higher than the mark.
-
Page 51: Loading Letterheads
Loading letterheads Loading letterheads To print on letterheads, the method used to load them into a tray varies depending on your model and the letterhead orientation. 6.5.1 When using bizhub C3850FS Loading letterheads in portrait orientation Load letterheads so that their top edges are set in the paper feed port side of the tray. Tips If you allow printing on both sides of letterhead paper in [Letterhead duplex print permission settings] on this machine, load the letterheads into the paper tray as shown below. -
Page 52: When Using Bizhub C3850/Bizhub C3350
Loading letterheads 6.5.2 When using bizhub C3850/bizhub C3350 Loading letterheads in portrait orientation Load letterheads in portrait orientation so that their top edges are set in the reverse direction of the paper feed port of the tray. Tips If you allow printing on both sides of letterhead paper in [Letterhead duplex print permission settings] on this machine, load the letterheads into the paper tray as shown below. -
Page 53: Control Panel
Control Panel... -
Page 54: Names And Functions Of Control Panel Keys
Names and functions of Control Panel keys Control Panel Names and functions of Control Panel keys Tips This figure shows the Control Panel with an optional Keypad installed. Name Description Touch Panel Displays setting screens and messages. Directly press this panel to carry out operations. [Menu] Tap this key to display the Main Menu. - Page 55 Names and functions of Control Panel keys Name Description Reset Press this key to reset the settings you entered or changed on the Control Panel. Stop Press this key to temporarily stop an active copy, scan, or print job. To restart, press the Start key. Start Press this key to start an operation such as copying, scanning, faxing, or printing.
-
Page 56: Changing The Angle Of The Control Panel
Changing the angle of the Control Panel Changing the angle of the Control Panel The Control Panel can be adjusted within the range shown below. Adjust the panel to an easy-to-use angle. To adjust the angle of the Control Panel, tilt the Control Panel up and down. [Introduction]... -
Page 57: Touch Panel
Touch Panel Touch Panel 7.3.1 Operating the Touch Panel Lightly touch the screen with your finger, then take your finger off the screen immediately. This action is avail- able when selecting or determining a menu. Flick Make a slight fillip while sliding your finger on the screen. 7.3.2 Displaying the Keypad Tap a number or input area on the screen to display the Keypad. -
Page 58: Switching The Entry Or Selection Screen
Touch Panel 7.3.3 Switching the entry or selection screen Tap a target input area or icon to switch to the entry or selection screen. Used to switch to the Select screen to enter text or select a registered item. Reference For details about the icon types, refer to page 7-10. -
Page 59: Entering Characters
Entering characters Entering characters When entering characters to register an address or program, use the keyboard screen displayed on the Touch Panel. Item Description Keyboard Tap the keys of characters you want to enter. Tap this key to delete a character or value you entered. [ ]/[ ] Tap this key to move the cursor. -
Page 60: Screen Layout
Screen layout Screen layout 7.5.1 Main Menu Tap [Menu] on the Control Panel to display the Main Menu. The Main Menu is a basic screen to perform operations of this machine. Switch from the Main Menu to each function mode. Item Description [Job List]... -
Page 61: Main Screen
Screen layout Related setting (for the administrator) The copy program, fax program, scan program, [Quick Security Setting] and [QR Code Display] shortcut keys can be arranged on the main menu. To configure settings: [Utility] - [Administrator Settings] - [System Settings] - [Main Menu Default Settings] 7.5.2 Main screen This example shows the screen layout for the main screen of the copy mode. -
Page 62: Icon Types
Screen layout 7.5.3 Icon types Icons indicating the status of this machine Icons indicating the status of this machine may appear in the icon display area. The types of icons to be dis- played are as follows. Icon Description Indicates that a warning has occurred on this machine. Tapping an icon displays a warning screen. -
Page 63: Changing The Function Assigned To A Register Key (For Administrators)
Changing the function assigned to a Register key (for administrators) Changing the function assigned to a Register key (for administra- tors) Select a function to be assigned to a Register key on the Control Panel to suit your requirements. It will be useful to assign frequently-used functions to Register keys. -
Page 64: Viewing Active Job And Job Logs
Viewing Active Job and Job Logs... -
Page 65: Displaying The Job List Screen
Viewing Active Job and Job Logs Displaying the Job List screen A job refers to an individual operation unit such as printing, sending, receiving, or saving. If you tap [Job List] on the Main Menu, you can view the active job and job logs. Viewing the active job Tap [Active] to display current or standby jobs on this machine. -
Page 66: Viewing Job Logs
Related setting (for the administrator) On the [Job List] screen, you can select whether or not to hide personal information such as destina- tions or job names. To configure settings: [Utility] - [Administrator Settings] - [Security Settings] - [Security Details] - [Hide Personal Data] (Default: [OFF]) You can select whether or not to permit a deletion of other user's job. -
Page 67: Login Screen
Login Screen... -
Page 68: Logging In To This Machine
Login Screen Logging in to this machine If user authentication or account track is installed on this machine, the Login screen appears on the Touch Panel. Enter the user or account track name and the password on the Login screen, then tap [Login] or [Access] to perform authentication. - Page 69 Tap the [Password] entry area. Enter the password, then tap [OK]. Tap [Login] or [Access] to log in to this machine. % If user authentication and account track are installed without being synchronized, account track is required after this. For details, refer to page 9-6. % If user authentication and account track are synchronized, account track is not required.
-
Page 70: Performing User Authentication (External Server Authentication)
Performing user authentication (external server authentication) Enter the user name and the password, and select a server to be authenticated. For details on how to configure user authentication settings, refer to Chapter 2 "Configuring the Oper- ating Environment of This Machine" in [User's Guide: Applied Functions]. Tap the [User Name] entry field. - Page 71 When using multiple authentication servers, tap the list icon for [Server], then select a server to be au- thenticated. % By default, the default authentication server is selected. When using the default authentication serv- er, proceed to Step 6. Tap [Login] or [Access] to log in to this machine. % If user authentication and account track are installed without being synchronized, account track is required after this.
-
Page 72: Performing Account Track
Performing account track Enter the account name and the password to perform account track. For details on how to configure account track settings, refer to Chapter 2 "Configuring the Operating Environment of This Machine" in [User's Guide: Applied Functions]. If user authentication and account track are installed without being synchronized, perform user authen- tication first. -
Page 73: Specifications
Specifications... -
Page 74: Checking The Specifications Of This Machine
10.1 Checking the specifications of this machine Specifications 10.1 Checking the specifications of this machine 10.1.1 bizhub C3850FS Main Unit Item Description Name bizhub C3850FS Type Scanner, reverse automatic document feeder, finisher, desktop type printer Color mode Full Color 600 dpi e 600 dpi Scanning resolution Writing resolution 600 dpi e 600 dpi (Standard mode) -
Page 75: Finisher
Corner Rear Staple capacity Length 11-11/16 inches (297 mm) or less: 50 sheets Length 11-3/4 inches (298 mm) or more: 30 sheets Consumables Staple: Staple Kit SK-602 10.1.2 bizhub C3850/bizhub C3350 Item Description Name bizhub C3850 bizhub C3350 Type Scanner, reverse automatic document feeder, desktop type printer... - Page 76 [W] e [D] e [H] (When the Manual Feed Tray and ADF are opened while the Paper Tray is pulled out) Weight bizhub C3850: Approx. 104-15/16 lb (47.6 kg (including consumables)) bizhub C3350: Approx. 104-11/16 lb (47.5 kg (including consumables)) [Introduction] 10-4...
-
Page 77: Checking The Specifications Of Optional Devices
10.2 Checking the specifications of optional devices 10.2 Checking the specifications of optional devices Paper Feed Unit PF-P13 Item Specifications Model number PF-P13 Paper type Plain paper, recycled paper, 1-sided special paper (15-15/16 lb to 23-15/16 lb (60 g/m to 90 g/m Paper size A4, B5 (JIS) Legal (8-1/2 e 14), Letter (8-1/2 e 11), Executive (7-1/4 e 10-1/2), Government... -
Page 78: Finisher Fs-P03
10.2 Checking the specifications of optional devices Finisher FS-P03 Item Specifications Model number FS-P03 Staple capacity 20 sheets (Plain paper 23-15/16 lb (90 g/m Continuous stapling in- Once 3 sec. terval Power supply Supply from machine Consumables Staple: Staple Kit SK-501 Dimensions [W] e [D] e 4 inches (101 mm) e 4-9/16 inches (115.3 mm) e 2-15/16 inches (74.5 mm) Weight... -
Page 79: Authentication Unit Au-201S
10.2 Checking the specifications of optional devices Authentication Unit AU-201S Item Specifications Name Card Authentication Unit AU-201S Dimensions [W] e [D] e 3-7/8 inches (98 mm) e 2-1/2 inches (64 mm) e 1/2 inches (13 mm) Weight Approx. 1/4 lb (0.1 kg) Power supply Power feeding from USB port System conditions (op-... -
Page 80: Standard Operating Life Of Consumables And Periodic Replacement Parts
C3350: Approx. 150,000 pages Imaging Unit bizhub C3850FS/bizhub C3850: Approx. 60,000 pages (4 pages / job) bizhub C3350: Approx. 50,000 pages (3 pages / job) Waste Toner Bottle Approx. 36,000 pages (black and white) Approx. 9,000 pages (full color) Transfer Roller bizhub C3850FS/bizhub C3850: Approx. -
Page 81: Trademarks And Licenses
Trademarks and Licenses... -
Page 82: Trademark Acknowledgement
Trademarks and Licenses Trademark acknowledgement KONICA MINOLTA, the KONICA MINOLTA logo, Giving Shape to Ideas, PageScope, and bizhub are regis- tered trademarks or trademarks of KONICA MINOLTA, INC. Mozilla and Firefox are trademarks of the Mozilla Foundation. Microsoft, Windows, Windows Vista, Windows 7, Windows 8, and Windows 8.1 are either registered trade- marks or trademarks of Microsoft Corporation in the United States and/or other countries. - Page 83 Redistributions in binary form must reproduce the above copyright notice, this list of conditions and the following disclaimer in the documentation and/or other materials provided with the distribution. All advertising materials mentioning features or use of this software must display the following acknowl- edgment: “This product includes software developed by the OpenSSL Project for use in the OpenSSL Toolkit.
-
Page 84: Openslp License
ON ANY THEORY OF LIABILITY, WHETHER IN CONTRACT, STRICT LIABILITY, OR TORT (INCLUDING NEGLIGENCE OR OTHERWISE) ARISING IN ANY WAY OUT OF THE USE OF THIS SOFTWARE, EVEN IF ADVISED OF THE POSSIBILITY OF SUCH DAMAGE. The licence and distribution terms for any publically available version or derivative of this code cannot be changed. - Page 85 works that remain separable from, or merely link (or bind by name) to the interfaces of, the Work and Deriv- ative Works thereof. “Contribution” shall mean any work of authorship, including the original version of the Work and any modifi- cations or additions to that Work or Derivative Works thereof, that is intentionally submitted to Licensor for inclusion in the Work by the copyright owner or by an individual or Legal Entity authorized to submit on behalf of the copyright owner.
-
Page 86: Netsnmp License
conditions. Notwithstanding the above, nothing herein shall supersede or modify the terms of any separate license agreement you may have executed with Licensor regarding such Contributions. 6. Trademarks. This License does not grant permission to use the trade names, trademarks, service marks, or product names of the Licensor, except as required for reasonable and customary use in describing the origin of the Work and reproducing the content of the NOTICE file. - Page 87 SULTING FROM THE LOSS OF USE, DATA OR PROFITS, WHETHER IN AN ACTION OF CONTRACT, NEG- LIGENCE OR OTHER TORTIOUS ACTION, ARISING OUT OF OR IN CONNECTION WITH THE USE OR PERFORMANCE OF THIS SOFTWARE. Part 2: Networks Associates Technology, Inc copyright notice (BSD) Copyright ©2001-2003, Networks Associates Technology, Inc All rights reserved.
-
Page 88: Kerberos
OR BUSINESS INTERRUPTION) HOWEVER CAUSED AND ON ANY THEORY OF LIABILITY, WHETHER IN CONTRACT, STRICT LIABILITY, OR TORT (INCLUDING NEGLIGENCE OR OTHERWISE) ARISING IN ANY WAY OUT OF THE USE OF THIS SOFTWARE, EVEN IF ADVISED OF THE POSSIBILITY OF SUCH DAMAGE. Part 5: Sparta, Inc copyright notice (BSD) Copyright ©2003-2004, Sparta, Inc All rights reserved. - Page 89 Individual source code files are copyright MIT, Cygnus Support, Novell, OpenVision Technologies, Oracle, Red Hat, Sun Microsystems, FundsXpress, and others. Project Athena, Athena, Athena MUSE, Discuss, Hesiod, Kerberos, Moira, and Zephyr are trademarks of the Massachusetts Institute of Technology (MIT). No commercial use of these trademarks may be made without prior written permission of MIT.
- Page 90 DISCLAIMER This software is provided 'as is' with no explcit or implied warranties in respect of any properties, including, but not limited to, correctness and fitness for purpose. Portions contributed by Red Hat, including the pre-authentication plug-ins framework, contain the following copyright: Copyright ©2006 Red Hat, Inc.
-
Page 91: Wpa Supplicant
Note User's Guide may not be reproduced in part or in full without permission. KONICA MINOLTA, INC. will not be held liable for any incidents caused by using this printing system or Us- er's Guide. Information included in User's Guide is subject to change without notice. -
Page 92: Software License Agreement
SOFTWARE LICENSE AGREEMENT This package contains the following materials provided by KONICA MINOLTA, INC. (KM): software included as part of the printing system ("Printing Software"), the digitally-encoded machine-readable outline data en- coded in the special format and in the encrypted form ("Font Programs"), other software which runs on a computer system for use in conjunction with the Printing Software ("Host Software"), and related explanatory... -
Page 93: About Adobe Color Profile
About Adobe Color Profile ADOBE SYSTEMS INCORPORATED COLOR PROFILE LICENSE AGREEMENT NOTICE TO USER: PLEASE READ THIS CONTRACT CAREFULLY. BY USING ALL OR ANY PORTION OF THE SOFTWARE YOU ACCEPT ALL THE TERMS AND CONDITIONS OF THIS SOFTWARE YOU ACCEPT ALL THE TERMS AND CONDITIONS OF THIS AGREEMENT. -
Page 94: Icc Profile For Toyo Ink Standard Color On Coated Paper (Toyo Offset Coated 3.0)
TRADEMARKS Adobe and the Adobe logo are the registered trademarks or trademarks of Adobe in the United States and other countries. With the exception of referential use, you will not use such trade- marks or any other Adobe trademark or logo without separate prior written permission granted by Ado- TERM This Agreement is effective until terminated. -
Page 95: Dic Standard Color Profile License Agreement
This ICC Profile was made by TOYO INK using X-Rite ProfileMaker and a license to distribute the profile has been granted by X-Rite, Incorporated. TOYO Offset Coated 3.0 ©TOYO INK MFG. CO., LTD. 2010 DIC STANDARD COLOR PROFILE LICENSE AGREEMENT IMPORTANT: PLEASE READ THIS STANDARD COLOR PROFILE LICENSE AGREEMENT ("LICENSE AGREEMENT") CAREFULLY BEFORE USING THE DIC STANDARD COLOR PROFILE, INCLUDING THE DIC STANDARD COLOR SFC1.0.1, DIC STANDARD COLOR SFC1.0.2, DIC STANDARD COLOR SFM1.0.2, DIC... -
Page 96: Our Concern For Environmental Protection
WARRANTY DISCLAIMER a. THE PROFILE IS PROVIDED TO YOU FREE OF CHARGE, AND ON AN "AS-IS" BASIS, IN ACCORD- ANCE WITH THE TERMS AND COONDITIONS OF THIS LICENSE AGREEMENT. DIC PROVIDES NO TECHNICAL SUPPORT, WARRANTIES OR REMEDIES FOR THE PROFILE. b. - Page 97 Index...
- Page 98 Index Account Track .............9-2 Specifications ............10-2 Main Unit ............. 10-2 ADF ................5-2 Optional Devices ..........10-5 CD-ROM ..............2-2 Touch Panel Consumables ............10-8 Operation ............... 7-5 Control Panel ............7-2 Precautions for Correct Operations ...... 7-6 Entering Characters ............7-7 User Authentication ............ 9-2 External Server Authentication ......
- Page 99 http://konicaminolta.com A3GN-9560-33A 2015. 2 © 2013...