Table of Contents
Advertisement
()/_kq]])O FI[){IR
Operating
Instructions
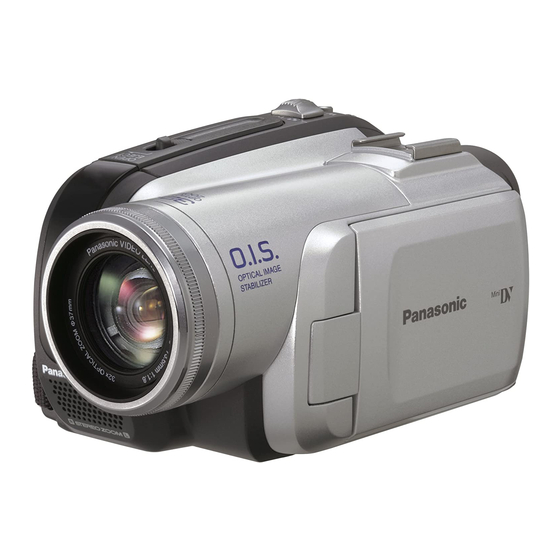
Digital Video Camcorder
Mode_ No. P M"GS85
PV-GS80
I ".Iv[6,1:1.1
I".lvll¢'t:Io]
m
Before connecting, operating or adjusting this product,
please read the instructions completely.
Spanish Quick Use Guide is included.
Guia para r_.pida consulta en espahol esta incluida.
,S'_
_
Mini_"
[_
[_
LSQT1121 C
Advertisement
Table of Contents

Related Manuals for Panasonic PV-GS80


Summary of Contents for Panasonic PV-GS80
- Page 1 ()/_kq]])O FI[){IR Operating Instructions Digital Video Camcorder Mode_ No. P M"GS85 PV-GS80 I ".Iv[6,1:1.1 I".lvll¢'t:Io] Before connecting, operating or adjusting this product, please read the instructions completely. Spanish Quick Use Guide is included. Guia para r_.pida consulta en espahol esta incluida.
- Page 2 Things You Should Know Thank you for choosing Panasonicf You have purchased one of the most sophisticated and reliable products on the market today. Used properly, we're sure it will bring you and your family years of enjoyment. Please take time to fill in the information right.
- Page 3 Trade Name: Panasonic Model No.: PV-GS85/PV-GSS0 Responsible party: Panasonic Corporation One Panasonic Way, Secaucus, NJ 07094 Support Contact: Panasonic Consumer Electronics 1-800-211-PANA(7262) This device complies with Part 15 of the FCC Rules. Operation is subject to the following two conditions:...
- Page 4 IMPORTANT SAFETY Read these operating instructions unit and the applicable safety instructions future reference. Read these instructions. Keep these instructions. Heed all warnings. Follow all instructions. Do not use this apparatus near water. Clean only with dry cloth. Do not block any ventilation openings. Install in accordance with the manufacturer's Do not install near any heat sources such as radiators, heat registers, stoves, or other apparatus (including amplifiers) that produce heat.
- Page 5 Precautions USE & LOCATION oTO AVOID SHOCK HAZARD ... Your Camcorder and power supply should not be exposed to rain or moisture. Do not connect the power supply or operate your Camcorder gets wet. Your Camcorder has been designed for outdoor use, however it is not designed to sustain direct exposure to water, rain, sleet, snow, sand, dust, or a direct splashing from a pool or even a cup of coffee.
- Page 6 Risk of fire, explosion and burns. Do not disassemble, I Warning AC adaptor This AC adaptor operates on AC between 110/120/220/240 oln the U.S.A. and Canada, the AC adaptor must be connected to a 120V AC power supply only. oWhen connecting to an AC supply outside of the U.S.A. or Canada, use a plug adaptor to suit the AC outlet configuration.
-
Page 7: Table Of Contents
Recording still pictures on a card while recording image onto a tape (PV-GS85 only) ... Recording a still picture on a tape (Photoshot) (PV-GS80 only) ... Recording still pictures onto a card (Photoshot) (PV-GS85 only) ... Zoom in/out function ... - Page 8 Playback mode Playing back tape ... Frame-by-frame playback ... Playback on TV ... Playing back card (PV-GS85 only) ... 42 Deleting files recorded on a card (PV-GS85 only) ... Formatting a card (PV-GS85 only) ... 43 Protecting files on a card (PV-GS85 only) ...
-
Page 9: Before Using
Quick Guide _iiiii iiiiiiiii_iiiii • Charging the battery 1 Connect the AC Cable to the AC adaptor and the AC Jack, 2 Put the battery on the battery mount by aligning the mark, and then securely plug it • Attaching the battery Push the battery against the battery holder and slide it until it clicks. - Page 10 • How to turn off the power 1 While pressing the button O, set the [OFF/ON] switch to [OFF]. • Recording on a tape oSet to Tape Recording Mode. . @..@ 1 Press the recording start/stop start recording. 2 Press the recording start/stop button to pause recording.
-
Page 11: Accessories
Before using Accessories The following are the accessories supplied with this product. PV DACI4D K2GJ2DC00011 CGR-DU06 K114A05CD0014 AC adaptor, DC Cable, AC Cable-/4- Battery pack -/4- AV cable -._5- USB cable (PV-GS85 only)-48- Before using Parts identification • Camcorder K2CA2CA00025 K2KC4CBO0020 Built-in LED video light (PV-GS85 only) -25-... - Page 12 _.9) Viewfinder-/7-,-6s- Due to limitations in LCD production technology, there may be some tiny bright or dark spots on the Viewfinder screen. However, this is not a malfunction and does not affect the recorded picture. _.1o ) Battery holder -14- _.11 USB terminal [._] (PV-GS85 only) -4s-...
-
Page 13: Attaching The Lens Cap
_.34_Tripod receptacle This is a hole for attaching the Camcorder optional tripod. (Please carefully read the operating instructions for how to attach the tripod to the Camcorder.) eYou cannot open the card slot cover when the tripod is used. Insert the card first and then attach the tripod. -
Page 14: Power Supply
Charge the battery before using this product. • Battery charging time. (-1._-) • We recommend using Panasonic batteries. (-xx-, - 72-) • If you use other batteries, we cannot guarantee the quality of this product. • If the DC Cable is connected to the AC adaptor, then the battery will not get charged. -
Page 15: Charging Time And Recordable Time
Charging time and recordable time The times shown in the tables below are for when the temperature is 25 °C (77 °F) and the humidity is 60%. If the temperature is higher or lower than 25 °C (77 °F), the charging time will become longer. -
Page 16: Setting Date And Time
• How to turn the power the LCD monitor/viewfinder When the power switch is set to [ON], the power can be turned on and off with the LCD monitor and the viewfinder when the unit is in Tape Recording Mode or Card Recording Mode. OFF ON 1 Open the LCD monitor out or extend the viewfinder to use. -
Page 17: Using The Lcd Monitor
Using the LCD monitor You can record the image while viewing it on the opened LCD monitor. 1 Pull the LCD monitor out in the direction of the arrow. • It can open up to 90 °. 2 Adjust the angle of the LCD monitor according to your preference. -
Page 18: Quick Start
Quick Start ®iiiii IIII_IIIIIIIIIIIIIIIII_IIIIIIIIIIIIIIIII_IIII_IIII_I_I_IIIII_IIIIIIIIIIIII_IIIIIIII_IIII_IIIIIIIIIIIIIIIIIII_IIIIIIII When Quick Start is ON the battery power is still being consumed, even when the LCD Monitor and the Viewfinder are closed. The Camcorder will resume recording/pause mode about 1.7 seconds after the LCD Monitor and the Viewfinder are reopened. •... -
Page 19: Inserting/Removing A Cassette
Inserting/remo ving a cassette 1 Fit the AC adaptor or the battery and turn on the power. 2 Slide the [OPEN/EJECT] lever and open the cassette cover. oWhen the cover is fully opened, the cassette holder will come out. 3 After the cassette holder is opened, insert/ remove the cassette. -
Page 20: Inserting/Removing A Card (Pv-Gs85 Only)
Inserting/removing a card (PV-GS85 only) Before inserting/removing a card, set the [OFF/ON] switch to [OFF]. olf the card is inserted or removed with the power turned on, this Camcorder may malfunction or the data recorded on the card may be lost. 1 Turn off the power O. -
Page 21: Selecting A Mode
Selecting a mode Rotate the mode dial to select the desired mode. 1 Rotate the mode dial. oSet your desired mode to O. : TAPE RECORDING MODE Use this when you record the image on a tape. (Also, you can simultaneously on a card while recording images on a tape.) : TAPE PLAYBACK MODE Use this to play back a tape. - Page 22 Tape recording mode ([AUTO/MANUAL/FOCUS] [MANUAL]) White balance • f_ Shutter speed f_" Iris or gain value 5/5 -- M_- Manual focus adjustment • O is displayed while recording on a tape. o_ is displayed only when the ([AUTO/MANUAL/ FOCUS] switch is set to [FOCUS]). Tape playback mode •...
-
Page 23: Help Mode
Help mode Select an icon for an explanation of the function. • Set to Tape/Card Recording 1 Press the joystick to display the icon during the recording pause. Move the joystick down until icon O appears. 2 Move the joystick right to select the Help mode icon [_[_]. -
Page 24: Adjusting Lcd Menitor/Viewfinder
5 Move the joystick right or press it to set the selection. 6 Move the joystick up or down in order to select the item to be set. 7 Press the joystick to determine the setting. • To exit the menu screen Press the [MENU] button. -
Page 25: Recording With The Built-In Led Video Light (Pv-Gs85 Only)
Recording with the built-in LED video light (PV-GS85 only) Gain up mode works with the built-in LED video light to enhance the light's brightness brighten the natural colors in a scene. 1 Press the [LIGHT] button. O oThe built-in LED video light lights up and the gain up mode is set to on. -
Page 26: Record Mode
• Playback on other digital video equipment is retracted. Even if or on digital video equipment without the LP are closed mode. (-2_/-) (-19-,-20-) auto mode switch to adjusted for an optimum (When set to the tape recording [_ANUAL mode Mode. >> using Panasonic of the... -
Page 27: Recording On A Tape
• Playback of the image on other digital video equipment recorded in the LP mode. • Frame-by-frame playback. Recording on a tape IIIIIIIIIIIIIIII_III_I_IIIIIIIIIIIIIIIIII_III_WIIIIIIIIIIIIIIIIIIII_IIIIIII_IIIIIIIIIIIIIIIIIIIIIII_II_IIIIIIIIII_IIII__ Remove the lens cap. (-/:r-) (When the Camcorder is turned on with the lens cap fitted, the automatic white balance adjustment may not function turn the Camcorder on after removing the lens... -
Page 28: Recording Check
• [POWER SAVE] [OFF]: When 5 minutes passes without any operation, the standby mode will be automatically set. In the standby mode, [11] blinks and it takes more time than usual to start recording after you press the recording start/stop button. [5 MINUTES]: When 5 minutes passes without any operation, the Camcorder automatically... -
Page 29: Recording Still Pictures On A Card While Recording Image Onto A Tape (Pv-Gs85 Only)
Camcorder. Record mode Recording a still picture (Photoshot) (PV-GS80 only) Still pictures can be recorded from the Camcorder directly onto the tape. • Set to Tape Recording 1 Press the Photoshot recording pause mode. -
Page 30: Recording Still Pictures Onto A Card (Photoshot) (Pv-Gs85 Only)
Recording still pictures (Photoshot) (PV-GS85 only) i_iHHHHHHHHHHHHHHHHHHHH_ _HHHHH_iHiHH HiHHHHHHHHHHHHHHHHHHH • Set to Card Recording Mode. 1 Press the Photoshot button [O]- • To record still pictures clearly • When zooming in on the subject magnification of 4x or higher, it is difficult to reduce the slight shaking from holding the Camcorder... -
Page 31: Zoom In/Out Function
Zoom in/out function You can zoom in up to 32× optically. oSet to Tape/Card Recording Mode. 1 Wide-angle recording (zoom out): Push the [W/T] lever towards [W]. Close=up recording (zoom in): Push the [W/T] lever towards [T]. • When zooming in and taking a picture while holding the Camcorder by hand, we recommend using the optical image stabilizer function. -
Page 32: Recording Yourself
Recording yourself You can record yourself while viewing the LCD monitor. You can record persons in front of the Camcorder while presenting them the image. The image is horizontally flipped as if you see a mirror image. (However the image to be recorded is not altered.) •... -
Page 33: Soft Skin Mode
Soft skin mode This allows the skin color to be recorded in a softer tone. This is more effective if you record a person closely from the torso up. • Set to Tape/Card Recording Mode. 1 Press the joystick to display the icon. Move the joystick down until icon O appears. -
Page 34: Wind Noise Reduction Function
• To select the color for fade The color which appears in fading pictures can be selected. 1 Set [ADVANCED] >> [FADE COLOR] >> [BLACK] or [WHITE]. oWhile the fade in/fade out function is selected, it takes several seconds to display the image when you start recording images. -
Page 35: Wide/4:3 Function
Wide/4:3 function iiiiiiiiiiiiiii_ii_iiiiiiiiiiii_iiiiiiiiii_iiiiii_iiiiii_iiiii iiiiii This allows you to record images compatible with wide-screen TVs. Wide Function Images are recorded with a 16:9 aspect ratio. 4:3 Function Images are recorded with a 4:3 aspect ratio. • Set to Tape/Card Recording Mode. 1 Wide Function Set [BASIC] >>... -
Page 36: Recording In Various Situations (Scene Mode)
Recording in various (Scene mode) When you record images in different situations, this mode automatically sets optimum shutter speeds and apertures. oSet to Tape/Card Recording Mode. 1 Set the [AUTO/MANUAL/FOCUS] [MANUAL]. MANUAL AUTOo Q_ FOCUS 2 Set [BASIC] >> [SCENE MODE] >> select the desired mode. -
Page 37: Recording In Natural Colors (White Balance)
Recording in natural colors (White balance) _Hi_i_i_iHHHHHH i_i_i_i_i_iHHHH_iHHHHH_i_i_iHHHHHHHHHHHHHH The automatic white balance function may not reproduce natural colors depending on the scenes or lighting conditions. If so, you can adjust the white balance manually. • Set to Tape/Card Recording Mode. 1 Set the [AUTO/MANUAL/FOCUS] [MANUAL]. -
Page 38: Manual Focus Adjustment
Manual focus adjustment If auto focusing is difficult due to the conditions, then manual focusing is available. oSet to Tape/Card Recording 1 Set the [AUTO/MANUAL/FOCUS] [MANUAL]. MANUAL AUTO• ,, _ FOCUS 2 Set the [AUTO/MANUAL!FOCUS] [FOCUS]. • The [_] indication and the manual focus [MF] indication appears. - Page 39 • During normal playback, image movement may not look smooth. • When recording in an extremely bright place, the color of the screen may change or flicker. If this happens adjust the shutter speed manually to 1/60 or 1/100. Manual iris/gain adjustment •...
-
Page 40: Playback Mode
Playback mode Playing back tape IIII_WIIIIIIIIIIIIIIWIIIIIIIIIIIIWIIIIIIIIII_IIIIIIIIIIIIIIIIIIIIIIIIIIIIIIIIIIIIIIIIIIIIIIIIII_WIIIIIIIIIII_IIIIIIIIIIIW • Set to Tape Playback Mode. [An operation icon automatically the LCD monitor.) 1 Operate with joystick. I_/11: Playback/Pause _1_1: Rewind/Review playback (Reverts to playback with the I_/! ! icon.) I_1_: Fast forward/Cue playback (Reverts to playback with the I_-/I ! icon.) Stop •... -
Page 41: Frame-By-Frame Playback
Frame-by-frame playback oSet to Tape Playback Mode. 1 During playback, move the joystick select the [1_/I I] icon to pause playback. 2 Push the -_/VOL+] lever. Towards [T]: normal direction Towards [W]: reversed direction olf you keep pushing the lever, then the images will continuously be played back frame by frame. -
Page 42: Playing Back Card (Pv-Gs85 Only)
Playing back card (PV-GS85 only) oSet to Card Playback Mode. (An operation icon automatically the LCD monitor.) 1 Operate with joystick. Plays back the previous picture I_-: Plays back the next picture I_/1: Slide show (Plays back the still pictures on the card in order) start/pause •... -
Page 43: Deleting Files Recorded On A Card (Pv-Gs85 Only)
Deleting files recorded on a card (PV-GS85 only) The deleted files cannot be restored. oSet to Card Playback Mode. 1 Move the joystick left or right to select a file to delete. • You can select a file in the multi-screen display. After selecting the file, press the joystick and display the operation icon. -
Page 44: Protecting Files On A Card (Pv-Gs85 Only)
Protecting files on a card (PV-GS85 only) Files recorded on a card can be protected so that they may not be deleted by mistake. (Even if the files are protected, they will be deleted if the card is formatted.) oSet to Card Playback Mode. 1 Set [BASIC] >>... -
Page 45: Edit Mode
Edit mode Recording from a tape onto a card (PV-GS85 only) Still pictures can be recorded on a memory card from scenes that have already been recorded on a cassette. • Set to Tape Playback Mode. • Insert a tape which already has recorded contents and a card. -
Page 46: Using The Dv Interface Cable For Recording (Digital Dubbing)
olf you record (dub) images onto another video device and then play them back on a wide- screen TV, the images may be stretched vertically. In this case, refer to the operating instructions for the device that you are recording (dubbing) to or read the operating instructions for the TV and set to 16:9 (full). -
Page 47: Pc Connection With The Dv Interface Cable
Using products from video editing software companies allows you to capture and edit video clips using the DV Interface. Panasonic DVC are OHCl compliant and should have no problem working with any OHCI compliant FireWire Card/Video -- Editing software package. -
Page 48: With A Pc
With a PC Connecting Computer and Camcorder Before making these connections, devices, which are to be connected. • Operating environment • Despite having the operating environment indicated, it may not be possible to use the program with some types of personal computers. -
Page 49: Using As A Web Camera (Pv-Gs85 Only)
Using as a Web camera (PV-GS85 only) i_i_iHHHHHHHHHHHHHHHHH_iHHHHHHHHHHHHHHHHHH_iH_i_i: _i_i_i_i_iH_iHH_ii_iHHHHHHHHHHHHHHHHHHHHHHHHHHH_iHHHHHHHHHHHHHHHHH_ If the Camcorder is connected to your personal computer, you can send video and sound from the Camcorder to other parties via the network. Note: oDo not connect the USB cable until the USB Driver is installed. - Page 50 Windows 2000 users, download the USB driver if you have Internet access. 1 Download the USB driver (For U.S.A. consumers) http:llwww.panasonic.coml consumerdownloads (For Canadian consumers) htt p://www.panasonic.ca/english/ customercare/downloads.asp 2 (For U.S.A.consumers) Click [Camcorders]. (For Canadian consumers) Click [software, drivers & firmware] page changes.
- Page 51 6 Select the microphone attached to the PC in the [Microphone] 7 Click [Web Camera Settings...] in the [Tools] menu. 8 Confirm that the [Panasonic Camera Device] is selected. in the menu. DVC Web Camera] is selected.
-
Page 52: Using On Macintosh
In the case of MSN Messenger Windows Live Messenger 1 Type in your E-mail address • If you do not have a password, click [Get a new account]. 2 After setup is completed, sign in and start MSN Messenger/Windows 3 Click [Audio and Video Setup] in the [Tools] menu and then click [Next]. -
Page 53: (Pv-Gs85 Only)
To disconnect USB cable safely (PV-GS85 only) _HHHHHH_i_iH_HHHHHHH Hi_i _ iHHHWiHHHHHH HH_i_i_i_i_HHHH_iH_iHH__HiHHHHHHHHHHHH_i_i_ If USB cable is disconnected while the computer is on, the error dialog box may appear. In such a case click [OK] and close the dialog box. By following the steps below yeu can disconnect the cable safely. -
Page 54: Notes
No tes iiii_ i_ii iiiii_ii iiiiiiiiiiiiiii_iiiiiiiiiiiiiii_iiiiiiiiiiiiiiiiiiiiiiiiiiiiiiiiiiiiiiiiw iii_ iiiiiii • Microsoft ® and Windows ® are either registered trademarks or trademarks of Microsoft Corporation in the United States and/or other countries. • lntel ®, Pentium ®, Intel ® Core Core SOlO are the registered trademarks trademarks of the Intel Corporation. - Page 55 • About the folder structure the Memory Card in a personal computer (PV-GS85 only) oWhen a Card with data recorded on it is inserted into a personal computer, folders will be displayed as shown in the following figure. [100CDPFP]: The images (IMGA0001.JPG, etc.) in this folder are recorded in the JPEG format.
-
Page 56: Menu
[PICT.QUALITY] (PV-GS85 only) -:ro- [O.l.S.] -:rs- [GUIDE LINES] -:rs- [FADE COLOR] -:r4- [AUDIO REC] -58- [D,ZOOM] -:rl- [ZOOM MIC] -3/- [SHTR EFFECT] (PV-GS80 only) -:to- [SETUP] [DISPLAY] -58- [DATE/TIME] -58- [POWER SAVE] -28- [QUICK START] -/8- [BEEP SOUND] -58- [LCD SET] -24-... - Page 57 • O [CARD RECORDING MENU] (PV-GS85 only) [BASIC] [SCENE MODE] -:{6- [PICT.QUALITY] -:to- [ASPECT] -:{._- [CLOCK SET] -/6- [ADVANCED] [O.l.S.] -3s- [GUIDE LINES]-3s- [SHTR EFFECT]-:to- [SETUP] [DISPLAY] -58- [DATE/TIME] -58- [POWER SAVE] -28- [QUICK START] -18- [BEEP SOUND] -58- [LCD SET] -24- [EVF SET] -24- [INITIAL SET] -58- [LANGUAGE]...
-
Page 58: Menus Related To Recording
Menus related to recording • [DATE/TIME] This switches between date and time indications. oThe Camcorder automatically and time the picture was taken on the tape/card. • [AUDIO REC] Switches the audio (PCM audio) recording systems. [12bit]: Records audio in "12 bit 32 kHz 4 tracks". (The original sound recorded is preserved after audio dubbing.) [16bit]:... -
Page 59: Others
Others Indications i_iiii_i ii_iii_iwi iiiiiiiiiii_iiiiii_i_i_i Various functions and the Camcorder status are shown on the screen. Basic indications Remaining battery power 0h00m00s00f: Time code 3:30:45PM Date/Time indication Recording indications R0:45: Remaining tape time oRemaining tape time is indicated in minutes. (When it reaches less than 3 minutes, the indication starts flashing.) Standard Play mode... -
Page 60: Warning/Alarm Indications
Warning/alarm indications If any one of the following indications lights up or flashes, please check the Camcorder. Confirmatory indications A cassette with the accidental prevention slider placed in the [SAVE] position is inserted. No cassette is inserted. [--]/_: The built-in battery is low. -16- The warning/alarm indication appears when you record yourself. -
Page 61: Functions That Cannot Be Used Simultaneously
Functions that cannot be used simultaneously Some functions in the Camcorder cannot be selected due to its specifications. table below shows examples of functions restricted by conditions. • Digital zoom • When the Card Recording • Fade mode is used •... -
Page 62: Before Requesting Repair 'Problems And Solutions)
Before requesting repair (Problems and solutions) Power/Body 1 :The Camcorder power cannot be turned on. • Is the battery fully charged? Use a fully charged battery. • The battery protection circuit may have operated. Attach the battery to the AC adaptor for 5 to 10 seconds. - Page 63 Indications 1 : A sentence is displayed in red in the screen center. • Read the contents and respond to them. (-6o-) 2: The remaining tape time indication disappears. • The remaining tape time indication may disappear temporarily during frame-by-frame playback or other operation.
- Page 64 Card (PV-GS85 only) 1 : Recorded pictures are not clear. • Have you set [BASIC] >> [PICT.QUALITY] [ ..%]? If recording is done with it set to [ .==], pictures with fine details may include a mosaic-like pattern. Set [PICT.QUALITY] [=|=].(-:to-) 2: A file recorded on a card cannot be deleted.
-
Page 65: Cautions For Use
Cautions for Use • About condensation If you turn the Camcorder on when condensation occurs on the head or the tape, condensation indication [[_] (yellow or red) is displayed on the viewfinder or the LCD monitor and the messages [[_DEW DETECT] or [[_ EJECT TAPE] (only when the tape is inserted) appear. - Page 66 • About the Camcorder oWhen the Camcorder is used for a long time, the Camcorder body becomes warm, but this is not a malfunction. Keep the Digital Video Camcorder as far away as possible from electromagnetic (such as microwave ovens, TVs, video games etc.).
- Page 67 • Extremely high temperatures temperatures will shorten the life of the battery. • If the battery is kept in a high-temperature, humidity, or oily-smoky places, the terminals may rust and cause malfunctions. • To store the battery for a long period of time, we recommend you charge it once every year and store it again after you have completely the charged capacity.
- Page 68 After use, be sure to remove the card from the Camcorder for storage. • After use, or when storing or carrying the card, put it in the storage case. • Do not allow dust, water, or foreign substances to adhere to the terminals on the back of the card.
-
Page 69: Explanation Of Terms
Explanation of terms • Automatic white balance White balance adjustment recognizes the color of light and adjusts so the white color will become a pure white. The Camcorder determines the hue of light that comes through the lens and white balance sensor, thereby judging the recording condition, and selects the closest hue setting. -
Page 70: Specifications
Specifications Digital Video Camcorder Information for your safety Recording format: Mini DV (Consumer-use digital video SD format) Tape used: 6.35 mm digital video tape Recording/playback time: SP: 80 min; LP: 120 min (with DVM80) Video Recording system: Digital component Television system: EIA Standard: 525 lines, 60 fields NTSC color signal Audio... - Page 71 AC adaptor Information for your safety Dimensions: 61 mm (W)X32 mm (H)X91 mm (D) 2.40 inch (W)X 1.26 inch (H)×3.58 Mass: Approx. 110 g (0.24 Ibs) Specifications may change without prior notice. Maximum number of still pictures recordable on an SD Card (optional) (PV-GS85 only) [16:9] mode and [4:3] mode: PICTURE (16:9)/[](4:3)
-
Page 72: Camcorder Accessory System
Camcorder Accessory System _CGR-DU06_IB _CGA-DU 12A/1 B _CGA-DU21A/1 PV-DDC9 (For USA) PV-DDC9-K (For Canada) RP-SDR04GU1K RP-SDR02GU1A RP-SDR01GU1A RP-SDR512U1A RP-SDR256U1A RP-SDK02GU1A RP-SDH01GU1A RP-SDK512U1A RP-SDH256U1A RP-SDV04GU1 RP-SDV02GU1A RP-SDV01GU1A RP-SS01GU 1K RP-SS512BU1K RP-SS256BU1K VW-LDC10 PV-HB002 (USA only) *Please refer to page -1._-, concerning NOTE: Accessories and/or... -
Page 73: (For Usa Customers)
VlSITYOUR CALL PANASONIC'S MAIL THIS ORDER TO: PANASONIC SERVICES COMPANY ACCESSORY 20421 84th Avenue South Kent, WA. 98032 In CANADA, please contact your local Panasonic dealer for more information on Accessories. Others Order Form (For USA Customers) Price Each Your State & Local Sales Tax Shipping &... -
Page 74: Request For Service Notice (Usa Only)
Please photocopy this form when making a request for service notice, in the unlikely event this product needs service. .,quest forService Notice: Mail this completed form and your Proof of Purchase along with your unit to: Panasonic Camera and Digital Service Center LSQT1121 Others *Please include your proof of purchase. -
Page 75: Limited Warranty (For Usa Customers)
If your product does [lot work properly because of a detect in materiaD or workmanship, Panasonic Consumer Electronics Company or Panasonic Puerto Rico, Inc. (collectively referred to as "the warrantor") will, for the length of the period indicated on the chart below, which starts with the date of original purchase ("warranty period"), at its option either (a) repair your product with new or refurbished... -
Page 76: Customer Services Directory
LSQT1121 Others Accessory Purchases and instruction Books online for ail Panasonic Products Centralized Factory Service Center Panasonic Camera and Digital Service Center f_g0 Touhy Elk Grove Village, IL 60007 on page -77-. Ave. in Puerto Rico"). As of November 2006... -
Page 77: Warranty (For Canadian Customers)
5770 Ambler Drive, Mississauga, Ontario L4W 2T3 PANASONIC Panasonic Canada Inc. warrants this product to be free from defects in material and workmanship and agrees to remedy any such defect for a period as stated below from the date of original purchase. -
Page 78: Index
Index • Numerics 4:3 Function ...35 •A AC Adaptor Aperture •B Backlight Compensation Blank Search Builtqn LED Video Light ... •c Camcorder Accessory Order Form ... 73 Card Playback Charging the Battery ... Condensation Customer Services Directory •U Date/Time Setting ... Digital Dubbing Digital Zoom ... -
Page 79: Spanish Quick Use Guide/Guia Espa_Ola Para El Use R4Pido
Spanish Quick Use Guide/ Gu/a espa_ola para el uso r_pido • Carga de la bateria 1 Conecte el cable el_ctrico de CA al adaptador de CA y a la toma de la red de 2 Meta la bateria en el respectivo soporte alineando la marca, luego encbjela. - Page 80 • Como apagar la alimentacion 1 Mientras que oprime el boton O, ponga el interruptor [OFF/ON] en [OFF]. • Grabacion en una cinta oAjuste al modo de grabaci6n de cinta. . @..@ ] Oprima el botdn de inicio/parada grabacion para empezar 20prima de nuevo el boton de inicio/parada de la grabacion...
- Page 81 Panasonic Consumer Electronics Company, Division of Panasonic Corporation of North America One Panasonic Way, Secaucus, NJ 07094 Panasonic Puerto Rico, inc. Ave. 65 de Infanter_a,Km. 9.5, San Gabriel Industrial Park, Carolina, Puerto Rico 00985 Panasonic Canada inc. 5770 Ambler Drive, Mississauga, Ontario, L4W 2T3...