Table of Contents
Advertisement
Quick Links
o o o o o o o o o o o o o o o o o o o o o o o o o o o o o o o o o o o o o o o o o o o o o o o o o o o o o o o o o o o o o o o o o o o o o o o o o o o o o o o o o o o o
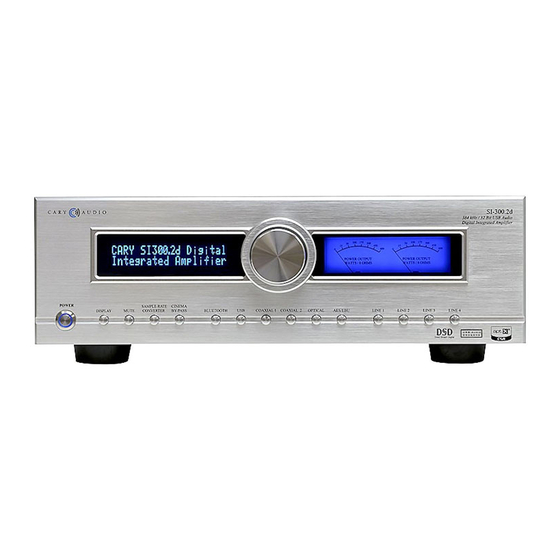
SI-300.2d
Digital Integrated Amplifier
NOTE: Before installing your new component, please read this manual
carefully as it will inform you of the product specifications, proper
installation and correct operating procedures for your unit. Also included
in this manual are guidelines on how to service and care for your new
Cary Audio Design product.
Advertisement
Table of Contents

Related Manuals for Cary Audio Design SI-300.2d


Summary of Contents for Cary Audio Design SI-300.2d
- Page 1 NOTE: Before installing your new component, please read this manual carefully as it will inform you of the product specifications, proper installation and correct operating procedures for your unit. Also included in this manual are guidelines on how to service and care for your new Cary Audio Design product.
-
Page 2: Table Of Contents
TABLE OF CONTENTS Important Safety Instructions ....................... 3 Welcome Thank You ............................. 5 Installation Unpacking ............................. 6 Warranty Card ............................6 Placement ............................. 7 Features Product Features ............................ 8 Controls and Displays Front Panel ............................9 Rear Panel ............................11 Remote Control ............................ - Page 3 TABLE OF CONTENTS USB Operation USB Requirements ..........................25 PC Driver Installation ..........................25 Macintosh USB Audio Setup ........................25 USB Audio Playback ..........................26 USB DSD Playback ..........................26 BLUETOOTH Operation BLUETOOTH Connection ........................27 BLUETOOTH Playback .......................... 27 TruBit™...
-
Page 4: Important Safety Instructions
If water or any metal object (such as a paper clip, coin, or staple) accidentally falls inside the unit, disconnect it from the AC power source immediately and contact Cary Audio Design for further instructions. HEAT: Position the unit away from heat sources such as radiators, heat registers, stoves, or other units (including amplifiers) that produce heat. - Page 5 IMPORTANT SAFETY INSTRUCTIONS 17. IMPORTANT SAFETY NOTE: • Before connecting a new product such as the Cinema 12 to your audio or home theater system, turn off all other equipment (preferably unplugging them from the AC power source). Many audio components feature automatic turn-on circuits that may activate during an installation, potentially causing damage to electronic components and/or speakers.
-
Page 6: Welcome
WELCOME THANK YOU Congratulations on becoming a Cary Audio owner! Cary Audio would like to thank you for purchasing our products. Since its founding in 1989, Cary Audio has stayed at the forefront of home entertainment equipment by stubbornly adhering to the principles of quality and musicality upon which it was founded. -
Page 7: Installation
Power Requirements The SI-300.2d Digital Integrated Amplifier is designed to operate from AC main current. The AC voltage is either 110V-120V or 220V-240V AC at 50-60 Hz. -
Page 8: Placement
Avoid extremely hot locations such as near radiator or other heating units. Keep the top of the SI-300.2d clear with plenty of ventilation to protect against overheating as the SI-300.2d can generate substantial heat. -
Page 9: Features
FEATURES The following section describes the SI-300.2d basic features. Please read the Operation Section of this manual to learn more on utilizing these features. The features are subject to change without notice or obligation. TruBit™ DSD & PCM CONVERSION AND UPSAMPLING Upsampling can be messy, leaving behind lots of digital artifacts resulting in noise and inaccurate signal generation. -
Page 10: Controls And Displays
CONTROLS AND DISPLAYS FRONT PANEL 1. POWER Press once to turn the power ON. The blue indicator ring will blink until the unit is ready to operate. Press again to turn the power off. 2. DISPLAY Press to change the brightness level of the front panel display. Low-->Medium-->High-- >Off 3. - Page 11 Line 1 (RCA Single-ended), Line 2 (XLR Balanced), Line 3 (RCA Single-ended w/CINEMA BYPASS), Line 4 (XLR Balanced w/CINEMA BYPASS). 13. ALPHANUMERIC DISPLAY WINDOW This twenty-character display provides a wide range of information concerning the operation of the SI-300.2d. 14. VOLUME CONTROL Turn knob to adjust the output volume level. 15. VU METERS...
-
Page 12: Rear Panel
For connecting an RCA source, or the front main Right & Left outputs of a surround sound processor. DIGITAL OUTPUT JACK (TOSLINK) 44.1 kHz – 192 kHz digital data output. DIGITAL OUTPUT JACK (COAXIAL) 44.1 kHz - 192 kHz digital data output. DC TRIGGER INPUT TERMINALS Connection of devices that have DC + 12V output for remote turn-on/off of the SI-300.2d. IR INPUT Connection of external IR sensors. ETHERNET RJ45 JACK For network system control. MINI USB FIRMWARE For internal service use only POWER INPUT (AC IN) Connect to AC mains using the included power supply cord. - Page 13 Connect your right channel speaker’s positive (Red +) and negative (Black -) to the corresponding (red +) and (Black -) connectors on the SI-300.2d. It is recommended to use a quality Spade or Banana connector. NOTE: Make sure the system power is off before making any connections.
-
Page 14: Remote Control
APP CONTROL FOR iOS AND ANDROID (FUTURE) The SI-300.2d has a custom App for iOS and Android devices that can be downloaded free of charge from Apple iTunes or the Google/Android Apps Marketplace. Utilizing the SI-300.2d Ethernet port or built-in Wi-Fi connection, these Apps can control all functions of the SI-300.2d once the SI-300.2d... -
Page 15: Menu Operation
MENU OPERATION SETUP MENU OVERVIEW 1. Press “MENU” on the hand held remote. 2. The display screen will show the Menu Mode as follows: SETUP MENU Volume Setup IR Controls Ethernet Wi-Fi EXIT 3. Using the “UP” or “DOWN” arrow keys on the remote, highlight your selection and press Enter. -
Page 16: Setup Menu - Expanded View And Functions
Master. IR Controls Front Select Front if there is only a need to control the SI-300.2d via the hand held remote and have line of sight to the front panel of the unit. Rear Select Rear if there are IR sensors connected to the rear of the SI-300.2d for when the unit is installed inside a rack or out of line of sight of the remote. -
Page 17: Network Ethernet And Wi-Fi Setup (From Dac)
MENU OPERATION NETWORK ETHERNET AND WI-FI SETUP (FROM DAC) The SI-300.2d comes with both an Ethernet Port and built-in Wi-Fi for connection to your network for controlling the SI-300.2d via network control systems as well as iOS and Android Apps. - Page 18 No is the default setting for Wi-Fi. Select YES. IP Assign: DHCP Static Select DHCP for an IP address to be assigned automatically to the SI-300.2d (most common method). (If Static is selected, follow steps a thru d. Otherwise skip to number 3) Scan Wi-Fi Networks: Select Yes to display available Wi-Fi networks.
- Page 19 No Connection will be displayed. If this happens, make sure your Wi- Fi is enabled on the SI-300.2d and your router/network is setup for DHCP. After confirming, make sure the above selections are correct and jump to Reset Connection...
- Page 20 MENU OPERATION Reset Connection: If your connection was unsuccessful, or you just need to reset the network connection for any reason, select YES. Local Port: Displays the assigned local port. IP Address: Displays the assigned IP address. Net Mask Addr: Displays the assigned net mask address.
-
Page 21: Network Wi-Fi Setup (From App)
By default, Ethernet is enabled for the SI-300.2d. Simply plug an Ethernet cable into the Ethernet port on the SI-300.2d. If you have trouble connecting the app, be sure to confirm the SI-300.2d’s Ethernet is connected using the previous instructions under “NETWORK ETHERNET AND WI-FI SETUP”. -
Page 22: Maintenance Functions
MAINTENANCE FUNCTIONS MAINTENANCE FUNCTIONS Checking the Software Versions, Date and Serial Number of the SI-300.2d. From hand held remote Ø Enter “8,5,2,1” quickly on the hand held remote . This will show the software version, date and serial number of the unit for a few seconds, then default to normal operation. -
Page 23: General Operation
SI-300.2d warms up and initializes. Once the blue ring steadily glows and you hear a click, the SI-300.2d is ready for use. When powering off, it is recommended to first turn the volume down to a low level, then press the power button once again. -
Page 24: Digital Input Operation
When Cinema Bypass in engaged on the SI-300.2d the LINE 3 or LINE 4 input will pass directly to the SI-300.2d amplifier stage bypassing the SI-300.2d’s volume control. Therefore, once engaged the surround sound processor will control all volume for all channels even though the SI-300.2d is acting as the... -
Page 25: Using The Spdif Inputs
1. Select the desired input by pressing COAXIAL 1, COAXIAL 2, AES/EBU or OPTICAL button. Once selected, the SI-300.2d will confirm your selection by display the input name in LARGE print for a few seconds, and then will default to the following display. -
Page 26: Usb Operation
NO driver is needed for MAC OS version 10.6.4 and above. PC DRIVER INSTALLATON To use the SI-300.2d USB port on a Windows based PC, you MUST install the provided driver which is downloadable from The SI-300.2d product page on the Cary Audio website. We advise that users read all instructions carefully before installing and following all instructions during the installation process. -
Page 27: Usb Audio Playback
Sound preferences in the Windows Control Panel. (2) Select the USB input by pressing the USB input button on the front panel of the SI-300.2d or pressing the USB button on the hand held remote. “USB” will appear on the display screen. -
Page 28: Bluetooth Operation
(2) Go to the “ Settings ” of your device and find Bluetooth settings and make sure Bluetooth function is ON and search for Bluetooth sources. (3) “CARY SI-300.2d” should appear on your device. Once it does, select it. After pairing is complete, the display of SI-300.2d will show “Pairing Successfully”. -
Page 29: Trubit™ Upsampling Operation
32 bits. Any signals played that are equal to or higher than the selected sample rate will playback unchanged. Each of the SI-300.2d inputs will remember the sample rate as set for that input. -
Page 30: Specifications
SPECIFICATIONS The following section describes the SI-300.2d basic specifications. The specifications are subject to change without notice or obligation. AMPLIFIER SPECIFICATIONS ..............................Power Output 2 x 300 watt RMS into 8 W from 20 Hz - 20 kHz 2 x 450 watt RMS into 4 W from 20 Hz - 20 kHz .............................. -
Page 31: Digital Specifications
SPECIFICATIONS DIGITAL SPECIFICATIONS ..............................Master Clock Jitter Below measurable levels ..............................Digital Filter 8x Oversampling Digital Filter ..............................Digital/Analog Converters 2 channel AK4490EQ ..............................Analog Filter Order Bessel ..............................GENERAL SPECIFICATIONS ..............................Control Trigger input 12VDC x1 IR control x1 .............................. -
Page 32: Spdif Playback (Pcm) Coaxial, Toslink, Aes/Ebu
SPECIFICATIONS SPDIF PLAYBACK (PCM) COAXIAL, TOSLINK, AES/EBU ..............................Frequency Range 2 Hz - 100 kHz ..............................Signal System 16, 20, and 24 bit ..............................Sampling Frequency 44.1 kHz to 192 kHz PCM ..............................Dynamic Range 123 dB ..............................System Clock Frequency 22.5792 MHz .............................. -
Page 33: Service And Care
SERVICE AND CARE CARE AND CLEANING The cabinet housing and front panel of the SI-300.2d may be cleaned with a soft cloth and Windex or a window cleaner. The frequency of cleaning will be governed by how many hours the SI-300.2d is operated and by operating environment cleanliness. -
Page 34: Limited Warranty
LIMITED WARRANTY Cary Audio Warrants to the Original Purchaser for the Following Cary Audio Products for the Periods Indicated: 1. Power Amplifiers, Integrated Amplifiers, Surround Sound Processors, and Preamplifiers have a three (3) year parts and labor warranty from the date of the original purchase from Cary Audio. - Page 35 LIMITED WARRANTY What Will We Pay For? We will pay for all labor and material expenses for items covered by the warranty. How Can You Get Service? In the event that the owner needs to return the unit to Cary Audio for service or repair of a possible defect, he must follow the following steps: 1.
- Page 36 LIMITED WARRANTY How State Law Relates to the Warranty Some states do not allow limitations on how long an implied warranty lasts and/or do not allow the exclusion or limitation of incidental or consequential damages, so the above limitations or exclusions may not apply to you.
- Page 37 CARY AUDIO DESIGN 6301 Chapel Hill Road | Raleigh, NC 27607 phone 919-355-0010 fax 919-573-9573 www.caryaudio.com o o o o o o o o o o o o o o o o o o o o o o o o o o o o o o o o o o o o o o o o o o o o o o o o o o o o o o o o o o o o o o o o o o o o o o o o o o o o o o o o o o o o o...