Table of Contents
Advertisement
Panasonic Appliances Microwave Oven (Shanghai) Co., Ltd.
888, 898 Long Dong Road, Pu Dong, Shanghai, 201203, China
Web Site: http://panasonic.net
IP4965_3BH70HP_Cov_03_140620.indd 1
IP4965_3BH70HP_Cov_03_140620.indd 1
F0003BH70HP
IP0714-0
Printed in China
Operating Instructions
Steam Convection Microwave Oven
蒸氣熱風燒烤微波爐
Ketuhar Gelombang Mikro Perolakan Stim
Household Use Only
Kegunaan Rumah Sahaja
Model No.
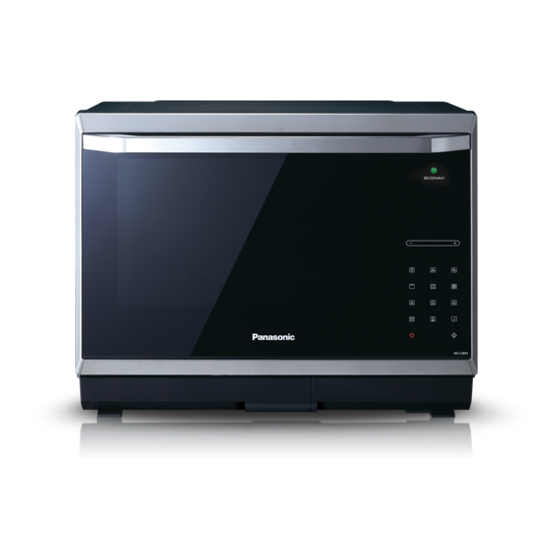
NN-CS894B
型號:
Important safety instructions
Read carefully and keep for future reference
重要安全措施
仔細閱讀並妥善保存
Panduan keselamatan penting
Baca dengan teliti dan simpan untuk rujukan masa depan
使用說明書
Panduan
僅家庭用
2014-6-20 17:07:32
2014-6-20 17:07:32
Advertisement
Table of Contents

Related Manuals for Panasonic NN-CS894B


Summary of Contents for Panasonic NN-CS894B
-
Page 1: Operating Instructions
Household Use Only 僅家庭用 Kegunaan Rumah Sahaja Model No. NN-CS894B 型號: Panasonic Appliances Microwave Oven (Shanghai) Co., Ltd. 888, 898 Long Dong Road, Pu Dong, Shanghai, 201203, China Web Site: http://panasonic.net Important safety instructions Read carefully and keep for future reference 重要安全措施... -
Page 2: Table Of Contents
Auto Steam Menus ............................43-46 Cleaning Setting .............................. 47-48 Before Requesting Service ..........................49-50 Care of your Microwave Oven ......................... 51-52 Technical Specifications ............................53 © Panasonic Appliances Microwave Oven (Shanghai) Co., Ltd. 2014 - Eng-1 - IP4965_3BH70HP_Eng_30_140703.indd 1 IP4965_3BH70HP_Eng_30_140703.indd 1 2014-7-3 15:39:22... -
Page 3: Quick Guide To Operation
Quick Guide to Operation Feature How to Operate To Set Clock (page 16) Tap twice Touch once Set time of day. To cancel: To set: To Set/Cancel Child Safety Lock (page 16) 3 times. Display 3 times. Display To Cook/Reheat/Defrost by Micro Power &... - Page 4 Quick Guide to Operation (continued) Feature How to Operate Set and operate the desired program. To Use Steam Shot Optional (page 22) As required during operation, If you want to add 2 or 3 minutes, hold steam for 2 seconds and tap Steam key once or twice within 3 1 minute steam will be added.
- Page 5 Quick Guide to Operation (continued) Feature How to Operate Once Once Set 40 ºC To Use Ferment (page 28) Once Set time To Use as a Kitchen Timer (page 30) Once Once Set time Set the desired cooking programme. Once Set time To Set Standing Time (page 30)
- Page 6 Quick Guide to Operation (continued) Feature How to Operate To Cook using Sensor Reheat (page 32) Once Once Select temperature Optional To Cook using Reheat with Steam (page 33) Twice Once Select More/Less Without Preheating: Once Once Select menu Once Select temperature Once Select serving/weight...
-
Page 7: Important Safety Instructions
Important Safety Instructions READ CAREFULLY AND KEEP FOR FUTURE REFERENCE Precautions to be taken when 3. The oven has two heaters situated in the top of the oven. After using the CRISPY GRILL, GRILL and using Microwave Ovens for Heating CONVECTION functions, the ceiling will be very hot. -
Page 8: Installation And General Instructions
Important Safety Instructions (continued) Warning (a) The door seals and door seal areas should be cleaned with a damp cloth. The appliance should be inspected for damage to the door seals and door seal areas and if these areas are damaged the appliance should not be operated until it has been repaired by a service technician trained by the manufacturer. - Page 9 Installation and General Instructions (continued) Food 6. DO NOT USE A CONVENTIONAL MEAT THERMOMETER IN THE MICROWAVE OVEN. To 1. Do not use your oven for home canning or the heating check the degree of cooking of roasts and poultry of any closed jar.
-
Page 10: Feature Diagram
Feature Diagram Flat Table 1. Clean the flat table after cooling. 2. Do not directly place the food on the flat table. Place it on a container or container rack special for the microwave oven. Shelf Positions Grill Elements Convection LED Lights Caution Label Heater... - Page 11 Feature Diagram (continued) The following chart shows correct use of the accessaries in the oven. Glass Shelf Metal Tray Grill Tray Plastic Trivet Micro Power √ × × × Grill √ √ √ × Convection √ √ √ × Crispy Grill ×...
-
Page 12: Feature Diagram
Feature Diagram (continued) Front View Rear View Air Vents Exhaust Identification Caution Label Label (Do not remove) Control Panel Drip Tray Water Tank Drip Tray 1. Before using the oven, the drip tray must be fi tted as it collects excess water during cooking. The drip tray should be removed and cleaned on a regular basis. -
Page 13: Control Panel
Control Panel ECONAVI lamp Display Window (page 14) Slider Bar (page 14) Steam key (page 18) Micro Power key (page 17) Convection key Steam Plus key (page 27-28) (page 20-21) Grill key (page 23) Sensor Reheat/Reheat with Crispy Grill key (page 24) steam key (page 32-33) Auto Cook Menu key Steam Menu key... -
Page 14: Cooking Modes
Cooking modes The diagrams shown below are examples of the accessories. It may vary depending on recipe/dish used. Recommended Cooking Modes Uses Containers accessories ■ Defrosting ■ Reheating MICROWAVE ■ Melting: butter, chocolate, cheese. Use your own ■ Cooking fish, vegetables, fruits, eggs. dishes, plates or Microwaveable, no ■... -
Page 15: Display Window
Display Window To help you operate the oven, the following numbers/symbols will appear in the display window. Number/Character Temperature Display Child Safety Lock Setting Weight Display (kg/g) 3-Stage Display Time Display (Minute/Second) Defrost Feature Plastic Trivet Display System Cleaning Start Feature Set Display More/Less Display Metal Tray Display... -
Page 16: Word Prompting
Word Prompting The oven has three different types of display. The default type of display is English prompting. You can select one of them just after plugging in and touching Start key. Plug-in English (default) English instructions scroll on the display Touch Start Key Bahasa Melayu Malaysian instructions scroll on the display... -
Page 17: Clock Setting
Clock Setting You can use the oven without setting the clock. The clock is an optional function for the user. Its accuracy may be affected by the local power supply condition. 1. Tap twice. 2. Tap "+"/"-" or swipe the slider 3. -
Page 18: Micro Power Setting
Micro Power Setting This feature allows you to set the desired power and time for cooking by yourself. 1. Touch once to select "Micro 2. Tap "+"/"-" or swipe the slider bar to select 3. Touch once. Power". the Micro Power level. Touch the Set key to verify your selection Micro Power level. -
Page 19: Steam Setting
Steam Setting The oven can be programmed as a steamer to cook vegetables, fish, chicken and rice. It can keep moisture of food and also can steam the food evenly. There are 3 different steam settings available. 1. Touch once. 2. -
Page 20: Steam & Micro Power Setting
Steam & Micro Power Setting This feature is a steam and microwave combined heating method by adjusting the settings. Steam can be used to cook foods simultaneously with microwave mode. This can often reduce traditional oven cooking times and keep the food moist. 1. -
Page 21: Steam Plus Setting
Steam Plus Setting This feature is a steam and convection combined heating method by adjusting the settings which can shoot steam during the convection. It is suitable for baking souffles, choux pastry, roasting meat items etc. Without Preheating: 1. Touch once. 2. -
Page 22: Steam Plus Setting
Steam Plus Setting (continued) Notes: 1. The maximum time for cooking in this mode is 60 minutes. If required to cook for longer than this time, re-fill the water tank and repeat the above operation for the remaining time. 2. If during operation the water tank becomes empty, the oven will stop operation. The prompt in the display will ask you to re-fill the water tank. -
Page 23: Steam Shot Setting
Steam Shot Setting This feature allows you add steam during cooking (up to 3 minutes). Adding steam during cooking enhances heat distribution and aids the rising process of breads, cakes and pastries. There are four combinations that you can use steam shot - microwave, grill, crispy grill and convection. Set and operate the desired program. -
Page 24: Grill Setting
Grill Setting There are three power levels for grill. When grilling, heat is radiated from the two heater. The oven door must be kept closed to prevent cooking odours from spreading in the kitchen and so as not to waste energy. The grill is especially suitable for thin slices of meat and seafood as well as bread and meals. -
Page 25: Crispy Grill Setting
Crispy Grill Setting The crispy grill feature allows the upper and lower surfaces of food to be roasted without turning over by means of the particular design of the grill tray only. Food can get golden-brown and crispy effect without turning over. It is suitable for grilling all kinds of meat, seafood and bread. -
Page 26: Micro Power Defrost Setting
Micro Power Defrost Setting This feature allows you to defrost by setting time by yourself. 1. Touch once to select "Micro 2. Tap "+"/"-" or swipe the slider bar to 3. Touch once. Power". select 300 W. Touch the Set key to verify "... -
Page 27: Defrosting Tips And Techniques
Defrosting Tips and Techniques Preparation for Freezing The quality of the cooked foods comes from the foods before wrap and the meat which has been sealed before selling are freezing, freezing ways and defrosting tips and times. So it all able to be reserved in the refrigerator for some times. is important to purchase fresh and high quality foods. -
Page 28: Convection Setting
Convection Setting The oven can be used as a conventional oven using the CONVECTION mode which incorporates a heating element with a fan. For best results always place food in a preheated oven. This feature offer a choice of Convection temperatures 40 °C and 100 °C ~ 230 °C in 10 °C increments. For quick selection of the most commonly used cooking temperatures, the temperatures start at 150 °C and count up to 230 °C. -
Page 29: Convection Setting
Convection Setting (continued) Ferment Setting (Ferment function is used for dough fermentation, such as the pizza base or bakery dough when making bread.) 1. Touch once. 2. Tap "+"/"-" or swipe the slider bar to 3. Touch once. select 40 °C. 5. -
Page 30: 3-Stages Setting
3-Stages Setting This feature allows you to program 3-Stages continually. E.g.: Continually set [600 W] 2 minutes, [Steam 1] 3 minutes and [Grill 1] 2 minutes. 1. Touch to select Micro Power. 3. Touch the Set key to verify 2. Tap "+"/"-" or swipe the your desired power level. -
Page 31: Timer Setting (Kitchen Timer/Standing Time/Delay Start)
Timer Setting (Kitchen Timer/Standing Time/Delay Start) This feature allows you to program the oven as a kitchen timer. It can be also used to program a stand time after cooking is completed or to program a delay start. To set Kitchen Timer: 1. -
Page 32: To Cook Using The Recipe Store
To Cook using the Recipe Store This feature allows you to pre-program your oven for regular reheating or cooking tasks. You are able to pre-program your oven for a specific power level and time that is convenient for you. You are able to pre-program three memory tasks. To Set a Recipe Program: 1. -
Page 33: Sensor Reheat Setting
Sensor Reheat Setting Sensor Reheat feature is utilizing the IR sensor equipped within the cavity to detect surface temperature of the food in the MWO to balance the reheating temperature and timing. This feature can cook food without setting power and time, only according to the temperature as your require. -
Page 34: Reheat With Steam Setting
Reheat with Steam Setting This feature allows you to reheat rice, meal without setting power and time. The recommended weight is 100-500 g. 1. Tap twice. 2. Select "More/standard/Less" . 3. Touch once. Tap "+"/"-" or swipe the slider bar to select "More/standard/Less". For 100~250 g, please select Less to reheat. -
Page 35: Auto Cook Setting
Auto Cook Setting This feature allows you to set some ordinary menus with different weights. It will cook automatically without setting power and time. Select the category of food and then just enter the weight. Do not include the weight of any added water or the container weight. -
Page 36: Auto Cook Menus
Auto Cook Menus Recommended Accessories and Number Menu/Function Serving/Weight Containers Placement Beverages 1 cup 2 cups 3 cups 4 cups cups on flat table Double Boil Casserole with lid on flat table serv serv Quick Soup Casserole with lid on flat table serv serv Casserole Rice... - Page 37 Auto Cook Menus (continued) Recommended Accessories and Number Menu/Function Serving/Weight Containers Placement 1 pc Metal tray in lower Cake (9 inches) shelf position Metal tray in lower Muffin 12 pcs shelf position Metal tray in lower Egg Tart 9 pcs shelf position Metal tray in lower Cream Puff...
- Page 38 Auto Cook Menus (continued) 21. Beverages 24. Casserole Rice It is suitable for reheating beverages (coffee, tea, etc.) from It is suitable for cooking plain rice. Always use a high room temperature or fridge temperature. The reheat field is microwave safe casserole and cover with a lid or microwave 1-4 cups (200 ml/cup).
- Page 39 Auto Cook Menus (continued) 28. Steam Raw Meat 35. Reheat Fried Foods Suitable for cooking minced/sliced pork. Place them in a Suitable for reheating fried food including fried chicken microwave safety container. Add salt, ginger, green onion, pieces, curry buns, deep-fried spring rolls. Place the food on cooking wine and corn flour.
-
Page 40: Frozen Pizza
Auto Cook Menus (continued) 38. Teriyaki Chicken Standard 41. Frozen Spring Rolls Ingredient: (4 serv) Suitable for cooking different kinds of frozen spring rolls. 4 pcs (about 125 g one piece) Boneless chicken leg Place the spring rolls on the grill tray and brush some oil in the rolls. - Page 41 Auto Cook Menus (continued) 44. Cake 46. Egg Tart (egg tart mould with 7cm diameter and 2.2 cm height) Ingredient: 200 g (about 4 pcs) Ingredients A: (Pastry) 170 g Plain flour 70 g Butter - chilled Baking powder 14 g ¼...
- Page 42 Auto Cook Menus (continued) 48. Cookie 1 Level Ingredient: 35 g 120 g Plain flour 60 g (room temperature) Butter 60 g Castor sugar vanilla essence Method: Whisk the butter and sugar to be softened and creamy with egg beater. Add beaten eggs and vanilla essence and stir evenly.
-
Page 43: Auto Steam Cook Setting
Auto Steam Cook Setting There are 2 way for you to steam some of your favourite foods by setting the weight only. One is steam only, the other is steam with microwave. Steam with microwave mode saves cooking time. The oven determines the power and the cooking time automatically. -
Page 44: Auto Steam Menus
Auto Steam Menus Menu Weight Accessories and Placement 1. Steam Frozen Foods 200 g 250 g 300 g the glass shelf in the middle shelf position with plastic trivet 2. Steam Frozen Foods 200 g 250 g 300 g inside (Quick) 3. - Page 45 Auto Steam Menus (continued) 1. Steam Frozen Foods 6. Frozen Chinese Bun (Pau) (Quick) (use Steam only) (use Steam + Micro) Suitable for steaming some dessert such as buns. It’s not Suitable for steaming some frozen Chinese bun, the suitable for big size food and all kinds of frozen dumpling. Fill weight is 80 g per piece .
-
Page 46: Frozen Vegetables
Auto Steam Menus (continued) 8. Steam Raw Pudding 12. Fresh Root Vegetables (Quick) (use Steam + Micro) (use Steam + Micro) Ingredients: To steam fresh root vegetables e.g. carrots, potatoes. Fill Radish (peeled) 750 g water tank. Wash and peel carrots. Cut carrots into round Rice flour 227 g pieces about 1.5 ~ 2 cm thick. - Page 47 Auto Steam Menus (continued) 18. Fresh Fish Fillets 20. Pudding (use Steam only) (use Steam only) To cook fresh fish fillets. Each fish fillets should weigh Ingredient: between 100-200 g each. Fill water tank. Place fresh fish Sugar 125 g onto plastic trivet.
-
Page 48: Cleaning Setting
Cleaning Setting 50. Deodorization Setting: This feature is suitable for cleaning the particular smell from the microwave oven (30 minutes is needed). 1. Touch once. 2. Select "Deodorization". 3. Touch once. Tapping "+"/"-" or swipe the slider bar until Touch the Set key to verify the "Deodorization"... -
Page 49: Cleaning Setting
Cleaning Setting (continued) 52. System Cleaning Setting: The first stage of this program cleans the system with a citric acid solution. The second stage runs water through the system to rinse the pipes. 1. Make a solution of 16 g citric acid and 200 g of water, add the solution to the water tank. -
Page 50: Before Requesting Service
Before Requesting Service ALL THESE THINGS ARE NORMAL: The oven causes interference with Some radio and TV interference might occur when you cook with the my TV. microwave oven. This interference is similar to the interference caused by small appliances such as mixers, vacuums, hair dryers, etc. It does not indicate a problem with your oven. -
Page 51: Before Requesting Service
Before Requesting Service (continued) PROBLEM POSSIBLE CAUSE REMEDY Remove plug from outlet, wait 10 seconds The oven is not plugged in securely. and re-insert. Circuit Breaker or fuse is tripped or Oven will not turn on. Contact the specified service center. blown. -
Page 52: Care Of Your Microwave Oven
3. Failure to maintain the oven in a clean condition could lead to deterioration of the surface that could adversely affect the life of the appliance and possibly result in a hazardous situation. 4. When it becomes necessary to replace the oven light, please consult the service center specified by Panasonic. - Eng-51 - IP4965_3BH70HP_Eng_30_140703.indd 51... -
Page 53: Care Of Your Microwave Oven
Care of your Microwave Oven (continued) Cleaning the Water Tank Clean with a soft sponge in water. Remove the water tank and clean the compartment where the Open the water supply cap, remove the lid and pipe cap and water tank is inserted. clean. -
Page 54: Technical Specifications
Technical Specifications Power Supply: 220 V, 50 Hz 230 - 240 V, 50 Hz Power Consumption*: Microwave 4.6 A 990 W 4.3 A 990 W Grill 6.0 A 1330 W 5.6 A 1330 W Convection 6.3 A 1380 W 5.7 A 1380 W Power Requirement: (Maximum) 7.2 A 1570 W 6.5 A 1570 W...