Table of Contents
Advertisement
DIGITAL VOICE
RECORDER
DS-3400
INSTRUCTIONS
Thank you for purchasing an Olympus
Digital Voice Recorder.
Please read these instructions for information
about using the product correctly and safely.
Keep the instructions handy for future reference.
To ensure successful recordings, we recommend that
you test the record function and volume before use.
EN
Advertisement
Table of Contents

Related Manuals for Olympus DS DS-3400


Summary of Contents for Olympus DS DS-3400
- Page 1 DIGITAL VOICE RECORDER DS-3400 INSTRUCTIONS Thank you for purchasing an Olympus Digital Voice Recorder. Please read these instructions for information about using the product correctly and safely. Keep the instructions handy for future reference. To ensure successful recordings, we recommend that...
- Page 2 ● Any liability for passive damages or damage of any kind occurred due to data loss incurred by a defect of the product, repair performed by the third party other than Olympus or an Olympus authorized service station, or any other reasons is excluded from Olympus’s liability.
- Page 3 PLAY/OK Table of Contents Safe and Proper Usage Getting Started Basic Operations Advanced Operations Managing Files on Your PC Other Practical Use Methods Other Information P.19 P.33 P.59 P.67 P.68...
-
Page 4: Table Of Contents
Table of Contents Table of Contents ... 4 Safe and Proper Usage ... 5 General Precautions ... 5 1 Getting Started Main Features ... 7 Memory Card ... 8 Identification of Parts ... 10 Installing Batteries ... 12 Power Supply ... 14 Power Save Mode (Power Save) ... -
Page 5: Safe And Proper Usage
Safe and Proper Usage Before using your new recorder, read this manual carefully to ensure that you know how to operate it safely and correctly. Keep this manual in an easily accessible location for future reference. • The warning symbols indicate important safety related information. - Page 6 1 remove the batteries immediately while being careful not to burn yourself, and; 2 call your dealer or local Olympus representative for service. • Do not expose the batteries to water. Do not allow water to contact the terminals.
-
Page 7: Getting Started Main Features
1 Getting Started 1 Getting Started Main Features ● Support type of memory: SD card (☞ P.8). ● Three Programmable smart buttons F1, F2 and F3 (☞ P.58). ● Recording and storing voice in Digital Speech Standard Pro (DS2 format). ●... -
Page 8: Memory Card
512 MB to 16 GB. Settings and operating environment relating to the card Check the latest operating information on the Olympus homepage (http://www.olympus.com) when using cards other than the included card. In addition, refer to the following pages as well when handling the card. - Page 9 To recover the original recording time, initialize/format the card in the recorder. • Olympus will not be held liable for any data corruption or loss due to misuse of the media card.
-
Page 10: Play/Ok
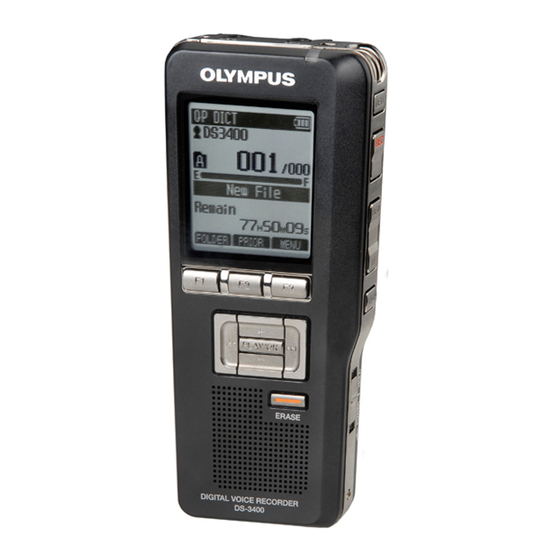
Identification of Parts & 1 SD card slot 2 Built-in microphone 3 NEW button 4 REC button 5 REW button 6 FF button 7 STOP button 8 POWER/HOLD switch 9 ERASE button 0 EAR (Earphone) jack ! MIC (Microphone) jack @ Record indicator light # Display (LCD panel) (Volume) button... - Page 11 Display Status Indicators QP DICT DS3400 / 030 VERBAL DISPLY INDEX Display in the recording mode 1 Record mode indicator 2 Current folder 3 Memory remaining indicator (E/F bar) 4 Record indicator 5 Remaining recording time 6 Level meter indicator 7 Microphone sensitivity indicator 8 Current file number 9 Total number of files in the folder...
-
Page 12: Installing Batteries
Installing Batteries This recorder can be used with AAA Alkaline Batteries. Lightly press down on the battery cover release button, then open the battery cover. Insert two AAA batteries, observing the correct polarity as shown in the illustration below, then close the battery cover. - Page 13 Notes • Be sure to turn OFF the recorder before replacing the batteries. Removing the batteries while the recorder is in use may corrupt the card. If you are recording into a file and the batteries run out, you will lose your currently recorded file since the file header will not be written.
-
Page 14: Power Supply
Power Supply When the recorder is not being used, turn the power off to reduce battery consumption to a minimum. Even if the power is turned off, existing data, mode settings, and clock settings will be maintained. Turning On the Power While the recorder’s power is off, slide the POWER/HOLD switch in the direction indicated by the arrow. -
Page 15: Hold
HOLD If you bring the POWER/HOLD switch to the HOLD position, the current conditions will be preserved, and all buttons and switches will be disabled.This feature is useful when the recorder has to be carried in a bag or pocket. Set the recorder to HOLD mode Slide the POWER/HOLD switch to the HOLD position. -
Page 16: Inserting And Ejecting A Sd Card
Inserting and Ejecting a SD card Inserting a SD card Insert the SD card into the card slot in the direction shown in the illustration until it clicks. When inserting SD card into the SD card slot, the recorder message [Please Wait] will flash on the LCD display for a few seconds while validating the SD card. -
Page 17: Setting Time And Date (Time & Date)
Setting Time and Date (Time & Date) Setting the correct time and date on the recorder is very important since every file recorded on the recorder will have the time and date information as part of the file header. This will simplify the file management aspects later on. -
Page 18: Changing The Time And Date
Setting Time and Date (Time & Date) • You can choose the order of the year, month, day by pressing the F2(D/M/Y or Y/M/D or M/ D/Y)* button while setting them. Example: March 15, 2009 (Initial setting) 2009 *The display will vary depending on the status of the settings. -
Page 19: Basic Operations Recording
2 Basic Operations 2 Basic Operations Recording The recorder has five folders, A, B, C, D, E and you can select folder by pressing the F1(FOLDER) button. These five folders can be selectively used to distinguish the kind of recording; for example, Folder A might be used to store private information, while Folder B might be dedicated to holding business information. -
Page 20: New Recording
Recording New Recording Create a new file to record in. Press the NEW button to create a new file. aSelected Author ID bNew file number cRemaining recording time Press the REC button to start recording. The record indicator light glows orange and (Record indicator) appears on the display. -
Page 21: Overwrite Recording
Overwrite Recording You can overwrite a previously recorded file from any point within the file. Note that the overwritten recordings will be erased. Select and play the file you want to overwrite. Stop playback at the starting point of overwrite. Press the REC button to start overwriting. -
Page 22: Insert Recording
Recording PLAY/OK PLAY/OK Insert Recording Additional recording can be inserted into previously recorded file. Select and play the file you want to insert an additional recording into. While playing the file, press the F1 ( INSERT ) button to insert an additional recording. -
Page 23: Microphone Sensitivity (Mic Sense)
Microphone Sensitivity (Mic Sense) You can switch between two microphone sensitivities to meet recording needs: [Dictation] for oral dictation and [Conference] which is suited for situations like meetings and conferences with a small number of people. The setting status will appear on the display CONF DICT F1, F3 button... -
Page 24: Recording Modes (Rec Mode)
Recording Modes (Rec Mode) The recording mode can choose between QP (Quality Playback) and SP (Standard Playback). PLAY/OK Select [Rec Mode] at the [Record Menu] screen, then press the PLAY/OK or 9 button. Refer to P.33 regarding each menu item settings. Record Menu Rec Mode Mic Sense... -
Page 25: Using The Variable Control Voice Actuator (Vcva)
Using the Variable Control Voice Actuator (VCVA) The Variable Control Voice Actuator (VCVA) is a function that starts recording automatically when the microphone senses that sounds have reached a preset threshold volume level, and automatically pauses when the volume drops below the threshold. -
Page 26: Recording Monitor
Recording Monitor It is possible to monitor your recording by listening to the recording while recording is in progress. Insert the earphone plug into the earphone jack and use the + or – button to control the volume level. Note •... -
Page 27: Playing
Playing You can start playing a file at any point. PLAY/OK PLAY/OK Select the file, then press the PLAY/ OK button to start playback. (Play indicator) appears on the display. aPlay indicator – Press the button to adjust the volume. The display shows the volume level. - Page 28 Playing Playback functions Press the 9 or FF button once while stopped. Fast Forward (FF) Press the 0 or REW button once while stopped. Rewind (REW) Press and Hold the 9 or FF button while stopped (CUE) or playing a file. Press and Hold the 0 or REW button while stopped Review (REV)
-
Page 29: Erasing
Erasing Erasing a File PLAY/OK Erasing or deleting a file from any of the folder on the recorder is a very simple process. PLAY/OK PLAY/OK [Erase Done] is displayed when the file is erased. File numbers will be reassigned automatically. •... -
Page 30: Erasing All Files In A Folder
Erasing PLAY/OK PLAY/OK PLAY/OK Erasing All Files in a Folder All files in a folder can be erased simultaneously. Select the folder you want to erase. Press the ERASE button. Press the button to select [All Erase], then press the PLAY/OK button. -
Page 31: Partially Erasing A File
Partially Erasing a File You can erase a selected file in part. Start playback for the file you want to erase partially. Press the ERASE button at the point to start erasing. PLAY/OK While playback continues, [Partial Erase] will appear on the display. Press the ERASE button at the point to end erasing. - Page 32 Erasing PLAY/OK Press the ERASE button to confirm erase. The display changes to [Partial Erase!] and erasing will start. When [Erase Done] appears on the display, partial erase is complete. Notes • If the ERASE button is not pressed within 8 seconds after the “Partial Erase Start” and “Partial Erase End”...
-
Page 33: Advanced Operations
3 Advanced Operations 3 Advanced Operations Menu List ● Menu Setting (while the recorder is stopped, press the F3(MENU) button Main Menu Second layer Priority File Menu Pending Lock Work Type Information Rec Mode Record Mic Sense Menu VCVA Backlight Contrast Display Menu... - Page 34 Menu List Main Menu Cue/Rev Sound Device Menu Power Save Time & Date Reset Settings System Info. File Menu (To the page 33) Notes • The selectable language varies depending on the countries where the product was purchased. • Items appear in bold letters in the “Setting” column to indicate that they are the initial settings. Second layer Setting On, Off...
-
Page 35: Learning To Use The Menu
Learning to Use the Menu To navigate through the different options in the Menu, use the Menu List flow chart (☞ P.33, 34) and the following steps to modify or change any settings. F1, F3 button PLAY/OK, PLAY/OK 9, 0 button Press the F3(MENU) button. -
Page 36: Selecting Folders And Files
Selecting Folders and Files PLAY/OK Changing Folders While the recorder is stopped, press the F1 ( FOLDER ) button. The folder list screen will be displayed. QP DICT Folder A Folder B Folder C Folder D Folder E FOLDER EXIT –... -
Page 37: Displaying File Information (Information)
Displaying File Information (Information) The recorder can display a variety of information related to the current file. PLAY/OK 9 button PLAY/OK Select the file whose information you want to display. Refer to P.36 regarding file selection. Select [Information] at the [File Menu] screen, then press the PLAY/OK or 9 button. -
Page 38: Device Lock Function
Device Lock Function Recorder access can be restricted by enabling the device lock function. Authentication via password can act as a safe guard for your data even in case the recorder is lost or left unattended. Password registry can be performed by using DSS Player (☞... - Page 39 Device Lock Function Authentication Halt Mode If there is no password match after five tries the recorder will enter password input halt mode for ten minutes. After ten minutes have passed the mismatch history will be erased and it will once again return to the password input screen.
-
Page 40: Locking Files (Lock)
Locking Files (Lock) When a file is set to [Lock], the display, allowing you to prevent important files from accidental erase. Furthermore, the file will not be erased even when all files within a folder are erased. PLAY/OK Select the file you want to Lock. Select [Lock] at the [File Menu] screen, then press the PLA Y/OK or 9 button. -
Page 41: Pending Files (Pending)
Pending Files (Pending) When you set [Pending] to the file, the file becomes “Pending file” and the editing sign of on the display. If “Download file” is set to “Finished file” by DSS Player, the [Pending] file is not transferred and only [Finished] file (edited file) will be transferred to your PC. -
Page 42: Setting Priority Levels (Priority)
Setting Priority Levels (Priority) By default, F2 button is programmed with Priority function. The setting can also be performed from the menu. You can set a priority level on each file recorded. You can choose between “HIGH” and “NORMAL” The default is Normal level. PLAY/OK To Set a Priority Level on a File To Set the F2(PRIOR) Button... -
Page 43: Setting The Author Id And Work Type
Setting the Author ID and Work Type Every file recorded on the recorder will include the Author ID and Work Type as part of its header information. To create multiple Author IDs and Work Types on the recorder, use the bundled DSS Player software to create and upload a Data list (list of Author IDs and Work Types) to the recorder. - Page 44 Setting the Author ID and Work Type Setting the Work Type Up to 10 Work Types can be registered in the DSS Player software and uploaded to the recorder. Each Work Type can have up to 10 Option Items associated with it. The Work Types and Option Items can be used on the recorder to populate the recording file header information.
- Page 45 Inputting Option Item Value – Press the button on the file information input screen to select the targeting Option Item, then press the PLAY/OK button. The input screen will be displayed. When inputting an Option Item value into a New file or the file with a re-selected Work Type, only eligible input characters as specified in the DSS Player can be entered.
-
Page 46: Verbal Comment
Verbal Comment The data recorded with the F1(VERBAL) button being pressed during recording, is recorded as a Verbal comment position (a position within a file) in the header. It is possible to instantly search and play back Verbal comment sections through DSS Player, thereby making it useful for things like giving instructions to transcriptionists. -
Page 47: Index Marks
Index Marks Index marks can be placed in a file during recording or playback. Index marks are used to provide a quick and easy way to identify important or significant parts within the file. F3 button 9, 0 PLAY/OK button ERASE button Setting an Index Mark... -
Page 48: Language (Language)
Language (Language) You can select the display language for this recorder. The selectable language varies depending on the countries where the product was purchased. PLAY/OK Select [Language] at the [Display Menu] screen, then press the PLAY/OK or 9 button. Refer to P.33 regarding each menu item settings. Display Menu Backlight Contrast... -
Page 49: Backlight (Backlight)
Backlight (Backlight) When the display backlight is set to [On], the backlight will light up for about 10 seconds when a button is pressed. This is useful in that it allows you to check the display even in dark locations. F1, F3 button PLAY/OK, PLAY/OK... -
Page 50: Led (Led)
LED (LED) You can set it so the Record indicator light does not turn on. PLAY/OK Select [LED] at the [Display Menu] screen, then press the PLAY/OK or 9 button. Refer to P.33 regarding each menu item settings. Display Menu Backlight Contrast Language... -
Page 51: Lcd Contrast Adjustment (Contrast)
LCD Contrast Adjustment (Contrast) Display contrast can be adjusted from level 01 to 12. F1, F3 button PLAY/OK, PLAY/OK 9, 0 button Select [Contrast] at the [Display Menu] screen, then press the PLAY/OK or 9 button. Refer to P.33 regarding each menu item settings. Display Menu Backlight Contrast... -
Page 52: System Sounds (Beep)
System Sounds (Beep) When this is set to [On], the recorder beeps to alert you to button operations or warn you of errors. PLAY/OK Select [Beep] at the [Device Menu] screen, then press the PLAY/OK or 9 button. Refer to P.34 regarding each menu item settings. Device Menu Beep Cue/Rev Sound... -
Page 53: Cue/Rev Sound (Cue/Rev Sound)
Cue/Rev Sound (Cue/Rev Sound) The playback tone of Cue (Cue) operation and Review (Rev) operation can be set to On or Off (☞P.28). F1, F3 button PLAY/OK, PLAY/OK 9, 0 button Select [Cue/Rev Sound] at the [Device Menu] screen, then press the PLAY/OK or 9 button. -
Page 54: Formatting The Card (Format)
Formatting the Card (Format) Cards that have been used in non-Olympus devices, or cards that are not recognized by the recorder, must be formatted before they can be used with the recorder. To familiarize yourself with the formatting process, read the steps below. - Page 55 – Press the button again to select [Start] option. Format Are You Sure? Start Cancel BACK EXIT Press the PLAY/OK button again to initiate the formatting process. Format Format Format ! Format Done [Format Done] displays when formatting ends. Initializing the Recorder’s Menu Settings (Reset Settings) To return the recorder’s menu settings to their original status from the time of...
-
Page 56: Check System Information (System Info.)
Check System Information (System Info.) System information about the recorder like its [Model Name], [Version] and [Serial] can be displayed. In this recorder, you can check the Card Information (☞ P.9) and File Information (☞ P.37). PLAY/OK Select [System Info.] at the [Device Menu] screen, then press the PLAY/OK or 9 button. -
Page 57: Changing The Usb Class (Usb Class)
Changing the USB Class (USB Class) You can set the USB class of this recorder with a USB connection to [Composite] or [Storage]. Set to [Composite] when using this recorder as a USB speaker or a USB microphone. F1, F3 button PLAY/OK, PLAY/OK 9, 0... -
Page 58: Customizing The Recorder
Customizing the Recorder You can customize various specifications of the recorder when using DSS Player (☞ P.59). For more details, refer to the Online help for DSS Player (☞ P.63). The Recorder’s Customized Settings Common Settings You can set the default values for each of the recorder ’s Menu items. -
Page 59: Managing Files On Your Pc
• Recording Instruction Comments and Verbal comments (Windows only). • Encrypt the Dictation within the folder by encrypting the folder itself (Windows only). Make sure that your computer meets the minimum requirements listed below. Please check with your system administrator or your Olympus Professional Dealer. -
Page 60: Minimum Requirement
1024 x 768 pixels or more, 32000 colors more USB port: One or more free ports Notes • Macintosh version does not support voice recognition software. • Currently supported OS are listed on our Web page. For the latest information, please visit the Olympus Web site at http://www.olympus-global.com/en/global/. -
Page 61: Installing Dss Player Software
An explanation of the installation method for individuals installing the software on a single PC will be provided here. Insert Olympus DSS Player CD into the CD-ROM drive. The installation program will start automatically. If the installation program does not start automatically, browse your CD-ROM drive and execute “launcher.exe”. -
Page 62: Uninstalling Dss Player Software
Click the [start] button on the taskbar. Select [Add/Remove programs] from the [Control Panel]. A list of installed applications is displayed. Select [Olympus DSS Player Pro], then click the [Change/Remove] button. Proceed with the uninstallation according to the instructions on the screen. -
Page 63: Using Online Help
For information on the DSS Player usage and features, refer to the Online help. To start Online help: Windows Click the [start] button, then select [All Programs], [Olympus DSS Player Pro], [Dictation Module Help]. While DSS Player is running, select the [Help] menu, [Contents]. -
Page 64: Connecting Recorder To Pc
Connecting Recorder to PC Connecting to Your PC Using the USB Cable Connect the USB cable to the USB port of the PC. Confirm that the recorder has stopped and connect a USB cable to the connection port on the recorder. If [Remote] is displayed on the recorder, it indicates proper connections. - Page 65 Notes • NEVER remove the card or disconnect the USB cable while the record indicator light is flashing. If you do, the data on the card will get destroyed. • Some PC’s may not supply sufficient power and the recorder fails to connect. Refer to your PC User’s Manual regarding the USB port on your PC.
-
Page 66: Running Dss Player Software
The check mark on [DSS Player Pro Dictation Module] disappears. Manual Start Click the [start] button, then select [All Programs]. All program menu will be displayed. Select [Olympus DSS Player Pro], then click [Dictation Module]. Macintosh Disabling Automatic Start Click the Dock’s System Preferences. Click Device Detector. -
Page 67: Other Practical Use Methods
5 Other Practical Use Methods 5 Other Practical Use Methods Using as External Memory of the Computer When the recorder is connected to your PC, it will be recognized on your PC as a removable drive. You can view and access the recorder card from My Computer and download data from the card to your PC using standard windows copy/move and delete commands. -
Page 68: Other Information
Please remove the card. Erase files that are no longer required or insert another card. Reformat the card (☞ P.54). This is a malfunction. Contact the place of purchase or Olympus Service Center for repair. Insert a card (☞ P.16). -
Page 69: Troubleshooting
Troubleshooting Symptom Probable cause Nothing appears The batteries are not loaded properly. on the display The batteries are dead. The recorder is in power off mode. The recorder is in power off mode. Won’t start The batteries are dead. Unable to record The card does not have enough memory. -
Page 70: Accessories
Ni-MH rechargeable battery and charger set: BC400 (Europe only) BC400 comes with an Ni-MH rechargeable battery charger (BU-400) and 4 Ni-MH rechargeable batteries (BR401) as a pack. This charger can quick charge Olympus AA or AAA Ni-MH rechargeable batteries. Ni-MH rechargeable battery: BR401... -
Page 71: Specifications
(without protrusions) Weight 105 g (Including alkaline batteries) * Specifications and design are subject to change without notice. * Battery life is measured by Olympus. It varies greatly according to the type of batteries used and the conditions of use. Ni-MH... -
Page 72: Technical Assistance And Support
Technical Assistance and Support DS-3400 is part of the Olympus Professional Dictation System. Your dealer is trained to troubleshoot and fix many common problems that you may be having with this system. If you encounter problems using your DS-3400, we recommend that you contact your Olympus Professional Dealer that sold you the system. - Page 75 For customers in Europe “CE” mark indicates that this product complies with the European requirements for safety, health, environment and customer protection. This symbol [crossed-out wheeled bin Directive 2006/66/EC Annex II] indicates separate collection of waste batteries in the EU countries. Please do not throw the batteries into the domestic refuse.
- Page 76 émanant d’appareils numériques, tel que prévu dans les Règlements sur l’Interférence Radio du Département Canadien des Communications. DS-3400 DIGITAL VOICE RECORDER OLYMPUS IMAGING AMERICA INC. 3500 Corporate Parkway, P.O. Box 610, Center Valley, PA 18034-0610, U.S.A. 1-888-553-4448 Tested To Comply...