Table of Contents
Advertisement
DIGITAL
VOICE RECORDER
DS - 9500
DS - 9000
INSTRUCTIONS
EN
Thank you for purchasing an Olympus digital voice recorder.
Please read these instructions for information about using the product correctly and safely.
Keep the instructions handy for future reference.
To ensure successful recording, we recommend that you test the record function and volume before use.
Advertisement
Table of Contents

Related Manuals for Olympus DS-9500


Summary of Contents for Olympus DS-9500
- Page 1 DS - 9500 DS - 9000 INSTRUCTIONS Thank you for purchasing an Olympus digital voice recorder. Please read these instructions for information about using the product correctly and safely. Keep the instructions handy for future reference. To ensure successful recording, we recommend that you test the record function and volume before use.
-
Page 2: Table Of Contents
Inserting the battery ......8 Verbal Comment ......31 Charge the battery ......9 Share the dictation file via Wi-Fi (DS-9500 only) ........32 Charge using the docking station ..... 9 Charging directly via USB cable ....9 Index marks ........35 Using the lithium ion battery ....10 How to use the menu ......36... - Page 3 Table of contents 5 Other information Indications used in this manual Device care ........53 Alarm message list ......54 NOTE Describes precautions and operations that should be Troubleshooting ......55 absolutely avoided in using the voice recorder. Accessories (optional) ....57 Copyright and trademark information ........58 Describes useful information and hints that will help you getting the most out of your voice recorder.
-
Page 4: Getting Started
Device Lock function to prevent *1 PCM and MP3 files cannot be encrypted. unauthorized access to device *2 An AC adapter is included with only the DS-9500. (☞ P.29, P.46). *3 This function is available with only the DS-9500. -
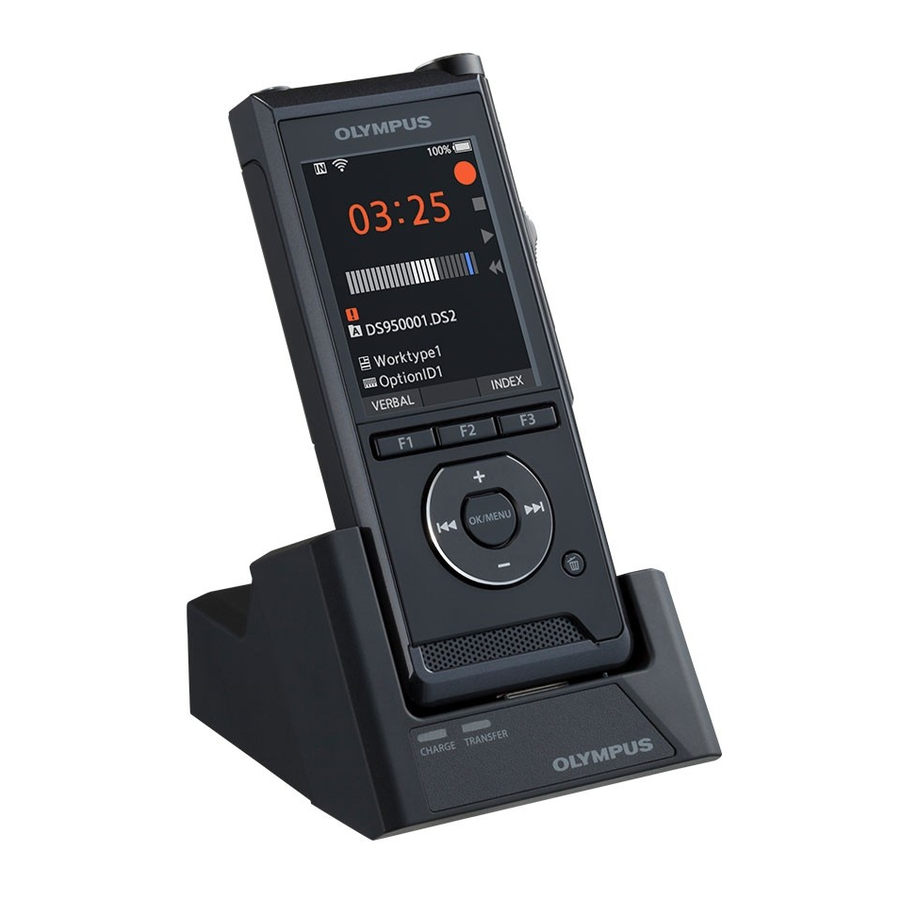
Page 5: Names Of Parts
Names of parts Recorder/ Docking station & Docking station: A docking station is included with only the DS-9500. 1 q (earphone) jack % OK/MENU button 2 Built-in 2 microphone (L) ^ 9 (fast forward) button 3 Display & k (erase) button... -
Page 6: Display
Names of parts Display Display in the recording mode Display in the playback mode Display in the file list * Display in the device information... - Page 7 7 File information area ]: E-mail transfer failed ]: File lock $ Current folder * ]: Speech recognition % File name and recording date/time * ]: Worktype ]: Option item ]: Priority ]: Author * DS-9500 only 8 Current playback time...
-
Page 8: Inserting The Battery
Inserting the battery This recorder uses a lithium ion battery specified Battery indicator by Olympus (Li-92B). Do not use any other type of battery. The battery indicator on the display will decrease as the battery loses power. Lightly press down on the battery cover release button, then open the battery cover, as shown in the illustration below. -
Page 9: Charge The Battery
Connect the USB cable to the docking station. The docking station and AC adapter are included with the DS-9500, and sold separately for the DS-9000. Charge using docking station and AC adapter Fully charge the battery (approx. 2 hours) before use. -
Page 10: Using The Lithium Ion Battery
For customers in Germany: This recorder uses a lithium ion battery specified Olympus has a contract with the GRS (Joint Battery by Olympus (Li-92B). Do not use any other type of Disposal Association) in Germany to ensure battery. environmentally friendly disposal. -
Page 11: Power Supply From Ac Adapter Or Usb Cable
The docking station and AC adapter are included with If the recorder detects a DC power voltage the DS-9500, and sold separately for the DS-9000. outside the allowed voltage range (4.4-5.5V), then [Power supply error Remove power... -
Page 12: Turn The Power On
Memory cards compatibility POWER For a list of memory card compatible with the recorder, please visit the product homepage at the Olympus website applicable to your region or contact your Olympus reseller where you purchased the product. NOTE • When initializing (formatting) a memory card, confirm that no necessary data is stored on the memory card beforehand. -
Page 13: Inserting And Ejecting A Memory Card
Memory card Inserting and ejecting a memory card NOTE • Inserting the memory card the wrong way or at an angle could damage the contact area or Inserting a memory card cause the memory card to jam. • If the memory card is not inserted all the Insert the memory card fully into the card way into the slot, data may not be written properly. -
Page 14: Setting Time And Date [Time & Date]
Setting time and date [Time & date] Press the 9 or 0 button to select If you set the time and date beforehand, the information when the file is recorded is the item to set. automatically stored for each file. Setting the time and date beforehand enables easier file Select the item from the management. -
Page 15: Changing The Time And Date
Setting time and date [Time & date] Changing the time and date If the current time and date is not correct, set it using the procedure below. Press the OK/MENU or 9 button. When the file display screen appears, press the OK/MENU button while the voice recorder is in stop mode. -
Page 16: Selecting Folders And Files
Selecting folders and files For DS-9500: Select a file using the filter function When the file display screen appears, When the file list display screen appears, press the F1 (LIST) button while the press the F2 (FILTER) button. voice recorder is in stop mode. -
Page 17: Operate The Slide Switch
If the desired file is in the same folder, select it by performing the operation of step 4*. * A file can be selected with the operation of step 4 on the DS-9500 as well. When the file display screen appears, press the F1 (FOLDER) button while the voice recorder is in stop mode. -
Page 18: Basic Operations
Recording will start from the current position of the existing file. NOT E • Append recording, overwrite recording, and insert recording are not available for MP3 files. • Insert recording is not available for PCM files (DS-9500 only). -
Page 19: New Recording
Recording New recording Create a new file to record in. Press the NEW button to create a new file. • [New file] appears in the display. • It is possible to select the Worktype from the Worktype list uploaded using the ODMS software (☞... -
Page 20: Overwrite Recording
Recording Overwrite recording You can overwrite a previously recorded file starting from any point within the file. When using overwriting, the overwritten part will be erased. Select and play the file you want to overwrite. • Stop the playback at the point you want to start overwriting. -
Page 21: Insert Recording
• The recording’s time and date will be updated to the one of the latest recording inserted. • You cannot select a recording mode different from the one set onto the original file. • Insert recording is not available for MP3 files. • Insert recording is not available for PCM files (DS-9500 only). -
Page 22: Hands-Free Recording
To set up the recorder for hands-free to it even while the recording is in progress. In operation, connect the optional Olympus Foot order to do so, insert the earphone plug into the q (earphone) jack and use the + or – buttons to control... -
Page 23: Playback
Playback You can playback a file starting from any point. Select the file, then move the slide switch to the PLAY (`) position to start playback. • The LED indicator lights in green. a Elapsed playback time Press the + or – button to adjust the volume. - Page 24 Playback Playback functions Operation How to cancel Fast Forward Press the 9 button once while in stop mode. Move the slide switch to a position other (FF) than the STOP (4) position. • The recorder starts the operation of Rewind Press the 0 button once while in stop mode.
-
Page 25: Erasing
Erasing a file from the file list display screen files in a folder can be erased simultaneously. When the file list display screen appears, For DS-9500: press the k (erase) button. Select the file you want to erase. Select the file you want to erase, then press the OK/MENU button. - Page 26 Erasing Press the + button to select [Start], For DS-9000: then press the OK/MENU button. Select the file you want to erase. • The display changes to [Erasing] and erasing will start. Press the k (erase) button. • [Erased] is displayed when the file is erased. Press the + button to select [Erase all] or [Erase one file].
-
Page 27: En Partially Erasing A File
Press the k (erase) button at the point • MP3 files cannot be partially erased. you want to start erasing. • PCM files cannot be partially erased (DS-9500 • While playback continues, [Start point] will only). appear on the display. -
Page 28: Advanced Operations
Press the F3 (EXIT) button to exit the • The F3 button becomes [INFO] when in stop mode in the case of the DS-9000 and when information screen. the New file screen is displayed in the case of the DS-9500. -
Page 29: Device Lock Function
Device lock function After all four digits have been entered, Access to the recorder can be restricted by using the Device Lock function. Password authentication can press the F2 (ENTER) button. be safer for your data in case the recorder is lost. The password can be set by using the ODMS software (☞... -
Page 30: Setting The Author Id And Worktype
Setting the Author ID and Worktype Every file recorded on the recorder will include Setting the Worktype the Author ID and Worktype as part of its header information. To create multiple Author IDs and Up to 20 Worktypes can be registered and uploaded Worktypes on the recorder, use the bundled ODMS to the recorder using the ODMS software. -
Page 31: Verbal Comment
Verbal Comment Verbal comments are useful to append vocal Clearing a Verbal Comment instructions while recording. It is possible to search and playback Verbal When playing a Verbal Comment, press comments using the ODMS and DSS Player software. the k (erase) button. Verbal comments are also useful to give instructions to transcriptionists. -
Page 32: Share The Dictation File Via Wi-Fi (Ds-9500 Only)
Share the dictation file via Wi-Fi (DS-9500 only) By using Wi-Fi, you can share dictation files with transcriptionists at any time and from any location without needing to return to the office. By connecting to a wireless LAN access point in your office, you can send dictation files to the local folder on your own PC. - Page 33 Share the dictation file via Wi-Fi (DS-9500 only) Press the + or – button to select [Select Send dictation file a network], then press the OK/MENU or 9 button. Select [Wi-Fi] at the [Device menu] • Access points configured in ODMS, and...
- Page 34 Share the dictation file via Wi-Fi (DS-9500 only) After dictation is completed, press F3 Press the OK/MENU button. (SEND) button. Press the + or – button to select [Yes], Press the + or – button to select [to then press the OK/MENU button.
-
Page 35: Index Marks
Index marks Index marks can be placed into a file during Clearing an index mark recording or playback. Index marks are used to provide a quick and easy way to identify important Select a file in which index marks you or significant parts within the file. -
Page 36: How To Use The Menu
How to use the menu Press the + or − button to select the tab Items in menus are categorized by tabs, so select a tab first and move to a desired item to quickly set it. containing the item you want to set. You can set each menu item as follows. - Page 37 How to use the menu Press the OK/MENU or 9 button. Menu list • Move to the setting of the selected item. File menu [File information] [Priority] [Status] [File lock] [Worktype] Recording menu [Mic mode] [Mic sense] [Rec mode] [VCVA] Press the + or –...
-
Page 38: Menu Items
Menu items Worktype File menu The Worktype information of the recorded or uploaded files can be edited with the menu settings File information of the recorder. For details, see “Editing the Worktype information” The recorder can display a variety of information (☞... - Page 39 Menu items Rec mode Three recording formats are available for selection: DS2, WAV, and MP3. Select [DSS], [PCM] or [MP3]. Level meter (varies Select the options. according to the sound When [DSS] is selected: volume being recorded) [DSS Pro QP] [DSS Pro SP]: The recorded file will be DS2 format.
-
Page 40: Lcd/ Sound Menu
For details, see “Share the dictation file via Wi-Fi You can set it so the record indicator light does not (DS-9500 only)” (☞ P.32). turn on. [On]: E-mail (DS-9500 only) LED light will be set. - Page 41 Rev skip Format This function reverse skips (rewinds) the file being Memory cards that have been used in non-Olympus played back for a set amount of time and it is a devices, or memory cards that are not recognized by...
-
Page 42: Editing The Worktype Information
Menu items Editing the Worktype information [Select from Worktype list]: You can re-select Worktype from the Worktype list. Select the file for which you want 1 Press the + or − button to select the to edit the Worktype information Worktype. - Page 43 Menu items s Character selection: s Canceling the entered contents: +, –, 0, 9 button: Use these buttons to Press the F1 (BACK) button, and select [Yes], then press the OK/MENU button select the character you want to input on the when inputting characters: This will delete Keyboard window.
-
Page 44: Formatting The Memory Card [Format]
Formatting the memory card [Format] Press the OK/MENU or 9 button. Memory cards that have been used in non-Olympus devices, or memory cards that are not recognized by the recorder, must be formatted before they can be used with the recorder. - Page 45 Formatting the memory card [Format] Press the + button again to select NOTE [Start] option. • The time required to format a memory card varies according to the capacity of the memory card to be formatted. Do not interrupt the formatting process with the following actions.
-
Page 46: Customizing The Recorder
You can customize / adjust / set / configure settings display items. related to the Worktype. File Information in List View (DS-9500 only): Worktype List: • You can set the time and date, Worktype, and • Register Worktypes (up to max. 20 items). - Page 47 It is possible to set the Encryption level to [High] Switch (optional). (256 bit), [Standard] (128 bit) or [No] (deactivates ❏ Wireless Network (DS-9500 only) the function). You can customize / adjust / set / configure various Password: settings related to the recorder’s wireless network.
- Page 48 • You can set whether or not to convert files from DSS to WAV when downloading. ❏ E-mail Profile (DS-9500 only) You can customize / adjust / set / configure various settings related to the recorder’s E-mail. E-mail Profile List •...
-
Page 49: Managing Files On Your Pc
Olympus Dictation Management System (ODMS) ODMS* is a fully featured software that provides a simple to use but sophisticated method for managing your recordings. This software can be downloaded from each local Olympus Websites. Main features of the software is the following. -
Page 50: Operating Environment
PCs and other compatible machines will not be covered under the operational warranty. • Macintosh version does not support voice recognition software. • For information on the latest OS upgrades compatibility, visit the Olympus Web page at http://www.olympus-global.com... -
Page 51: Connecting To Your Pc
Otherwise, the recorder may not operate properly. Connecting to your PC using the docking station The docking station is included with the DS-9500, and sold separately for the DS-9000. Place the recorder in the docking station Connect the USB cable to the... -
Page 52: Disconnecting From Your Pc
Connecting to your PC Disconnecting from your PC NOTE • NEVER remove the memory card or disconnect the USB cable while the record indicator light is Windows flashing. If you do, the data will be destroyed. • Never touch the contact points at the bottom of the docking station, as this may cause a bad Click [ ] on the task bar located at the... -
Page 53: Other Information
Other information Device care s Exterior Wipe the device gently. Wipe gently with a soft cloth. If the device is very dirty, soak the cloth in mild soapy water and wring well. Wipe the device with the damp cloth and then wipe it with a dry cloth. s Display Wipe gently with a soft cloth. -
Page 54: Alarm Message List
The memory card was not recognized correctly. (☞ P.13). [Format error] A formatting problem occurred. Format again (☞ P.44). Contact the Olympus Customer Support Center [Memory error] An internal memory error occurred. (☞ back cover). [Insert SD card] The recorder cannot find the memory card. -
Page 55: Troubleshooting
Troubleshooting Symptom Probable cause Action The remaining battery power is low. Charge the battery (☞ P.9). Nothing appears on The recorder is turned off. Turn the power on (☞ P.12). the display. The recorder is currently in Power Save mode. Press any button. - Page 56 Troubleshooting Symptom Probable cause Action The maximum number of index marks has been Erase unnecessary index marks (☞ P.35). reached. Unable to set index The file is locked. Unlock the file from the file menu (☞ P.38). marks. The memory card is locked. Unlock the memory card.
-
Page 57: Accessories (Optional)
A lavalier omni-directional microphone that clips This lithium ion rechargeable battery is to clothing. Used to record your own voice or manufactured by Olympus. It is best paired with the UC90 battery charger. people near you. s PC transcription kit: AS-9000 s AC adapter (5V): A517 &... -
Page 58: Copyright And Trademark Information
• Any liability for passive damages or damage of any kind occurred due to data loss incurred by a defect of the product, repair performed by the third party other than Olympus or an Olympus authorized service station, or any other reason is excluded. -
Page 59: Safety Precautions
“memory card”. manual in an easily accessible location for future reference. • The word “ODMS” is used to refer to the Olympus Dictation Management System in The warning symbols indicate important safety Windows environment. related information. To protect yourself and others from personal injury or damage to property, it is •... - Page 60 Doing so may cause parts repair performed by the third party other to deteriorate and, in some circumstances, than Olympus, an Olympus authorized cause the recorder to catch fire. Do not use service station or any other reason is the charger or AC adapter if it is covered.
- Page 61 1. Remove the battery immediately while to flame, heated, short-circuited or being careful not to burn yourself, and; disassembled. 2. Call your dealer or local Olympus • Never heat or incinerate battery. representative for service. • Take precautions when carrying or storing •...
- Page 62 Getting the docking station wet • Use only Olympus’ special AC adapter. may cause fire or electric shock. Attempting to use other equipment could • Do not drop the docking station or allow it cause fire or electric shock due to heating, to suffer extreme shocks.
- Page 63 • Store the memory card in a location that is out of the reach of children. In case of 3. call your dealer or local Olympus accidental ingestion, consult a physician representative for servicing. Continued immediately.
- Page 64 Safety precautions Wi-Fi Function (For DS-9500) • Communication performance may be affected if the device is used near a • When using the recorder in a medical microwave, cordless telephone set, or institution, follow the instructions of that device that uses the 2.4GHz frequency medical institution.
-
Page 65: Specifications
ø 3.5 mm impedance 2 kΩ 320 mW (8 Ω speaker) 4 MIC jack 4 Maximum headphone output â 150 mV (conforms to EN 50332-2) ø 3.5 mm impedance 8 Ω or more 4 Wireless standards (DS-9500 only) IEEE802.11 b/g/n/a/ac 56 mW or less... - Page 66 External power supply: USB connection, 4 During recording mode AC adapter (A517, F-5AC) (DC5V) (Built-in microphone): 4 External dimensions For DS-9500: 120.8 mm × 49.8 mm × 18.6 mm DSS format (Not including largest projection) 4 Weight DSS Pro QP Approx.
- Page 67 Guide to recording times Specifications and design are subject to change without notice. The following values are for reference only. Battery life is measured by Olympus. It varies DSS format greatly according to the conditions of use. Recording media DSS Pro QP...
- Page 68 For customers in North America ➤ Consult the dealer or an experienced radio/TV technician for help. The DS-9500/DS-9000 is part of the Olympus ➤ Use only Olympus’ supplied cable or Professional Dictation System. Your certified AC adapter when you connect the...
- Page 69 FCC regulations. For customers in USA Declaration of Conformity Model Number: DS-9500/DS-9000 Trade Name: OLYMPUS Responsible Party: OLYMPUS AMERICA INC. Address: 3500 Corporate Parkway, P.O. Box 610, Center Valley, PA 18034-0610, U.S.A. Telephone Number: 484-896-5000 Tested To Comply With FCC Standards...
- Page 70 Republic, Hungary, Poland, Iceland, Bulgaria, Israel, Latvia, Lithuania, Estonia, Russia, South Africa. Some phone service providers do not permit Professional dictation devices from Olympus access to 00800 numbers or require an additional are distributed via specially trained and prefix. Charges may apply here. Please contact educated partners.
- Page 71 Hereby, Olympus Corporation declares that the radio equipment type DS-9500 is in compliance with Directive 2014/53/EU. The full text of the EU declaration of conformity is available at the following internet address: http://www.olympus-europa.com/...
- Page 72 3500 Corporate Parkway, P.O. Box 610, Center Valley, PA 18034-0610, U.S.A. E-mail: Audio@olympus.com http://www.olympusamerica.com OLYMPUS EUROPA SE & CO. KG (Premises) Wendenstrasse 14 – 18, 20097 Hamburg, Germany Tel. +49 40 - 23 77 3-0 (Goods delivery) Modul H, Willi-Bleicher Str. 36, 52353 Düren, Germany (Letters) Postfach 10 49 08, 20034 Hamburg, Germany http://www.olympus-europa.com...