Table of Contents
Advertisement
Advertisement
Table of Contents

Related Manuals for NEFF B57VS24N0B


Summary of Contents for NEFF B57VS24N0B
- Page 1 Built-in oven [en] INSTRUCTION MANUAL B57VS24.0B...
-
Page 3: Table Of Contents
Table of contents [ e n ] I N S T R U C T I O N M A N U A L Intended use ......5 Childproof lock. - Page 4 Test dishes....... . . 55 Produktinfo Additional information on products, accessories, replacement parts and services can be found at www.neff-international.com and in the online shop www.neff-eshop.com...
-
Page 5: Intended Use
Intended use en 8Intended use (Important safety information Read these instructions carefully. Only then I n t e n d e d u s e will you be able to operate your appliance General information safely and correctly. Retain the instruction i n f o r m a t i o n I m p o r t a n t s a f e t y manual and installation instructions for future... -
Page 6: Steam
Important safety information Warning Warning Risk of scalding! Hazard due to magnetism! The accessible parts become hot during Permanent magnets are used in the control ■ operation. Never touch the hot parts. Keep panel or in the control elements. They may children at a safe distance. -
Page 7: Causes Of Damage
Causes of damage en Warning ]Causes of damage Risk of serious damage to health! The appliance will become very hot during the General information cleaning function. The non-stick coating on C a u s e s o f d a m a g e baking trays and tins is destroyed and noxious Caution! Accessories, foil, greaseproof paper or ovenware on... -
Page 8: Steam
Environmental protection Steam 7Environmental protection Caution! Baking tins: Ovenware must be heat and steam ■ Your new appliance is particularly energy-efficient. Here resistant. Silicone baking tins are not suitable for t e c t i o n E n v i r o n m e n t a l p r o you can find tips on how to save even more energy combined operation with steam. -
Page 9: Getting To Know Your Appliance
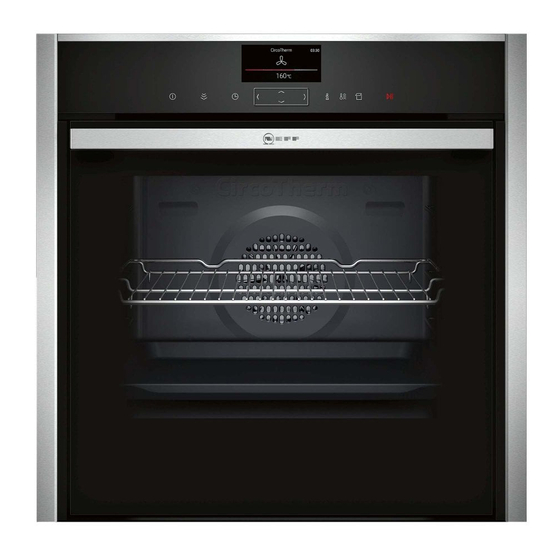
Getting to know your appliance en Note: Depending on the appliance model, individual *Getting to know your details and colours may differ. appliance Control panel In this chapter, we will explain the displays and controls. In the control panel, set the appliance's different y o u r a p p l i a n c e G e t t i n g t o k n o w You will also find out about the various functions of your... -
Page 10: Main Menu
Getting to know your appliance Main menu ShiftControl control Use the ShiftControl control element to navigate Touch the 0 touch button to access the main menu. through the lines on the display and select the settings. Settings that you can change are displayed more Menu brightly. -
Page 11: Cooking Compartment Functions
Getting to know your appliance en Bottom heating 50 - 250 °C For cooking in a bain marie and for the final baking stage. † The heat is emitted from below. Slow cooking 70 - 120 °C For gentle and slow cooking of seared, tender pieces of meat in ovenware without Š... -
Page 12: Accessories
Accessories When inserting the wire rack, ensure that the lug ‚ is _Accessories facing downwards. Your appliance is accompanied by a range of A c c e s s o r i e s accessories. Here, you can find an overview of the accessories included and information on how to use them correctly. -
Page 13: Combining Accessories
Accessories en Optional accessories Fitting the bar Fit the bar at the back (Fig. You can purchase optional accessories from the after- sales service and specialist retailers, or on the Internet. You will find a comprehensive range of products for your appliance in our brochures and on the Internet. -
Page 14: Before Using For The First Time
Before using for the first time Setting the date KBefore using for the first Use the & button to navigate to the bottom line. time Use the ( or ) button to select the current day. Use the & button to navigate to the next line. Use the ( or ) button to select the current month. -
Page 15: Operating The Appliance
Operating the appliance en Use the ( or ) button to select the type of heating. 1Operating the appliance Use the & button to navigate to the next line. Use the ( or ) button to select the temperature. You have already learnt about the controls and how p l i a n c e O p e r a t i n g t h e a p they work. -
Page 16: Changing Or Cancelling The Appliance Operation
Operating the appliance Changing or cancelling the appliance Activating the "PowerBoost" function operation Set CircoTherm hot air ‚ or the bread baking setting … and the temperature. Changing the appliance operation Note: Set a temperature above 100 °C to allow the Use the # button to stop the operation. -
Page 17: Steam
Steam en Cancelling steam addition `Steam Touch the Ž touch button to cancel the addition of steam early. With some heating modes, you can prepare food with S t e a m steam assistance. In addition, the Dough proving and Note: The operation continues without adding steam. -
Page 18: Filling The Water Tank
Steam Touch the ” touch button. Starting The control panel is automatically pushed forwards. Touch the # touch button. Pull the control panel forwards with both hands and Refill the water tank. then push it upwards until it locks into place (Fig. Use the ( or ) button to select "Reheat ¨". -
Page 19: After Every Steam Operation
Steam en After every steam operation Starting drying During drying, the cooking compartment is heated up Warning so that the moisture in the cooking compartment Risk of scalding! evaporates. Then open the appliance door so that the When you open the appliance door, hot steam can steam escapes. -
Page 20: Time-Setting Options
Time-setting options Setting the cooking time OTime-setting options Once the set cooking time has elapsed, the appliance switches off automatically. The function can only be Your appliance has different time-setting options. used in combination with a type of heating. i o n s T i m e - s e t t i n g o p t Time-setting option Touch the # touch button. -
Page 21: Childproof Lock
Childproof lock en Deactivating AChildproof lock Press and hold the 0 touch button until "Childproof lock deactivated" appears on the display. Your appliance is equipped with a childproof lock so Touch the ± touch button. C h i l d p r o o f l o c k that children cannot switch it on accidentally or change Touch the 0 touch button. -
Page 22: Basic Settings
Basic settings QBasic settings Action after switching on Main menu Heating types There are various settings available to you in order to Baking and roasting assistant B a s i c s e t t i n g s help use your appliance effectively and simply. If Steam programmes necessary, you can change these settings in Night-time dimming... -
Page 23: Baking And Roasting Assistant
Baking and roasting assistant en Continue cooking nBaking and roasting Use the & button to select "Continue cooking". assistant If necessary, use the ( or ) button to change the recommended setting. Touch the # touch button to start "Continue The baking and roasting assistant helps you to prepare cooking". -
Page 24: Programmes
Programmes Selecting and setting the programme PProgrammes You will be guided through the entire setting process for your chosen food. You can prepare food very easily using the various P r o g r a m m e s programmes. You select a programme and enter the Touch the # touch button to switch on the weight of your food. -
Page 25: Sabbath Mode
Sabbath mode en FSabbath mode DCleaning agent You can set a time of up to 74 hours using Sabbath With good care and cleaning, your appliance will retain S a b b a t h m o d e C l e a n i n g a g e n t mode. -
Page 26: Keeping The Appliance Clean
Cleaning agent Notes Door panels Hot soapy water: Slight differences in colour on the front of the ■ Clean with a dish cloth and then dry with a soft appliance are caused by the use of different cloth. materials, such as glass, plastic and metal. Do not use a glass scraper or a stainless steel Shadows on the door panels, which look like ■... -
Page 27: Cleaning Function
Cleaning function en Note: When using the cleaning function, you can clean .Cleaning function the enamel accessory provided at the same time. You cannot clean any of the wire racks when using the cleaning function. The wire racks are not suitable for Your appliance is equipped with a self-cleaning C l e a n i n g f u n c t i o cleaning using the cleaning function;... -
Page 28: Easyclean
Cleaning function Once the cleaning function has ended Final cleaning Once the cooking compartment has cooled down, wipe Open the appliance door and remove the remaining off the ash that has been left behind in the cooking water with an absorbent sponge cloth. compartment, in the accessories on the racks and Clean the smooth surfaces in the cooking around the appliance door with a damp cloth. -
Page 29: Descaling
Cleaning function en Descaling Mix 500 ml water with 150 ml liquid descaler to make a descaling solution. The appliance must be descaled regularly in order for it Touch the # touch button. to continue operating correctly. Remove the water tank and fill with descaling solution. -
Page 30: Rails
Rails qAppliance door pRails With good care and cleaning, your appliance will retain With good care and cleaning, your appliance will retain R a i l s A p p l i a n c e d o o r its appearance and remain fully functional for a long its appearance and remain fully functional for a long time to come. - Page 31 Appliance door en Open the appliance door a little (Fig. Turn the door handle upwards slightly ‚ so that the Using a coin, fully turn both the left- and right-hand appliance door slides downwards fully ƒ (Fig. locks on the inside of the appliance at the bottom Use a coin to release both locks on the appliance (Fig.
-
Page 32: Removing And Installing The Door Panels
Appliance door Removing and installing the door panels If required, remove the spacers (Fig. ) and seals & (Fig. ) for cleaning. For cleaning, you can remove the glass panels from the appliance door. To do this, the appliance door must be removed beforehand (see section "Removing and fitting the appliance door"). - Page 33 Appliance door en Insert the intermediate panel with the seals and spacers. The arrow on the intermediate panel must line up with the arrow on the frame (Fig. Insert the second intermediate panel without the seals and spacers and push it in the direction of the arrow until it is fitted in the frame.
-
Page 34: Trouble Shooting
Trouble shooting 3Trouble shooting Warning Risk of electric shock! Incorrect repairs are dangerous. Repairs may only be If a fault occurs, there is often a simple explanation. carried out and damaged power cables replaced by T r o u b l e s h o o t i n g Before calling the after-sales service, please refer to the one of our trained after-sales technicians. -
Page 35: Maximum Operating Time Exceeded
Trouble shooting en The appliance cannot be switched on; The automatic childproof lock is activated Press and hold the 0 touch button until the 1 sym- the 1 symbol is shown on the dis- bol goes out play The appliance cannot be operated The childproof lock is activated Press and hold the 0 touch button until the 1 sym- when it is switched on;... -
Page 36: Customer Service
Customer service 4Customer service Our after-sales service is there for you if your appliance C u s t o m e r s e r v i c e needs to be repaired. We will always find an appropriate solution, also in order to avoid after-sales personnel having to make unnecessary visits. -
Page 37: Tested For You In Our Cooking Studio
Tested for you in our cooking studio en Baking on one level JTested for you in our When baking on one level, use the following shelf cooking studio positions: Tall baked items: Level 2 ■ Flat baked items: Level 3 ■... - Page 38 Tested for you in our cooking studio If you wish to follow one of your own recipes when Recommended setting values baking, you should use a similar baked item in the table You can find the ideal heating type for various pastries as a reference.
- Page 39 Tested for you in our cooking studio en Dish Accessories/cookware Shelf po- Type of Tempera- Steam in- Cooking sition heating ture in °C tensity time in mins. Jam tarts 12-cup-tin 180-200 15-25 ƒ Meringue baking tray 80-90* 120-150 ‚ Pavlova baking tray 90-100* 120-180...
-
Page 40: Roasting And Braising
Tested for you in our cooking studio The cake is too dark on top, and too Bake the cake one level lower in the oven the next time. Select a lower temperature and extend the baking light underneath. time. Cakes baked in a tray or tin are too Place the baking tray in the middle of the accessories, not directly against the back wall. - Page 41 Tested for you in our cooking studio en this reason. Try using the lower values at first. You can Braising in covered cookware When preparing food with covered cookware, the increase the temperature next time if necessary. cooking compartment remains considerably cleaner. The setting values are based on the assumption that Ensure that the lid fits well and closes properly.
- Page 42 Tested for you in our cooking studio Dish Accessories/cookware Shelf po- Type of Tempera- Steam in- Cooking sition heating ture in °C tensity time in mins. Pork Roast joint wire rack 180-190* 35+35 ‚ Roast joint, 1,5 kg wire rack ‚...
-
Page 43: Grilling
Tested for you in our cooking studio en Tips on roasting and braising The cooking compartment becomes Prepare your food in an enclosed roasting dish with higher temperature or use the grill tray. You will achieve very dirty. the best roasting results if you use the grill tray. The grill tray can be bought later as a special accessory. The roast is too dark and the crack- Check the shelf position and temperature. - Page 44 Tested for you in our cooking studio Covered cookware Notes When cooking with covered cookware, the cooking The grill element switches itself on and off ■ compartment remains considerably cleaner. Ensure that continuously; this is normal. The set temperature the lid fits well and closes properly. Place the cookware determines how frequently this occurs.
- Page 45 Tested for you in our cooking studio en Types of heating used: The levels of steam intensity are indicated as numbers ‡ Circo-roasting in the table: ■ ˆ Grill, large area ■ 1 = Low ■ 2 = Medium ■ 3 = High ■...
-
Page 46: Convenience Products
Tested for you in our cooking studio Dish Accessories Shelf po- Type of Tempera- Steam in- Cooking time sition heating ture in °C tensity in mins. Poultry Chicken drumstick, 150 g each wire rack 210-230 20-30 ‡ Chicken drumstick, 150 g each wire rack 210-220 30-40... - Page 47 Tested for you in our cooking studio en ranges are indicated for this reason. Try using the lower Baking on one level When baking on one level, use the following shelf values at first. A lower temperature results in more even positions: browning.
-
Page 48: Yogurt
Tested for you in our cooking studio Dish Accessories/cookware Shelf po- Type of Tempera- Steam in- Cooking sition heating ture in °C tensity time in mins. Fried food, frozen Fish fingers* universal pan 200-220 20-30 ƒ Chicken nuggets universal pan 190-210 20-25 „... -
Page 49: Acrylamide In Foodstuffs
Tested for you in our cooking studio en Note: Baking times can not be reduced by using higher Recommended setting values temperatures. Cakes or baked items would only be Here, you can find specifications for the various dishes cooked on the outside, but would not be fully cooked in with CircoTherm Eco and Top/bottom heating Eco. -
Page 50: Slow Cook
Tested for you in our cooking studio Slow cook Cookware Use shallow cookware, e.g. a glass/porcelain serving Slow cooking is a technique for cooking food over a dish. Place the cookware into the cooking compartment long period at low temperatures. For this reason, it is to preheat it. -
Page 51: Drying
Tested for you in our cooking studio en Dish Cookware Shelf posi- Type of Searing time Tempera- Cooking tion heating in mins. ture in °C time in mins. Lamb Saddles of lamb, boneless, 200 g each Cookware, uncovered 120-180 Š Leg of lamb, boned, medium, 1 kg, tied Cookware, uncovered 150-210 Š... -
Page 52: Allowing The Dough To Prove At Dough Proving Setting
Tested for you in our cooking studio Preparing fruit and vegetables Ending the preserving process Only use fruit and vegetables that are in good condition. Fruit Wash them thoroughly. After a short while, small bubbles will form at short intervals. Switch off the appliance once all preserving Peel, core and chop fruit and vegetables appropriate to jars are bubbling. -
Page 53: Defrosting
Tested for you in our cooking studio en Type of heating used: Recommended setting values Œ Dough proving The temperature and proving time are dependent on ■ the type and quantity of the ingredients. The values in the table are therefore only meant to be average values. Dish Accessories/cookware Shelf posi-... -
Page 54: Reheating
Tested for you in our cooking studio Type of heating used: “ Defrost setting ■ Dish Accessories Shelf posi- Type of Tempera- Cooking tion heating ture in °C time in mins. Bread, bread rolls Bread & bread rolls general Baking tray 40-70 “... -
Page 55: Keeping Warm
Tested for you in our cooking studio en Keeping warm Universal pan: Level 3 ■ Baking tray: Level 1 ■ You can keep cooked dishes warm using the "Keeping warm" heating type. This will avoid condensation Double-crusted apple pie developing, and means you will not have to wipe out the Double- crusted apple pie on one level: place dark- cooking compartment. - Page 56 Tested for you in our cooking studio Type of heating used: Grilling ˆ Grill, large area Also slide in the universal pan. The liquid will be caught ■ and the cooking compartment stays cleaner. Dish Accessories Shelf posi- Type of Tempera- Cooking tion...
- Page 60 Constructa Neff Vertriebs-GmbH Carl-Wery-Straße 34 D-81739 München *9001037124* Register your product online www.neff-international.com 9001037124 941209...