
Related Manuals for E-FLITE AT-6 25e Texan ARF


Summary of Contents for E-FLITE AT-6 25e Texan ARF
-
Page 1: Specifications
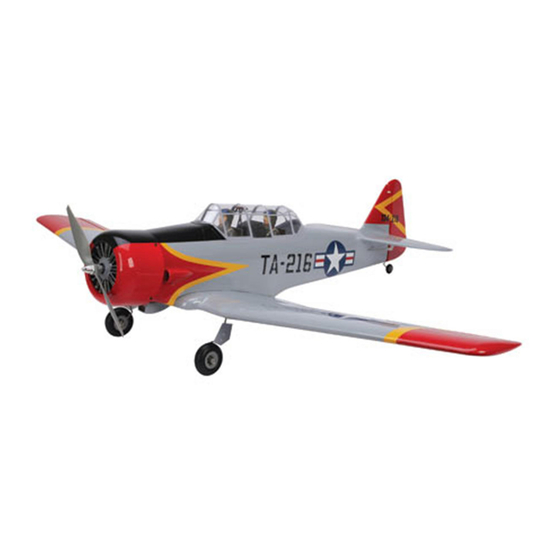
AT-6 25e Texan ARF Assembly Manual Specifications Wingspan: 54 in (1370mm) Length: 39 in (990mm) Wing Area: 455 sq in (29.35 sq dm) Weight w/ Battery: 3.9–4.5 lb (1.8–2.0 kg) Weight w/o Battery: 3–3.25 oz (1.4–1.5 kg) -
Page 2: Table Of Contents
Table of Contents Introduction Specifications ..............1 E-flite’s AT-6 25e ARF is a superb scale replica of the legendary Introduction ................. 2 “Texan” trainer used by the U.S.—and its allies—from WWII Using the Manual ..............2 through the late 1960s. It features a level of scale detail that Contents of Kit/Parts Layout .......... -
Page 3: Contents Of Kit/Parts Layout
AR7000 DSM2 7CH Rx (for DX7 only) JSP20030 MC35 Micro Servo (7) JSP98100 3-inch Servo Extension (3) JSP98110 6-inch Servo Extension (5) JSP98020 Y-Harness (3) JSP20080 RT88 retract Servo Spektrum is used with permission of Bachmann Industries, Inc. E-flite AT-6 Texan ARF Assembly Manual... -
Page 4: Important Information About Motor Selection
Drill bit: 1/16-inch (1.5mm), 5/64-inch (2mm), 1/8-inch (3mm) Felt-tipped pen File Flat blade screwdriver Hobby knife (#11 blade) Low-tack tape Medium CA Pencil Phillips screwdriver: #1, #2 Pin drill Pliers Rotary tool w/sanding drum Ruler Sandpaper Side cutters Thin CA Threadlock E-flite AT-6 Texan ARF Assembly Manual... -
Page 5: Notes Regarding Servos And Esc
Horizon before shipment. Horizon Hobby, Inc., (Horizon) warranties that the Products purchased (the “Product”) will be free from defects in materials and workmanship at the date of purchase by the Purchaser. E-flite AT-6 Texan ARF Assembly Manual... -
Page 6: Damage Limits
Provided warranty conditions have been met, your Product will be repaired or replaced free of charge. Repair or replacement decisions are at the sole discretion of Horizon Hobby. E-flite AT-6 Texan ARF Assembly Manual... -
Page 7: Safety, Precautions, And Warnings
• Moisture causes damage to electronics. Avoid water exposure Champaign, Illinois 61822 to all equipment not specifically designed and protected for this purpose. Please call 877-504-0233 with any questions or concerns regarding this product or warranty. E-flite AT-6 Texan ARF Assembly Manual... -
Page 8: Stabilizer Installation
Threadlock Hex wrench (included with kit) 1. Slide the stabilizer tube all the way into the stabilizer. 3. Secure the tube using a 3mm x 10mm self-tapping screw and #1 Phillips screwdriver. E-flite AT-6 Texan ARF Assembly Manual... - Page 9 Slide the remaining stabilizer screwdriver. onto the tube. With both stabilizer halves tight against the fuselage, use a drill and 5/64-inch (2mm) drill bit to drill through the hole in the stabilizer and into the stabilizer tube. E-flite AT-6 Texan ARF Assembly Manual...
- Page 10 20 -inch (530mm) pushrod wires. 7. Slide the pushrod wire into the opening in the fuselage that aligns with the stabilizer control horn. Snap the clevis onto the elevator control horn. E-flite AT-6 Texan ARF Assembly Manual...
- Page 11 Remember to use threadlock the pushrod wire into the opening in the fuselage that on the setscrew to prevent it from vibrating loose. aligns with the stabilizer control horn. Snap the clevis onto the elevator control horn. E-flite AT-6 Texan ARF Assembly Manual...
-
Page 12: Motor Installation
AT-6's. It is better and easier to paint it at this time before it is installed in the cowling. Please refer to our Scale Accessories section beginning on Page 43 for the correct color choices for the motor. E-flite AT-6 Texan ARF Assembly Manual... - Page 13 Align the hole with the blind cowling and over the motor. nut and use low-tack tape to hold the card stock to the fuselage. E-flite AT-6 Texan ARF Assembly Manual...
- Page 14 4-40 socket head screws onto the outside of the cowling. flight characteristics. Note: If it is necessary to enlarge the hole in the propeller, make sure to check the balance of the propeller afterwards. E-flite AT-6 Texan ARF Assembly Manual...
- Page 15 11 Slide the cowling back onto the fuselage and secure it using four 4-40 x 1/4-inch socket head screws and a 3/32-inch ball driver. Make sure to use threadlock on the screws to prevent them from vibrating loose. E-flite AT-6 Texan ARF Assembly Manual...
-
Page 16: Main Radio Installation
0 and no mixing functions are turned on. Center the trim levers and stick at this time as well. Plug the servos into the radio system and make sure all servos operate and are centered as well. E-flite AT-6 Texan ARF Assembly Manual... - Page 17 5. Apply a few drops of thin CA to each of the 7. Repeat Steps 3 through 6 to install the remaining holes drilled in the previous step to harden the elevator servo and rudder servo. surrounding wood. E-flite AT-6 Texan ARF Assembly Manual...
- Page 18 90-degree bend in the pushrod at the mark made in the previous step using pliers. You will also have to remove the clevis at this time as well to reinstall the pushrod. E-flite AT-6 Texan ARF Assembly Manual...
- Page 19 14. Repeat Steps 9 through 13 to connect the two servo horn from the topside of the horn. Use a pushrod elevator pushrods to the elevator servos. connector to secure the pushrod to the horn. E-flite AT-6 Texan ARF Assembly Manual...
-
Page 20: Aileron Servo Installation
Note: You will find the servo mounting blocks in your kit to vary in length from the measurements listed above. They have been cut to the correct length from the manufacturer. E-flite AT-6 Texan ARF Assembly Manual... - Page 21 8. Use a #1 Phillips screwdriver to install the screws 6. Use a drill and 1/16-inch (1.5mm) drill bit to drill the provided with the servos to attach the servo to the holes for the servo mounting screws. servo mounting blocks. E-flite AT-6 Texan ARF Assembly Manual...
- Page 22 10. Slide a clevis retainer onto a nylon clevis. Thread the clevis onto one of the 2 -inch (64mm) pushrod wires. E-flite AT-6 Texan ARF Assembly Manual...
- Page 23 Use side cutters to remove any panel. excess wire. 14. Repeat Steps 3 through 14 for the remaining aileron servo installation. E-flite AT-6 Texan ARF Assembly Manual...
-
Page 24: Flap Servo Installation
Note: The arms are shown in the center position (which will be the mid flap position) if you are using three-position flaps. Make sure when using proportional flaps that the control has been centered before installing the servo horns. E-flite AT-6 Texan ARF Assembly Manual... - Page 25 Use a kit to vary in length from the measurements listed pencil to mark the cover for the servo mounting blocks. above. They have been cut to the correct length from the manufacturer. E-flite AT-6 Texan ARF Assembly Manual...
- Page 26 -inch (73mm) from the pin in the clevis and mark the pushrod wire. Make a 90-degree bend at the mark. This will give you a good starting length for the installation of the flap linkage. E-flite AT-6 Texan ARF Assembly Manual...
- Page 27 Repeat the process for "Down Flap" and check that the full throw is adjusted as noted in the "Control Throw" section of this manual. 13. Repeat Steps 3 through 12 for the remaining aileron servo installation. E-flite AT-6 Texan ARF Assembly Manual...
-
Page 28: Fixed Landing Gear Installation
Use a pencil to transfer the locations for the four mounting screws through the gear and onto the rails. 3. Apply a few drops of thin CA to each of the holes to harden the surrounding wood. E-flite AT-6 Texan ARF Assembly Manual... - Page 29 5. Use a file to create a flat on the bottom of the landing gear wire. This provides a place to tighten the screws for the wheel collars, making them more secure on the wire. E-flite AT-6 Texan ARF Assembly Manual...
-
Page 30: Retractable Landing Gear Installation
Mark the location of the servo mounting screws using a pencil or felt-tipped pen. 8. Repeat Steps 1 through 7 for the remaining landing gear and wheel. E-flite AT-6 Texan ARF Assembly Manual... - Page 31 3. Apply a few drops of thin CA to each hole to harden the opening for the wheel. Use a covering iron to seal the surrounding wood. the covering tight against the wing before removing the covering. E-flite AT-6 Texan ARF Assembly Manual...
- Page 32 8. Use a drill and 5/64-inch (2mm) drill bit to drill the to seal the covering into the opening for a super clean four holes for the mounting screws. Use care not to retract installation. accidentally drill through the top of the wing. E-flite AT-6 Texan ARF Assembly Manual...
- Page 33 10. Use a #1 Phillips screwdriver and the four self- tapping screws included with the retracts to secure the gear in the wing center section. 13. Repeat Steps 7 through 12 for the remaining retract. E-flite AT-6 Texan ARF Assembly Manual...
- Page 34 The position of the linkages will be fine- tuned in the following step. Secure the wires using two 1/16-inch wheel collars to the top of the servo pushrods to work as keepers. E-flite AT-6 Texan ARF Assembly Manual...
- Page 35 #1 Phillips screwdriver to secure the wheel collar, with the edge of the collar aligned with the end of the landing gear wire. Use threadlock on the screw to prevent it from vibrating loose. E-flite AT-6 Texan ARF Assembly Manual...
- Page 36 #1 Phillips screwdriver. the retract mechanism until the wheel is centered in the Use threadlock prevent the screw from vibrating loose. wheel well. 21. Repeat Steps 17 through 20 to install the remaining wheel. E-flite AT-6 Texan ARF Assembly Manual...
-
Page 37: Power System Installation
Secure the speed control inside the fuselage using hook and loop tape. Note: The photo shows the older E-flite 40-amp speed control unit. All of our prototypes used the new E-flite 60 and 40-amp Switching BEC ESC's. E-flite AT-6 Texan ARF Assembly Manual... - Page 38 Note: Never check the motor rotation on the bench with the propeller installed. The plane could move and cause serious injury. Always check the motor without the propeller to avoid injury. E-flite AT-6 Texan ARF Assembly Manual...
-
Page 39: Wing Installation
1. Secure a Y-harness to both the flap and aileron extensions in one wing panel. 3. Tie the string from the center section to the ends of the Y-harness that will plug into the receiver. E-flite AT-6 Texan ARF Assembly Manual... - Page 40 Use threadlock on the screw to prevent it from vibrating loose. E-flite AT-6 Texan ARF Assembly Manual...
- Page 41 10. Secure the leads from the remaining wing panel to the Y-harness. Repeat Steps 2, 5, 6 and 7 to secure the wing panel. E-flite AT-6 Texan ARF Assembly Manual...
-
Page 42: Basic Cockpit And Accessories
1. Use medium CA to glue the pilot figure in the fuselage as shown. 12. Secure the wing to the fuselage using the two 1/4-20 x 2-inch nylon bolts and flat blade screwdriver. E-flite AT-6 Texan ARF Assembly Manual... - Page 43 A felt-tipped pen can be used to color in the scoop to give that open look. Trim the radiator scoop as necessary for a perfect fit and glue it only to the wing using medium CA. E-flite AT-6 Texan ARF Assembly Manual...
-
Page 44: Optional Scale Cockpit Installation
Note: The cockpit kit comes prepainted from our vendor. Our first samples were not painted and were painted in the following colors for those who would like to duplicate the model as shown on the box. E-flite AT-6 Texan ARF Assembly Manual... - Page 45 Note: You may want to tape off the fuselage around the cockpit opening for the next few steps to help protect the fuselage during the floor installation. 2. Glue the floor assembly to the fuselage using medium CA. E-flite AT-6 Texan ARF Assembly Manual...
- Page 46 5. Glue the aft instrument hood in place using Medium CA. You will want to place the aft instrument decal from your kit on the panel at this time. Place the front instrument panel decal in place at this time. E-flite AT-6 Texan ARF Assembly Manual...
- Page 47 Use low-tack tape to hold the canopy in position until the glue fully cures. Note that the front of the canopy has a black strip that aligns with the anti- glare panel on the front of the fuselage. E-flite AT-6 Texan ARF Assembly Manual...
-
Page 48: Control Throws
These are general guidelines measured from our own flight tests. You can experiment with higher rates to match your preferred 3. Be sure that your transmitter batteries are fully charged, style of flying. per the instructions included with your radio. E-flite AT-6 Texan ARF Assembly Manual... -
Page 49: Center Of Gravity
Replace any items that would be considered questionable. Failure of any of these components in flight would mean the loss of your aircraft. E-flite AT-6 Texan ARF Assembly Manual... -
Page 50: Flying Your At-6 Texan Arf
After about 100 feet and while at full power your best approach. apply up elevator in a smooth motion until the model lifts from We hope you enjoy many happy flights with your new E-flite the ground. Once airborne and climbing out, retract the landing AT-6 Texan. -
Page 51: 2007 Official Ama National Model Aircraft Safety Code
Only personnel involved with flying the aircraft are allowed at or in front of the flight line. Intentional flying behind the flight line is prohibited. E-flite AT-6 Texan ARF Assembly Manual... - Page 52 © 2007 Horizon Hobby, Inc. 4105 Fieldstone Road Champaign, Illinois 61822 (877) 504-0233 horizonhobby.com E-fliteRC.com 11067...