Table of Contents
Advertisement
Available languages
Available languages
I
GB
F
NL
ITALIANO
MANUALE
TECHNICAL
MANUEL
TECHNISCHE
FT SB 07
TECNICO
MANUAL
TECHNIQUE
HANDLEIDING
MT SB2 01
Sistema Videocitofonico Digitale a 2 fili
Digital video door entry system with 2 wires
Système visiophonique numérique à 2 fils
Tweedraads digitaal video-intercom systeem
02/2004
GROUP S.P .A.
Advertisement
Table of Contents

Related Manuals for Comelit MT SB2 01


Summary of Contents for Comelit MT SB2 01
- Page 1 MANUEL TECHNISCHE FT SB 07 TECNICO MANUAL TECHNIQUE HANDLEIDING MT SB2 01 Sistema Videocitofonico Digitale a 2 fili Digital video door entry system with 2 wires Système visiophonique numérique à 2 fils Tweedraads digitaal video-intercom systeem 02/2004 GROUP S.P .A.
- Page 2 MT SB2 01 Sistema Simplebus2 SOMMARIO REGOLE DI INSTALLAZIONE pag. 15 GENERALITÀ pag. 2 • • CONFIGURAZIONE DEI DISPOSITIVI pag. 18 AVVERTENZE pag. 2 • • NOTE DI FUNZIONAMENTO pag. 21 POSTI INTERNI VIDEO pag. 2 • • SCHEMI DI COLLEGAMENTO pag.
- Page 3 Tutti gli apparecchi costituenti l’impianto devono essere destinati esclusivamente all’uso per cui sono stati concepiti. COMELIT GROUP S.p.A. declina ogni responsabilità per un utilizzo improprio degli apparecchi, per modifiche effettuate da altri a qualunque titolo e scopo, per l’uso di accessori e materiali non originali.
- Page 4 MT SB2 01 Art. 4700W/I Art. 4701W/A Monitor serie Videocom da semi-incasso (tubo-lungo) Monitor serie Videocom da parete Caratteristiche tecniche: Caratteristiche tecniche: Monitor della serie Videocom di dimensioni 193x223x65, da Monitor della serie Videocom di dimensioni 193x223x65, da parete, incasso (68mm di profondità a muro), colore bianco RAL9010 colore bianco RAL9010 con schermo B/W da 4,5”...
- Page 5 7. CV2, CV1, CV7 cavallotti alimentazione monitor aggiuntivo tramite Art. 1212/B (vedi variante SB2/A3 pag. 101). 8. CV3, CV4 cavallotti per liberare pulsante 1. 9. CV6 cavallotto selezione tipo di funzionamento (Simplebus2 o Simplebus1). 10. JP2 jumper selezione tipo di funzionamento (Simplebus2 o Simplebus1). MT SB2 01...
- Page 6 MT SB2 01 Installazione monitor Art. 4700W e Art. 4700W/I a parete Installazione base da tavolo Art. 4712W per monitor Art. 4701W/A e Art. 4700W Per monitor Art. 4700W 4700W/I Art. 4514 solo per monitor Art. 4700W Art. 4517 MT SB2 01...
- Page 7 AB pulsante normalmente dedicato a servizi vari. Per avere contatto pulito NO tagliare i cavallotti CV1 e CV2. 4. Dip switches per impostazione codice utente (vedi pag. 19). 5. Trimmer regolazione volume microfono. 6. Trimmer regolazione volume suoneria. MT SB2 01...
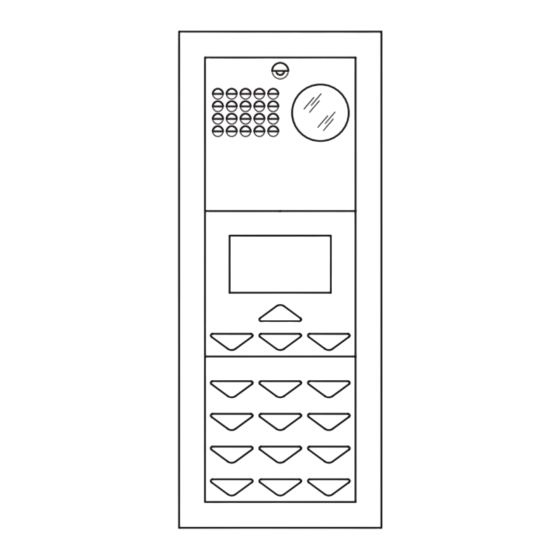
- Page 8 MT SB2 01 POSTAZIONI ESTERNE Art. 2410W In impianti Simplebus2 possono essere utilizzate postazioni esterne della Serie Powercom, Vandalcom e Logicom. Per Vandalcom e Logicom rifarsi al foglio tecnico FT/SB/01 e al Catalogo 50. Portiere audio Serie Powercom Citofono Citofono come l’Art. 2408W/A con in più interruttore e Led supplementare per servizio Privacy o Dottore (apertura automatica serratura a seguito di chiamata).
- Page 9 Disponibili a 4 e 6 pulsanti. Dimensioni di occupato. Il cartoncino trasparente è fornito neutro per inserire le 112x89,5x40 mm. Per programmazione pulsanti vedi pag. 20. scritte in tutte le lingue. Dimensioni: 112x89,5x38 mm. MT SB2 01...
- Page 10 MT SB2 01 Istruzioni per installazione posto esterno audio e video Altezza scatola incasso Come accostare più scatole Fissaggio del telaio su scatola da incasso Fissaggio del telaio su custodia da parete Collegamento cavetto a 4 poli Cablaggio morsettiera inserita o estratta...
- Page 11 GROUP S.P.A. Inserimento moduli Montaggio, collegamenti e regolazioni gruppo audio-video Posizione alternativa del microfono Montaggio /Smontaggio frontalini Fissaggio cornice Montaggio/Smontaggio cartellini 360˚ open close MT SB2 01...
- Page 12 MT SB2 01 Istruzioni per montaggio moduli informativi Art. 3326, Art. 3344 e Art. 3346 Collegamento cavetto a 4 poli Inserimento modulo Estrazione porta cartellino Inserimento/estrazione cartellino MT SB2 01...
- Page 13 Vedi pag. 20 per configurazione Art. 1216 a seconda del cavo utilizzato. Morsetti connessione impianto: Lin Lin: ingresso linea montante. Lout Lout: uscita linea montante. LM LM: linea montante derivata verso il monitor/citofono. + +: morsetti connessione alimentazione per compatibilità impianti Simplebus1. MT SB2 01...
- Page 14 MT SB2 01 Art. 1195 Trasformatore Trasformatore 60VA (interm). Primario 230VAC Secondario: OUT1: 0-12V 1,5A OUT2: 0-12V 1,5A Il trasformatore è equipaggiato con fusibile interno di protezione. Dimensioni: 87x105x65 (5 moduli DIN). L’Art. 4896 deve essere alimentato tramite trasformatore Art.1246.
- Page 15 L1 L1: uscita derivazione1 di montante. dell’Art. 1254. L2 L2: uscita derivazione2 di montante. L3 L3: uscita derivazione3 di montante (tagliare la resistenza prima di inserire i cavi). L4 L4: uscita derivazione4 di montante (tagliare la resistenza prima di inserire i cavi). MT SB2 01...
- Page 16 MT SB2 01 REGOLE DI INSTALLAZIONE Regole d’installazione per impianti videocitofonici Il numero MAX di utenti collegabili ad un singolo Miscelatore- Evitare di porre i fili di montante in prossimità di cavi di alimentatore Art. 4896 è di 100 indipendentemente che siano alimentazione (220/380V).
- Page 17 Art. 4896 Art. 4896. amplifcatore Art. 1214/2 Art. 4833/A con un e posto interno. Art. 4834/2 inserito. Cavo Comelit Art. 4577 sez. 1 mm (Ø 1,2 mm) 200 m 200 m 200 m 200 m 150 m 60 m Cavo bifilare sez.
- Page 18 MT SB2 01 Figure per le distanze MT SB2 01...
- Page 19 MIN e massimo MAX di codici che possono • Per l’impostazione dei valori desiderati si faccia riferimento essere riconosciuti dallo scambio. alla tabella di pag. 19. • Scambi distinti devono gestire intervalli di codici non sovrapposti. MT SB2 01...
- Page 20 MT SB2 01 Tabella di programmazione dei Dip switches Cod.ut. Dip switches su ON Nome utente Cod.ut. Dip switches su ON Nome utente Cod.ut. Dip switches su ON Nome utente Cod.ut. Dip switches su ON Nome utente 1,3,4,5,6 1,4,5,6,7 1,3,5,6,8...
- Page 21 è necessario mettere tutti i Dip switches del selettore su ON. Tabella Impostazioni dell’Art. 1216 in funzione del tipo di cavo di connessione utilizzato Tipo di cavo Impostazione Art. 1216 Cavo Comelit Art. 4577 sez. 1 mm (Ø 1,2 mm) Cavo bifilare sez. 1,5 mm (Ø 1,4 mm) Cavo intrecciato e schermato sez.
- Page 22 MT SB2 01 NOTE DI FUNZIONAMENTO • Il visitatore premendo il tasto di chiamata aziona la suoneria • Per variare la luminosità del monitor agire sulla rotella di del posto interno. regolazione posta nel lato inferiore. • Al posto esterno si ha un tono di avvenuta chiamata; se in impianti •...
-
Page 24: Table Of Contents
MT SB2 01 Simplebus2 System SUMMARY INSTALLATION RULES page 37 GENERAL INFORMATION page 24 • • CONFIGURATION OF THE DEVICES page 40 WARNINGS page 24 • • NOTES ON OPERATION page 43 INTERNAL VIDEO UNITS page 24 • • WIRING DIAGRAMS... -
Page 25: General Information
All the pieces of apparatus making up the system must only be used for the purpose they were designed for. COMELIT GROUP S.p.A. declines any responsibility for incorrect use of the apparatus, for modifications made by third parties for any reason and purpose, for the use of accessories and materials which are not originals. - Page 26 MT SB2 01 Art. 4700W/I Art. 4701W/A Videocom series semi flush-mounted Monitor (long tube) Videocom series surface-mounted Monitor Technical characteristics: Technical characteristics: Videocom series monitor with dimensions: 193x223x65, flush-mounted Videocom series monitor with dimensions: 193x223x65, (68mm of depth on wall), white RAL9010 surface-mounted, white RAL9010, with 4.5”...
- Page 27 Art. 1212/B (see variant SB2/A3 on page 101). 8. CV3, CV4 bridges to free push-button 1. 9. CV6 bridge for selection of type of operation (Simplebus2 or Simplebus1). 10. JP2 jumper selection of type of operation (Simplebus2 or Simplebus1). MT SB2 01...
- Page 28 MT SB2 01 Installation of surface-mounted monitor Installation of desk convertion kit Art. 4712W Art. 4700W and Art. 4700W/I for monitor Art. 4701W/A and Art. 4700W For monitor Per monitor Art. Art. 4700W 4700W 4700W/I 4700W/I Art. 4514 solo per monitor only for monitor Art.
-
Page 29: Internal Telephone Handsets
AB push-button normally dedicated to various services. To have a clean NO contact, cut bridges CV1 and CV2. 4. Dip switches for setting user code (see page 40). 5. Microphone volume adjustment trimmer. 6. Call tone volume adjustment trimmer. MT SB2 01... -
Page 30: External Units
MT SB2 01 EXTERNAL UNITS Art. 2410W In Simplebus2 systems, external units of the Powercom, Vandalcom and Logicom Series can be used. For Vandalcom and Logicom, refer to technical sheet FT/SB/01 and to Catalogue 50. Powercom Series speaker unit Telephone Telephone like Art. - Page 31 Available with 4 and engaged state. The transparent label is provided blanck to insert 6 push-buttons. Dimensions: 112x89.5x40 mm. For push-button the correct wording. Dimensions: 112x89.5x38 mm. programming, see page 42. MT SB2 01...
- Page 32 MT SB2 01 Instructions for installing external audio and video unit Height of flush-mounted box How to place several boxes together Fixing the frame onto the flush-mounting box Fixing the frame onto the surface-mounted housing Connection of 4-pole cable Cabling terminal board inserted or withdrawn...
- Page 33 GROUP S.P.A. Insertion of modules Audio-video Group Assembly, connections and adjustments Alternative position of the microphone Assembly/Dismantling faces Fixing the cornice Assembly /Dismantling labels 360˚ open close MT SB2 01...
- Page 34 MT SB2 01 Instructions for assembly of information modules Art. 3326, Art. 3344 and Art. 3346 Connection of 4-pole cable Insertion of module Withdrawal of label holder Insertion/withdrawal of label MT SB2 01...
-
Page 35: Power Supplies And Accessories
See page 42 for configuration of Art. 1216 according to the cable used. Terminals for system connection: Lin Lin: riser line input. Lout Lout: riser line output. LM LM: riser line branched towards the monitor/telephone. + +: power supply connection terminals for compatibility with Simplebus1 systems. MT SB2 01... - Page 36 MT SB2 01 Art. 1195 Transformer Transformer 60VA (interm). Primary 230VAC Secondary: OUT1: 0-12V 1.5A OUT2: 0-12V 1.5A The transformer is equipped with internal protection fuse. Dimensions: 87x105x65 (5 DIN modules). Art. 4896 must be supplied by means of transformer Art.1246.
- Page 37 L1 L1: branch output1 of riser. documentation. L2 L2: branch output2 of riser. L3 L3: branch output3 of riser (cut the resistance before inserting the cables). L4 L4: branch output4 of riser (cut the resistance before inserting the cables). MT SB2 01...
-
Page 38: Installation Rules
MT SB2 01 INSTALLATION RULES Installation rules for video door entry systems The MAX number of users which can be connected to a single Avoid placing the riser wires near power supply cables (220/380V). Mixer-power supply Art. 4896 is 100 regardless of whether they In the branches towards each user, insert terminal Art. - Page 39 Art. 4896 Art. 4833/A. Art. 4896. amplifier Art. 4833/A Art. 1214/2 and with a Art. 4834/2 internal unit. inserted. Comelit cable Art. 4577 200 m 200 m 200 m 200 m 150 m 60 m 1 mm cross-sect. (Ø 1.2 mm) Two-wire cable 1.5 mm...
- Page 40 MT SB2 01 Figures showing distances MT SB2 01...
-
Page 41: Configuration Of The Devices
- MIN - MAX - of • For setting the values desired, refer to the table on page 41. codes which can be recognised by the switching device. • Distinct switching devices must manage code ranges which are not overlapping. MT SB2 01... - Page 42 MT SB2 01 Table for programming the Dip switches User code Dip switches to ON User name User code Dip switches to ON User name User code Dip switches to ON User name User code Dip switches to ON User name...
- Page 43 ON. Table of Art. 1216 Settings according to the type of connection cable used Type of cable Setting Art. 1216 Comelit cable Art. 4577 1 mm cross-sect. (Ø 1.2 mm) Two-wire cable 1.5 mm cross-sect. (Ø 1.4 mm) Braided and shielded cable 1 mm cross-sect.
- Page 44 MT SB2 01 OPERATING NOTES • When the visitor presses the call button the bell of the internal unit • To vary the brightness of the monitor, use the adjustment wheel is activated. at the bottom. • There is a reassurance tone for the call having been made at the •...
- Page 46 MT SB2 01 Système Simplebus2 SOMMAIRE REGLES D’INSTALLATION page 59 GENERALITES page 46 • • CONFIGURATION DES DISPOSITIFS page 62 AVERTISSEMENTS page 46 • • NOTES DE FONCTIONNEMENT page 65 POSTES INTERIEURS VIDEO page 46 • • SCHEMAS DE CONNEXION...
- Page 47 Tous les appareils qui composent l’installation doivent impérativement être destinés à l’usage pour lequel ils ont été conçus. La société COMELIT GROUP S.p.A. décline toute responsabilité quant à tout préjudice matériel ou corporel qui se vérifierait à la suite d’une utilisation impropre des appareils, de modifications effectuées par d’autres à...
- Page 48 MT SB2 01 Art. 4700W/I Art. 4701W/A Moniteur semi-encastrable série Videocom (tube long) Moniteur mural série Videocom Caractéristiques techniques: Caractéristiques techniques: Moniteur de la série Videocom, dimensions: 193x223x65 mm, Moniteur de la série Videocom, dimensions: 193x223x65 mm, à encastrer (68 mm de profondeur murale), couleur blanc mural, couleur blanc RAL9010, avec écran en N/B de 4,5”,...
- Page 49 1212/B (voir variante SB2/A3 page 101). 8. CV3, CV4 cavalier pour dégager le bouton 1. 9. CV6 cavalier de sélection du type de fonctionnement (Simplebus2 ou Simplebus1). 10. JP2 jumper de sélection du type de fonctionnement (Simplebus2 ou Simplebus1). MT SB2 01...
- Page 50 MT SB2 01 Installation moniteur mural Art. 4700W Installation base de table Art. 4712W et Art. 4700W/I pour moniteur Art. 4701W/A et Art. 4700W Pour Per monitor Art. moniteurs 4700W Art. 4700W 4700W/I 4700W/I Art. 4514 seulement pour solo per monitor moniteurs Art.
- Page 51 Pour avoir un contact libre NO couper les cavaliers CV1 et CV2. 4. Dip switches de programmation du code usager (voir page 63). 5. Trimmer de réglage du volume du micro. 6. Trimmer de réglage du volume de la sonnerie. MT SB2 01...
- Page 52 MT SB2 01 PLAQUES DE RUE Art. 2410W Les installations Simplebus2 peuvent monter des plaques de rue Série Powercom, Vandalcom et Logicom. Pour les séries Vandalcom et Logicom, se référer à la fiche technique FT/SB/01 et au Catalogue 50. HP-micro Série Powercom Combiné...
- Page 53 La led bleue d’éclairage des étiquettes porte-noms est enlevable L’étiquette transparente en carton est fournie neutre pour pouvoir frontalement. Disponibles à 4 et 6 boutons. Dimensions y écrire dans toutes les langues. Dimensions: 112x89,5x38 mm. 112x89,5x40 mm. Pour la programmation des boutons voir page 64. MT SB2 01...
- Page 54 MT SB2 01 Instructions pour l’installation de la plaque de rue audio et vidéo Hauteur boîtier à encastrer Comment associer plusieurs boîtiers Fixation du petit câble sur le boîtier à encastrer Fixation du cadre sur le boîtier mural Connexion cadre à 4 pôles Câblage boîte à...
- Page 55 GROUP S.P.A. Introduction modules Montage connexions et réglages groupe audio-vidéo Position alternative du micro Pose/dépose éléments frontaux Fixation cadre Pose/dépose étiquettes 360˚ open close MT SB2 01...
- Page 56 MT SB2 01 Instructions pour le montage des modules d’information Art. 3326, Art. 3344 et Art. 3346 Connexion câble à 4 pôles Introduction module Retrait porte-étiquette Introduction/retrait étiquette MT SB2 01...
- Page 57 Voir page 64 pour la configuration de l’Art. 1216 selon le câble utilisé. Bornes de connexion à l’installation: Lin Lin: entrée ligne montant. Lout Lout: sortie ligne montant. LM LM: ligne montant dérivée vers le moniteur/combiné parlophonique. + +: bornes connexion alimentation pour compatibilité avec les installations Simplebus1. MT SB2 01...
- Page 58 MT SB2 01 Art. 1195 Transformateur Transformateur 60VA (interm). Primaire 230VAC Secondaire: OUT1: 0-12V 1,5A OUT2: 0-12V 1,5A Le transformateur est équipé d’un fusible intérieur de protection. Dimensions: 87x105x65 (5 modules DIN). L’Art. 4896 doit être alimenté par le transformateur Art.1246.
- Page 59 1254. L2 L2: sortie dérivation 2 du montant. L3 L3: sortie dérivation 3 du montant (couper la résistance avant d’introduire les câbles). L4 L4: sortie dérivation 4 du montant (couper la résistance avant d’introduire les câbles). MT SB2 01...
- Page 60 MT SB2 01 REGLES D’INSTALLATION Le nombre MAX d’usagers pouvant être branché à un seul Règles d’installation pour installations visiophoniques mélangeur-alimentation Art. 4896 est de 100 usagers, Eviter de placer les fils du montant à proximité de câbles indépendamment qu’ils soient distribués sur un seul montant d’alimentation (220/380V).
- Page 61 4833/A. Art. 4896. ou l’amplificateur Art. 1214/2 et le Art. 4896. Art. 4833/A avec un poste intérieur. Art. 4834/2 branché. Câble Comelit Art. 4577 sect. 1 mm (Ø 12/10) 200 m 200 m 200 m 200 m 150 m 60 m Câble bifilaire sect.
- Page 62 MT SB2 01 Figures pour les distances MT SB2 01...
- Page 63 être reconnus par le commutateur. • Des commutations distinctes doivent gérer des intervalles • N’oubliez pas que les dip switches MIN et MAX définissent de codes non superposés. respectivement le code usager le plus bas et le code usager MT SB2 01...
- Page 64 MT SB2 01 Tableau de programmation des dip switches Code u. Dip switches sur ON Nom usager Code u. Dip switches sur ON Nom usager Code u. Dip switches sur ON Nom usager Code u. Dip switches sur ON Nom usager...
- Page 65 ON. Tableau des programmations de l’Art. 1216 en fonction du type de câble de connexion utilisé Type de câble Programmation Art. 1216 Câble Comelit Art. 4577 sect. 1 mm (Ø 12/10) Câble bifilaire sect. 1,5 mm (Ø 14/10) Câble tressé...
- Page 66 MT SB2 01 NOTES DE FONCTIONNEMENT • La carte en option Art. 4703 permet de programmer la fonction • A l’appui sur la touche d’appel, le visiteur actionne la sonnerie Privacy. L’appui pendant plus de 2 sec. sur le bouton 4 du du poste intérieur.
- Page 68 MT SB2 01 Simplebus2 Systeem INHOUD INSTALLATIEVOORSCHRIFTEN pag. 81 ALGEMENE INFORMATIE pag. 68 • • CONFIGURATIE VAN DE APPARATUUR pag. 84 WAARSCHUWINGEN pag. 68 • • WERKING pag. 87 MONITOREN pag. 68 • • AANSLUITSCHEMA’S pag. 88 DEURTELEFOONS pag. 72 •...
- Page 69 Alle apparaten van de installatie mogen uitsluitend gebruikt worden voor het doeleinde waarvoor ze ontworpen zijn. COMELIT GROUP S.p.A. acht zich niet aansprakelijk voor een onjuist gebruik van de apparaten, door anderen aangebrachte wijzigingen voor wat voor doeleinde dan ook en het gebruik van niet originele accessoires en materiaal.
- Page 70 MT SB2 01 art. 4700W/I art. 4701W/A Halfinbouwmonitor serie Videocom (lange buis) Wandmonitor serie Videocom Technische gegevens: Technische gegevens: Monitor van de serie Videocom met afmetingen 193x223x65 mm, Monitor van de serie Videocom met afmetingen 193x223x65, voor ingebouwd (68 mm diep in de muur), wit (RAL9010) met Z/W 4.5”...
- Page 71 (zie variant SB2/A3 pag. 101). 8. CV3, CV4 draadbruggen om knop 1 potentieel vrij te maken. 9. CV6 draadbrug voor de keuze van het systeem (Simplebus2 of Simplebus1). 10. JP2 jumper voor de keuze van het systeem (Simplebus2 of Simplebus1). MT SB2 01...
- Page 72 MT SB2 01 Installatie wandmonitor Installatie van bureausteun art. 4712W art. 4700W en art. 4700W/I voor monitor art. 4701W/A en art. 4700W Voor monitor Per monitor Art. art. 4700W 4700W 4700W/I 4700W/I art. 4514 Art. 4514 Alleen voor solo per monitor monitor Art.
- Page 73 Voor een potentieelvrij NO contact, de draadbruggen CV1 en CV2 doorknippen. 4. Dipswitches voor het instellen van de gebruikerscode (zie pag. 85). 5. Trimmer voor het afstellen van het volume van de microfoon. 6. Trimmer voor het afstellen van het volume van de bel. MT SB2 01...
- Page 74 MT SB2 01 ENTREEPANELEN art. 2410W In Simplebus2 installaties kunnen entreepanelen van de serie Powercom, Vandalcom en Logicom gebruikt worden. Voor Vandalcom en Logicom wordt er verwezen naar het technisch blad FT/SB/01 en naar de Catalogus 50. Audio luidsprekerunit Serie Powercom Deurtelefoon Deurtelefoon net als art.
- Page 75 Leverbaar met 4 of 6 voor het aangeven van de bezet status. Wordt geleverd met een drukknoppen. Afmetingen 112x89.5x40 mm. Voor het programmeren blanco label, zodat een eigen tekst kan worden toegevoegd. van de knoppen zie pag. 86. Afmetingen: 112x89.5x38 mm MT SB2 01...
- Page 76 MT SB2 01 Aanwijzingen voor het installeren van de audio en video entreepanelen Hoogte inbouwdoos Hoe meerdere dozen naast elkaar te plaatsen Bevestiging van het frame op de inbouwdoos Bevestiging van het frame op de opbouw behuizing Aansluiting 4-polige kabel...
- Page 77 GROUP S.P.A. Aanbrengen van de modulen Montage, aansluitingen en afstellingen audio-video systeem Andere positie van de microfoon Montage / Demontage voorpanelen Bevestiging sierrand Aanbrengen / verwijderen naamkaartjes 360˚ open close MT SB2 01...
- Page 78 MT SB2 01 Montage-instructies informatieve modulen art. 3326, art. 3344 en art. 3346 Aansluiting 4-polige kabel Aanbrengen van de module Verwijdering kaartjeshouder Kaartje aanbrengen/verwijderen MT SB2 01...
- Page 79 Zie pag. 86 voor de configuratie van art. 1216 i.c.m. de gebruikte kabel. Aansluitklemmen: Lin Lin: ingang stamleiding. Lout Lout: uitgang stamleiding. LM LM: Aftakking naar de monitor/deurtelefoon. + +: klemmen voor aansluiting voeding voor compatibiliteit met Simplebus1 installaties. MT SB2 01...
- Page 80 MT SB2 01 art. 1195 Transformator Transformator 60VA Primair 230VAC Secundair: OUT1: 0-12V 1.5A OUT2: 0-12V 1.5A De transformator is uitgerust met interne zekering. Afmetingen: 87x105x65 (5 DIN modulen). Art. 4896 moet gevoed worden door middel van transformator art.1246. Maak de aansluitingen van de installatie met uitgeschakelde stroom.
- Page 81 L1 L1: uitgang buslijn 1. art. 1254. L2 L2: uitgang buslijn 2. L3 L3: uitgang buslijn 3 (weerstand afknippen alvorens de draad aan te brengen). L4 L4: uitgang buslijn 4 (weerstand afknippen alvorens de draad aan te brengen). MT SB2 01...
- Page 82 MT SB2 01 INSTALLATIEVOORSCHRIFTEN Op iedere buslijnverdeler art. 4834/2 kunnen MAX. 4 aftakkingen Installatievoorschriften voor video deurtelefoons worden aangesloten: als er meer aftakkingen nodig zijn (max. 16) Plaats de draden van de stamleiding niet in de buurt van dienen er twee buslijnverdelers art. 4834/2 in cascade te worden voedingskabels (220/380V).
- Page 83 4833/A. art. 4896. of versterker binnentoestel. binnentoestel. art. 4896. art. 4833/A met art. 4834/2 Comelit kabel art. 4577 doorsn. 1 mm (Ø 1.2 mm) 200 m 200 m 200 m 200 m 150 m 60 m Tweeaderige kabel doorsn.
- Page 84 MT SB2 01 Afbeeldingen voor de afstanden MT SB2 01...
- Page 85 MIN en de maximale MAX range van codes worden • Om de waarden in te stellen verwijzen wij naar pag. 85. ingesteld op de selector. • Bij meerdere selektors mogen de codes elkaar niet overlappen. MT SB2 01...
- Page 86 MT SB2 01 Programmeringtabel van de dipswitches Gebruik. dipswitches op ON Naam gebruiker Gebruik. dipswitches op ON Naam gebruiker Gebruik. dipswitches op ON Naam gebruiker Gebruik. dipswitches op ON Naam gebruiker 1,3,4,5,6 1,4,5,6,7 1,3,5,6,8 2,3,4,5,6 2,4,5,6,7 2,3,5,6,8 1,2,3,4,5,6 1,2,4,5,6,7 1,2,3,5,6,8...
- Page 87 3 Tabel met de instellingen van art. 1216 behorend bij de gebruikte bekabeling Type kabel Instelling art. 1216 Comelit kabel art. 4577 doorsn. 1 mm (Ø 1.2 mm) Tweeaderige kabel doorsn. 1.5 mm (Ø 1.4 mm) Getwiste en afgeschermde kabel doorsn. 1 mm (Ø...
- Page 88 MT SB2 01 WERKING • De helderheid van de monitor kan worden veranderd door het • De bezoeker drukt op de beldrukker en activeert daarmee de stelwieltje aan de onderkant te gebruiken. beltoon van de binnentoestellen. • Het volume van de bel kan worden ingesteld door de schakelaar •...
-
Page 89: Wiring Diagrams
Installation avec 1 porte audio Série Logicom. Installatie 1 audio entreepaneel Serie Logicom. SBC/01 Impianto 1 porta audio Serie Powercom. System with 1 Powercom Series audio entrance. Installation avec 1 porte audio Série Powercom. Installatie 1 audio entreepaneel Serie Powercom. MT SB2 01... - Page 90 MT SB2 01 SBC/02L Impianto 1 porta audio digitale Serie Logicom 3040 (3070) – 3042 (3072). System with 1 Logicom Series digital audio entrance 3040 (3070) – 3042 (3072). Installation avec 1 porte audio numérique Série Logicom 3040 (3070) – 3042 (3072).
- Page 91 GROUP S.P.A. SB2V/01L Impianto 1 porta video Serie Logicom. System with 1 Logicom Series video entrance. Installation avec 1 porte vidéo Série Logicom. Installatie 1 video entreepaneel Serie Logicom. MT SB2 01...
- Page 92 MT SB2 01 SB2V/01 Impianto 1 porta video Serie Powercom. System with 1 Powercom Series video entrance. Installation avec 1 porte vidéo Série Powercom. Installatie 1 video entreepaneel Serie Powercom. MT SB2 01...
- Page 93 GROUP S.P.A. SB2V/03L Impianto 2 porte video Serie Logicom. System with 2 Logicom Series video entrances. Installation avec 2 portes vidéo Série Logicom. Installatie 2 video entreepanelen Serie Logicom. MT SB2 01...
- Page 94 MT SB2 01 SB2V/03 Impianto 2 porte video Serie Powercom. System with 2 Powercom Series video entrances. Installation avec 2 portes vidéo Série Powercom. Installatie 2 video entreepanelen Serie Powercom. MT SB2 01...
- Page 95 System with 1 Powercom Series video entrance and MAX 4 Mixers-power supplies Art. 4896. Installation avec 1 porte vidéo Série Powercom et MAX 4 mélangeurs-alimentations Art. 4896. Installatie met 1 video entreepaneel Serie Powercom en MAX. 4 voedingmixers art. 4896. MT SB2 01...
- Page 96 MT SB2 01 SB2V/013 Impianto con 2 porte video e centralino di portineria Art. 1998. System with 2 video entrances and porter switchboard Art. 1998. Installation avec 2 portes vidéo et un HP-micro Art. 1998. Installatie met 2 video entreepanelen en portierscentrale art. 1998.
- Page 97 System with 1 main video entrance and MAX 4 Logicom series secondary videos. Installation avec 1 entrée principale vidéo MAX 4 secondaires vidéo série Logicom. Installatie 1 video hoofdentreepaneel met MAX. 4 secundaire video entreepanelen serie Logicom. MT SB2 01...
- Page 98 MT SB2 01 SB2V/EN/112 Impianto 1 ingresso principale video max 4 secondari video serie Powercom. System with 1 main video entrance and MAX 4 Powercom series secondary videos. Installation avec 1 entrée principale vidéo MAX 4 secondaires vidéo série Powercom.
-
Page 99: Variants To The Basic Wiring Diagrams
Secundair (gaat niet aan als er gebeld wordt, maar be set as described below. het beeld kan opgeroepen worden door knop 2 in te drukken). Naar gelang het type installatie dienen de grondplaten van de extra monitoren ingesteld te worden zoals als volgt beschreven wordt. MT SB2 01... - Page 100 MT SB2 01 SB2/A1 Collegamento in derivazione di monitor con lo stesso codice utente alimentati da montante. Branched connection of monitors with the same user code supplied by a riser. Connexion en dérivation de moniteurs ayant le même code usager alimentés à partir du montant.
- Page 101 • Possibility of carrying out Self-ignition on the Main monitor. • Mogelijkheid tot beeldoproep van de hoofdmonitor. MONITOR PRINCIPALE MONITOR SECONDARIO MONITOR SECONDARIO MAIN MONITOR SECONDARY MONITOR SECONDARY MONITOR MONITEUR PRINCIPAL MONITEUR SECONDAIRE MONITEUR SECONDAIRE HOOFDMONITOR SECUNDAIRE MONITOR SECUNDAIRE MONITOR MT SB2 01...
- Page 102 MT SB2 01 SB2/A3 Collegamento in cascata di monitor con lo stesso codice utente alimentati separatamente. Connection in cascade of monitors with the same user code supplied separately. Connexion en cascade de moniteurs ayant le même code usager alimentés séparément.
- Page 103 Connection of users with the same user code in mixed systems. Branched telephones. Connexion d’usagers ayant le même code usager dans des installations mixtes. Combinés parlophoniques en dérivation. Aansluiting van gebruikers met dezelfde gebruikerscode in gemengde installaties. Afgetakte deurtelefoons. MONITOR PRINCIPALE MAIN MONITOR MONITEUR PRINCIPAL HOOFDMONITOR MT SB2 01...
- Page 104 MT SB2 01 SB2/B Collegamento di MAX 4 diramazioni di montante per ogni Miscelatore-alimentatore Art. 4896. Connection of a MAX of 4 riser branches for each Mixer-power supply Art. 4896. Connexion d’au MAX 4 dérivations du montant pour chaque mélangeur-alimentation Art. 4896.
- Page 105 Refer to the table on page 38 column E for the permitted distances. TAGLIARE SOLO LA RESISTENZA DELL’USCITA UTILIZZATA. ONLY CUT THE RESISTANCE OF THE OUTPUT USED. COUPER SEULEMENT LA RESISTANCE DE LA SORTIE UTILISEE. VERWIJDER ALLEEN DE WEERSTAND ALS DE UITGANG GEBRUIKT WORDT. MT SB2 01...
- Page 106 MT SB2 01 SB2/D Connessione di dispositivi di ripetizione chiamata su staffa Art. 4714W/2 e citofono Art. 2428W. Connection of call repetition devices on bracket Art. 4714W/2 and telephone Art. 2428W. Connexion de dispositifs de répétition d’appel sur la bride Art. 4714W/2 et sur le combiné parlophonique Art. 2428W.
- Page 107 Art. 4896 according to the cables, please refer to the table on page art. 1214/2. Voor de toegestane afstanden met de toegepaste kabel 38 column A. tussen het verste binnentoestel en de voedingsmixer art. 4896, wordt er verwezen naar de tabel op pag. 83 kolom A. MT SB2 01...
- Page 108 MT SB2 01 SB2/I Installazione elettroserratura di sicurezza con comando in mancanza si tensione temporizzato tramite Art.3340. Installation of fail secure door release, timed by means of Art.3340. Installation pour commande de gâche a rupture ou ventouse, temporisée par l’Art. 3340.
- Page 109 Art. 2408W/A ou 2410W. Les combinés parlophoniques ayant le même code usager retentissent en même temps à l’appel venant du palier. Gebruik van de etagebel op de deurtelefoon art. 2408W/A of 2410W. De deurtelefoons met dezelfde gebruikerscode bellen tegelijkertijd bij een verdiepingsoproep. MT SB2 01...
- Page 110 MT SB2 01 VARIANTE C VARIANT C VARIANTE C VARIANT C Utilizzo per usi vari del pulsante 2 del citofono Art. 2428W (normalmente dedicato alla chiamata centralino). Application for various uses of push-button 2 of telephone Art. 2428W (normally dedicated to the switchboard call).
- Page 111 2 . Stel de grondplaat in als secundair d.m.v. JP1 van de grondplaat als er meerdere monitoren met dezelfde gebruikerscode aanwezig zijn, die geen eigen voeding hebben. MT SB2 01...
- Page 112 MT SB2 01 VARIANTE G VARIANT G VARIANTE G VARIANT G + 20 Utilizzo della chiamata da piano sulle staffe Art. 4714W/2. I monitor con il medesimo codice utente suonano contemporaneamente su chiamata da piano. Use of the local floor call on brackets Art. 4714W/2.
- Page 113 Om deze functie weer te deactiveren, knop 4 opnieuw indrukken To de-activate it, press push-button 4 again until the LED turns off. totdat de LED dooft. MT SB2 01...
- Page 114 Comelit Group S.p.A. - Via Don Arrigoni 5 - 24020 Rovetta S. Lorenzo BG Italy - tel. (+39) 0346 750 011 - fax (+39) 0346 71436 www.comelit.it info@comelit.it commerciale.italia@comelit.it export.department@comelit.it 15, Rue Jean Zay - 69800 Saint Priest Polderweg Oost 26 - 2973 An Molenaarsgraaf Chaussée de Ninove, 900 - 1703 Schepdaal (Dilbeek)