Table of Contents
Advertisement
Quick Links
Advertisement
Table of Contents

Related Manuals for NEFF B58VT28.0B


Summary of Contents for NEFF B58VT28.0B
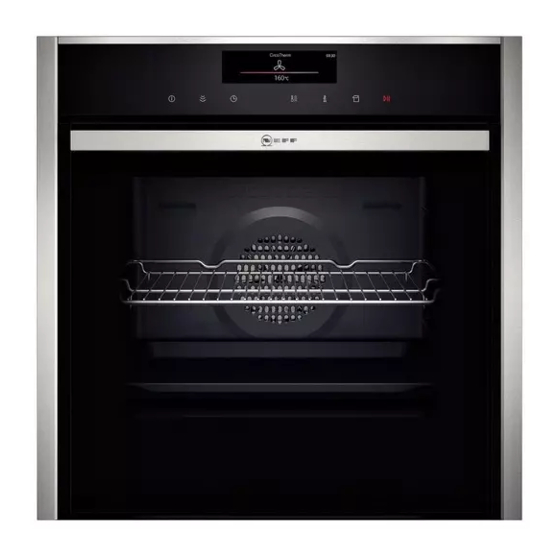
- Page 1 Built-in oven [en] INSTRUCTION MANUAL B58VT28.0B...
-
Page 3: Table Of Contents
Table of contents [ e n ] I N S T R U C T I O N M A N U A L Intended use ......4 Time-setting options . -
Page 4: Intended Use
Additional information on products, accessories, replacement parts and services can be found at use this appliance indoors. www.neff-international.com and in the online shop This appliance may be used by children over www.neff-eshop.com the age of 8 years old and by persons with... -
Page 5: Important Safety Information
Important safety information en Warning (Important safety Risk of injury! information Scratched glass in the appliance door may ■ develop into a crack. Do not use a glass scraper, sharp or abrasive cleaning aids or General information i n f o r m a t i o n I m p o r t a n t s a f e t y detergents. -
Page 6: Steam
Important safety information Steam Cleaning function Warning Warning Risk of scalding! Risk of fire! The water in the water tank may become Loose food residues, grease and meat ■ ■ very hot if you continue to operate the juices may catch fire during the cleaning appliance. -
Page 7: Causes Of Damage
Causes of damage en Steam ]Causes of damage Caution! Baking tins: Ovenware must be heat and steam General information ■ resistant. Silicone baking tins are not suitable for C a u s e s o f d a m a g e combined operation with steam. -
Page 8: Environmental Protection
Environmental protection 7Environmental protection Your new appliance is particularly energy-efficient. Here t e c t i o n E n v i r o n m e n t a l p r o you can find tips on how to save even more energy when using the appliance, and how to dispose of your appliance properly. -
Page 9: Getting To Know Your Appliance
Getting to know your appliance en Note: Depending on the appliance model, individual *Getting to know your details and colours may differ. appliance Control panel In this chapter, we will explain the displays and controls. In the control panel, set your appliance's different y o u r a p p l i a n c e G e t t i n g t o k n o w You will also find out about the various functions of your... -
Page 10: Main Menu
Getting to know your appliance Main menu FullTouch TFT display With the FullTouch TFT display, you can navigate Touch the 0 touch button to access the main menu. through the lines and select settings. Menu To adjust a setting, touch the appropriate point on the display using your finger. -
Page 11: Cooking Compartment Functions
Getting to know your appliance en Bottom heating 50 - 250 °C For cooking in a bain marie and for the final baking stage. † The heat is emitted from below. Slow cooking 70 - 120 °C For gentle and slow cooking of seared, tender pieces of meat in ovenware without Š... -
Page 12: Accessories
Accessories Locking function _Accessories The accessories can be pulled out approximately halfway until they lock in place. The locking function Your appliance is accompanied by a range of prevents the accessories from tilting when they are A c c e s s o r i e s accessories. -
Page 13: Changing The Shelf Position For The Telescopic Rail
Accessories en Changing the shelf position for the Combining accessories telescopic rail You can insert the wire rack and the universal pan at the same time to catch drops of liquid. Bars and telescopic rails can be positioned in any order. -
Page 14: Before Using For The First Time
Before using for the first time Setting the date KBefore using for the first Touch "Date". time Touch the bottom line. Swipe to the left or right to select the current day. Touch "Month". Before you can use your new appliance, you must Swipe to the left or right to select the current month. -
Page 15: Operating The Appliance
Operating the appliance en Touch the # touch button to start the appliance 1Operating the appliance operation. The heat-up indicator bar and the run time appear in the display. You have already learnt about the controls and how p l i a n c e O p e r a t i n g t h e a p they work. -
Page 16: Heating Up The Appliance Quickly
Steam Heating up the appliance quickly `Steam You can use the "Rapid heat-up" and "PowerBoost" functions to reduce the preheat time. Whether the With some heating modes, you can prepare food with appliance is preheated with the "Rapid heat-up" function S t e a m steam assistance. -
Page 17: Dough Proving Setting
Steam en Note: If the water tank runs dry during an operation with Reheating steam assistance, a message appears on the display With the "Reheat ¨" heating mode, you can gently prompting you to fill up the water tank. reheat food that has already been cooked or crisp up day-old baked goods. -
Page 18: After Every Steam Operation
Steam Caution! Refilling the water tank The appliance may become damaged due to the use of If the water tank runs dry during a steam operation, a unsuitable liquids. message appears on the display prompting you to fill Do not use distilled water, highly chlorinated tap water up the water tank. -
Page 19: Time-Setting Options
Time-setting options en evaporates. Then open the appliance door so that the OTime-setting options steam escapes. Leave the appliance to cool down. Your appliance has different time-setting options. Remove the worst dirt from the cooking i o n s T i m e - s e t t i n g o p t compartment immediately and wipe away moisture Time-setting option from the cooking compartment floor. -
Page 20: Setting The Cooking Time
Childproof lock Setting the cooking time AChildproof lock Once the set cooking time has elapsed, the appliance switches off automatically. The function can only be Your appliance is equipped with a childproof lock so used in combination with a type of heating. C h i l d p r o o f l o c k that children cannot switch it on accidentally or change any settings. -
Page 21: One-Time Childproof Lock
Basic settings en One-time childproof lock QBasic settings The control panel is locked so that the appliance cannot be switched on. To switch it on, the one-time childproof There are various settings available to you in order to lock must be deactivated. After the appliance operation, B a s i c s e t t i n g s help use your appliance effectively and simply. -
Page 22: Setting Favourites
Baking and roasting assistant nBaking and roasting Action after switching on Main menu Heating types assistant Baking and roasting assistant Steam programmes The baking and roasting assistant helps you to prepare n g a s s i s t a n t B a k i n g a n d r o a s t i Night-time dimming Switched off... -
Page 23: Programmes
Programmes en Continue cooking PProgrammes Touch "Continue cooking". If necessary, adjust the recommended setting. You can prepare food very easily using the various Touch the # touch button to start "Continue P r o g r a m m e s programmes. -
Page 24: Selecting And Setting The Programme
Meat thermometer Selecting and setting the programme @Meat thermometer You will be guided through the entire setting process for your chosen food. The MultiPoint meat thermometer makes precise M e a t t h e r m o m e t e r cooking possible. -
Page 25: Setting And Starting The Appliance Operation
Meat thermometer en Fish: Place the whole fish onto the wire rack and prop it Touch the ¥ core temperature on the right in the up in the swimming position using half a potato. Insert bottom line. the meat thermometer behind the head as far as it will Swipe to the left or right to select the required core go towards the bones in the middle of the fish. -
Page 26: Sabbath Mode
Sabbath mode FSabbath mode DCleaning agent You can set a time of up to 74 hours using Sabbath With good care and cleaning, your appliance will retain S a b b a t h m o d e C l e a n i n g a g e n t mode. -
Page 27: Keeping The Appliance Clean
Cleaning agent en Notes Door panels Hot soapy water: Slight differences in colour on the front of the ■ Clean with a dish cloth and then dry with a soft appliance are caused by the use of different cloth. materials, such as glass, plastic and metal. Do not use a glass scraper or a stainless steel Shadows on the door panels, which look like ■... -
Page 28: Cleaning Function
Cleaning function Note: When using the cleaning function, you can clean .Cleaning function the enamel accessory provided at the same time. You cannot clean any of the wire racks when using the cleaning function. The wire racks are not suitable for Your appliance is equipped with a self-cleaning C l e a n i n g f u n c t i o cleaning using the cleaning function;... -
Page 29: Easyclean
Cleaning function en Once the cleaning function has ended Final cleaning Once the cooking compartment has cooled down, wipe Open the appliance door and remove the remaining off the ash that has been left behind in the cooking water with an absorbent sponge cloth. compartment, in the accessories on the racks and Clean the smooth surfaces in the cooking around the appliance door with a damp cloth. -
Page 30: Descaling
Cleaning function Descaling Swipe to the left or right to select "Descale ,". Touch the bottom line. The appliance must be descaled regularly in order for it The duration of the descaling programme is to continue operating correctly. displayed. It cannot be changed. Touch the bottom line. -
Page 31: Rails
Rails en qAppliance door pRails With good care and cleaning, your appliance will retain With good care and cleaning, your appliance will retain R a i l s A p p l i a n c e d o o r its appearance and remain fully functional for a long its appearance and remain fully functional for a long time to come. - Page 32 Appliance door Open the appliance door a little (Fig. Using a coin, fully turn both the left- and right-hand locks on the inside of the appliance at the bottom (Fig. & Left lock: Clockwise Right lock: Anti-clockwise Left lock: Anti-clockwise Right lock: Clockwise Open the appliance door a little wider and then close Warning...
-
Page 33: Removing And Installing The Door Panels
Appliance door en Removing and installing the door panels If required, remove the spacers (Fig. ) and seals & (Fig. ) for cleaning. For cleaning, you can remove the glass panels from the appliance door. To do this, the appliance door must be removed beforehand (see section "Removing and fitting the appliance door"). - Page 34 Appliance door Insert the intermediate panel with the seals and spacers. The arrow on the intermediate panel must line up with the arrow on the frame (Fig. Insert the second intermediate panel without the seals and spacers and push it in the direction of the arrow until it is fitted in the frame.
-
Page 35: Trouble Shooting
Trouble shooting en 3Trouble shooting Warning Risk of electric shock! Incorrect repairs are dangerous. Repairs may only be If a fault occurs, there is often a simple explanation. carried out and damaged power cables replaced by T r o u b l e s h o o t i n g Before calling the after-sales service, please refer to the one of our trained after-sales technicians. -
Page 36: Maximum Operating Time Exceeded
Trouble shooting The appliance cannot be switched on; The automatic childproof lock is activated Press and hold the 0 touch button until the 1 sym- the 1 symbol is shown on the dis- bol goes out play The appliance cannot be operated The childproof lock is activated Press and hold the 0 touch button until the 1 sym- when it is switched on;... -
Page 37: Customer Service
Customer service en 4Customer service Our after-sales service is there for you if your appliance C u s t o m e r s e r v i c e needs to be repaired. We will always find an appropriate solution, also in order to avoid after-sales personnel having to make unnecessary visits. -
Page 38: Tested For You In Our Cooking Studio
Tested for you in our cooking studio Baking on one level JTested for you in our When baking on one level, use the following shelf positions: cooking studio Tall baked items: Level 2 ■ Flat baked items: Level 3 ■ Here, you can find a selection of dishes and the ideal You can also prepare soufflés in a water bath in the u d i o... - Page 39 Tested for you in our cooking studio en Note: Baking times can not be reduced by using higher Remove unused accessories from the cooking temperatures. Cakes or small baked items would only compartment. This will achieve the best possible be cooked on the outside, and would not be fully baked cooking results and energy savings of up to 20 per in the middle.
- Page 40 Tested for you in our cooking studio Dish Accessories/cookware Shelf po- Type of Tempera- Steam in- Cooking sition heating ture in °C tensity time in mins. Soufflé 1,2L-soufflé dish 160-170* 35-45 ‚ Soufflé 1,2L-soufflé dish 160-180 35-45 ‚ Soufflé individual moulds 170-190 65-75 ƒ...
-
Page 41: Roasting And Braising
Tested for you in our cooking studio en The whole cake is too dark. Select a lower temperature next time and extend the baking time if necessary. The cake is unevenly browned. Select a slightly lower temperature. Protruding greaseproof paper can affect the air circulation. Always cut greaseproof paper to size. Ensure that the baking tin does not stand directly in front of the openings in the cooking compartment back wall. - Page 42 Tested for you in our cooking studio Very hot steam may escape when opening the lid after this reason. Try using the lower values at first. You can cooking. Lift the lid at the rear, so that the hot steam increase the temperature next time if necessary.
- Page 43 Tested for you in our cooking studio en Dish Accessories/cookware Shelf po- Type of Tempera- Steam in- Cooking sition heating ture in °C tensity time in mins. Pork Roast joint wire rack 180-190* 35+35 ‚ Roast joint, 1,5 kg wire rack ‚...
-
Page 44: Grilling
Tested for you in our cooking studio Tips on roasting and braising The cooking compartment becomes Prepare your food in an enclosed roasting dish with higher temperature or use the grill tray. You will achieve very dirty. the best roasting results if you use the grill tray. The grill tray can be bought later as a special accessory. The roast is too dark and the crack- Check the shelf position and temperature. - Page 45 Tested for you in our cooking studio en Covered cookware Notes When cooking with covered cookware, the cooking The grill element switches itself on and off ■ compartment remains considerably cleaner. Ensure that continuously; this is normal. The set temperature the lid fits well and closes properly.
- Page 46 Tested for you in our cooking studio Types of heating used: The levels of steam intensity are indicated as numbers ‡ Circo-roasting in the table: ■ ˆ Grill, large area ■ 1 = Low ■ 2 = Medium ■ 3 = High ■...
-
Page 47: Convenience Products
Tested for you in our cooking studio en Dish Accessories Shelf po- Type of Tempera- Steam in- Cooking time sition heating ture in °C tensity in mins. Poultry Chicken drumstick, 150 g each wire rack 210-230 20-30 ‡ Chicken drumstick, 150 g each wire rack 210-220 30-40... - Page 48 Tested for you in our cooking studio ranges are indicated for this reason. Try using the lower Baking on one level When baking on one level, use the following shelf values at first. A lower temperature results in more even positions: browning.
-
Page 49: Yogurt
Tested for you in our cooking studio en Dish Accessories/cookware Shelf po- Type of Tempera- Steam in- Cooking sition heating ture in °C tensity time in mins. Fried food, frozen Fish fingers* universal pan 200-220 20-30 ƒ Chicken nuggets universal pan 190-210 20-25 „... -
Page 50: Acrylamide In Foodstuffs
Tested for you in our cooking studio Note: Baking times can not be reduced by using higher Recommended setting values temperatures. Cakes or baked items would only be Here, you can find specifications for the various dishes cooked on the outside, but would not be fully cooked in with CircoTherm Eco and Top/bottom heating Eco. -
Page 51: Slow Cook
Tested for you in our cooking studio en Slow cook Cookware Use shallow cookware, e.g. a glass/porcelain serving Slow cooking is a technique for cooking food over a dish. Place the cookware into the cooking compartment long period at low temperatures. For this reason, it is to preheat it. -
Page 52: Drying
Tested for you in our cooking studio Tips for slow cooking Slow-cooking duck breast. Place the cold duck breast into a pan and fry the skin side first. After slow cooking, grill for 3 to 5 minutes until crispy. The slow-cooked meat is not as hot as So that the roasted meat does not cool so quickly, warm the plates and serve the sauces very hot. -
Page 53: Allowing The Dough To Prove At Dough Proving Setting
Tested for you in our cooking studio en they may crack. Cover the preserving jars to protect Ending the preserving process them from draughts. Only remove the clamps once the Fruit jars are cold. After a short while, small bubbles will form at short intervals. -
Page 54: Defrosting
Tested for you in our cooking studio Type of heating used: Œ Dough proving ■ Dish Accessories/cookware Shelf posi- Type of Step Dough Cooking tion heating proving time in mins. Yeast dough, sweet E.g. small baked items Bowl Dough fer- 30-45 Œ... -
Page 55: Reheating
Tested for you in our cooking studio en Type of heating used: “ Defrost setting ■ Dish Accessories Shelf posi- Type of Tempera- Cooking tion heating ture in °C time in mins. Bread, bread rolls Bread & bread rolls general Baking tray 40-70 “... -
Page 56: Keeping Warm
Tested for you in our cooking studio Keeping warm Universal pan: Level 3 ■ Baking tray: Level 1 ■ You can keep cooked dishes warm using the "Keeping warm" heating type. This will avoid condensation Double-crusted apple pie developing, and means you will not have to wipe out the Double- crusted apple pie on one level: place dark- cooking compartment. - Page 57 Tested for you in our cooking studio en Type of heating used: Grilling ˆ Grill, large area Also slide in the universal pan. The liquid will be caught ■ and the cooking compartment stays cleaner. Dish Accessories Shelf posi- Type of Tempera- Cooking tion...
- Page 60 Constructa Neff Vertriebs-GmbH Carl-Wery-Straße 34 D-81739 München *9001046343* Register your product online www.neff-international.com 9001046343 941209...