Sign In
Upload
Manuals
Brands
Zeiss Manuals
Measuring Instruments
Humphrey II-i series
Zeiss Humphrey II-i series Manuals
Manuals and User Guides for Zeiss Humphrey II-i series. We have
1
Zeiss Humphrey II-i series manual available for free PDF download: User Manual
Zeiss Humphrey II-i series User Manual (581 pages)
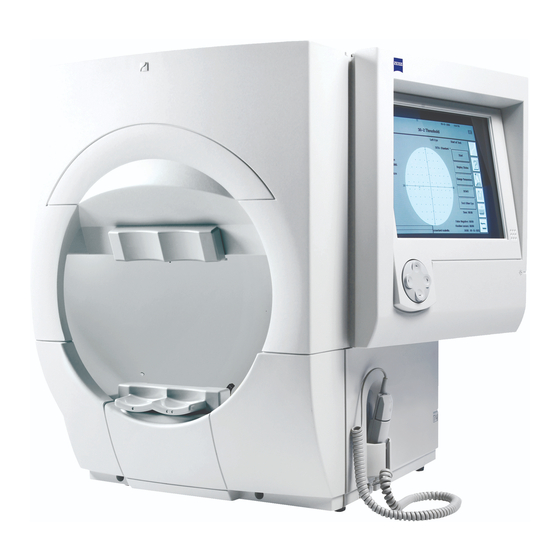
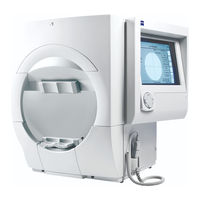
Field Analyzer
Brand:
Zeiss
| Category:
Measuring Instruments
| Size: 21.16 MB
Table of Contents
Table of Contents
3
Introduction & Instrument Setup
9
Intended Use
9
Indications for Use
9
Essential Performance
10
Patient Population
10
Application
10
User Profile
10
Instrument Operation
10
Data Interpretation
11
Model Differentiation
12
Text Conventions
12
Purpose of this User Manual
12
Access Menu Options
13
Electronic User Manual Access
13
Additional References
13
Symbols and Labels
13
Protective Packing Symbols
16
Handling Requirements
16
Transport and Storage Conditions
16
Instrument Disposition
16
Disposal
16
User Changes to Software or Hardware
17
Approved Software
17
Instrument Installation
17
Care in Handling
17
Tips to Avoid Damage
17
HFA II-I Embedded License
18
Product Safety
19
General Safety Requirements
19
Warnings and Cautions
19
Product Compliance
19
Electromagnetic Compatibility (EMC)
20
Accessory Equipment
24
About Visual Fields
25
What Visual Field Tests Measure
25
Normal Versus Pathologic Fields
26
The Boundaries of the Normal Visual Field
26
The Normal Hill of Vision
26
Methods of Testing the Visual Field
27
Patient Fixation and Test Reliability
27
Benefits of Computerized Perimetry
27
The Humphrey Advantage
28
Ergonomic Design
28
Easy Operation
28
Rapid Testing
28
Sophisticated Data
29
SWAP (Blue-Yellow) Testing
29
Automatic Fixation Monitoring
29
Data Protection Features
30
Risks of Internet Connectivity
30
Networking Features
30
System Components
31
Power on
31
The HFA II-I – Rear View
32
The HFA II-I – Front View
32
Additional Components
33
Printers
33
Power Table for the HFA II-I
33
Printrex: Table-Mounted and Stand-Alone Model
34
Hewlett-Packard Laserjet
34
External Keyboard
34
Removable USB Storage Devices and USB Floppy Drives
35
HFA II-I Carl Zeiss Meditec USB Flash Drives
36
Glidepad, Mouse, Trackball, or Other Input Device
36
External VGA Monitor
36
Surge Protectors
36
Connection of External Devices
37
Enlarged View of Cable Connections Panel and Label on Rear of HFA II-I
38
Rear View of the HFA II-I with Panel Removed
38
System Assembly
39
The HFA II-I – Rear View of Power Table
39
General Operation
41
General Information
41
Operating Environment
41
Screen Simplicity
41
The Title Bar
42
The Screen Body
42
Icon Buttons
42
The Information Button
43
Touch Screen
44
Pop-Up Windows
44
The Unit Configuration Screen
44
General Operation
44
Drop-Down Menus
45
Example of a Drop-Down Menu
45
Example of a Pop-Up Window
45
Using the External Keyboard
46
Using a Trackball, Mouse or Other Input Device
47
Using the Keyboard Glidepad
47
Screen Saver
48
Using the File Directory
48
Command Buttons
49
Recall Last Test
49
Test Button
49
The Main Menu Screen
49
Head Tracking
50
Language
50
System Setup
50
Vertex Monitor
50
Communications Setup
51
Print/Save System Log
51
Save/Transmit Option
51
Set Time and Date
51
Custom Printer Setup
52
Personalized ID
52
Print Setup
52
Print-To-File Setup
52
Accessing the System Setup Screen
53
Additional Setup
53
Accessing Head Tracking
54
Changing the Language
54
Accessing the Vertex Monitor
55
Setting the Time and Date
55
Printing or Saving the System Log
56
Save System Log Dialog
56
Setting the Save/Transmit Options
57
Setting up Networking Communications
57
Setting up Printing
62
To Browse for a Shared Printer
63
To Enter a Shared Printer Manually
63
Choose the Print Destination and Options
64
Selecting a Visual Acuity Format
65
Altering the Main Menu Screen
66
Personalizing Hard Copy Printouts
66
Selecting Auto Pupil
66
Deleting a Button
68
Adding Text to an Existing Button
70
Additional Setup
70
Simulation
70
Switch Beep
70
Touch Screen Calibration
70
Backup Configuration
71
Clean up Hard Disk Database
71
Custom Test
71
Restore Configuration
71
Diagnostics
72
Help Screens
72
Install Software
72
Example of a Help Screen
73
Setting-Up Tests
75
Selecting the Test Pattern and Test Eye
75
Using Test Buttons
76
Using the Test Library
77
Test Library
78
Quick Reference to Tests Applicable for Specific Disease Categories
78
The Screening Test Library
79
The Threshold Test Library
79
The Specialty Test Library
80
Test Library Notes
80
Entering Patient Data
81
Esterman Functional Tests
81
Entering Patient ID, Patient Name, Date of Birth, Gender, & Comments
82
Entering Trial Lens Data
85
Clearing Patient Data
87
Recalling Patient Data
88
Patient Folder
90
Patient Data 2 Screen
90
Entering Diagnostic and Procedure Codes
90
Entering Pupil Diameter and Visual Acuity
91
Entering Intraocular Pressure (IOP)
92
Entering Cup/Disk (C/D) Ratios
93
Completed Patient Data 2 Screen
93
Using Trial Lenses
94
Guidelines for Trial Lens Selection
94
How to Calculate the Spherical Equivalent
94
Spherical Trial Lens Correction for Central Visual Field Testing of Myopic Patients
95
Examples of Trial Lens Correction
95
No Trial Lenses Required for Esterman Monocular/Binocular Tests
96
Inserting Trial Lenses into the Holder
97
Preparing the Patient
98
Patient Instructions for Static Testing
98
Occluding the Non-Test Eye
98
Seating the Patient
98
Positioning the Patient
99
Test Parameters and Strategies
101
Setting Test Parameters
101
To Change Test Parameters
102
Standard Parameters
103
Test Strategies
104
Screening Test Parameters
104
Threshold Test Parameters
107
SITA Testing
110
Tests Available with SITA
110
File Directory Indicators for SITA Tests
110
Testing
111
Start Test Options
112
Display Status
112
Change Parameters
112
Monitoring and Maintaining the Patient’s Eye Position
113
Test Other Eye
113
Internal Diagnostic Alert
113
Video Eye Monitor
113
Gaze Tracking
114
The Gaze Graph
114
Gaze Graph Example: Good Fixation with a Large Number of Blinks
115
Gaze Graph Example: Poor Fixation
115
Supplemental Testing
117
Foveal Threshold
117
Gaze Tracking Initialization
118
Test in Progress
120
Pause
120
Fixation
120
Fixation Monitoring
121
Cancel Test
121
Printing Partial Tests
121
Re-Try to Initialize Gaze
121
Turn off Blind Spot Monitor
122
Re-Try to Find Blind Spot
122
Turn off All Fixation Monitoring
122
Turn off Gaze Tracking
122
Tips for Gaze Tracking and Head Tracking
123
Test Complete Screen Options
123
Saving the Test
123
The Test Complete Screen
125
The Threshold Printout Selection Screen
126
Testing: a Step-By-Step Guide
126
Esterman Testing
129
Test Reliability
131
Factors Affecting Reliability
132
Patient Compliance
132
Patient Fixation
133
Trial Lenses
133
Evaluating Reliability
134
Fixation Losses
134
False Positive Errors
134
Sample Printout Showing Poor Reliability
135
False Negative Errors
136
STATPAC Analysis & Printing
137
Introduction to STATPAC Analysis
138
Prerequisites for STATPAC Analysis
138
STATPAC Threshold Formats
138
Threshold Test Printout Formats
139
Reliability Indices
139
The Single Field Analysis Printout
140
The Glaucoma Hemifield Test
141
Superior Field Zones Used in the Glaucoma Hemifield Test
141
Total Deviation Plots
142
Pattern Deviation Plots
142
Removal of Pattern Deviation (PD) and Progression Analysis Plots for Severely Depressed Fields
142
Global Indices
143
The Overview Printout
144
The Change Analysis Printout
146
The Box Plot
146
Change Analysis Summary of Global Indices
148
Linear Regression
148
On Statistics and Probability
149
A Note of Caution
150
Three-In-One Printout
150
Printing Current Threshold Test Results
152
Screening Printout Formats
152
Screening Printout Formats: All Screening Test Patterns
152
Screening Test Printouts
153
Printing Current Screening Test Results
154
Printing Previously Saved Test Results
155
Printing Stored Test Results
155
Printing from Recall Last Test
156
Printing from View Test
156
Printing Delay
156
Grayscale Symbols
157
Guided Progression Analysis (GPA)
159
Introduction to GPA
160
GPA Adds Value to Your Practice
160
Event Analysis
160
Trend Analysis
160
GPA was Clinically Developed
161
GPA Is Easy to Use
161
GPA Is Designed for Compatibility and Flexibility
161
GPA Is Easy to Understand
161
GPA Event Analysis Includes Progression Indicators
162
Overview of GPA Reports
162
GPA Summary Report
162
Single Field Analysis with GPA (SFA GPA)
164
Full GPA Report
164
GPA Last 3 Follow-Up Report
164
Single Field Analysis with GPA (SFA GPA) Example
165
Full GPA Report Example – Baseline Page
166
Full GPA Report Example – Follow-Up Pages
167
Understanding GPA Reports
168
Deviation from Baseline Plot
168
Progression Analysis Probability Plot
168
GPA Alert
169
VFI Plot
169
Establishing the GPA Baseline
170
GPA Baseline – Follow-Up Configurations
170
Default Baseline Selection Rules
170
Permitted Baseline–Follow-Up Configurations for GPA
170
Using the VFI Plot to Select Consistent Baseline Exams
171
Choosing to Re-Baseline a Patient
171
Clinical Interpretation of GPA Results
171
Out-Of-Range Points
172
Significance of Change Depends on Test Point Location
172
GPA Case Studies
173
Progressing Right Eye – GPA Summary
173
Progressing Right Eye – Follow up
174
Unilateral Progression – Left Eye
175
Stable Left Eye – GPA Summary
175
Stable Left Eye – Follow up
176
Learning Effect
177
Patient Learning Effect – Right Eye
177
Full Threshold as Baseline and Follow-Up
178
Using Full Threshold Tests for a Baseline
178
Poor Quality Default Baseline
179
Poor Quality Default Baseline – Follow up
180
Poor Default Baseline Corrected
181
Correction of a Poor Quality Default Baseline – Follow up
182
Changing the Baseline to Improve “Out of Range” Points
183
Changed Baseline Improves “Out of Range” Points
185
Improving out of Range Points – Baseline 2
185
Improving out of Range Points - Follow up 2
186
How to Print GPA Reports
187
Default GPA Report Options
187
Select a Valid Follow-Up Exam
188
Select Reports from Threshold Printout Selection Screen
189
Modify the GPA Exam Selection (Optional)
190
Selection Mode Button
191
Add or Remove an Exam from GPA
191
Exam Selection – Follow-Up Selection Mode
191
Change the Baseline Selection
192
GPA Exam Selection Features and Constraints
192
GPA Recalls Previous Test Selections
193
How to Activate GPA Software on the HFA II-I
193
GPA References
194
Short-Wavelength Automated Perimetry (SWAP)
195
Introduction to Short-Wavelength Automated Perimetry
195
Advantages of Testing with SWAP
195
And 750
195
How SWAP Works
196
Patient Selection for SWAP Perimetry
196
For Neurological and Systemic Disease
196
Patients Who May Not be Candidates
196
SITA-SWAP Testing
197
Extending the Blue-Yellow Visor Prior to Testing
199
Additional Notes on SITA-SWAP
200
Returning the Visor to the Retracted Position
200
Printing out SITA-SWAP Results
202
An Example of a Single Field Analysis Printout for SITA-SWAP
202
Blind Spot Monitoring with SITA-SWAP
203
Specificity of SITA-SWAP Testing
203
SITA-SWAP Case Studies
204
Classic Nasal Step
204
Nasal Step Seen in SITA-SWAP Printout
204
Comparing a SITA-SWAP Test with Standard White-On-White Testing
205
Glaucomatous Visual Field Defect Discovered with SITA-SWAP
205
Standard White-On-White Results for the SITA-SWAP Patient
206
Effect of an Intra-Ocular Lens on SITA-SWAP Results
207
Licensing SITA-SWAP on Your HFA
208
SWAP References
209
Short-Wavelength Automated Perimetry (SWAP)
209
File Functions
211
File Functions Menu
212
Retrieving the File Directory
214
Disk Options
215
Source
216
Destination
216
The Disk Options Screen (USB Storage Device Selected)
216
Directory Order
217
The File Directory – Sorted by Patient
217
The File Directory – Single Patient Test Display
218
Selecting Tests from the File Directory
219
Merging Patient Files
222
Performing File Functions
223
The View Test Screen
223
To Change Patient Data
224
To Convert Tests to Older Database Formats
226
To Duplicate Floppy Disks
226
To Initialize a Floppy Disk
227
To Compare Test Results
227
To Copy Tests
228
To Move Tests
228
To Delete Tests
228
Database Status
229
Serial Transfer of Tests between HFA I, HFA II or HFA II-I Instruments
229
Serial Communication between an HFA I or HFA II and an HFA II-I
230
Serial Communication between an HFA II-I to and from an HFA II-I
230
Transferring Tests from the HFA I to the HFA II-I
231
Threshold
231
Screening
231
How to Transfer Tests from the HFA I to the HFA II-I Series Via Serial Cable
232
How to Transfer Tests from an Older HFA II to the HFA II-I Via Serial Cable
232
How to Transfer Tests from One HFA II-I to a Second HFA II-I Via Serial Cable
233
Organizing Patient Files
234
Database Management
235
Introduction to Database Management
236
Database Integrity Functions
236
Patient Database Protection Procedures
237
Database Protection
237
Maintaining Backups on Network File Servers or USB Storage Devices
238
To Back up Hard Drive Data Onto USB Storage Devices
239
To Back up Hard Drive Data Onto the Network File Server
239
Configuration Back up and Restore
239
Backing up Configurations to a USB Storage Device
240
To Restore Configurations from a Floppy Disk or USB Storage Device
242
How to Handle Database Failures
244
Pathways for Resolving a Hard Disk Database Failure – an Overview
245
Hard Drive Failure: FIX NOW Option
246
Hard Drive Failure: USB ONLY Option
248
Hard Drive Failure: REBUILD HARD DISK DATABASE
251
Restoring the Hard Disk Database
254
To Restore the Hard Disk Database from a USB Storage Device
254
To Restore the Hard Disk Database from Backup Floppy Disks
254
To Restore the Hard Disk Database from the Network File Server
255
Removable Media Failure: Using the Rebuild Removable Media Database Button
255
Merging Databases
256
Cleanup Hard Disk Database
257
Practices with Multiple Field Analyzers
257
Synchronizing Networked Office Hfa’s
258
Synchronizing Multiple Office Hfa’s Manually
258
Care and Handling of Removable Storage Media
258
Custom Testing
259
Creating Custom Tests
259
Getting to the Custom Test Screen
260
Create Threshold Test
261
Create Screening Test
261
Delete Static Test
261
Point Pattern
262
Cancel
262
Field Size
263
Point Spacing
263
Adding Single Points
264
Adding Grid Points
266
Combining Grids and Single Points
267
Erasing Grids or Single Points
269
Saving Custom Tests
269
Deleting Custom Tests
271
Performing Custom Tests
274
Printout Formats
275
Kinetic Testing
277
Introduction to Kinetic Testing
278
Performing Kinetic Perimetry Manually
279
Setting Parameters
281
Stimulus Size
282
Stimulus Intensity
282
Stimulus Intensity Modifier
282
Stimulus Speed
282
Changing the Visual Field Size
283
Meridian Pattern
283
Radius Distance
283
Peripheral Testing Limits
284
Presenting a Stimulus Along a Meridian
284
Choosing Meridians by Cursor or Keypad
285
Selecting a Meridian with the Cursor
286
Selecting the Meridian with the Keypad
287
Erasing Entries
288
Repeating Points Along the Meridians
289
Pre-Defined Kinetic Test Patterns
289
Running Automated Kinetic Tests
290
Automatic Mode
290
Pausing the Test
293
Saving the Test Results
294
Step by Step Mode
295
Retesting a Meridian
297
Social Security Administration Kinetic Disability Test
300
Special Mapping
303
Scotoma Mapping
304
Blind Spot Mapping
306
Static Points
308
Custom Scan
310
End of Test
313
Save Test
313
Show Alternate Isopters
313
Add Isopter Lines
314
Zoom to 30/Expand to 80
314
Viewing Kinetic Tests
315
Patient Data
317
Printing Kinetic Tests
319
Full Field Printout
319
Central Printout
320
Numerical Values Printout
321
Printout Legend
321
Printing Sequence
322
Designing a Custom Kinetic Test Pattern
324
Order of Stimulus Presentation
324
Erasing a Meridian
329
Naming the Test Button
330
Saving the Custom Test
330
Deleting Existing Kinetic Tests
331
Creating the Aphakic SSA Disability Test
332
Final Verification
337
Deleting the Test
337
Networking
339
Chapter Organization
340
DICOM Gateway Features
340
HFA-NET Pro Features
341
Licensing HFA-NET Pro and DICOM Gateway 2.0
341
Network Configurations
341
An Overview of HFA-NET Pro
343
Backing up Data to the Server
343
Restoring Data from the Server
343
Backing up and Restoring Your HFA Network Configuration
343
Synchronizing Databases
344
Exporting Data from the HFA II-I
344
Save & Transmit
345
Printing to a File
345
Exporting Examples
346
Exams Shown on Transfer Tests Function
346
Patient Folder on the PC of Patient Displayed in Figure 14.3
346
Patient Folder on the PC Showing SFA Files Selected
347
Exported File Name Information for Patient “Zeiss, Eric”
347
PDF Image of SFA File Displayed on the PC
348
Patient Folder on the PC Showing GPA Summary Files Selected
349
PDF Image of the GPA Summary File Displayed on the PC
350
How to Use the Hfa’s Networking Features
351
Backing up Data to the Server
352
Restoring Data from the Server
354
Synchronizing Databases on Two or more HFA II-I Perimeters
356
Making Changes to Automatic Synchronization
357
Automatic Archiving in Process Message
357
Setting up Weekly Automatic Archiving
358
Setting up Monthly Automatic Archiving
358
Manually Archiving Data
359
Archive Reminders
359
Manually Retrieving Archived Data
360
Archive/Retrieve Selection Dialog
360
Database Retrieval Screen
360
Retrieve Reminders
361
Data Retrieval Progress Indicator
361
Initial Reminder to Retrieve the Database Manually
361
Reminder to Retrieve Data Manually
362
Using Patient Folders
363
Manually Creating a Patient Folder with the Patient Folder Button
364
Manually Creating Patient Folders with the Specify Patient Folders Function
365
Using the Prompt for Patient Folder Setting
367
Transferring Tests
368
Transfer Tests Screen (with Export Format: Drop-Down Box Open)
370
Using the Save/Transmit Option
371
Transfer Deferred Tests
372
Changing the Print-To-Files Options
374
Printing to a File
374
Print Destination: and Export To: Drop-Down Buttons
375
Export Options Screen
375
Using an EMR/PMS/DICOM System
376
Patient Uniqueness—Patient ID and Issuer of ID
377
Patient ID and Issuer of ID Fields
377
Specifying Your Practice’s Issuer of ID
378
Exporting
378
Importing Work Lists
378
Exporting to EMR/PMS/DICOM Systems
379
Setting up Save/Transmit for EMR/PMS/DICOM Systems
379
Setting Transfer Destination Drop-Down Box to EMR/PMS Host
380
Setting Transfer Destination Drop-Down Box to DICOM Archive
380
Transfer Tests Screen (with Drop-Down Boxes Open)
381
Importing Work Lists from Non-DICOM EMR/PMS Systems and DICOM Systems Using DICOM Gateway 1.0
383
Empty Patient Data Screen
383
Select Work List on Source Options Screen (QUERY and RETRIEVE)
384
Source Options Screen (RETRIEVE ONLY)
385
Work List Browser Screen
385
Importing Work Lists from DICOM Systems Using DICOM Gateway 2.0
386
Select Work List on Source Options Screen
387
Work List Browser Screen – Patient Selected
390
Work List Details Screen
390
Patient Data Screen with Patient Data and Accession Number
391
Recall Patients, View, or Print Tests from a DICOM Archive
392
(DICOM Gateway 2.0 Only)
392
Imported Patient Rules and Conflicts
397
Patient Conflict Dialog
398
Care and Cleaning
399
General Use Principles
400
Cleaning the HFA II-I
400
Air Intake Filter
401
Replacing Parts
402
Stimulus Projection Lamp
402
Background Illumination Lamps
403
Patient Response Button
404
Replacing Instrument Fuses
404
Power Table Fuses
405
HFA II-I Power Table with Mounted Printer Showing Location of Fuses
405
Replacing Power Table Fuses
406
Operating the Printrex Printer
407
Loading Paper
407
Controls and Indicators
408
About Thermal Paper
408
The Printrex Printer Control Panel
408
Standard Touch Screen Calibration
409
Alternative Touch Screen Calibration Method Number One
410
Alternative Touch Screen Calibration Method Number Two
410
Using Removable USB Storage Devices and Floppy Disks
410
Using the Optional USB Floppy Disk Drive
411
(A) Product Specifications
413
Product Specifications
414
Product Features
417
Testing Features
417
(B) Product Features
418
(C) Legal Notices
421
Limitation of Liability
422
(D) Icon Glossary
427
(E) Goldmann Conversion Tables
429
Conversion Table for Blue-Yellow
433
Blue-Yellow Specifications
434
(F) Test Patterns
435
Screening Test Patterns
435
Threshold Test Patterns
438
Specialty Tests Patterns
440
(G) Easyconnect RCT 1.0
441
Overview
441
Before You Run the RCT
442
Firewall Software
442
Windows File Sharing Settings
442
Easyconnect RCT
442
(G) Easyconnect RCT
442
Enable the RCT and Name HFA II-I Instruments
443
Launch the RCT
444
Welcome Screen
444
Easy Mode (Default)
446
Copy Mode
454
Custom Mode
460
Report Mode
471
Test Mode
475
Troubleshooting
483
Not All Hfas on the Local Network Are Visible in the List of Configurable Instruments
483
The RCT was Not Able to Configure the Selected HFA
483
HFA Has Been Transferring Exams Successfully but Subsequently Fails
483
Folder Options Screen – View Tab
484
(H) DICOM Gateway 2.0 (Optional
485
Overview
485
DICOM Gateway 2.0 Configuration Overview
485
DICOM Gateway 2.0 Configuration Overview
486
HFA II-I Configuration
486
Configuration Steps and Checklist
486
DICOM 2.0 Gateway Setup on HFA
487
DICOM Gateway Services Screen
488
(I) Networking Reference
491
Licensing HFA-NET Pro and DICOM Gateway 2.0
491
Connecting Your Network Components
491
Setting up Your HFA Network
491
File Server Access Protocol for FTP or Shared Folder
491
Archiving Data
491
If Connecting to a Network or Peer-To-Peer
492
Network Procedure Summary
492
Connecting Your Network Components
493
Location of the Network Connector (Panel and Label)
493
Setting up Your HFA Network
494
HFA Network: Setting up Link-Local
495
HFA Network: Setting up DHCP
496
HFA Network: Manual Setup (Static IP)
497
File Server Access Protocol for FTP or Shared Folder
498
Setting up FTP
499
Setting up a Shared Folder
501
Setting up Patient Folders
503
Archiving Data
504
Setting up Manual Archiving
505
Setting up Automatic Archiving
506
Setting up Manual Archive Retrieval
507
Setting up Automatic Archive Retrieval
508
Setting up Save & Transmit to a Network File Server
511
Setting up Exporting to Non-DICOM EMR/PMS Systems and
512
DICOM Systems Using DICOM Gateway 1.0
512
DICOM Systems Using DICOM Gateway 1.0
513
Setting up Save & Transmit for EMR/PMS/DICOM Systems
514
Setting up Printing to a File
515
Setting up the Print to a File Function
515
Backing up and Restoring Your HFA Network Configuration
517
Network Diagnostics
518
Remote Host
518
Test Connection
518
Ping a Host
519
Loop Back Test
519
Save Diagnostic Results
519
Reset Networking
519
Show MAC Address
520
Remote Configuration Service Port
520
Restore from Archive
520
Reset DICOM Status
520
Network Troubleshooting Error Messages
521
Specific Networking Error Messages
521
Unknown Networking Error Messages
522
General Networking Error Messages
522
Work List Networking Error Messages
526
DICOM Networking Error Messages
527
Networking Terminology
528
Serial Communications Protocols Used by Hfas
530
Back up All Data First
531
Identify the Current Software
531
(J) Installing & Licensing HFA II-I Software
531
System Software Installation
532
If You Have Trouble Installing Your New Software
532
Installing Additional Software
533
Licensing GPA, SITA-SWAP, HFA-NET Pro, or DICOM Gateway 2.0
535
How SITA Works
541
(K) SITA Normative and GPA Databases
541
Normative and GPA Database Collection and Demographics
541
Normative and GPA Database Collection and Demographics
543
SITA and SITA-SWAP Normative Databases
543
SITA-SWAP Database
544
Inclusion Criteria
544
Exclusion Criteria
544
GPA Database
545
Data Collection
545
Database Demographics
546
Data Analysis
547
Conclusion
547
Acknowledgements
548
Variations in Reliability Indices
549
(L) Reference to Older Test Strategies
549
STATPAC Test Parameters
550
Change Analysis Printouts Displaying Mixed Test Strategies
551
Global Indices SF & CPSD
551
Mixed Change Analysis Printout with Sita Tests Included
552
The Glaucoma Change Probability Analysis Printout
553
The Glaucoma Change Probability – Baseline
554
The Glaucoma Change Probability – Follow up
555
The Change Probability Map
556
Change in Mean Deviation
556
Additional Notes on SWAP Perimetry
557
Macula Threshold Test
557
How to Print the System Log
559
How to Print the Unit Configuration Information
559
(M) Troubleshooting
559
Troubleshooting Table
560
Accessories and Supplies List
566
Index
567
Advertisement
Advertisement
Related Products
Zeiss humphrey HFA II-i series
Zeiss Humphrey Field Analyzer 3
Zeiss Humphrey matrix
Zeiss Conquest HD 8x32
Zeiss Conquest HD 8x42
Zeiss Conquest HD 10x42
Zeiss HBO 100
Zeiss JENA PLAN HD 9x12
Zeiss HBO 50
Zeiss N HBO 103
Zeiss Categories
Microscope
Medical Equipment
Binoculars
Laboratory Equipment
Measuring Instruments
More Zeiss Manuals
Login
Sign In
OR
Sign in with Facebook
Sign in with Google
Upload manual
Upload from disk
Upload from URL