Sign In
Upload
Manuals
Brands
Videotec Manuals
Security Camera
ulisse2
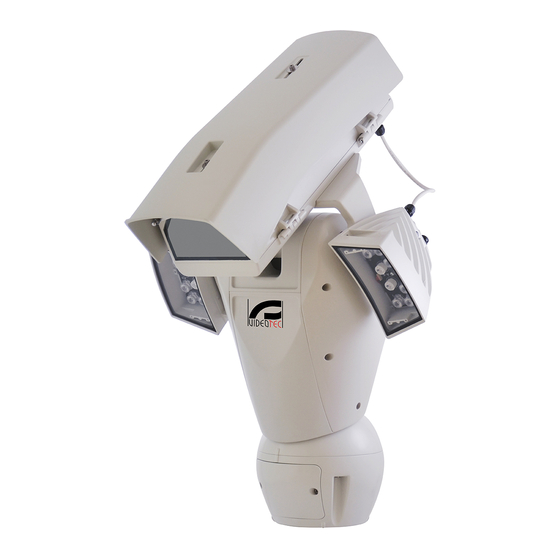
User Manuals: Videotec ulisse2 Outdoor IP PTZ
Manuals and User Guides for Videotec ulisse2 Outdoor IP PTZ. We have
1
Videotec ulisse2 Outdoor IP PTZ manual available for free PDF download: Instruction Manual
Videotec ulisse2 Instruction Manual (324 pages)
Brand:
Videotec
| Category:
Security Camera
| Size: 57 MB
Table of Contents
English
5
Table of Contents
5
1 About this Manual
9
Typographical Conventions
9
2 Notes on Copyright and Information on Trademarks
9
3 Safety Rules
10
4 Identification
12
Product Description and Type Designation
12
Product Overview
12
Product Marking
13
Checking the Markings
13
5 Versions
13
Germanium Window
13
6 Preparing the Product for Use
14
Safety Precautions before Use
14
Unpacking
14
Safely Disposing of Packaging Material
14
Preparatory Work before Installation
15
Attaching the Bracket
15
Cables Management
15
Pre-Configuration of Third Party Cameras
15
7 Assembly
16
Cameras Features
16
Fixing the Sunshield
16
Assembling the Camera and Motorised Lenses
16
How to Open the Housing
16
How to Install the Camera
17
Connection of the Camera and Motorised Lens
19
Housing Board Description
19
Maximum Nominal Values of the Camera and Motorised Lens
20
Network Camera Connection
20
Connecting the Controlled Motorised Lenses When Powered
21
Connecting the Lenses with Reverse Polarity Motors
21
Connecting Lenses with Common Wiring Motors
21
Adjustment of the Supply Voltage of the Lens Motors
21
Connecting the Potentiometers
21
One Push Autofocus
22
Connecting the Motorised Lenses Controlled Via Serial Line
22
Installation of the Visible Camera Module (Optional)
22
Installation of the Upper Body of the Housing with Anti-Icing Heated Glass and Wiper (Optional)
23
Closing the Housing
23
8 Installation
23
Fixing the Base to the Support
23
Connecting the Pan & Tilt to the System
25
Connector Board Description
25
Connection of the Power Supply Line
25
Signal Cable Connection
26
Connection of the Ethernet Cable
26
Connection of the Alarm Inputs, of the Twilight Switch and of the Relays
26
Selecting the Unit Operating Mode
27
Description of the Master Selection Mode
27
Description of the Factory Default Procedure
28
Closing the Connector Housing Cover
28
Installing the Memory Card
28
Fixing the Upper Body
29
LED Illuminators Installation (Optional Features)
29
Fitting the Bracket
29
Fitting the Illuminator on the Bracket
30
Connection of the LED Illuminators
31
LED Illuminator Activation and Adjustment Instructions
31
LED Illuminator Switching on Threshold Adjustment
32
LED Illuminator Power Adjustment
32
Activation of the LED Illuminator Via an External Dusk Switch
33
Activation of the LED Illuminator Via the Integrated Dusk Sensor
33
Activation of the LED Illuminators Via the Camera
33
Manually Activate the LED Illuminators
33
9 Switching on
34
10 Configuration
34
Default IP Address
34
Identification of the MAC Address
34
Web Interface
35
First Access to the Web
35
Hardware Configuration Page
35
Home Page
38
Video Snapshot
38
System Status
38
Horizontal and Vertical Movement
39
Lens Control
39
Wiper and Wash System Control
39
Day/Night Mode Control
39
Slave Illuminator Control
39
Preset Management
40
Relay and Alarm Status Control
40
Device Control Using the Keyboard
40
Device Parameters Page
41
Device Statistics Page
41
Network Page
41
Users Page
42
Movements Page
42
Autopan Page
43
Patrol Page
43
Motions Recall Page
43
Preset Page
44
Preset (Advanced) Page
44
Digital Inputs Page
44
Digital Outputs Page
45
Auxiliary Commands Page
45
Night Mode Page
46
Wash System Page
47
Camera Setting Page
48
Third Party Camera
48
Visible Camera Module
48
Masking Page
50
System Log Page
51
Tools Page
51
11 Accessories
52
Washer
52
Mounting Bracket for LED Illuminators
52
LED Illuminators
52
Wall Mount Bracket
52
Parapet Bracket
52
Visible Camera Module
53
Anti-Icing Heated Glass
53
12 Maintenance
54
Fuses Replacement
54
13 Cleaning
54
Window and Plastic Cover Cleaning
54
Cleaning the Germanium Window
54
14 Disposal of Waste Materials
54
15 Troubleshooting
55
16 Technical Data
58
General
58
Mechanical
58
Housing's Window
59
Electrical
59
Network
59
Camera
60
Environment
61
Certifications
61
17 Technical Drawings
62
Italiano
69
1 Informazioni Sul Presente Manuale
73
Convenzioni Tipografiche
73
2 Note Sul Copyright E Informazioni Sui Marchi Commerciali
73
3 Norme DI Sicurezza
74
4 Identificazione
76
Descrizione E Designazione del Prodotto
76
Panoramica del Prodotto
76
Marcatura del Prodotto
77
Controllo Della Marcatura
77
5 Versioni
77
Finestra in Germanio
77
6 Preparazione del Prodotto Per L'utilizzo
78
Precauzioni DI Sicurezza Prima Dell'utilizzo
78
Disimballaggio
78
Smaltimento in Sicurezza Dei Materiali DI Imballaggio
78
Lavoro Preparatorio Prima Dell'installazione
79
Fissaggio del Supporto
79
Passaggio Cavi
79
Preconfigurazione Della Telecamera DI Terze Parti
79
7 Assemblaggio
80
Caratteristiche Delle Telecamere
80
Fissaggio del Tettuccio
80
Montaggio Telecamera E Ottiche Motorizzate
80
Apertura Della Custodia
80
Installazione Della Telecamera
81
Collegamento Della Telecamera E Dell'ottica Motorizzata
83
Descrizione Della Scheda Della Custodia
83
Valori Nominali Massimi Della Telecamera E Dell'ottica Motorizzata
84
Collegamento Della Telecamera DI Rete
84
Collegamento Delle Ottiche Motorizzate Controllate in Tensione
85
Collegamento Delle Ottiche con Motori Ad Inversione DI Polarità
85
Collegamento Delle Ottiche con Motori a Filo Comune
85
Regolazione Della Tensione DI Alimentazione Dei Motori Delle Ottiche
85
Collegamento Dei Potenziometri
85
One Push Autofocus
86
Collegamento Delle Ottiche Motorizzate Controllate Tramite Linea Seriale
86
Installazione del Modulo Telecamera Visibile (Opzionale)
86
Installazione del Corpo Superiore Della Custodia con Vetro Riscaldato Antighiaccio E Tergicristallo (Opzionale)
87
Chiusura Della Custodia
87
8 Installazione
87
Fissaggio Della Base al Supporto
87
Collegamento del Brandeggio All'impianto
89
Descrizione Della Scheda Connettori
89
Collegamento Della Linea DI Alimentazione
89
Collegamento Dei Cavi DI Segnale
90
Collegamento del Cavo DI Rete Ethernet
90
Collegamento Degli Ingressi DI Allarme, Dell'interruttore Crepuscolare E Dei Relè
90
Selezione Della Modalità Operativa Dell'unità
91
Descrizione Della Modalità Master Selection
91
Descrizione Della Procedura DI Factory Default
92
Chiusura Dello Sportellino Dei Connettori
92
Installazione Della Memory Card
92
Fissaggio del Corpo Superiore
93
Montaggio Degli Illuminatori a LED (Opzionali)
93
Montaggio Della Staffa
93
Montaggio Dell'illuminatore Sulla Staffa
94
Collegamento Degli Illuminatori a LED
95
Regolazione E Modalità DI Attivazione Degli Illuminatori a LED
95
Regolazione Della Soglia DI Accensione Degli Illuminatori a LED
96
Regolazione Della Potenza Degli Illuminatori a LED
96
Attivazione Degli Illuminatori a LED Tramite un Interruttore Crepuscolare Esterno
97
Attivazione Degli Illuminatori a LED Tramite Il Sensore Crepuscolare Integrato
97
Attivazione Degli Illuminatori a LED Tramite la Telecamera
97
Attivazione Manuale Degli Illuminatori a LED
97
9 Accensione
98
10 Configurazione
98
Indirizzo IP DI Default
98
Identificazione del MAC Address
98
Interfaccia Web
99
Primo Accesso alle Pagine Web
99
Pagina Configurazione Hardware
99
Pagina Home
102
Snapshot del Video
102
Stato del Sistema
102
Movimento Orizzontale E Verticale
103
Controllo Delle Ottiche
103
Controllo del Tergicristallo E Dell'impianto DI Lavaggio
103
Controllo Della Modalità Diurna/Notturna
103
Controllo Dell'illuminatore Slave
103
Gestione Preset
104
Controllo Relè E Stato Degli Allarmi
104
Controllo del Dispositivo Tramite Tastiera
104
Pagina Parametri Dispositivo
105
Pagina Statistiche Dispositivo
105
Pagina Rete
105
Pagina Utenti
106
Pagina Movimenti
106
Pagina Autopan
107
Pagina Patrol
107
Pagina Richiamo Movimenti
107
Pagina Preset
108
Pagina Preset (Avanzato)
108
Pagina Ingressi Digitali
108
Pagina Uscite Digitali
109
Pagina Comandi Ausiliari
109
Pagina Modalità Notturna
110
Pagina Impianto DI Lavaggio
111
Pagina Settaggi Telecamera
112
Telecamera DI Terze Parti
112
Modulo Telecamera Visibile
112
Pagina Mascheratura
114
Pagina Registro DI Sistema
115
Pagina Strumenti
115
11 Accessori
116
Impianto DI Lavaggio
116
Staffa DI Supporto Per Illuminatori a LED
116
Illuminatori a LED
116
Supporto da Parete
116
Supporto da Parapetto
116
Modulo Telecamera Visibile
117
Vetro Riscaldato Anti-Ghiaccio
117
12 Manutenzione
118
Sostituzione Dei Fusibili
118
13 Pulizia
118
Pulizia del Vetro E Delle Parti in Plastica
118
Pulizia Della Finestra in Germanio
118
14 Smaltimento Dei Rifiuti
118
15 Risoluzione Dei Problemi
119
16 Dati Tecnici
122
Generale
122
Meccanica
122
Finestre Per Custodia
123
Elettrico
123
Rete
123
Telecamere
124
Ambiente
125
Certificazioni
125
17 Disegni Tecnici
126
Français
133
1 À Propos de Ce Mode D'emploi
137
Conventions Typographiques
137
2 Notes Sur Le Copyright Et Informations Sur Les Marques de Commerce
137
3 Normes de Securité
138
4 Identification
140
Description Et Désignation du Produit
140
Vue D'ensemble du Produit
140
Marquage du Produit
141
Contrôle du Marquage
141
5 Versions
141
Fenêtre en Germanium
141
6 Préparation du Produit en Vue de L'utilisation
142
Précautions de Sécurité Avant L'utilisation
142
Déballage
142
Élimination Sans Danger des Matériaux D'emballage
142
Opérations À Effectuer Avant L'installation
143
Fixation du Support
143
Passage des Câbles
143
Préconfiguration de la Caméra Tierce
143
7 Assemblage
144
Caractéristiques des Caméras
144
Fixation du Double Toit
144
Montage Caméras, Systèmes Optiques Motorisés
144
Ouverture du Caisson
144
Installation de la Caméra
145
Branchement de la Caméra Et de L'optique Motorisée
147
Description de la Carte du Caisson
147
Valeurs Nominales Maximales de la Caméra Et de L'optique Motorisée
148
Branchement de la Caméra Réseau
148
Branchement des Optiques Motorisées Contrôlées en Tension
149
Branchement des Optiques Avec Moteurs À Inversion de Polarité
149
Branchement des Optiques Avec Moteurs À Fil Commun
149
Réglage de la Tension D'alimentation des Moteurs des Optiques
149
Branchement des Potentiomètres
149
One Push Autofocus
150
Branchement des Optiques Motorisées Contrôlées Par la Ligne Sérielle
150
Installation du Module Caméra Visible (en Option)
150
Installation du Corps Supérieur du Caisson Avec Vitre Chauffée Antigel Et Essuie-Glace (en Option)
151
Fermeture du Caisson
151
8 Installation
151
Fixage de la Base Au Support
151
Branchement de la Tourelle À L'installation
153
Description de la Carte de Connexion
153
Connexion de la Ligne D'alimentation
153
Connexion des Câbles de Signalisation
154
Branchement du Câble de Réseau Ethernet
154
Branchement des Entrées D'alarme, de L'interrupteur Crépusculaire Et des Relais
154
Sélection du Mode de Fonctionnement de L'unité
155
Description du Mode Master Selection
155
Description de la Procédure des Standards D'usine
156
Fermeture du Module des Connecteurs
156
Installation de la Carte Mémoire
156
Fixation du Corps Supérieur
157
Montage des Projecteurs À LED (en Option)
157
Montage de L'étrier
157
Montage du Projecteur Sur L'étrier
158
Branchement des Projecteur À LED
159
Réglage Et Modalité D'activation des Projecteurs À LED
159
Réglage du Seuil D'allumage des Projecteurs À LED
160
Réglage de la Puissance des Projecteurs À LED
160
Activation des Projecteurs À LED À L'aide D'un Interrupteur Crépusculaire Externe
161
Activation des Projecteurs À LED À L'aide du Détecteur Crépusculaire Intégré
161
Activation des Projecteurs À LED À L'aide de la Caméra
161
Activation Manuelle des Projecteurs À LED
161
9 Allumage
162
10 Configuration
162
Adresse IP Par Défaut
162
Identification de L'adresse MAC
162
Interface Web
163
Premier Accès Aux Pages Web
163
Page Configuration du Matériel
163
Page Home
166
Instantané de la VIDéo
166
État du Système
166
Mouvement Horizontal Et Vertical
167
Contrôle des Optiques
167
Contrôle de L'essuie-Glace Et de L'installation de Lavage
167
Contrôle du Mode Jour/Nuit
167
Contrôle du Projecteur Slave
167
Gestion du Preset
168
Contrôle du Relais Et de L'état des Alarmes
168
Contrôle de L'appareil Via Le Clavier
168
Page Paramètres Dispositif
169
Page Statistiques Dispositif
169
Page Réseau
169
Page Utilisateurs
170
Page Mouvements
170
Page Autopan
171
Page Patrol
171
Page Rappel Mouvements
171
Page Preset
172
Page Preset (Avancé)
172
Page Entrées Numériques
172
Page Sorties Numériques
173
Page Commandes Auxiliaires
173
Page Mode Nuit
174
Page Installation de Lavage
175
Page Configuration Caméra
176
Caméra Tierce
176
Module Caméra Visible
176
Page Masquage
178
Page Registre Système
179
Page Instruments
179
11 Accessoires
180
Système de Lavage
180
Bride de Support Pour Projecteurs À LED
180
Projecteurs À LED
180
Support Fixation Murale
180
Support Fixation Sol
180
Vitre Chauffée Antigel
181
12 Entretien
182
Remplacement des Fusibles
182
13 Nettoyage
182
Entretiens de la Vitre Et des Parties en Plastique
182
Nettoyage de la Fenêtre en Germanium
182
14 Élimination des Déchets
182
15 Dépannage
183
16 Données Techniques
186
Généralités
186
Mécanique
186
Fenêtres Pour Caisson
187
Électrique
187
Réseau
187
Caméra
188
Environnement
189
Certifications
189
17 Dessins Techniques
190
Deutsch
197
1 Allgemeines
201
Schreibweisen
201
2 Anmerkungen zum Copyright und Informationen zu den Handelsmarken
201
3 Sicherheitsnormen
202
4 Identifizierung
204
Beschreibung und Bezeichnung des Produktes
204
Produktübersicht
204
Kennzeichnung des Produkts
205
Prüfung der Kennzeichnung
205
5 Versionen
205
Fensterscheibe aus Germanium
205
6 Vorbereitung des Produktes auf den Gebrauch
206
Sicherheitsvorkehrungen vor dem Gebrauch
206
Entfernen der Verpackung
206
Sichere Entsorgung der Verpackungsmaterialien
206
Auf die Installation Vorbereitende Tätigkeiten
207
Befestigung der Halterung
207
Kabelführung
207
Vorkonfiguration der Kamera von Drittanbietern
207
7 Zusammenbau
208
Eigenschaften der Kameras
208
Befestigung des Dachs
208
Montage Kamera und Motorisch Bewegte Optiken
208
Öffnung des Schutzgehause
208
Installation der Kamera
209
Anschluss der Kamera und der Motorisch Bewegten Optik
211
Beschreibung der Karte Gehäuse
211
Max. Nennwerte der Kamera und der Motorisierten Optik
212
Anschluss der Netzwerkkamera
212
Verbindung der Spannungsgeregelten Motorisierten Optiken
213
Verbindung der Optiken mit Motoren mit Umgekehrter Polarität
213
Verbindung der Optiken mit Motoren mit Gemeinsamen Draht
213
Einstellung der Versorgungsspannung der Motoren der Optiken
213
Anschluss der Potenziometer
213
One Push Autofocus
214
Verbindung der über eine Serielle Leitung Gesteuerten Motorisierten Optiken
214
Installation des Kameramoduls Sichtbar (Sonderausstattung)
214
Installation des Oberen Gehäusekorpus mit Beheizter Eisschutzscheibe und Scheibenwischer (Sonderausstattung)
215
Schließen des Gehäuses
215
8 Installation
215
Befestigung der Basis an der Halterung
215
Anschluss des Schwenk-Neige-Kopfs an die Anlage
217
Beschreibung der Karte Anschlüsse
217
Anschluss der Stromversorgung
217
Anschluss der Signalkabel
218
Anschluss der Ethernet-Kabel
218
Auswahl des Betriebsmodus der Einheit
219
Beschreibung des Modus Master Selection
219
Beschreibung des Vorgangs Factory Default (Werkseitige Anfangseinstellungen)
220
Schließen der Kleinen Klappe der Steckverbinder
220
Installation der Speicherkarte
220
Befestigung des Oberen Körpers
221
Montage der Scheinwerfer mit LED (Fakultativ)
221
Bügelmontage
221
Montage des Scheinwerfers auf den Bügel
222
Anschluss der LED-Scheinwerfer
223
Einstellung und Aktivierungsarten der LED-Scheinwerfer
223
Einstellung der Einschaltschwelle der LED-Scheinwerfer
224
Einstellung der Leistung der LED-Scheinwerfer
224
Aktivierung der LED-Scheinwerfer durch einen Externen Dämmerungsschalter
225
Aktivierung der LED-Scheinwerfer durch den Integrierten Dämmerungssensor
225
Aktivierung der LED-Scheinwerfer durch die Kamera
225
Manuelle Aktivierung der LED-Scheinwerfer
225
9 Einschaltung
226
10 Konfiguration
226
Vorgegebene IP-Adresse
226
Identifikation der MAC-Adresse
226
Web-Schnittstelle
227
Erster Webseitenaufruf
227
Seite Hardware-Konfiguration
227
Home Seite
230
Snapshot des Videos
230
Horizontale und Vertikale Bewegung
231
Steuerung der Optiken
231
Steuerung des Scheibenwischers und der Scheibenwaschanlage
231
Steuerung des Tag- / Nachtmodus
231
Steuerung des Scheinwerfers Slave
231
Steuerung Preset
232
Kontrolle Relais und Alarmstatus
232
Steuerung des Geräts über die Tastatur
232
Geräteparameter Seite
233
Gerätestatistiken Seite
233
Seite Netzwerk
233
Seite Nutzer
234
Seite Bewegungen
234
Autopan Seite
235
Patrol Seite
235
Bewegungsanforderung Seite
235
Seite Preset
236
Seite Preset (Fortgeschritten)
236
Seite Digitaleingänge
236
Seite Digitalausgänge
237
Seite Hilfsbefehle
237
Seite Nachtmodus
238
Seite Scheibenwaschanlage
239
Kamera-Einstellungen Seite
240
Kamera von Drittanbietern
240
Kamera-Modul Sichtbar
240
Seite Maskierung
242
Seite Systemaufzeichnung
243
Werkzeuge Seite
243
11 Zubehör
244
Waschanlage
244
Bügelhalterung für LED-Scheinwerfer
244
LED Scheinwerfer
244
Wandhalterung
244
Halterung für Brüstungsmontage
244
Heizbares Vereisungsschutz-Glas
245
12 Wartung
246
Wechsel der Sicherungen
246
13 Reinigung
246
Reinigung des Glases und der Kunststoffteile
246
Putzen des Germaniumfensters
246
14 Müllentsorgungsstellen
246
15 Problemlösung
247
16 Technische Daten
250
Allgemeines
250
Mechanik
250
Fenster für Gehäuse
251
Elektrik
251
Netzwerk
251
Kamera
252
Umgebung
253
Zertifizierungen
253
17 Technische Zeichnungen
254
Русский
261
О Настоящем Руководстве
265
Примечания В Отношении Авторского Права И Информация О Торговых Марках
265
Типографские Условные Обозначения
265
Правила Техники Безопасности
266
Обозначение
268
Общий Вид Изделия
268
Описание И Обозначение Типа Устройства
268
Германиевое Окно
269
Маркировка Изделия
269
Проверка Маркировки
269
Модели
269
Безопасная Утилизация Упаковочных Материалов
270
Комплект Оборудования
270
Меры Безопасности Перед Использованием
270
Подготовка Устройства К Использованию
270
Распаковка
270
Подготовительные Работы Перед Установкой
271
Установка Кронштейна
271
Предварительная Настройка Камер Других Производителей
271
Монтаж
272
Монтаж Камеры И Объективов С Приводом
272
Как Открыть Кожух
272
Установка Камеры
273
Установка Солнцезащитного Козырька
272
Характеристики Камер
272
Подключение Камеры И Объектива С Приводом
275
Описание Платы Кожуха
275
Максимальные Номинальные Значения Камеры И Объектива С Приводом
276
Подключение Камеры К Сети
276
Подключение Регулируемых Объективов С Приводом При Включении Питания
277
Подключение Объективов С Приводами Обратной Полярности
277
Подключение Объективов С Приводами На Общем Проводе
277
Регулирование Напряжения Питания Приводов Объективов
277
Подключение Потенциометров
277
Установка Верхней Части Кожуха С Противообледенительным Обогреваемым Стеклом И Стеклоочистителем (Опция)
279
Закрытие Корпуса
279
Монтаж
279
Крепление Основания К Опорной Конструкции
279
Подключение Сигнального Кабеля
282
Подключение Ethernet-Кабеля
282
Подключение Входов Сигнала Тревоги, Сумеречного Выключателя И Реле
282
Выбор Рабочего Режима Устройства
283
Описание Режима Выбора Главного Устройства (Master Selection)
283
Описание Процедуры Установки Заводских Настроек
284
Закрытие Крышки Разъема
284
Установка Карты Памяти
284
Крепление Верхней Части Кожуха
285
Установка Светодиодных Осветителей (Дополнительные Функции)
285
Установка Кронштейна
285
Установка Осветителя На Кронштейне
286
Подключение Светодиодных Осветителей
287
Регулировка И Режим Включения Светодиодных Осветителей
287
Регулировка Порога Включения Светодиодных Осветителей
288
Регулировка Мощности Светодиодных Осветителей
288
Включение Светодиодных Осветителей С Помощью Внешнего Сумеречного Выключателя
289
Включение Светодиодных Осветителей При Помощи Встроенного Сумеречного Датчика
289
Включение Светодиодных Осветителей При Помощи Камеры
289
Включение Светодиодных Осветителей Вручную
289
Включение
290
Конфигурация
290
Заданный По Умолчанию IP-Адрес
290
Определение MAC-Адреса
290
Веб-Интерфейс
291
Первый Вход На Веб-Страницу
291
Страница Настройки Аппаратных Средств (Hardware Configuration Page)
291
Главная Страница (Home Page)
294
Снимок Экрана
294
Статус Системы
294
Горизонтальное И Вертикальное Перемещение
295
Управление Объективом
295
Управление Стеклоочистителем И Моющей Установкой
295
Управление Режимом "День-Ночь
295
Управление Подчиненным Осветителем
295
Управление Предварительными Настройками
296
Управление Статусом Реле И Сигнала Тревоги
296
Управление Устройством С Помощью Клавиатуры
296
Страница Параметров Устройства (Device Parameters Page)
297
Страница Статистики Устройства
297
Страница Сети (Network Page)
297
Страница Пользователей (Users Page)
298
Страница Движений (Movements Page)
298
Страница Автоматического Панорамного Наблюдения (Autopan Page)
299
Страница Патрулирования (Patrol Page)
299
Страница Вызова Движения (Motions Recall Page)
299
Страница Предварительно Установленных Параметров (Preset Page)
300
Страница Предварительных Настроек (Дополнительно)
300
Страница Цифровых Входов (Digital Inputs Page)
300
Страница Цифровых Выходов (Digital Outputs Page)
301
Страница Вспомогательных Команд (Auxiliary Commands Page)
301
Страница Режима "Ночь" (Night Mode Page)
302
Страница Моющей Системы
303
Страница Настроек Камеры (Camera Setting Page)
304
Камера Другого Производителя
304
Модуль Камеры Видимого Спектра
304
Страница Маскировки (Masking Page)
306
Страница Системного Журнала (System Log Page)
307
Страница Инструментов (Tools Page)
307
Комплектующие
308
Кронштейн Для Крепления На Стене
308
Кронштейн Для Крепления Параллельно Потолку
308
Омыватель (Washer)
308
Опорный Кронштейн Для Светодиодных Осветителей
308
Светодиодные Осветители
308
Обогреваемое Стекло С Защитой От Обледенения
309
Замена Предохранителей
310
Очистка
310
Очистка Германиевого Окна
310
Очистка Окошка И Пластиковой Крышки
310
Техническое Обслуживание
310
Утилизация Отходов
310
Устранение Неисправностей
311
Общие Характеристики
314
Технические Характеристики
314
Окно Кожуха
315
Сеть
315
Электрические Характеристики
315
Камера
316
Окружающая Среда
317
Сертификаты
317
Технические Чертежи
318
Advertisement
Advertisement
Related Products
Videotec ULISSE RADICAL THERMAL
Videotec ulisse netcam
Videotec ULISSE
Videotec Ulisse Compact HD
Videotec ULISSE MAXI NETCAM
Videotec ULISSE COMPACT
Videotec ULISSE MAXI
Videotec ULISSE COMPACT DELUX
Videotec Ulisse Evo
Videotec Ulisse Evo Thermal
Videotec Categories
Camera Accessories
Security Camera
Receiver
Racks & Stands
Switch
More Videotec Manuals
Login
Sign In
OR
Sign in with Facebook
Sign in with Google
Upload manual
Upload from disk
Upload from URL