Sign In
Upload
Manuals
Brands
Sharp Manuals
All in One Printer
MX-C311
Sharp MX-C311 Manuals
Manuals and User Guides for Sharp MX-C311. We have
7
Sharp MX-C311 manuals available for free PDF download: Operation Manual, Quick Start Manual, Software Setup Manual, Maintenance & Safety Manual, Handy Manual
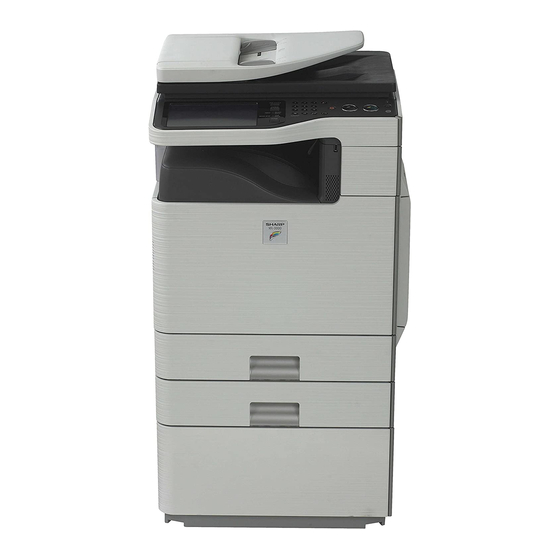
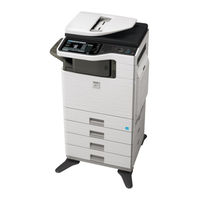
Sharp MX-C311 Operation Manual (849 pages)
Digital Full Color Multifunctional System
Brand:
Sharp
| Category:
All in One Printer
| Size: 24 MB
Table of Contents
Table of Contents
84
Operation Guide
1
Please Read First
2
Warranty
5
To Ensure Safe Use of the Machine
6
Laser Information
9
Installation Requirements
10
Storage of Supplies
12
Supply of Spare Parts and Consumables
12
Replacing Supplies and Maintenance
13
Replacing the Toner Cartridges
13
Close the Front Cover
17
Replacing the Toner Collection Container
18
Replacing the Developer Cartridge / Drum Cartridge
21
Remove the Developer Cartridge
23
On the Machine
25
Turn on the Power
28
Replacing the Drum Cartridge
29
Open the Cover
31
Replacing the Staple Cartridge in the Finisher
31
Close the Cover
33
Cleaning the Document Glass and Automatic Document Feeder
34
Regular Maintenance
34
Cleaning the Main Charger of the Photoconductive Drum
35
Scanning Area
35
Clean the Main Charger
37
Cleaning the Bypass Tray Rollers
40
Automatic Document Feeder
43
Cleaning the Laser Unit
46
Clean the Laser Unit
50
Replace the Cleaning Tool
51
Cleaning the Pt Charger of the Primary Transfer Belt Unit
53
Machine Specifications / Copier Specifications
56
Scanning Resolution
56
First-Copy Time
57
Warm-Up Time
57
Bypass Tray
58
Duplex Module
58
Interface Port
59
Ambient Environment
60
Continuous Copying Speeds
60
Acoustic Noise Emission
61
Automatic Document Feeder Specifications
62
Business Card Feeder Specifications
63
Finisher Specifications
65
Maximum Number of Sheets for Stapling
66
Printer Specifications
67
Pull Scan Function (TWAIN) Specifications
69
Facsimile Specifications
70
Factory Default Passwords
73
To the Administrator of the Machine
73
For the Users of the Fax Function
74
Important Safety Instructions
74
Fcc Notice to Users
75
Notice for Users in the U.s.a
76
Avis pour Nos Utilisateurs au Canada
77
Notice for Users in Canada
77
Trademark Acknowledgments
78
Software License
83
Table of Contents
84
CD-Roms and Software
85
Software CD-Rom
85
Before Installing the Software
85
Other CD-Roms
87
For Windows
87
Verifying System Requirements
88
Software Requirements
89
Type of Connection
89
Connecting the Machine with a Usb Cable (Windows)
90
Connecting to a Network
90
Connecting the Machine
90
Setup in a Windows Environment
91
Opening the Software Selection Screen (for All Software)
91
Installing the Printer Driver / Pc-Fax Driver
93
When the Machine Is Connected to Anetwork
93
Standard Installation
94
Follow the On-Screen Instructions
97
When the Machine will be Connected with a Usb Cable
105
Using the Machine as a Shared Printer
113
USING the STANDARD WINDOWS PS PRINTER DRIVER (Windows 98/Me/Nt 4.0)
116
Configuring the Printer Driver for the Options Installed on the Machine
118
Installing the Printer Status Monitor
123
Installing the Scanner Driver
125
Changing the Port
128
Setup in a Macintosh Environment
131
Mac os X
131
Printing Using the Ipp Function
139
When Installation was Not Successful
145
Troubleshooting
145
Removing the Software
150
Make a Copy
154
Other Convenient Functions
161
Print a Document
162
Search for a File
186
How to Use this Manual
189
Manuals Provided with the Machine
190
Printed Manuals
190
Chapter 1 Before Using the Machine
192
Before Using the Machine
193
Part Names and Functions
193
Exterior
193
Interior
195
Automatic Document Feeder and Document Glass
196
Side and Back
197
Operation Panel
198
Touch Panel
200
Using the Touch Panel
200
Status Display
202
System Bar
203
Restarting the Machine
205
Turning the Power on and off
205
Energy Save Functions
206
[Power Save] Key
206
User Authentication
207
Authentication by User Number
207
Authentication by Login Name / Password
209
Home Screen
212
Remote Operation of the Machine
213
Items Recorded in the Job Log
214
Important Points about Paper
217
Names and Locations of Trays
217
Useable Paper
217
Print Side Face up or Face down
218
Non-Recommended Paper
219
Loading Paper
217
Tray Settings for Tray 1 to 4
220
Loading Paper and Changing the Paper Size
220
Loading Paper in the Bypass Tray
222
Important Points When Using the Bypass Tray
223
Inserting Paper
223
Loading Envelopes
224
Originals
225
Placing the Original
225
Placing Originals in the Automatic Document Feeder
225
Place the Originals
226
Placing the Original on the Document Glass
227
Placing a Thick Book
228
Peripheral Devices
229
Finisher
230
Part Names
230
Supplies
230
Document Feeder Tray
231
Business Card Feeder
231
Selecting a Standard Application
232
Standard Application Setup
232
Sharp Osa
232
Application Communication Module (MX-Amx2)
232
External Account Application Setup
233
Operation in External Account Mode
233
External Account Module (MX-Amx3)
233
Entering Text
235
Functions of the Main Keys
235
Chapter 2 Copier
237
Base Screen of Copy Mode
239
Identifying the Tray that Is Being Used to Feed Paper
240
Tray During Paper Feeding
240
Basic Copy Settings
242
Before Using the Machine as Acopier
239
Copying Sequence
242
Output Settings
243
Start Copying
243
Special Mode Settings
243
Originals
244
Standard Original Placement Orientations
244
Paper Trays
245
Basic Procedure for Making Copies
246
Making Copies
246
Using the Automatic Document Feeder to Make Copies
246
Using the Document Glass to Make Copies
248
Automatic 2-Sided Copying
251
Using the Automatic Document Feeder to Make 2-Sided Copies
251
Using the [Binding Change] Key
253
Using the Document Glass to Make 2-Sided Copies
254
Color Copy Modes
257
Changing the Exposure and Original Image Type
259
Automatic Adjustment of the Exposure and Original Type
259
Manual Adjustment of the Exposure and Original Type
259
Reduction/Enlargement/Zoom
261
AUTOMATIC RATIO SELECTION (Auto Image)
261
MANUAL RATIO SELECTION (Preset Ratios/Zoom)
262
ENLARGING/REDUCING the LENGTH and WIDTH SEPARATELY (XY Zoom)
264
Original Sizes
265
Specifying the Original Size
265
Storing Original Sizes (Editing/Clearing)
267
Storing Frequently Used Original Sizes
267
Retrieving a Stored Original Size
269
Output
270
Offset Function
271
Sort Mode
271
Output Modes
271
Original Placement Orientation
272
Making Copies Using the Bypass Tray
273
Set the Paper Size
274
Special Modes
276
ADDING MARGINS (Margin Shift)
279
ERASING PERIPHERAL SHADOWS (Erase)
281
MAKING COPIES in PAMPHLET FORMAT (Pamphlet Copy)
283
COPYING a LARGE NUMBER of ORIGINALS at ONCE (Job Build)
285
Adding Inserts When Copying on Transparency Film
287
Inserts
287
COPYING TWO ORIGINAL PAGES ONTO ONE SHEET (2In1)
289
COPYING both SIDES of a CARD on ONE SHEET of PAPER (Card Shot)
291
PRINTING the DATE and a STAMP on COPIES (Stamp)
294
Select the Print Position
295
General Procedure for Using Stamp
295
Set the Date Format
297
ADDING the DATE to COPIES (Date)
297
STAMPING COPIES (Stamp)
299
Page Numbering
301
Printing Page Numbers on Copies
301
PRINTING TEXT on COPIES (Text)
304
CHECKING the STAMP LAYOUT (Layout)
308
Image Edit Menu Screen
310
[Image Edit] KEY
310
REPEATING PHOTOS on a COPY (Photo Repeat)
311
REVERSING the IMAGE (Mirror Image)
313
COPYING in the CENTER of the PAPER (Centering)
314
REVERSING BLACK and WHITE in ACOPY (B/W Reverse)
316
[Color Adjustments] KEY
318
ADJUSTING RED/GREEN/BLUE in COPIES (RGB Adjust)
319
Adjust the Image
320
ADJUSTING the SHARPNESS of an IMAGE (Sharpness)
320
WHITENING FAINT COLORS in COPIES (Suppress Background)
321
ADJUSTING the COLOR (Color Balance)
323
Adjust the Color Balance
324
ADJUSTING the BRIGHTNESS of ACOPY (Brightness)
325
Adjust the Brightness
325
ADJUSTING the INTENSITY of a COPY (Intensity)
326
CHECKING COPIES before PRINTING (Proof Copy)
327
Change the Settings
329
COPYING ORIGINALS of DIFFERENT SIZES (Mixed Size Original)
330
Copying Thin Originals
332
Mode)
332
"Copy
334
Convenient Copy Functions
336
Interrupting a Copy Run
336
Interrupt Copy
336
COPYING MULTIPLE BUSINESS CARDS (Business Card Scan)
334
Job Status Screen
338
Job Queue Screen and Completed Job Screen
339
Cancel the Job
341
Canceling a Job that Is Waiting in the Queue
341
Giving Priority to a Job in the Queue
342
Checking Job Details
343
Checking Information on a Copy Job Waiting in the Queue
343
STORING COPY OPERATIONS (Job Programs)
344
Storing (Editing/Deleting) a Job Program
345
Chapter 3 Printer
347
Printer Function of the Machine
349
Printing from Windows
350
Basic Printing Procedure
350
Selecting the Paper
352
Printing on Envelopes
353
Printing When the User Authentication Function Is Enabled
354
Start Printing
355
Viewing Printer Driver Help
356
Information Icon
356
Saving Frequently Used Print Settings
357
Saving Settings at the Time of Printing
357
Using Saved Settings
359
Deleting Saved Settings
359
Changing the Printer Driver Default Settings
360
Printing from a Macintosh
362
Basic Printing Procedure
362
Selecting Paper Settings
362
Printing
363
Selecting the Paper
365
Printing on Envelopes
366
Printing When the User Authentication Function Is Enabled
367
Frequently Used Functions
369
Selecting the Color Mode
369
Black and White Printing
370
Selecting a Print Mode Setting
371
Two-Sided Printing
372
Fitting the Print Image to the Paper
374
Printing Multiple Pages on One Page
375
Stapling Output
377
Convenient Printing Functions
379
Convenient Functions for Creating Pamphlets and Posters
379
CREATING a PAMPHLET (Pamphlet)
379
INCREASING the MARGIN (Margin Shift)
381
CREATING a LARGE POSTER (Poster Printing)
382
Functions to Adjust the Size and Orientation of the Image
383
ROTATING the PRINT IMAGE 180 DEGREES (Rotate 180 Degrees)
383
ENLARGING/REDUCING the PRINT IMAGE (Zoom/Xy-Zoom)
384
ADJUSTING LINE WIDTHS WHEN PRINTING (Line Width Settings)
385
REVERSING the IMAGE (Mirror Image)
386
Color Mode Adjustment Function
387
ADJUSTING the BRIGHTNESS and CONTRAST of the IMAGE (Color Adjustment)
387
PRINTING FAINT TEXT and LINES in BLACK (Text to Black/Vector to Black)
388
SELECTING COLOR SETTINGS to MATCH the IMAGE TYPE (Advanced Color)
389
Functions that Combine Text and Images
391
ADDING a WATERMARK to PRINTED PAGES (Watermark)
391
PRINTING an IMAGE over the PRINT DATA (Image Stamp)
392
CREATING OVERLAYS for PRINT DATA (Overlays)
393
Printing with an Overlay File
393
Print Functions for Special Purposes
394
PRINTING SPECIFIED PAGES on DIFFERENT PAPER (Different Paper)
394
ADDING INSERTS WHEN PRINTING on TRANSPARENCY FILM (Transparency Inserts)
396
PRINTING a CARBON COPY (Carbon Copy)
397
TWO-SIDED PRINTING with SPECIFIC PAGES PRINTED on the FRONT SIDE (Chapter Inserts)
398
Convenient Printer Functions
399
SAVING and USING PRINT FILES (Retention/Document Filing)
399
Automatically Print All Stored Data
400
Printing Without the Printer Driver
401
Directly Printing from the Machine
401
Directly Printing a File on an Ftp Server
402
Directly Printing a File in Usb Memory
403
Print the Selected File
404
Directly Printing a File in Anetwork Folder
405
Directly Printing from a Computer
408
Submit Print Job
408
Ftp Print
408
E-Mail Print
409
Checking the Print Status
410
Job Status Screen
410
Spool Screen/Job Queue Screen/Completed Job Screen
411
Printing an Encrypted Pdf File
413
Giving a Print Job Priority/Canceling a Print Job
414
Giving a Print Job Priority
414
Canceling a Print Job
415
Changing to Another Paper Size and Printing When Paper Runs out
416
Appendix
417
Printer Driver Specification List
417
Advertisement
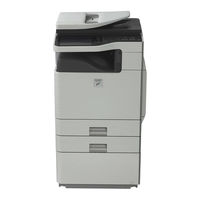
Sharp MX-C311 Operation Manual (697 pages)
Digital full colour multifunctional system
Brand:
Sharp
| Category:
All in One Printer
| Size: 15 MB
Table of Contents
Chapter 1 Before Using the Machine
40
Operation Guide
1
Make a Copy
2
Other Convenient Functions
9
Print a Document
10
Search for a File
34
How to Use this Manual
37
Manuals Provided with the Machine
38
Printed Manuals
38
Table of Contents
40
Part Names and Functions
41
Exterior
41
Interior
43
Automatic Document Feeder and Document Glass
44
Side and Back
45
Operation Panel
46
Touch Panel
48
Using the Touch Panel
48
Status Display
50
System Bar
51
Restarting the Machine
53
Turning the Power on and off
53
Energy Save Functions
54
[Power Save] Key
54
User Authentication
55
Authentication by User Number
55
Authentication by Login Name / Password
57
Home Screen
60
Remote Operation of the Machine
61
Items Recorded in the Job Log
62
Loading Paper
65
Important Points about Paper
65
Names and Locations of Trays
65
Useable Paper
65
Bypass Tray
66
Print Side Face up or Face down
66
Non-Recommended Paper
67
Tray Settings for Tray 1 to 4
68
Loading Paper and Changing the Paper Size
68
Loading Paper in the Bypass Tray
70
Important Points When Using the Bypass Tray
71
Inserting Paper
71
Loading Envelopes
72
Placing Originals in the Automatic Document Feeder
73
Originals
73
Placing the Original
73
Place the Originals
74
Placing the Original on the Document Glass
75
Placing a Thick Book
76
Peripheral Devices
77
Finisher
79
Part Names
79
Supplies
79
Business Card Feeder
80
Selecting a Standard Application
81
Standard Application Setup
81
Sharp Osa
81
Application Communication Module (MX-Amx2)
81
External Account Application Setup
82
Operation in External Account Mode
82
External Account Module (MX-Amx3)
82
Entering Text
84
Functions of the Main Keys
84
Chapter 2 Copier
86
Base Screen of Copy Mode
88
Identifying the Tray that Is Being Used to Feed Paper
89
Tray During Paper Feeding
89
Basic Copy Settings
91
Before Using the Machine as Acopier
88
Copying Sequence
91
Output Settings
92
Start Copying
92
Special Mode Settings
92
Originals
93
Standard Original Placement Orientations
93
Paper Trays
94
Basic Procedure for Making Copies
95
Making Copies
95
Using the Automatic Document Feeder to Make Copies
95
Using the Document Glass to Make Copies
97
Automatic 2-Sided Copying
100
Using the Automatic Document Feeder to Make 2-Sided Copies
100
Using the [Binding Change] Key
102
Using the Document Glass to Make 2-Sided Copies
103
Colour Copy Modes
106
Changing the Exposure and Original Image Type
108
Automatic Adjustment of the Exposure and Original Type
108
Manual Adjustment of the Exposure and Original Type
108
Reduction/Enlargement/Zoom
110
AUTOMATIC RATIO SELECTION (Auto Image)
110
MANUAL RATIO SELECTION (Preset Ratios/Zoom)
111
ENLARGING/REDUCING the LENGTH and WIDTH SEPARATELY (XY Zoom)
113
Original Sizes
114
Specifying the Original Size
114
Storing Original Sizes (Editing/Clearing)
116
Storing Frequently Used Original Sizes
116
Retrieving a Stored Original Size
118
Output
119
Offset Function
120
Output Modes
120
Sort Mode
120
Original Placement Orientation
121
Making Copies Using the Bypass Tray
122
Set the Paper Size
123
Special Modes
125
ADDING MARGINS (Margin Shift)
128
ERASING PERIPHERAL SHADOWS (Erase)
130
MAKING COPIES in PAMPHLET FORMAT (Pamphlet Copy)
132
COPYING a LARGE NUMBER of ORIGINALS at ONCE (Job Build)
134
Adding Inserts When Copying on Transparency Film
136
Inserts
136
COPYING TWO ORIGINAL PAGES ONTO ONE SHEET (2In1)
138
COPYING both SIDES of a CARD on ONE SHEET of PAPER (Card Shot)
140
PRINTING the DATE and a STAMP on COPIES (Stamp)
143
General Procedure for Using Stamp
144
Select the Print Position
144
ADDING the DATE to COPIES (Date)
146
Set the Date Format
146
STAMPING COPIES (Stamp)
148
Page Numbering
150
Printing Page Numbers on Copies
150
PRINTING TEXT on COPIES (Text)
153
CHECKING the STAMP LAYOUT (Layout)
157
Image Edit Menu Screen
159
[Image Edit] KEY
159
REPEATING PHOTOS on a COPY (Photo Repeat)
160
REVERSING the IMAGE (Mirror Image)
162
COPYING in the CENTRE of the PAPER (Centring)
163
[Colour Adjustments] KEY
165
ADJUSTING RED/GREEN/BLUE in COPIES (RGB Adjust)
166
Adjust the Image
167
ADJUSTING the SHARPNESS of an IMAGE (Sharpness)
167
WHITENING FAINT COLOURS in COPIES (Suppress Background)
168
ADJUSTING the COLOUR (Colour Balance)
170
ADJUSTING the BRIGHTNESS of ACOPY (Brightness)
172
Adjust the Brightness
172
ADJUSTING the INTENSITY of a COPY (Intensity)
173
CHECKING COPIES before PRINTING (Proof Copy)
174
Change the Settings
176
COPYING ORIGINALS of DIFFERENT SIZES (Mixed Size Original)
177
Document Feeder Tray
178
Copying Thin Originals
179
Mode)
179
"Copy
181
Convenient Copy Functions
183
Interrupting a Copy Run
183
Interrupt Copy
183
COPYING MULTIPLE BUSINESS CARDS (Business Card Scan)
181
Job Status Screen
185
Job Queue Screen and Completed Job Screen
186
Cancel the Job
188
Cancelling a Job that Is Waiting in the Queue
188
Giving Priority to a Job in the Queue
189
Checking Job Details
190
Checking Information on a Copy Job Waiting in the Queue
190
STORING COPY OPERATIONS (Job Programs)
191
Storing (Editing/Deleting) a Job Program
192
Chapter 3 Printer
194
Printer Function of the Machine
196
Printing from Windows
197
Basic Printing Procedure
197
Selecting the Paper
199
Printing on Envelopes
200
Printing When the User Authentication Function Is Enabled
201
Start Printing
202
Viewing Printer Driver Help
203
Information Icon
203
Saving Frequently Used Print Settings
204
Saving Settings at the Time of Printing
204
Using Saved Settings
206
Deleting Saved Settings
206
Changing the Printer Driver Default Settings
207
Printing from a Macintosh
209
Basic Printing Procedure
209
Selecting Paper Settings
209
Select Paper Settings
209
Printing
210
Selecting the Paper
212
Printing on Envelopes
213
Printing When the User Authentication Function Is Enabled
214
Frequently Used Functions
216
Selecting the Colour Mode
216
Black and White Printing
217
Selecting a Print Mode Setting
218
Two-Sided Printing
219
Fitting the Print Image to the Paper
221
Printing Multiple Pages on One Page
222
Stapling Output
224
Convenient Printing Functions
226
Convenient Functions for Creating Pamphlets and Posters
226
CREATING a PAMPHLET (Pamphlet)
226
INCREASING the MARGIN (Margin Shift)
228
CREATING a LARGE POSTER (Poster Printing)
229
Functions to Adjust the Size and Orientation of the Image
230
ROTATING the PRINT IMAGE 180 DEGREES (Rotate 180 Degrees)
230
ENLARGING/REDUCING the PRINT IMAGE (Zoom/Xy-Zoom)
231
ADJUSTING LINE WIDTHS WHEN PRINTING (Line Width Settings)
232
REVERSING the IMAGE (Mirror Image)
233
Colour Mode Adjustment Function
234
ADJUSTING the BRIGHTNESS and CONTRAST of the IMAGE (Colour Adjustment)
234
PRINTING FAINT TEXT and LINES in BLACK (Text to Black/Vector to Black)
235
SELECTING COLOUR SETTINGS to MATCH the IMAGE TYPE (Advanced Colour)
236
Functions that Combine Text and Images
238
ADDING a WATERMARK to PRINTED PAGES (Watermark)
238
PRINTING an IMAGE over the PRINT DATA (Image Stamp)
239
CREATING OVERLAYS for PRINT DATA (Overlays)
240
Printing with an Overlay File
240
Print Functions for Special Purposes
241
PRINTING SPECIFIED PAGES on DIFFERENT PAPER (Different Paper)
241
ADDING INSERTS WHEN PRINTING on TRANSPARENCY FILM (Transparency Inserts)
243
PRINTING a CARBON COPY (Carbon Copy)
244
TWO-SIDED PRINTING with SPECIFIC PAGES PRINTED on the FRONT SIDE (Chapter Inserts)
245
Convenient Printer Functions
246
SAVING and USING PRINT FILES (Retention/Document Filing)
246
Automatically Print All Stored Data
247
Printing Without the Printer Driver
248
Directly Printing from the Machine
248
Directly Printing a File on an Ftp Server
249
Directly Printing a File in Usb Memory
250
Print the Selected File
251
Directly Printing a File in Anetwork Folder
252
Directly Printing from a Computer
255
Submit Print Job
255
Ftp Print
255
E-Mail Print
256
Checking the Print Status
257
Job Status Screen
257
Spool Screen/Job Queue Screen/Completed Job Screen
258
Printing an Encrypted Pdf File
260
Giving a Print Job Priority/Cancelling a Print Job
261
Giving a Print Job Priority
261
Cancelling a Print Job
262
Changing to Another Paper Size and Printing When Paper Runs out
263
Appendix
264
Printer Driver Specification List
264
Chapter 4 Facsimile
266
Before Using the Machine as Afax
269
Preparations for Fax
269
Connection to the Telephone Line
269
Make Sure the Main Power Switch Is in the "On" Position
270
Checking the Date and Time
271
Storing the Sender Fax Number
271
Base Screen of Fax Mode
272
Address Book Screen
276
Changing the Display of One-Touch Keys in the Address Book Screen
277
Change the Display Mode
277
Index Display
278
Fax Transmission Sequence
279
Begin Transmission
281
Entering Destinations
282
Entering a Fax Number with the Numeric Keys
282
Retrieving a Fax Number from the Address Book
283
Retrieving a Stored Destination
284
Select the Destination
284
Checking and Deleting Entered Destinations
285
Using a Search Number to Retrievea Destination
286
Retrieving a Destination from Aglobal Address Book
287
Using the Resend Function
289
Chain Dialling
290
Basic Transmission Methods
291
Transmission Methods
291
Placement Orientation of the Original
293
When the Line Is Busy
293
When a Communication Error Occurs
293
Functions that Cannot be Used
294
Fax Destination Confirmation Mode
294
Using the Automatic Document Feeder for Transmission
295
Using the Automatic Document Feeder to Send a Fax in Direct Transmission Mode
296
Using the Document Glass for Transmission
298
Using the Document Glass to Send a Fax in Direct Transmission Mode
300
Transmission Using the Speaker
302
SENDING the same FAX to MULTIPLE DESTINATIONS (Broadcast Transmission)
303
Resending to Unsuccessful Broadcast Transmission Destinations
306
SENDING a FAX DIRECTLY from ACOMPUTER (PC-Fax)
308
Image Settings
309
AUTOMATICALLY SCANNING both SIDES of an ORIGINAL (2-Sided Original)
310
Specifying the Scan Size and Send Size
311
Specifying the Send Size of the Original
316
Select the Exposure
318
Changing the Exposure
318
Exposure Settings
318
Resolution Settings
319
Changing the Resolution
319
Fax Reception
320
Receiving Faxes
320
Receiving a Fax
321
Receiving a Fax Manually
322
PRINTING a PASSWORD-PROTECTED FAX (Hold Setting for Received Data Print)
323
Checking the Image before Printing
324
Image Check Screen
325
Forward)
326
Forwarding Received Faxes
326
Forwarding Received Faxes to Anetwork Address
327
Settings)
327
Configuring Inbound Routing Settings
327
Special Modes
330
STORING FAX OPERATIONS (Program)
332
ERASING PERIPHERAL SHADOWS on the IMAGE (Erase)
334
(Timer)
336
Sending a Fax at a Specified Time
336
SENDING both SIDES of a CARD as ASINGLE PAGE (Card Shot)
338
SENDING a LARGE NUMBER of PAGES (Job Build)
341
FAXING THIN ORIGINALS (Slow Scan Mode)
343
SENDING BUSINESS CARDS (Business Card Scan)
345
Changing the Print Settings for the Transaction Report
346
ADDING YOUR SENDER INFORMATION to FAXES (Own Number Sending)
348
TEMPORARILY CHANGING the SENDER INFORMATION (Own Name Select)
349
CALLING a FAX MACHINE and INITIATING RECEPTION (Polling)
350
Initiating Polling Reception Manually
352
Receive the Fax
352
SENDING a FAX WHEN ANOTHER MACHINE POLLS YOUR MACHINE (Polling Memory)
353
RESTRICTING POLLING ACCESS (Polling Security)
353
Scanning a Document into Polling Memory
354
Checking the Document in the Public Box
356
Deleting a Document from the Public Box
357
Performing F-Code Communication
358
F-Code Communication
358
How F-Codes Work
358
Creating Memory Boxes in the Machine for F-Code Communication
359
F-Code Dialling
359
Confidential Communication Using F-Codes
360
F-Code Confidential Transmission
361
Checking Faxes Received by F-Code Confidential Reception
362
Polling Reception Using F-Codes
364
Polling Memory Transmission Using F-Codes
366
Scanning a Document into Amemory Box for F-Code Polling Transmission
366
Checking the Document in the F-Code Memory Polling Box
369
Deleting a Document Stored for F-Code Polling Transmission
370
Relay Request Transmission Using F-Codes
371
Relay Broadcast Transmission Using F-Codes
373
Using an Extension Phone
374
CONNECTING and USING an EXISTING PHONE (Extension Phone Connection)
374
RECEIVING a FAX after ANSWERINGA CALL on the EXTENSION PHONE (Remote Reception)
375
Making and Receiving Phone Calls
375
Checking the Status of Fax Jobs
376
Job Status Screen
376
Job Queue Screen and Completed Job Screen
377
Operation When a Job in the Job Queue Is Completed
380
Checking a Reserved Job or the Job in Progress
381
Checking Completed Jobs
382
Cancelling a Fax in Progress or Areserved Fax
383
Giving Priority to a Reserved Fax
384
Job
384
CHECKING the ACTIVITY LOG (Image Sending Activity Report)
385
Image Sending Activity Report
385
Information Appearing in the Result Column
386
Sharp MX-C311 Quick Start Manual (148 pages)
Digital Full Color Multifunctional System
Brand:
Sharp
| Category:
All in One Printer
| Size: 6 MB
Table of Contents
Quick Start Guide
2
Printed Manuals
2
Operation Guide
3
Manuals in PDF Format
3
Checking the Ip Address
4
Opening the Web Pages
5
Accessing the Web Server in the Machine
5
Downloading the Operation Guide
6
Table of Contents
7
Before Using the Machine
7
Before Using the Machine
11
Part Names and Functions
12
Supplies
13
Operation Panel
14
Using the Touch Panel
16
User Authentication Methods
19
User Authentication
19
Logging out
20
Home Screen
21
Image Check Function (Preview)
22
Using the Automatic Document Feeder
24
Using the Document Glass
24
Placing Originals
24
Names of the Trays
26
Print Side Face up or Face down
26
Changing Paper in a Tray
26
Loading Paper in a Tray
27
Changing the Tray Settings
28
Loading Paper in Bypass Tray
30
Base Screen of Copy Mode
32
Place the Originals
34
Making Copies
34
Set the Number of Copies
35
2-SIDED COPYING (Automatic Document Feeder)
36
COPYING on SPECIAL PAPER (Bypass Copy)
38
Selecting a Tray
40
Bypass Tray
40
MAKING COLOR COPIES (Color Mode)
41
Selecting the Exposure and Image Type
43
Place the Originals
45
Fitting the Copy Image to the Paper
45
Selection)
45
FITTING the COPY IMAGE to the PAPER (Automatic Ratio Selection)
45
ENLARGEMENT/REDUCTION (Preset Ratios / Zoom)
47
Enlargement/Reduction
47
Zoom
47
INTERRUPTING a COPY RUN (Interrupt Copy)
49
Storing a Job Program
50
STORING COPY OPERATIONS (Job Programs)
50
Deleting a Job Program
51
Special Modes
53
Selecting a Special Mode
54
Adding Margins (Margin Shift)
56
Erasing Peripheral Shadows (Erase)
56
Making Copies in Pamphlet Format (Pamphlet Copy)
56
Advertisement
Sharp MX-C311 Maintenance & Safety Manual (80 pages)
DIGITAL FULL COLOUR MULTIFUNCTIONAL SYSTEM
Brand:
Sharp
| Category:
All in One Printer
| Size: 1 MB
Table of Contents
Notice for Users in the UK
2
Material Safety Data Sheet
3
Table of Contents
4
Warranty
5
To Ensure Safe Use of the Machine
6
Cautions
6
Warnings
7
Laser Information
9
Installation Requirements
10
Supplies
12
Storage of Supplies
12
Supply of Spare Parts and Consumables
12
Replacing Supplies and Maintenance
13
Replacing the Toner Cartridges
13
Close the Front Cover
17
Replacing the Toner Collection Container
18
Replacing the Developer Cartridge / Drum Cartridge
21
Replacing the Developer Cartridge
21
Remove the Developer Cartridge
23
Turn on the Power
28
Replacing the Drum Cartridge
29
Replacing the Staple Cartridge in the Finisher
31
Open the Cover
31
Close the Cover
33
Regular Maintenance
34
Cleaning the Document Glass and Automatic Document Feeder
34
Scanning Area
35
Cleaning the Main Charger of the Photoconductive Drum
35
Clean the Main Charger
37
Cleaning the Bypass Tray Rollers
40
Cleaning the Automatic Document Feeder Rollers
43
Cleaning the Laser Unit
46
Clean the Laser Unit
50
Replace the Cleaning Tool
51
Cleaning the PT Charger of the Primary Transfer Belt Unit
53
Specifications
56
Machine Specifications / Copier Specifications
56
Duplex Module
58
Bypass Tray
58
Continuous Copying Speeds
60
Ambient Environment
60
Acoustic Noise Emission
61
Iso7779)
61
Automatic Document Feeder Specifications
62
Original Sizes
62
Business Card Feeder Specifications
63
500-Sheet Paper Feed Unit Specifications
64
Finisher Specifications
65
Printer Specifications
67
Network Scanner / Internet Fax Specifications
68
Pull Scan Function (TWAIN) Specifications
69
Facsimile Specifications
70
Sharp MX-C311 Maintenance & Safety Manual (80 pages)
DIGITAL FULL COLOR MULTIFUNCTIONAL SYSTEM
Brand:
Sharp
| Category:
All in One Printer
| Size: 3 MB
Table of Contents
Table of Contents
3
To Ensure Safe Use of the Machine
5
Cautions
5
Warnings
6
Laser Information
8
Installation Requirements
9
Supplies
11
Storage of Supplies
11
Supply of Spare Parts and Consumables
11
Replacing Supplies and Maintenance
12
Replacing the Toner Cartridges
12
Close the Front Cover
16
Replacing the Toner Collection Container
17
Replacing the Developer Cartridge / Drum Cartridge
20
Replacing the Developer Cartridge
20
Remove the Developer Cartridge
22
On the Machine
24
Turn on the Power
27
Replacing the Drum Cartridge
28
Replacing the Staple Cartridge in the Finisher
30
Open the Cover
30
Close the Cover
32
Regular Maintenance
33
Cleaning the Document Glass and Automatic Document Feeder
33
Scanning Area
34
Cleaning the Main Charger of the Photoconductive Drum
34
Clean the Main Charger
36
Cleaning the Bypass Tray Rollers
39
Cleaning the Automatic Document Feeder Rollers
42
Cleaning the Laser Unit
45
Clean the Laser Unit
49
Replace the Cleaning Tool
50
Close the Front Cover
51
Cleaning the PT Charger of the Primary Transfer Belt Unit
52
Specifications
55
Machine Specifications / Copier Specifications
55
Continuous Copying Speeds
59
Ambient Environment
59
Acoustic Noise Emission (Measurement According to ISO7779)
60
Automatic Document Feeder Specifications
61
Business Card Feeder Specifications
62
500-Sheet Paper Feed Unit Specifications
63
Finisher Specifications
64
Printer Specifications
66
Network Scanner / Internet Fax Specifications
67
Pull Scan Function (TWAIN) Specifications
68
Facsimile Specifications
69
To the Administrator of the Machine
72
Factory Default Passwords
72
Forwarding All Transmitted and Received Data to the Administrator (Document Administration Function)
72
For the Users of the Fax Function
73
Important Safety Instructions
73
Notice for Users in the U.s.a
75
Trademark Acknowledgments
77
Sharp MX-C311 Software Setup Manual (84 pages)
DIGITAL FULL COLOUR MULTIFUNCTIONAL SYSTEM
Brand:
Sharp
| Category:
All in One Printer
| Size: 3 MB
Table of Contents
Table of Contents
3
Software License
2
1 Before Installing the Software
4
CD-Roms and Software
4
Software CD-Rom
4
Other CD-Roms
6
Verifying System Requirements
7
System Requirements
7
Software Requirements
8
Connecting the Machine
9
Connecting to a Network
9
CONNECTING the MACHINE with a USB CABLE (Windows)
9
2 Setup in a Windows Environment
10
Opening the Software Selection Screen (for All Software)
10
Installing the Printer Driver / Pc-Fax Driver
12
When the Machine Is Connected to Anetwork
12
Standard Installation
13
When the Machine will be Connected with a Usb Cable
24
Using the Machine as a Shared Printer
32
Configuring the Printer Driver for the Options Installed
35
USING the STANDARD WINDOWS PS PRINTER DRIVER (Windows 98/Me/Nt 4.0)
35
Configuring the Printer Driver for the Options Installed on the Machine
37
Installing the Printer Status Monitor
42
Installing the Scanner Driver
44
Installing the Ps Display Fonts (MX-C310/C380/C400)
47
Changing the Port
49
3 Setup in a Macintosh Environment
52
Mac os X
52
Printing Using the Ipp Function
60
Mac os 9.0 - 9.2.2
60
4 Troubleshooting
66
When Installation was Not Successful
66
Removing the Software
71
Sharpdesk Installation Guide
73
Please Read
73
Warranty
73
Sharpdesk CD-ROM (for Windows)
74
Software Programs
74
Sharpdesk (Desktop Document Management Software)
74
Network Scanner Tool
75
Sharp Twain Ar/DM
75
User's Guides for Software Programs
76
Installing the Software Program
77
Installing Sharpdesk and Network Scanner Tool
78
Installing SHARP TWAIN AR/DM
80
Uninstalling the Software Program
81
Uninstalling the Software Program from the Control Panel
81
Sharp MX-C311 Handy Manual (59 pages)
Brand:
Sharp
| Category:
All in One Printer
| Size: 2 MB
Table of Contents
Table of Contents
1
Product Options
4
Consumables
6
Initial Setup
8
Colour Calibration
11
Maintenance
13
Operating System Support Updated
17
Coin Vend Interface
18
Firmware Upgrade
20
Firmware Recovery
26
E-Manual Update
28
HDD Replacement Procedure
30
EEPROM Replacement Procedure
32
MX-C311
33
MX-C310
33
MX-C380
33
Firmware & Print Driver Revision 33 Updated
33
Test Simulation
34
Trouble Codes
39
Job Log Error Codes
42
Jam Cause Codes
47
Repair Hints
50
Technical Bulletin Index 56 Updated
57
Document Reference
58
Notes
59
Advertisement
Related Products
Sharp MX-C310
Sharp MX-C312
Sharp MX-C380
Sharp MX-C380P
Sharp MX-C300F
Sharp MX-C300WE
Sharp MX-C300WR
Sharp MX-C304W
Sharp MX-C303WH
Sharp MX-C358F
Sharp Categories
Microwave Oven
LCD TV
TV
Stereo System
Refrigerator
More Sharp Manuals
Login
Sign In
OR
Sign in with Facebook
Sign in with Google
Upload manual
Upload from disk
Upload from URL