Sign In
Upload
Manuals
Brands
SATO Manuals
Printer
CL6NX PLus
SATO CL6NX PLus Manuals
Manuals and User Guides for SATO CL6NX PLus. We have
5
SATO CL6NX PLus manuals available for free PDF download: Operator's Manual, Programming Reference Manual, Manual, Quick Manual, Quick Start Manual
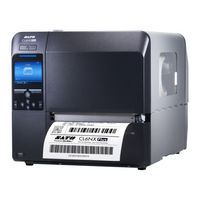
SATO CL4NX Plus, CL6NX Plus - Industrial Label Printer Quick Guide
Brand:
SATO
| Category:
Barcode Reader
| Size: 1 MB
Table of Contents
Accessories
Parts Identification
Options
Connecting the Power Cord
Loading Ribbon (For thermal transfer)
Loading Media
Powering-On the Product
Starting Up the Product (Startup Guide)
Powering-Off the Product
Basic Specifications
Videos
Sato CL4NX Plus - Calibrating Video
Documents / Resources
References
Advertisement
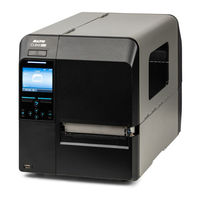
SATO CL6NX PLus Operator's Manual (889 pages)
Brand:
SATO
| Category:
Label Maker
| Size: 19 MB
Table of Contents
Table of Contents
2
Before You Start
8
About this Manual
8
Features of the Product
9
Safety Precautions
10
Precautions for Installation and Handling
15
Select a Safe Location
15
Power Supply
16
Printing
17
Regulatory Approval
18
Environmentally Hazardous Materials
21
Copyrights
22
Limitation of Liability
23
Trademarks
24
Basic Information
25
Bundled Accessories
25
Optional Devices
26
Parts Identification
28
Parts Identification for the Product
28
Front View
28
Rear View
29
Internal View
30
Parts Identification for the Operator Panel
31
Using the Operator Panel
33
Display and Operation of the Operator Panel
33
LED Indicator
33
Operations in Online/Offline Mode
33
Status Icon
35
Operations When Errors Occur
40
Guidance Videos
44
Adjusting the Print Settings During Printing
49
Canceling the Print Job
50
Settings Mode
52
Settings Mode Menus
52
Changing to the Settings Mode
52
Logging in To/Logging out of the Settings Mode
54
Item Selection
54
Setting Value Input or Selection
56
Product Memory and USB Memory
61
Getting Started
62
Installation
62
Installation Precautions
62
Installation Space
64
Front View
64
Side View
65
Bottom View
66
Powering On/Off the Product
68
Connecting the Power Cord
68
Powering on the Product
70
Powering off the Product
71
Initial Setup (Startup Guide)
73
Overview of the Startup Guide
74
Startup Screen
78
Language Selection
79
Region Setting with Optional RTC Kit
80
City Setting with Optional RTC Kit
81
Date Setting with Optional RTC Kit
82
Time Setting with Optional RTC Kit
83
Print Method Setting
84
Ribbon Setting
85
Media Sensor Type Setting
86
Media Setting
87
Completion of Initial Setup Screen
89
Startup Guide Cancelation
90
Configuring the Product According to Media and Options
91
Print Method
92
Media Sensor Type
95
Print Mode
99
Connecting the Product to a Computer
103
Procedure for Connecting the Product to a Computer
104
Connecting Interfaces
105
Available Interfaces
105
USB Interface Connection (Standard)
106
LAN Interface Connection (Standard)
106
Bluetooth Interface Connection (Standard)
107
NFC Interface Connection (Standard)
107
RS-232C Interface Connection (Standard)
108
IEEE1284 Interface Connection (Standard)
109
Wireless LAN Interface Connection (Optional)
110
Configuring the Interface Settings
112
Interface Setting Methods
112
Configuring the Interface Settings from the Interface Menu of the Product
112
Configuring the Interface Settings Using the All-In-One Tool
115
Installing the Printer Driver
116
All-In-One Tool Features
117
Loading Media and Ribbon
118
Media, Ribbon and Print Methods
118
Loading Media
119
Usable Media
119
Adjusting the Position of the Media Sensor
120
Loading the Media
121
Precautions for Loading the Media
121
Loading the Media Roll
121
Loading the Fan-Fold Media
125
Loading the Media with the Optional Cutter Unit
126
Loading the Media with the Optional Rotary Cutter Unit (CL4NX Plus Only)
132
Loading the Media with the Optional Dispenser Unit and Liner Discharge Outlet
137
Loading the Media with the Optional Dispenser Unit and Liner Discharge Rewinder
141
Removing the Liner from the Rewinder
146
Loading Ribbon (Thermal Transfer Only)
147
Checking the Ink Side of the Ribbon
148
Loading the Ribbon
149
Replacing the Ribbon
153
When to Replace Media and Ribbon
157
Checking the Remaining Amount of Media and Ribbon
157
Conditions that Trigger Paper End
158
Conditions that Trigger Label Near End
161
Conditions that Trigger Ribbon End
162
Conditions that Trigger Ribbon Near End
163
Various Settings of the Product
164
The Product's [Settings] Menu
164
[Shortcut] Menu
164
[Printing] Menu
165
[Label Length]
166
[Label Width]
167
[Auto Measure]
168
[Printing Mode]
169
[Ribbon Near End]
169
[Speed]
170
[Sensor Type]
171
[Micro Label Print Mode]
172
[Auto-Mode]
176
[Print Mode]
176
[Backfeed]
178
[Eject Cut]
179
[Darkness Range]
179
[Darkness]
180
[Imaging]
180
[Advanced]
184
[Interface] Menu
205
[Network]
206
[Ieee1284]
326
[Usb]
332
[Bluetooth]
334
[Nfc]
341
[Ignore CR/LF]
342
[Ignore CAN/DLE]
342
[External I/O]
343
[RFID] (RFID Models Only)
349
[Applications] Menu
378
[Protocol]
379
[Auto Switch Group]
380
[Sbpl]
384
[Szpl]
397
[Sipl]
403
[Stcl]
406
[Sdpl]
414
[Sepl]
436
[Aep]
441
[System] Menu
444
[Regional]
445
[Notifications]
451
[Sound]
458
[Energy Saving]
460
[LCD Brightness]
461
[Show Total Count]
461
[Password]
462
[Start on AC]
466
[Tools] Menu
467
Information Menu
515
Accessing to the Web Configuration Page
534
Various Ways to Output
543
Outputting with General-Purpose Software
543
Outputting and Controlling with Dedicated Command
544
Printable Area
546
Media Sensor Positions and Media Stop Positions
548
Flow of Printing Operations
550
Operations in Continuous Mode
551
Operations in Tear-Off Mode
555
Operations in Cutter Mode
561
Operations in Dispenser Mode
579
Operations When the Media Sensor Is Disabled
623
Adjusting the Base Reference Point
624
About the Base Reference Point
624
Adjusting the Print Position
626
Adjusting the Media Stop Position
629
Notes on the Stop/Cut Position of Different Media
632
Adjusting the Print Quality
634
Adjusting the Print Darkness
634
Adjusting the Print Speed
637
Adjusting the Product's Buzzer Volume
640
Adjusting the Head Pressure Balance
642
Print Head Balance
642
Head Pressure Setting
643
Pressure Balance Setting
644
RFID Settings (RFID Models Only)
646
Usable RFID Standards
646
Configuring the Product to Encode Inlays
647
Setting Write/Read Conditions Appropriate for RFID Tags
650
Using the SATO RF Analyze Function to Measure RFID Tags
650
Loading the Saved RFID Tag Model
657
Printing RFID Tag Errors
662
RFID Error and Reset Timing
669
External Signal (EXT) Interfaces When RFID Mode Is Enabled
672
RFID Printing Tips
674
Configuring Optional Barcode Check Function
675
Basic Specifications of the Barcode Check Function
675
Setting up the Barcode Checker
682
Operational Settings for the Barcode Checker and Installation
682
Changing How the RS-232C Interface Is Used (When Using the KEYENCE Barcode Checkers)
683
Doing a Test Read with the Barcode Checker
685
Enabling the Barcode Check
689
Selecting the Barcode Check Mode
689
Contents of the Check for Readable Mode and Comparison Mode
691
Restrictions for the Barcode Check Function
694
Initializing the Product
697
Procedures for Initializing
697
Initializing the Data Saved on the Product
697
Initializing the Setting Values and Data on the Product
700
Initializing the Setting Values on the Product
704
List of Initial Values
709
[Printing] Menu
709
[Interface] Menu
712
[Applications] Menu
729
[System] Menu
734
[Tools] Menu
736
[Information] Menu
739
Maintenance
741
Cleaning the Product
741
Cleaning
741
Cleaning Intervals
742
Cleaning Using the Cleaning Kit
743
Cleaning the Optional Linerless Cutter Kit (CL4NX Plus Only)
746
Cleaning Using the Cleaning Sheet
747
Replacing Consumable Parts
750
Replacing the Print Head
750
Replacing the Platen Roller
752
Operating the Notification Screen of SOS (SATO Online Services) (SOS Users Only)
755
Operating the Notification Screen of the SOS (SATO Online Services) On-Demand Mode (SOS Users Only)
755
Operating the Date and Time Settings Notification Screen of SOS (SATO Online Services) (SOS Users Only)
757
SOS (SATO Online Services) Application (SOS Users Only)
759
When You Are in Trouble
760
When an Error Message Appears
760
Error Message Indication and Operating Procedure When the SOS (SATO Online Services) Is Enabled (SOS Users Only)
824
Contact Information for When You Are in Trouble
826
Product Specifications
827
Hardware
827
Interface
832
Supported Interfaces
832
USB Interface
833
LAN Interface
834
Bluetooth Interface
835
NFC Interface
836
RS-232C Interface
837
IEEE1284 Interface
839
External Signal (EXT) Interface
841
Basic Specifications of External Signal (EXT) Interface
841
Connector Pin Specifications of External Signal (EXT) Interface
841
Timing Chart of the EXT Input Signal
843
Timing Chart of the EXT Output Signal
845
Timing Chart of the Wait Signal for Dispense Completion
848
Wireless LAN Interface
850
Built-In Functions
852
Printer Languages
854
Standards
855
Usable Media
856
Usable Ribbon
860
Usable Fonts
861
Scalable Fonts
884
Usable Barcodes
885
Support and Warranty
887
SOS (SATO Online Services) (SOS Users Only)
887
Warranty for Consumables Within the Product Warranty Period
888
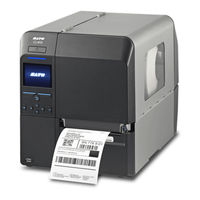
SATO CL6NX PLus Programming Reference Manual (759 pages)
Brand:
SATO
| Category:
Label Maker
| Size: 11 MB
Advertisement
SATO CL6NX PLus Manual (131 pages)
Printer Driver
Brand:
SATO
| Category:
Printer Accessories
| Size: 5 MB
Table of Contents
Table of Contents
2
Before You Start
4
Installing the Printer Driver
5
Preparing the Printer Driver
7
Checking the Printer Interface
8
Connecting the Printer to the Computer
14
Running the Installation
15
Installing the Printer Driver When Connected Via USB or
15
Ieee1284
15
Installing the Printer Driver When Connected Via LAN or
21
Wireless LAN
21
Installing the Printer Driver When Connected Via Bluetooth
28
Installing the Printer Driver When Connected Via RS-232C
38
Installing the Printer Driver When no Printer Is Connected
43
Installing the Printer Driver for Second and Later Printers
51
What To Do If The Printer Driver Is Added Under [Unspecified]
52
Setting up the Printer Driver
57
Printing Defaults] (for All Users) and [Printing Preferences] (for Individual Users)
57
How to Get Administrator Privileges
61
Settings on the [Driver Settings] Tab
62
Stocks
62
Page Setup
63
Print Options
64
Fonts
65
Barcode Font Settings And Usage Example
66
Command Font Settings And Usage Example
71
Substitution Font Settings And Usage Example
77
Download Font Settings
81
Pw4Nx/S84Nx/S86Nx Only)
81
Setup
84
Maintenance (CL4NX/CL6NX/CL4NX Plus/Cl6Nx Plus/Ct4-LX/ FX3-Lx/Pw208Nx/Pw208Mnx/S84Nx/S86Nx Only)
86
Settings
87
Configure Printer
88
Rfid Settings (Cl4Nx/Cl4Nx Plus/Cl6Nx Plus Only)
89
Support
91
Help and about
92
Settings on the [Printer Settings] Tab
93
Page Setup
95
Print Options
97
Print Mode
100
Barcode Verifier (CL4NX/CL6NX/CL4NX Plus/Cl6Nx Plus/S84Nx/S86Nx Only)
101
Graphic Options
103
Custom Commands
104
Maintenance
107
Units
108
Help and about
109
Test Page
110
Sharing the Printer
111
Installing the Printer Driver on the Print Server and Client Computers
113
Configuring Sharing Settings On The Print Server Printer
118
Configuring Sharing Settings On The Client Printer
120
Updating the Printer Driver
123
Uninstalling the Printer Driver
127
Removing the Printer Driver Data File
129
SATO CL6NX PLus Quick Manual (4 pages)
Brand:
SATO
| Category:
Label Maker
| Size: 1 MB
Advertisement
Related Products
SATO CL6NX
SATO CL6e Series
SATO CL608e
SATO CL612e
SATO CL6XXe
SATO CL608e/CL612e
SATO CL608VA
SATO CL612VA
SATO CL608
SATO CL612
SATO Categories
Printer
Label Maker
Barcode Reader
Measuring Instruments
Cutter
More SATO Manuals
Login
Sign In
OR
Sign in with Facebook
Sign in with Google
Upload manual
Upload from disk
Upload from URL