Sign In
Upload
Manuals
Brands
SATO Manuals
Printer
CL608e/CL612e
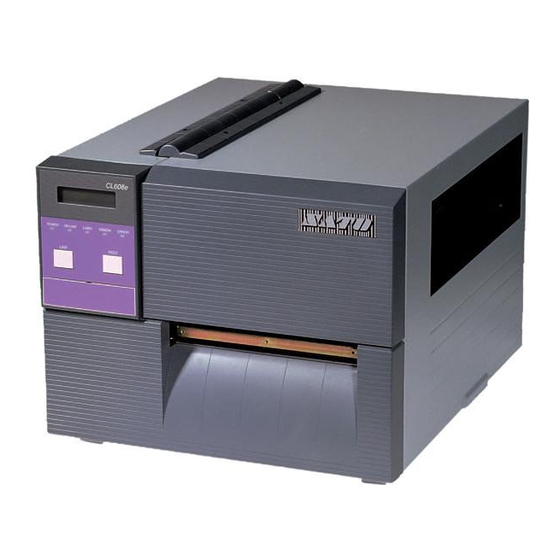
User Manuals: SATO CL608e/CL612e Barcode Label Printer
Manuals and User Guides for SATO CL608e/CL612e Barcode Label Printer. We have
1
SATO CL608e/CL612e Barcode Label Printer manual available for free PDF download: Service Manual
SATO CL608e/CL612e Service Manual (245 pages)
Thermal Transfer Printer
Brand:
SATO
| Category:
Printer
| Size: 3 MB
Table of Contents
Service Manual
1
Table of Contents
3
Section 1. Overview and Specifications
7
Overview
7
Section 1. Overview and Specifications
8
Physical Characteristics
8
Access Door
8
Printer Features
9
Rear Panel
9
External Accessory Connector
9
Printer Features
10
Operation Paneldisplays
12
Sensors and Switches
14
Components
14
Power Supply Unit
14
Switches and Sensors
15
Ribbon
16
Installation Considerations
16
Optional Accessories
16
General Printer Specifications
17
Environment & Approvals
17
General Printer Specifications
18
Character Fonts
20
Bar Codes
21
Section 2. Configuration
23
Dip Switch Settings
23
Dip Switches
23
Dip Switch Settings
24
Printer Set up
25
Default Settings
29
Dip Switch Selections
29
Lcd Panel Configuration
30
Normal Mode
31
Print Darkness Setting
31
Print Speed Adjustment
32
Pitch Offset Adjustment
33
Advanced Mode
35
Print Offset
36
Character Pitch
38
Exit Advanced Mode
38
Card Mode
39
Reprint W/Feed
50
Euro Code
52
Priority Setting Lcd Command
53
Service Mode
53
Counters Hd Dsp Cut Life
54
Counters Mode
54
Test Print Mode
55
Default Setting Mode
56
All Clear Mode
58
Maintenance Mode
58
Clear Non-Standard Protocol
59
Download User Defined Protocol Codes
59
Hex Dump Mode
60
User Download Mode
60
Sample Test Labels
62
Interface Types
63
Section 3. Interface Specifications
63
Overview
63
Available Interfaces
64
Interface Types
64
Centronics Parallel Interface
64
Usb Interface
64
Ethernet Interface
64
Receive Buffer
65
IEEE 1284 Parallel Interface
66
IEEE 1284 Parallel Interface
67
Rs232C Serial Interface
68
General Specifications
68
Electrical Specifications
68
Pin Assignments - Rs232C Printer End
68
Cable Requirements
69
Rs232C Interface Signals
70
Ready/Busy Flow Control
70
X-On/X-Off Flow Control
71
Data Streams
71
Universal Serial Bus (USB) Interface
71
Ethernet Interface
72
Bi-Directional Communications
72
Accessory (EXT) Connector
73
Pin Assignments
73
Standard Operation
74
Repeat Print
75
Section 4. Electrical Checks and Adjustments
77
Overview
77
Steps Prior to some Procedures
78
DC Power Voltage Checks
80
Potentiometer Assignments & Adjustments
82
Interface Board
83
SATO Cl608E/Cl612E Service Manual I
83
A Print Position Adjustment
84
B Print Position Adjustment
85
Section 4. Electrical Checks and Adjustments
86
Label Gap Adjustment
86
Eye-Mark Adjustment
87
Offset Label Stop Position Adjustment
88
Ribbon Sensor Verification
89
Ribbon Sensor Adjustment (Near End)
90
LCD Display Adjustment
91
Print Darkness Adjustment
92
Section 5. Mechanical Adjustments
93
Overview
93
Ribbon Clutch Adjustments
94
Rewind Clutch
95
Unwind Clutch
95
Print Head Position Adjustment
97
Print Head Position Adjustment
98
Print Head Balance Adjustment
99
Ribbon Roller Adjustment
100
Feed Roller Adjustment (Label Tracking)
101
Timing Belt Tension Adjustment
103
Head Latch Adjustment
104
Notch/Gap Sensor Adjustment
105
Section 6. Replacement Procedures
107
Overview
107
Replacing the Main Circuit Board
108
Disconnect Cables
110
Remove (2) Screws
110
Replacing the Fuses
113
Back of Printer
113
Main P.C.board
114
Replacing the Power Supply
115
Replacing the Stepper Motor
118
Replacing the Timing Belts
119
Replacing the Print Head
122
Replacing the Platen
125
Replacing the Ribbon Drive Clutch Washers
129
Replacing the Ribbon Motion Sensor
133
Sensor Locations
136
Replacing the Paper End Switch (Micro-Switch) and the Bottom Half of the Notch/Gap and Eye-Mark Sensors
137
Replacing the Top Half of the Notch/Gap Sensor
140
Replacing the Display Panel or Keyboard
143
Display Panel Assembly
145
Section 7. Factory Resets
147
Overview
147
Factory Settings/Test Print
148
Clear Head Counters
149
Clear Dispenser Counter
150
Clear Cutter Counter
151
Clear EEPROM
152
Sample Test Prints
153
Section 8. Troubleshooting
155
Overview
155
Initial Checklist
156
The IEEE1284 Parallel Interface
156
Section 8. Troubleshooting
156
The RS232C Serial Interface
158
The Universal Serial BUS (USB)
158
Lan Ethernet Interface
159
Windows Nt/Lan Server Troubleshooting
162
Error Signals
164
Troubleshooting Tables
165
Print Quality Problems
166
Head Pattern Examples
170
Feed Direction
170
Receive Buffer Hex Dump
171
Hex Dump Diagnostic Labels
171
Section 9. Optional Accessories
173
Overview
173
Label Cutter Kit Installation
174
Label Cutter Kit Installation
175
Cutter Unit
176
Pulley Cover
179
Front Cover
182
PCMCIA Memory Expansion Installation
187
PCMCIA Memory Expansion Installation
188
Flash Memory Expansion Installation
191
Real Time Clock Installation
193
Factory Reset Procedure
195
Set Calendar
196
Section 10. Parts List
199
Spare Parts List
199
Overview
199
Section 10. Parts List
200
Base Cover Assembly
200
Frame Assembly
209
Print Head Assembly
216
Print Head Assembly
217
Ribbon Assembly
220
Feed Roller Assembly
225
Main PCB Assembly
228
Interface Option
229
Dispenser Assembly Option
230
Cutter Assembly Option
237
PCMCIA Memory Option
241
Index
243
Advertisement
Advertisement
Related Products
SATO CL608e
SATO CL6e Series
SATO CL612e
SATO CL6XXe
SATO CL608VA
SATO CL612VA
SATO CL608
SATO CL612
SATO CL6NX
SATO CL6NX PLus
SATO Categories
Printer
Barcode Reader
Label Maker
Measuring Instruments
Cutter
More SATO Manuals
Login
Sign In
OR
Sign in with Facebook
Sign in with Google
Upload manual
Upload from disk
Upload from URL