Sign In
Upload
Manuals
Brands
Ricoh Manuals
All in One Printer
3180DNP
Ricoh 3180DNP Manuals
Manuals and User Guides for Ricoh 3180DNP. We have
3
Ricoh 3180DNP manuals available for free PDF download: User Manual, Operating Instructions Manual
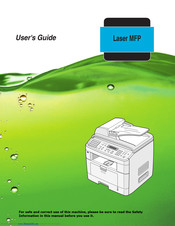
Ricoh 3180DNP User Manual (339 pages)
Laser MFP
Brand:
Ricoh
| Category:
All in One Printer
| Size: 5.91 MB
Table of Contents
Table of Contents
12
Safety Information
3
For Fax or Telephone
4
Laser Safety
4
Ozone Safety
4
Power Supply
4
Cdrh Regulations
5
For North America
5
Mercury Safety
5
Warning and Caution Labels
7
Chapter 1: NTRODUCTION
18
Special Features
18
Understanding Component Locations
18
Front View
21
Rear View
22
Control Panel Functions
23
Chapter 2: GETTING STARTED
26
Installing Software
26
Unpacking
27
Selecting a Location
29
Installing the Toner Cartridge
30
Loading Paper
32
Changing the Size of the Paper in the Paper Tray
34
Making Connections
36
Turning the Machine on
40
Changing the Display Language
41
Setting the Machine ID
42
Entering Characters Using the Number Keypad
43
Changing Numbers or Names
44
Inserting a Pause
44
Keypad Letters and Numbers
44
Setting the Date and Time
45
Changing the Clock Mode
46
Setting the Paper Size and Type
46
Setting Sounds
47
Speaker, Ringer, Key Sound, and Alarm Sound
47
Speaker Volume
48
Using the Save Modes
49
Power Save Mode
49
Scan Lamp Save Mode
49
About the Software
51
Printer Driver Features
52
Installing the Software in Windows
53
System Requirements
53
Installing Software for Local Printing
54
Installing Software for Network Printing
59
Installing the Smarthru 4
66
Repairing Software
68
Removing Software
69
Uninstalling the MFP Driver
69
Uninstalling the Network Scan Driver
70
Uninstalling the Smarthru
70
Using the Set IP
71
Installing Set IP
71
To Use Set IP
72
Using the Printer Settings Utility
73
The Phonebook Tab
74
The Scan Settings Tab
74
The Printer Tab
75
The Firmware Update Tab
76
Chapter 3 PAPER HANDLING
78
Selecting Print Materials
79
Paper Type, Input Sources, and Capacities
79
Guidelines for Paper and Special Materials
80
Loading Paper
81
In the Standard Tray
81
In the Multipurpose Tray
83
Using the Manual Feed Mode
85
Selecting an Output Location
87
Printing to the Front Output Tray (Face Down)
87
Printing to the Rear Output Slot (Face Up)
88
Chapter 4: PRINTING TASKS
90
Printing a Document in Windows
91
Canceling a Print Job
92
Printer Settings
93
Layout Tab
94
Paper Tab
95
Graphics Tab
97
Extras Tab
99
About Tab
100
Printer Tab
100
Using a Favorite Setting
101
Using Help
101
Printing Multiple Pages on One Sheet of Paper
102
Printing Posters
103
Fitting Your Document to a Selected Paper Size
105
Printing a Reduced or Enlarged Document
106
Using Watermarks
107
Using an Existing Watermark
107
Creating a Watermark
108
Deleting a Watermark
109
Editing a Watermark
109
Using Overlays
110
Creating a New Page Overlay
110
What Is an Overlay
110
Using a Page Overlay
111
Deleting a Page Overlay
113
Chapter 5: COPYING
114
Loading Paper for Copying
115
Selecting the Paper Tray
115
Preparing a Document
116
Making Copies on the Document Glass
117
Making Copies from the Automatic Document Feeder
118
Setting Copy Options
120
Darkness
120
Original Type
120
Reduced/Enlarged Copy
121
Number of Copies
122
Using Special Copy Features
122
Clone Copying
123
Collation Copying
123
Auto Fit Copying
124
Sides on 1 Page Copying
124
Up or 4 up Copying
125
Poster Copying
126
Changing the Default Settings
127
Setting the Time out Option
128
Chapter 6: SCANNING
130
Scanning Basics
131
Scanning from the Control Panel to an Application
132
Scanning Using the Smarthru
133
Using Onscreen Help File
135
Scanning Using the WIA Driver
136
Scanning to USB Flash Drive
137
Scanning Using the Network Scan
138
About Network Scan
138
Setting the Network Scan Option
138
Scanning Using Network Scan
139
Setting Network Scan Timeout
140
Using the Network Scan Driver
141
Adding a Scanner
141
Removing a Scanner
142
Setting the Properties
143
Advanced Page
144
Scanner Icons
146
Scanning Using the Network Scan Driver
146
Chapter 7: FAXING
148
Changing the Fax Setup Options
149
Available Fax Setup Options
150
Loading a Document
153
Selecting the Paper Tray
156
Adjusting the Document Resolution
156
Sending a Fax Automatically
158
Sending a Fax Manually
159
Redialing the Last Number
159
Confirming Transmission
160
Automatic Redialing
160
About Receiving Modes
161
Loading Paper for Receiving Faxes
162
Receiving Automatically in Fax Mode
162
Receiving Manually in Tel Mode
162
Receiving Automatically in Ans/Fax Mode
163
Receiving Manually Using an Extension Telephone
163
Receiving Faxes Using the DRPD Mode
164
Receiving Faxes in the Memory
165
One-Touch Dialing
166
Storing a Number for One-Touch Dialing
166
Sending a Fax Using a One-Touch Number
167
Speed Dialing
168
Storing a Number for Speed Dialing
168
Sending a Fax Using a Speed Dial Number
169
Group Dialing
170
Setting a Group Dial Number
170
Editing Group Dial Numbers
171
Sending a Fax Using Group Dialing (Multi-Address Transmission)
172
Searching for a Number in Memory
173
Searching Sequentially through the Memory
173
Searching with a Particular First Letter
173
Printing a Phone Book List
174
Sending Broadcast Faxes
175
Sending a Delayed Fax
176
Sending a Priority Fax
178
Adding Documents to a Scheduled Fax
179
Canceling a Scheduled Fax
180
Using Secure Receiving Mode
181
Printing Reports
182
Message Confirmation Report
183
Power Failure Report
183
System Data List
183
Using Advanced Fax Settings
184
Changing Setting Options
184
Advanced Fax Setting Options
185
Chapter 8: MAINTENANCE
188
Clearing the Memory
189
Cleaning Your Machine
190
Cleaning the Inside
190
Cleaning the Outside
190
Cleaning the Scan Unit
192
Maintaining the Toner Cartridge
193
Redistributing Toner
194
Replacing the Toner Cartridge
195
Setting the Notify Toner Option
197
Cleaning the Drum
198
Ignoring the Toner Empty Message
199
Setting E-Mail Notification
200
Setting the Machine Setup Tab
200
Setting the Contact Information Tab
203
Chapter 9: TROUBLESHOOTING
204
Clearing Document Jams
205
Input Misfeed
205
Exit Misfeed
206
Roller Misfeed
207
Clearing Paper Jams
208
In Tray 1
208
In Optional Tray 2
209
In the Fuser Area or Around the Toner Cartridge
210
In the Paper Exit Area
212
In the Multipurpose Tray
213
Tips for Avoiding Paper Jams
214
Clearing LCD Error Messages
215
Paper Feeding Problems
219
Solving Other Problems
219
Printing Problems
220
Printing Quality Problems
222
Copying Problems
227
Scanning Problems
228
Fax Problems
229
General Problems
231
Solving Network Printing Problems
231
Network Scan Problems
232
Windows Problems
232
Chapter 10: USING USB FLASH DRIVE
234
About USB Flash Drives
235
Installing a USB Flash Drive
235
Scanning to USB Flash Drive
236
Scanning with Default Settings
236
Scanning with Your Own Settings
237
Changing the Default Settings
239
Managing the USB Flash Drive
239
Deleting an Image File
240
Formatting the USB Flash Drive
241
Viewing the USB Memory Status
242
Printing from the USB Flash Drive
243
Backing up Data
244
Appendix A: USING YOUR MACHINE on a NETWORK
247
Setting up a Locally-Shared Machine
247
In Windows 98/Me
247
In Windows NT 4.0/2000/XP
248
Setting up a Network-Connected Machine
249
Configuring Network Parameters on the Control Panel
249
Printing a Network Configuration Page
250
Static Addressing
251
Restoring the Network Configuration
253
Installing Machine Options
255
Appendix B: INSTALLING MACHINE OPTIONS
255
Installing Memory DIMM
255
Removing a Memory DIMM
257
Installing an Optional Tray
258
Setting Tray 2 in the Printer Properties
260
Appendix C: SPECIFICATIONS
262
General Specifications
263
Scanner and Copier Specifications
264
Printer Specifications
265
Facsimile Specifications
266
Paper Specifications
267
Overview
267
Supported Sizes of Paper
268
Guidelines for Using Paper
269
Paper Output Capacity
270
Paper Specifications
270
Paper Storage Environment
270
Table of Contents
281
Basic Network Installation
283
Introduction
283
Information Checklist
284
Installation Procedure
285
Basic TCP/IP Settings
285
Enabling or Disabling TCP/IP
286
Network Communication Setup
287
Automatically Setting Tcp/Ip Addresses
287
Manually Setting Tcp/Ip Addresses
289
Workstation Setup
291
Test Print
292
Print Driver Installation for Networked Printers
293
Introduction
293
Information Checklist
294
Workstation Setup
295
Windows XP (TCP/IP)
296
Windows 2000 (TCP/IP)
298
Windows NT V4.0 (TCP/IP)
300
Windows 98/Me
302
Windows 2000/XP (Internet Printing Protocol)
303
Windows 98/Me/Nt V4.0 (Internet Printing Protocol)
304
Port Configuration
305
Common Page
305
Job Template Attributes " Page
305
Groups " Page
306
Test Print
308
Network Installation Using Internet Services
309
Introduction
309
Information Checklist
310
Using Web Image Monitor Type 103
311
Introduction
311
Network Communication Setup
312
Enabling Internet Services
313
Configuring the Network
314
Ethernet
315
Tcp/Ip
316
Snmp
318
Lpr/Lpd
320
Raw TCP/IP Printing
322
Ipp
324
Administration Tools
327
Introduction
327
Network Tools
328
Reset Network
328
Set to Defaults
329
Maintenance Using Internet Services
330
Enabling Internet Services
330
Checking Printer Status
331
Printing Reports
332
Defining the Printer
333
Using Security
334
Upgrading Firmware
335
Advertisement
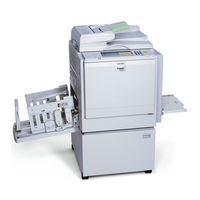
Ricoh 3180DNP Operating Instructions Manual (136 pages)
Brand:
Ricoh
| Category:
All in One Printer
| Size: 5.3 MB
Table of Contents
Operating Instructions
1
Table of Contents
3
Manuals for this Machine
7
What You Can Do with this Machine
8
Notice
10
How to Read this Manual
11
Safety Information
12
Safety During Operation
12
Positions of RWARNING and RCAUTION Labels
14
Guide to Components
15
Options
17
Option List
17
Guide to Major Options
17
Control Panel
18
Panel Display
20
1 Before Using the Machine
23
Originals
23
Size and Weights of Recommended Originals
23
Print Paper
25
Non-Recommended Paper
25
Storing Paper
26
Printing Size
27
2 Basics
29
Printing Preparations
29
Using the Paper Feed Tray and Delivery Tray
29
After Printing
32
Folding the Paper Feed Tray and Delivery Tray
32
Placing Originals
34
Placing Originals on the Exposure Glass
34
Placing Originals in the Auto Document Feeder
34
Basic Procedure
36
How to Operate
37
Auto Reset
38
Energy Saver Mode
38
Printing on Thick or Thin Paper
39
Feed Roller Pressure Lever Position
39
Separation Pressure Lever Position
40
Auto Cycle
41
Original Type
42
Sample Print and Adjustment
43
Adjusting the Print Image Position
43
Image Position
44
Changing the Printing Speed
45
3 Printing Functions
47
Master Making Density
47
Fine Mode
48
Preset Reduce/Enlarge
48
Erase Border
49
Economy Mode
50
Memory/Class
51
Class Mode (Print Per Class)
52
Memory Mode (Print Per Original)
53
Recall Program
55
Class/Year
59
Combine
61
Repeat
63
Skip Feed Printing
64
Security Mode
65
Online Printing
65
Hold Data-In
65
Program
66
Registering Print Settings
66
Recalling a Program
67
Make Color Prints
68
Changing the Color Drum Unit
68
Making Color Prints
70
Printing in Two Colors
70
Combination Chart
72
4 Troubleshooting
73
If Your Machine Does Not Operate as You Want
73
Printing Problems
74
Printing Problems When Using Combine Mode
74
Loading Paper into the Paper Feed Tray
75
Replenishing Paper
75
Changing the Paper Size
76
When the Add Ink Indicator (J) Lights
77
Master Roll Replacement
81
Placing a New Roll of Tape in the Tape Dispenser (Option)
83
Clearing Misfeeds
84
P" Original Misfeeds Occur in the Auto Document Feeder
84
A" Paper Misfeeds in the Paper Feed Section
87
B" Paper Wrapped Around the Drum
87
C" Paper Misfeeds in the Paper Exit Section
89
D" Master Misfeeds in the Master Feed Section
92
A + B" Paper Misfeeds in the Paper Feed Section
93
B + E" Master Misfeeds in the Master Eject Section
95
When the Open Cover/Unit Indicator (M) Lights and a Message Is Displayed
98
Front Cover Is Open
98
Cover of Optional Auto Document Feeder Is Open
98
Master Eject Unit Is Open
98
When the Master End Indicator (C) Lights and a Message Is Displayed
99
Master Feeding Cover Is Open
99
Master Tray Is Not Set Properly
99
When the Master Eject Indicator (K) Lights
100
When Other Indicators Light
101
Poor Printing
102
Dirt on the Back Side of Paper
102
Dirt on the Front Side of Paper (Black Line/Stain)
104
Blank Prints or Incomplete Prints
105
5 User Tools
109
Accessing the User Tools
109
Quitting User Tools
109
User Tools Menu
110
Counter
110
System
110
Set Operation Mode
111
Initial Settings
112
Mode Settings
113
Administrator Tools
114
Onine Settings
114
User Code
115
Entering the User Code to Use the Machine
115
Clearing the Counter
116
6 Remarks
117
Operation Notes
117
General Cautions
117
Print Paper
119
Originals
119
Where to Put Your Machine
120
Environmental Conditions
120
Power Connection
121
Access to Machine
121
Maintaining the Machine
122
Main Frame
122
Optional Document Feeder
123
7 Specifications
125
Main Frame
125
Tape Dispenser
127
Auto Document Feeder
127
Auto Document Feeder (ADF)
128
Consumables
129
Index
130
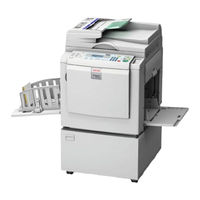
Ricoh 3180DNP Operating Instructions Manual (134 pages)
Brand:
Ricoh
| Category:
Printer
| Size: 3.64 MB
Table of Contents
Table of Contents
3
Manuals for this Machine
7
What You Can Do with this Machine
8
Notice
10
How to Read this Manual
11
Safety Information
12
Safety During Operation
12
User Information on Electrical & Electronic Equipment
14
Users in the EU, Switzerland and Norway
14
All Other Users
14
Positions of RWARNING and RCAUTION Labels
15
Guide to Components
16
Options
18
Option List
18
Guide to Major Options
18
Control Panel
19
Panel Display
21
Before Using the Machine
23
Originals
23
Size and Weights of Recommended Originals
23
Print Paper
25
Non-Recommended Paper
25
Storing Paper
26
Printing Size
27
Basics
29
Printing Preparations
29
Using the Paper Feed Tray and Delivery Tray
29
After Printing
32
Folding the Paper Feed Tray and Delivery Tray
32
Placing Originals
34
Placing Originals on the Exposure Glass
34
Placing Originals in the Auto Document Feeder
34
Basic Procedure
36
Energy Saver Mode
38
Auto Reset
38
Printing on Thick or Thin Paper
39
Feed Roller Pressure Lever Position
39
Separation Pressure Lever Position
40
Auto Cycle
41
Original Type
42
Sample Print and Adjustment
43
Adjusting the Print Image Position
43
Changing the Printing Speed
45
Printing Functions
47
Master Making Density
47
Fine Mode
48
Preset Reduce/Enlarge
48
Erase Border
49
Economy Mode
50
Memory/Class
51
Class Mode (Print Per Class)
52
Memory Mode (Print Per Original)
53
Recall Program
55
Class/Year
59
Combine
61
Repeat
63
Skip Feed Printing
64
Security Mode
65
Online Printing
65
Hold Data-In
65
Program
66
Registering Print Settings
66
Recalling a Program
67
Make Colour Prints
68
Changing the Colour Drum Unit
68
Making Colour Prints
70
Printing in Two Colours
70
Combination Chart
72
Troubleshooting
73
If Your Machine Does Not Operate as You Want
73
Printing Problems
74
Printing Problems When Using Combine Mode
74
Loading Paper into the Paper Feed Tray
75
Replenishing Paper
75
Changing the Paper Size
76
When the Add Ink Indicator (J) Lights
77
Master Roll Replacement
81
Placing a New Roll of Tape in the Tape Dispenser (Option)
83
Clearing Misfeeds
84
P" Original Misfeeds Occur in the Auto Document Feeder
84
A" Paper Misfeeds in the Paper Feed Section
86
B" Paper Wrapped Around the Drum
87
C" Paper Misfeeds in the Paper Exit Section
88
D" Master Misfeeds in the Master Feed Section
91
A + B" Paper Misfeeds in the Paper Feed Section
93
B + E" Master Misfeeds in the Master Eject Section
94
When the Open Cover/Unit Indicator (M) Lights and a Message Is Displayed
98
Front Cover Is Open
98
Cover of Optional Auto Document Feeder Is Open
98
Master Eject Unit Is Open
98
When the Master End Indicator (C) Lights and a Message Is Displayed
99
Master Feeding Cover Is Open
99
Master Tray Is Not Set Properly
99
When the Master Eject Indicator (K) Lights
100
When Other Indicators Light
101
Poor Printing
102
Dirt on the Back Side of Paper
102
Dirt on the Front Side of Paper (Black Line/Stain)
104
Blank Prints or Incomplete Prints
105
User Tools
109
Accessing the User Tools
109
Quitting User Tools
109
User Tools Menu
110
Counter
110
System
110
Set Operation Mode
111
Initial Settings
112
Mode Settings
113
Administrator Tools
114
Onine Settings
114
User Code
115
Entering the User Code to Use the Machine
115
Clearing the Counter
116
Remarks
117
Operation Notes
117
General Cautions
117
Print Paper
119
Originals
119
Where to Put Your Machine
120
Environmental Conditions
120
Power Connection
121
Access to Machine
121
Maintaining the Machine
122
Main Frame
122
Optional Document Feeder
123
Specifications
125
Main Frame
125
Auto Document Feeder (ADF)
128
Consumables
129
Index
130
Advertisement
Advertisement
Related Products
Ricoh 3183DNP
Ricoh Aficio 3131
Ricoh SP 311SFNw
Ricoh SP 313SFNW V
Ricoh Aficio 3035
Ricoh Aficio 3232C
Ricoh Aficio 3030
Ricoh 3310l
Ricoh GX 3050SFN
Ricoh SP 377SNWX
Ricoh Categories
All in One Printer
Printer
Digital Camera
Copier
Printer Accessories
More Ricoh Manuals
Login
Sign In
OR
Sign in with Facebook
Sign in with Google
Upload manual
Upload from disk
Upload from URL