Sign In
Upload
Manuals
Brands
NCR Manuals
Printer
7197 II SERIES
NCR 7197 II SERIES Manuals
Manuals and User Guides for NCR 7197 II SERIES. We have
2
NCR 7197 II SERIES manuals available for free PDF download: Owner's Manual
NCR 7197 II SERIES Owner's Manual (396 pages)
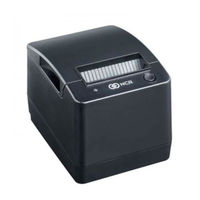
Thermal Receipt Printer
Brand:
NCR
| Category:
Printer
| Size: 31 MB
Table of Contents
Power Supply
3
Interface Cable
3
Power Cord
3
Federal Communications Commission (FCC) Radio Frequency Interference Statement
7
Communication Cables
7
Information to User
7
Table of Contents
12
Revision Record
25
Chapter 1: About the 7197 Series II Printer
27
General Description
27
Features
28
Receipt Station
28
General Features
29
Options
30
Thermal Print Head
30
Ordering Paper and Supplies
31
Ordering Thermal Receipt Paper
31
Ordering Other Supplies
32
Ordering Documentation
33
Cleaning the Printer
34
Cleaning the Cabinet
34
Cleaning the Thermal Print Head
34
Chapter 2: Setting up and Using the Printer
35
What Is in the Box
35
Removing the Packing Material
35
Repacking the Printer
36
Choosing a Location
37
Normal Table Top
37
Wall-Mounted
39
Setting Switches
40
Resetting the Printer
40
Connecting the Cables
41
RS-232 Cable Connection
42
USB Cable Connection
43
Ethernet Cable Connection (Ethernet Model)
44
About the Universal Serial Bus
45
Advantages of USB Connections
45
Advantages of the NCR USB Solution
45
Checking for USB Support on the Host Computer
46
Host Configuration
46
Windows XP
46
Windows 7, 8, and 10
46
Configuring the Printer
47
Installing the USB Virtual COM Port Driver for Printers
51
Windows XP
51
Windows POS Ready 7
56
Windows 8
60
Windows 10
63
Verifying the Installation
66
Windows XP
66
Windows POS Ready 7
68
Windows 8
70
Windows 10
72
Uninstalling the Drivers
73
Windows XP
73
Windows POS Ready 7
73
Windows 8
75
Windows 10
77
Configuring Serial Port Number Assignments
80
Serial Port Configuration Methods
80
Automatic (Default)
80
Assigning a Serial Port to the Printer
80
Using the Printer
81
Loading and Changing the Receipt Paper
82
Removing the Paper Roll
82
Loading the Paper Roll
84
Advancing Paper
86
Chapter 3: Solving Problems
87
Green LED Does Not Come On/Printer will Not Print
88
Green LED Blinking (Slow)
88
Green LED Blinking (Fast)
88
Receipt Printing Is Light or Spotty
90
Other Serious Problems
91
Contacting a Service Representative
91
Chapter 4: Diagnostics
93
Level 0 Diagnostics
94
Level 1 Diagnostics
95
Printer Configuration
95
Configuring the Printer
97
Communication Interface Modes
100
RS-232C/USB Interface Settings [Standard Model]
100
Ethernet Interface Settings [Standard Model]
103
Diagnostic Modes
103
Datascope Mode
104
Receipt Test Mode
104
Emulation/Software Options
105
Printer ID Mode
106
Default Lines Per Inch
107
Carriage Return Usage
107
Asian Mode
107
Receipt Synchronization
108
Ignore Sync Configuration
109
Clear User Defined Area
109
PDF417 Max Column Print
109
Auto Reset
110
Font Type
111
Compatibility Barcode Length
111
Compress Pitch
112
Model in 4610 Emulation
112
Hardware Options
113
Receipt Print Mode
113
Print Density
114
Power on Head Failure Detection
114
Maximum Power
115
Paper Low Sensor
115
Paper Width
115
Set Knife Option
116
Color Paper Option
116
Power LED Control
117
Shift to Standby
117
Shift Time to Power off
118
Wi-Fi Date Sync Option
118
Default Code Page
120
7158 Mode
121
DHCP Mode
122
LAN Interface
122
Mfg Adjustment
122
Rolling ASCII Print Test (Receipt)
123
H Print Test (Receipt)
124
Duty Check Print Test (Receipt)
125
Print Current Setting
126
EEPROM to Default Setting
127
Ethernet-Info to Default Setting
127
Level 2 Diagnostics
128
Level 3 Diagnostics
129
Chapter 5: Communication
131
Communication Overview
131
Interface
131
Sending Commands
131
Using DOS to Send Commands
131
Using BASIC to Send Commands
132
RS-232C Interface (Standard Model)
133
Print Speed and Timing
133
XON/XOFF Protocol
134
DTR/DSR Protocol
135
RS-232C Technical Specifications
135
Setting Extra RS-232C Options
135
Ethernet Interface (Ethernet Model)
136
Protocol
136
Ethernet Connection Port
137
TCP Socket Communication
137
Communication Procedure
137
UDP Socket Communication
138
Multiple Connection
138
Wifi Interface (Wifi Model)
139
Connector
140
RS 232 Connector
140
Ethernet Connector
140
Power Cable Connector
141
Cash Drawer Connector
141
USB Connector
142
Switch Settings
142
Chapter 6: Commands
145
Command Conventions
145
Introduction
145
List of Commands and Location
146
By Command Code
146
By Function
152
Printer Function Commands
152
Vertical Positioning and Print
153
Horizontal Positioning Commands
153
Unsolicited Status Update
156
Barcode Commands
156
Page Mode Commands
157
Flash Download Commands
159
Comparison Chart
159
Command Descriptions
161
Printer Function Commands
162
Clear Printer
162
Perform Partial Knife Cut
163
Generate Tone
164
Initialize Printer
165
Select Sensors to Stop Printing
165
Enable or Disable Panel Buttons
166
Generate Pulse to Open Cash Drawer
166
Select Cut Mode and Cut Paper
167
Print Test Form
168
Vertical Positioning and Print Commands
168
Print and Feed Paper One Line
168
Print and Carriage Return
169
Feed N Print Lines
169
Add N Extra Dot Rows
170
Set Line Spacing to 1/6 Inch
171
Set Line Spacing
172
Print and Feed Paper
172
Print and Feed N Lines
173
Set Horizontal and Vertical Minimum Motion Units
173
Horizontal Positioning Commands
174
Horizontal Tab
174
Set Column
174
Set Absolute Starting Position
175
Set Horizontal Tabs
176
Set Relative Print Position
176
Select Justification
178
Set Left Margin
179
Set Printing Area Width
180
Print Characteristic Commands
181
Select Double-Wide Characters
181
Select Single-Wide Characters
181
Select 90 Degree Counter-Clockwise Rotated Print
181
Select Pitch (Column Width)
182
Set Character Right-Side Spacing
183
Select Print Modes
183
Select or Cancel User-Defined Character Set
185
Define User-Defined Characters
185
Defining User-Defined Characters
186
Select or Cancel Underline Mode
186
Copy Character Set from ROM to RAM
187
Cancel User-Defined Characters
187
Select or Cancel Emphasized Mode
188
Select or Cancel Double Strike
188
Select or Cancel Italic Print
189
Select International Character Set
189
Select Character Code Table
190
Select or Cancel 90 Degrees Clockwise Rotated Print
191
Select Print Color
191
Select or Cancel Upside down Printing Mode
191
Select Character Size
192
Select or Cancel White/Black Reverse Print Mode
193
Select or Cancel Smoothing Mode
194
Select Superscript or Subscript Modes
194
Select or Cancel Unicode(UTF-16) Mode
195
Summary of Rotated Printing
195
Graphics Commands
196
Print Raster Graphics
196
Download BMP Logo
197
Select Bit Image Mode
197
Print Advanced Raster Graphics
199
Select Single-Density Graphics
200
Select Double-Density Graphics
200
Download Bit Image Registration/Printing
201
Select the Current Logo (Downloaded Bit Image)
201
Define Downloaded Bit Image
202
Print Downloaded Bit Image
204
Convert 6 Dots/MM Bitmap to 8 Dots/MM Bitmap
205
Status Commands
205
Status Command Introduction
205
Batch Mode
206
Transmit Peripheral Device Status
206
Transmit Printer Status
207
Transmit Printer ID
207
Transmit Printer ID, Remote Diagnostics Extension
209
Transmit Status
215
Send Printer Software Version
217
Execute Head Failure Detection
217
Get Print Completion
218
Recognizing Data from the Printer
219
Real Time Commands
220
Preferred Implementation
220
Alternate Implementation
221
Rules for Using Real Time Commands
221
Moving Data through the Buffer
221
UDP Communication
222
Real Time Status Transmission
222
Real Time Request to Printer
226
Real Time Printer Status Transmission
227
Unsolicited Status Update Validation
229
Determine if Device Supports USU
229
Enable/Disable Unsolicited Status Update
229
Baseline State Request
230
Printer Firmware Implementation Considerations
235
Bar Code Commands
236
Select Printing Position for HRI Characters
236
Select Pitch for HRI Characters
236
Select Bar Code Height
237
Print Bar Code
237
Select Bar Code Width
242
QR Code: Select the Model
243
QR Code: Set the Size of Module
243
QR Code: Select the Error Correction Level
244
QR Code: Store the Data in the Symbol Storage Area
245
QR Code: Print the Symbol Data in the Symbol Storage Area
245
QR Code: Transmit the Size Information of the Symbol Data in the Symbol Storage Area
246
Page Mode Commands
247
Print and Return to Standard Mode
247
Cancel Print Data in Page Mode
248
Select Page Mode
248
Select Standard Mode
249
Select Print Direction in Page Mode
250
Set Printing Area in Page Mode
251
Set Absolute Vertical Print Position in Page Mode
252
Set Relative Vertical Print Position in Page Mode
253
Macro Commands
254
Start or End Macro Definition
254
Execute Macro
255
User Data Storage Commands
256
Write to User Data Storage
256
Read from User Data Storage
257
Select Memory Type (Sram/Flash) Where to Save Logos or User-Defined Fonts
258
Flash Allocation
259
Erase User Flash Sector
260
Printer Setting Change
260
Asian Character Commands
267
Select Print Modes for Kanji Characters
267
FS - Turn Underline Mode ON/OFF for Kanji
268
Define User-Defined Kanji Characters
269
Set Kanji Character Spacing
270
FS W (Set Quadruple Mode ON/OFF for Kanji)
270
Flash Download Commands
271
Switch to Flash Download Mode
271
Request Printer ID
271
Return Segment Number Status of Flash Memory
272
Select Flash Memory Sector to Download
272
Get Firmware CRC
273
Return Microprocessor CRC
273
Erase the Flash Memory
274
Return Main Program Flash CRC
274
Erase Selected Flash Sector
275
Download to Active Flash Sector
275
Reboot the Printer
276
Chapter 7: Reflashing the Printer Firmware
277
Flash Utility Information
277
File Configurations
277
Printer Languages Cross-Reference
278
DOS Flash Utility
278
Windows Command Line Firmware Update Utility
280
Using Tseflash.exe Utility
282
Chapter 8: Configuration Network
283
Summary
283
Display Format of Configuration Setting Page
283
TCP/IP Setting
287
SNMP Setting
289
Other Settings
291
Reset Window
293
IP Address Automatic Acquisition
294
Chapter 9: Configuration Wi-Fi Network
295
Connect the Printer
295
Display Format of Configuration Setting Page
296
Client Settings
298
Configure the Enterprise Security
303
Setting up in Limited AP Mode
307
Change Provision Web-Page User Name and Password
311
Wifi Firmware
313
Appendix A: Specifications
315
Printing Specifications
315
Power Requirements
317
Power from Host
317
Power from External Power Supply
318
Environmental Conditions
319
Reliability
319
Dimensions and Weight
319
Density of Receipt Print Lines
320
Duty Cycle Restrictions (Printing Solid Blocks)
320
Appendix B: Reflashing the Printer Firmware
321
Appendix C: Lean Receipt Utility
323
Appendix D: Print Characteristics
325
Character Size
325
Receipt Station
325
Print Zones
326
Receipt Station
326
Appendix E: Thai Code
329
Outline
329
Validate Thai Code Page Function
330
Thai Character Configuration
330
Character Types
331
Thai Character Data Procedure
332
Appendix F: Arabic Font Support
335
Outline
335
Contextual Forms
335
Word Ligatures
335
Reverse the Arabic Strings
336
Proportional Font
336
Printing Layout (over the Area)
341
Character Sets
342
Advertisement
NCR 7197 II SERIES Owner's Manual (308 pages)
Brand:
NCR
| Category:
Printer
| Size: 4 MB
Table of Contents
Table of Contents
10
Quick Reference
8
How to Obtain more Information
9
Revision Record
9
Table of Contents
10
Who Should Use this Book
9
Contents
11
Chapter 1: About the 7197 Series II Printer
14
Features
15
Receipt Station
15
General Features
16
Options
16
Thermal Print Head
16
Ordering Paper and Supplies
18
Ordering Thermal Receipt Paper
18
Ordering Other Supplies
19
Ordering Documentation
19
Cleaning the Printer
20
Cleaning the Cabinet
20
Cleaning the Thermal Print Head
21
Chapter 2: Setting up and Using the Printer
22
What Is in the Box
22
Removing the Packing Material
23
Repacking the Printer
24
Choosing a Location
24
Wall Mounted
25
Setting Switches
26
Setting up the Printer
26
Connecting the Cables
27
About the Universal Serial Bus
30
Advantages of USB Connections
30
Advantages of the NCR USB Solution
30
Checking for USB Support on the Host Computer
31
Host Configuration
31
Configuring the Printer
31
Installing the USB Virtual COM Port Printer Driver When USB Type ION (Epic)
34
Checking the Installation
39
Configuring Serial Port Number Assignments
41
Serial Port Configuration Methods
41
Uninstalling the Drivers
41
Using the Printer
43
Loading and Changing the Receipt Paper
44
Removing the Paper Roll
44
Loading the Paper Roll
46
Advancing Paper
47
Chapter 3: Solving Problems
48
Green LED Does Not Come On/Printer will Not Print
49
Green LED Blinking (Slow)
49
Green LED Blinking (Fast)
49
Receipt Printing Is Light or Spotty
50
Other Serious Problems
51
Contacting a Service Representative
51
Chapter 4: Diagnostics
52
Level 0 Diagnostics
52
Level 1 Diagnostics
52
Printer Configuration
53
Configuring the Printer
55
Main Menu
55
Communication Interface Modes
58
Diagnostic Modes
61
Emulation/Software Options
62
Hardware Options
68
Print Density
68
Default Code Page
72
DHCP Mode
75
Mfg Adjustment
75
Level 2 Diagnostics
80
Level 3 Diagnostics
81
Chapter 5: Communication
82
Communication Overview
82
Interface
82
Sending Commands
82
RS-232C Interface (Standard Model)
83
Print Speed and Timing
83
XON/XOFF Protocol
84
DTR/DSR Protocol
84
RS-232C Technical Specifications
85
Setting Extra RS-232C Options
85
Ethernet Interface (Ethernet Model)
86
Protocol
86
Ethernet Connection Port
87
TCP Socket Communication
88
UDP Socket Communication
88
Multiple Connection
88
Connector
89
Switch Settings
91
Chapter 6: Commands
92
Command Conventions
92
Introduction
92
List of Commands and Location
92
Sending Commands
92
By Command Code
93
By Function
97
Printer Function Commands
97
Vertical Positioning and Print
97
Horizontal Positioning Commands
98
Print Characteristic Commands
98
Graphics Commands
99
Real Time Commands
100
Status Commands
100
Unsolicited Status Update
100
Barcode Commands
101
Page Mode Commands
101
Asian Character Commands
102
Flash Download Commands
102
Macro Commands
102
User Data Storage Commands
102
Comparison Chart
103
Command Descriptions
104
Printer Function Commands
105
Print Test Form
111
Vertical Positioning and Print Commands
112
Print and Feed Paper One Line
112
Print and Carriage Return
112
Feed N Dot Rows
113
Feed N Print Lines
113
Add N Extra Dot Rows
114
Print
115
Set Line Spacing
115
Set Line Spacing to 1/6 Inch
115
Print and Feed Paper
116
Print and Feed N Lines
117
Set Horizontal and Vertical Minimum Motion Units
117
Horizontal Positioning Commands
118
Horizontal Tab
118
Set Column
118
Set Absolute Starting Position
119
Set Horizontal Tabs
120
1B 5C N1 N2
121
Set Relative Print Position
121
Select Justification
122
1D 4C Nl Nh
123
Set Left Margin
123
1D 57 Nl Nh
124
Set Printing Area Width
124
Print Characteristic Commands
125
Select Double-Wide Characters
125
Select Single-Wide Characters
125
Select 90 Degree Counter-Clockwise Rotated Print
126
Select Pitch (Column Width)
126
Set Character Right-Side Spacing
127
Select Print Modes
128
Define User-Defined Characters
129
Select or Cancel User-Defined Character Set
129
Copy Character Set from ROM to RAM
131
Select or Cancel Underline Mode
131
Cancel User-Defined Characters
132
Select or Cancel Emphasized Mode
132
Graphics Commands
141
Status Commands
151
Real Time Commands
165
Unsolicited Status Update Validation
173
Bar Code Commands
178
Caution
185
Macro Commands
198
User Data Storage Commands
200
Flash Allocation
203
Asian Character Commands
211
Flash Download Commands
215
Chapter 7: Reflashing the Printer Firmware
222
Flash Utility Information
222
File Configurations
222
Printer Languages Cross Reference
223
Chapter 8: Configuration Network
229
Summary
229
Display Format of Configuration Setting Page
229
TCP/IP Setting
233
SNMP Setting
235
Other Setting
236
Reset Window
237
IP Address Automatic Acquisition
238
Appendix A: Specifications
239
Printing Specifications
239
Power Requirements
240
Environmental Conditions
240
Reliability
241
Dimensions and Weight
241
Density of Receipt Print Lines
241
Duty Cycle Restrictions (Printing Solid Blocks)
241
Appendix B: Reflashing the Printer Firmware
243
Appendix C: Lean Receipt Utility
244
Appendix D: Print Characteristics
245
Character Size
245
Receipt Station
245
Print Zones
246
Receipt Station
246
Character Sets
248
Code Page
253
Index
301
Advertisement
Related Products
NCR 7197
NCR 7193
NCR 7194
NCR RealPOS 7199
NCR 7156
NCR 7167
NCR 7158
NCR 7169
NCR 7350-K914
NCR 7360-K302
NCR Categories
Racks & Stands
Touch terminals
Printer
Scanner
Monitor
More NCR Manuals
Login
Sign In
OR
Sign in with Facebook
Sign in with Google
Upload manual
Upload from disk
Upload from URL