Sign In
Upload
Manuals
Brands
Minolta Manuals
Copier
EP1054
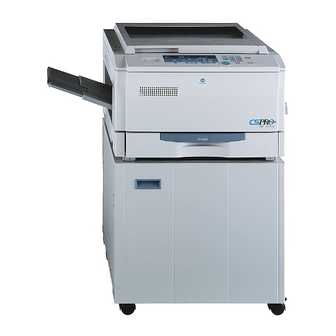
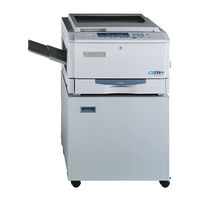
Minolta EP1054 Manuals
Manuals and User Guides for Minolta EP1054. We have
4
Minolta EP1054 manuals available for free PDF download: User Manual, General Instructions Manual, Service Manual, Operator's Manual
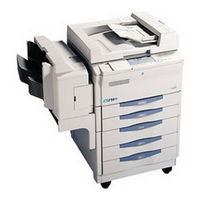
Minolta EP1054 User Manual (339 pages)
Brand:
Minolta
| Category:
All in One Printer
| Size: 9 MB
Table of Contents
Cotnents
2
Table of Contents
2
1 Specifications
3
L - L . Specifications of EP2030
3
L-2. Specifications of EP1085
6
L-3. Specifications of EP1054
9
2 Precautions for Installation
12
3 Precautions for Use
13
4 Handling of the Consumables
14
System Options
15
System Options of EP1085
16
System Options of EP1054
16
Ep1054/Ep1085/Ep2030 Dis/Reassembly
18
Service Instructions
20
INSTRUCTIONS for HANDLING the Pwbs with MOS Ics
20
L-2. HANDLING of the PC DRUM
20
L-3. PARTS WHICH MUST NOT be TOUCHED
23
Other Screws
23
Screws
23
Variable Resistors on Board
23
Disassembly/Reassembly
24
2-L. DOORS, COVERS, and EXTERIOR PARTS: IDENTIFICATION and REMOVAL PROCEDURES
24
REMOVAL of Pwbs
27
Belt Installations
29
Paper Take-Up/Transport Sections
30
Removal of the Paper Take-Up Unit
30
Cleaning of the Paper Take-Up Rolls
31
Removal of the Paper Take-Up Rolls
31
Removal of the Suction Unit
31
Disassembly of the Suction Unit
32
Replacement of the Paper Lifting Springs (2Nd Drawer): 23 Cpm Copier Only
33
Disassembly of the Multi Bypass Table (15/L 8 Cpm Copier: OPTION)
34
Optical Section
39
Removal of the Lens Drive Cable
39
Winding of the Lens Drive Cable
40
Removal of the Scanner Drive Cable
41
Winding of the Scanner Drive Cable
44
Cleaning of the Exposure Lamp
48
Removal of the Scanner
48
Cleaning of the Lens and 4Th Mirror
49
Cleaning of the Lst/2Nd/3Rd Mirrors
49
Cleaning of the Optical Section Cooling Fan Filter (15/L 8 Cpm Copier Only
49
Imaging Unit
50
Cleaning of the Image Erase Lamp
54
Cleaning of the Main Erase Lamp
54
The Imaging Unit
54
Pc Drum Charge Corona/Image Transfer Corona Unit
56
Cleaning of the PC Drum Charge Corona Housing
56
Cleaning of the Comb Electrode
57
Cleaning of the Image Transfer/Paper Separator Coronas Wires
57
Cleaning of the PC Drum Charge Corona Grid Mesh
57
Cleaning of the Lower Pre-Image Transfer Guide Plate
58
Housing
58
Replacement of the Ozone Filter
58
Fusing Unit
59
Removal of the Fusing Unit
59
Cleaning of the Pre-Fusing Guide Plate
60
Removal of the Upper Fusing Roller
60
Cleaning of the Fusing Thermistor
62
Cleaning of the Upper Fusing Roller
62
Cleaning of the Upper Paper Separator Fingers
62
Removal of the Lower Fusing Roller
62
Cleaning of the Lower Fusing Roller
63
Cleaning of the Lower Paper Separator Fingers
63
Disassembly of the Exit/Duplex Switching Unit (Option
64
Adjustment
68
Jigs and Tools Used
68
Adjustment Requirements List
69
Adjustment of Switches
70
Adjustment of Front Door Interlock Switch S21
70
Electrical/Image Adjustments
71
Adjustment of the Optimum Exposure Setting in the Manual Mode
74
Adjustment of the Optimum Exposure Setting in the Auto Mode
75
Adjustment of the ATDC Sensor
76
Adjustment of the Aperture Blades
77
Adjustment of the Multi Bypass Table Reference Position
78
Cpm Copier Only
78
Adjustment of the Leading Edge Registration
81
Adjustment of the Image Leading Edge Erase Width
85
Adjustment of the Image Erase Lamp Position
87
Other Adjustments
88
Adjustment of the Scanner/Mirrors Carriage Position
88
Adjustment of the Gap between the Doctor Blade and Sleeve Roller
89
Adjustment of the Original Size Detecting Board
90
Miscellaneous
91
4-L. INSTALLATION of the PLUG-IN COUNTER MOUNTING BRACKET (OPTION)
91
Cotnents
93
Cross-Sectional View
95
L - L . Cross-Sectional View of 23 Cpm Copier
95
I-2. Cross-Sectional View of I8 Cpm Copier
95
L-3. Cross-Sectional View of 15 Cpm Copier
95
Copy Process
98
Drive System
100
Sequential Explanation
101
Imaging Unit
106
5-L. Imaging Unit Drive
107
Imaging Unit Toner Recycling
108
Imaging Unit Fuse
108
Pc Drum
109
Drum Charging
110
Image Erase Lamp
111
Optical Section
114
9-I. Exposure Lamp
115
AE Sensor
116
Lamp Reflectors
117
Aperture Plates
117
Scanner and 2Nd/3Rd Mirror Carriage Movement
118
4Th Mirror Movement
120
Lens Movement
121
Original Size Detecting Sensors
122
Sensor Locations
123
4. Size Detection
124
5. Original Size Detection Timing
125
I O-6. Original Cover Angle Detection (23 Cpm Copier Only
126
Development
127
11-L. ATDC Sensor
128
I I-2. Magnet Roller
130
I L-3. Developing Bias
131
I I-4. Doctor Blade
132
5. Sleeve/Magnet Roller Lower Filter
132
Toner Hopper
133
12-L. Toner Hopper Locking/Unlocking
133
Toner Replenishing
133
Shutter
134
Toner Hopper Home Position Detection
134
Toner Bottle Vibration
135
Toner Replenishing Control
136
Paper Take-Up/Feed Section
137
Copier Only
137
13-I .Edge Guide and Trailing Edge Stop
138
13-2.Drawer Positioning
139
13-3.Paper Lifting Plate
139
13-4.Drawer-In-Position Detection
140
13-6.Paper Empty Detection
142
13-7.Paper Separating Mechanism
143
13-9.Paper Take-Up Retry Control
145
13-Lo.vertical PAPER TRANSPORT
146
Multi Bypass Table
147
Paper Take-Up Mechanism
148
14-2.Paper Take-Up Retry Control
149
14-3.Paper Separating Mechanism
150
14-4.Paper Empty Detection
150
Synchronizing Rollers
151
15-L .Upper Synchronizing Roller Positioning
151
15-2.Paper Dust Remover
152
15-3.Synchronizing Roller Control
153
Image Transfer and Paper Separation
154
Main Erase Lamp
156
Paper Separator Fingers
157
Cleaning Unit
158
19-L .Cleaning Bias
159
Paper Transport
160
Fusing Unit
161
Fusing Temperature Control
162
21-2.Fusing Rollers Pressure Mechanism
163
21-3.Cleaning Roller
163
Exit Unit
164
22-L .Upper/Lower Separator Fingers
164
22-2.Paper Exit Sensor
165
Exit/Duplex Switching Unit (Option
166
Dehumidifying Switch (Option
167
Cooling Fan
168
Optical Section Cooling Fan
169
Memory Backup
170
Other Precautions
228
Ep1054/Ep1085/Ep2030 Switches on Pwbs/
231
PRECAUTIONS for HANDLING the Pwbs
232
1-L. Precautions for Transportation and Storage
232
Precautions for Replacement and Inspection
232
Control Panel Keys and Indicators
233
Cpm Copier
235
FUNCTIONS of SWITCHES and OTHER PARTS on Pwbs
239
3-L. PWB Location
239
Tech. Rep. Setting Switches Board
239
User Mode
241
4-L. Functions Available from the User Mode
241
User Mode Setting Procedure
241
User Mode Setting Details
242
Service Mode
247
Service Mode Function Tree
247
Entering the Service Mode
248
Settings in the Service Mode
249
Test
250
Tech. Rep. Choice
251
Altering Fixed Zoom Ratios (for 23 Cpm Copier Only
256
PM Counter and Ports/Options Counter
256
Paper Size Counter
257
Misfeed Counter
258
Malfunction Counter
259
Parts/Supplies Life Counter
260
Paper Size Input (for 23 Cpm Copier Only
261
(Io) Adjust Mode
262
6-L. Functions Available in the Adjust Mode
262
Entering the Adjust Mode
262
Settings in the Adjust Mode
263
Function Setting Requirements at Replacement of Parts
265
Troubleshooting
266
Ep1054/Ep1085/Ep2030
267
Introduction
269
General Precautions
269
L-2. How to Use this Book
269
L-3. Reading the Text
269
I/O Port Check
270
Controlled Parts Check Procedure
270
Port Check List
271
Paper Transport Failure
279
3-L. Paper Misfeed
279
Misfeed Detected Types and Detection Timings
281
Misfeed Clearing Procedures
283
Copier Take-Up Misfeed
283
Take-Up Misfeed (23 Cpm Copier
286
Take-Up Misfeed (23 Cpm Copier
288
Bypass Port Misfeed
290
Transport/Separator Misfeed
292
Fusing/Exit Misfeed
294
Duplex Unit Vertical Transport/Storage Misfeed (23 Cpm Copier
296
Duplex Unit Take-Up Misfeed (23 Cpm Copier
299
Malfunctions
301
Troubleshooting Procedures
307
C0994: Main Tray Elevator M26S Failure to Turn
319
C099A: Shifter Return Failure
321
C099B: Shifter Transfer Failure
321
C0996: 3Rd Drawer Lock Release Failure
323
COF79: Paper Empty Sensor Failure
323
Cod20: Duplex Unit Trailing Gate Unit Home Position Detection Failure Cod50: Duplex Unit Drive Motors Failure to Turn Cod51: Duplex Unit Drive Motor Turning at Abnormal Timing
325
Detection Failure
325
COF30: ATDC Sensor Malfunction
327
COF02: Original Size Detection Error (Defective CPU) COFE2 to COFFE: Original Size Detecting Sensor Failure
328
Power Is Not Turned on
329
5-L. Image Failure Troubleshooting
332
Image Failures
332
Initial Checks
332
Troubleshooting Procedures Classified by Image Failures
333
Blank Copy
334
Black Copy
334
Low Image Density
335
Foggy Background
336
Black Streaks or Bands
337
Black Spots
337
Blank Streaks or Bands
338
Void Areas
339
Smear on Back
339
Advertisement
Minolta EP1054 General Instructions Manual (280 pages)
Brand:
Minolta
| Category:
Copier
| Size: 4 MB
Table of Contents
Section 1
2
Table of Contents
2
1 Specifications
3
Specifications of EP2030
3
Specifications of EP1085
6
Specifications of EP1054
9
2 Precautions for Installation
12
3 Precautions for Use
13
4 Handling of the Consumables
14
5 System Options
15
System Options of EP2030
15
System Options of EP1085
16
System Options of EP1054
16
Section 2
18
1 Cross-Sectional View
20
Cross-Sectional View of 23 Cpm Copier
20
Cross-Sectional View of 18 Cpm Copier
21
Cross-Sectional View of 15 Cpm Copier
22
2 Copy Process
23
3 Drive System
25
4 Sequential Explanation
26
5 Imaging Unit
31
Imaging Unit Drive
32
Imaging Unit Toner Recycling
33
Imaging Unit Fuse
33
6 Pc Drum
34
7 Drum Charging
35
8 Image Erase Lamp
36
9 Optical Section
39
Exposure Lamp
40
AE Sensor
41
Lamp Reflectors
42
Aperture Plates
42
Scanner and 2Nd/3Rd Mirror Carriage Movement
43
4Th Mirror Movement
45
Lens Movement
46
10 ORIGINAL SIZE DETECTING SENSORS (23 Cpm COPIER ONLY
47
Original Size Detecting Sensors
47
Original Size Detecting Operation
47
Sensor Locations
48
Size Detection
49
Original Size Detection Timing
50
Original Cover Angle Detection (23 Cpm Copier Only
51
11 Development
52
ATDC Sensor
53
Magnet Roller
55
Developing Bias
56
Doctor Blade
57
Sleeve/Magnet Roller Lower Filter
57
12 Toner Hopper
58
Toner Hopper Locking/Unlocking
58
Toner Replenishing
58
Shutter
59
Toner Hopper Home Position Detection
59
Toner Bottle Vibration
60
Toner Replenishing Control
61
13 PAPER TAKE-UP/FEED SECTION (2ND DRAWER: 23 Cpm COPIER ONLY
62
13-1.Edge Guide and Trailing Edge Stop
63
13-2.Drawer Positioning
64
13-3.Paper Lifting Plate
64
13-4.Drawer-In-Position Detection
65
13-6.Paper Empty Detection
67
13-7.Paper Separating Mechanism
68
13-9.Paper Take-Up Retry Control
70
13-10.Vertical Paper Transport
71
14 Multi Bypass Table
72
14-1.Paper Take-Up Mechanism
72
14-2.Paper Take-Up Retry Control
74
14-3.Paper Separating Mechanism
75
14-4.Paper Empty Detection
75
15 Synchronizing Rollers
76
15-1.Upper Synchronizing Roller Positioning
76
15-2.Paper Dust Remover
77
15-3.Synchronizing Roller Control
78
16 Image Transfer and Paper Separation
79
17 Main Erase Lamp
81
18 Paper Separator Fingers
82
19 Cleaning Unit
83
19-1.Cleaning Bias
84
20 Paper Transport
85
21 Fusing Unit
86
Fusing Temperature Control
87
21-2.Fusing Rollers Pressure Mechanism
88
21-3.Cleaning Roller
88
22 Exit Unit
89
22-1.Upper/Lower Separator Fingers
89
22-2.Paper Exit Sensor
90
23 Exit/Duplex Switching Unit (Option
91
24 Dehumidifying Switch (Option
92
25 Cooling Fan
93
26 Optical Section Cooling Fan
94
27 Memory Backup
95
Switches on Pwbs/ Tech. Rep. Settings
97
1 PRECAUTIONS for HANDLING the Pwbs
98
Precautions for Transportation and Storage
98
Precautions for Replacement and Inspection
98
2 Control Panel Keys and Indicators
99
Cpm Copier
101
Cpm Copier
103
3 FUNCTIONS of SWITCHES and OTHER PARTS on Pwbs
105
PWB Location
105
Tech. Rep. Setting Switches Board
105
4 User Mode
107
Functions Available from the User Mode
107
User Mode Setting Procedure
107
User Mode Setting Details
108
5 Service Mode
113
Service Mode Function Tree
113
Entering the Service Mode
114
Settings in the Service Mode
115
Test
115
Tech. Rep. Choice
117
Altering Fixed Zoom Ratios (for 23 Cpm Copier Only
122
PM Counter and Ports/Options Counter
122
Paper Size Counter
123
Misfeed Counter
124
Malfunction Counter
125
Parts/Supplies Life Counter
126
Display
127
Paper Size Input (for 23 Cpm Copier Only
127
6 Adjust Mode
128
Functions Available in the Adjust Mode
128
Entering the Adjust Mode
128
Settings in the Adjust Mode
129
7 Function Setting Requirements at Replacement of Parts
131
Dis/Reassembly, Adjustment
133
1 Service Instructions
135
INSTRUCTIONS for HANDLING the Pwbs with MOS Ics
135
Handling of the Pc Drum
135
Parts Which Must Not be Touched
138
Other Screws
138
Screws
138
Variable Resistors on Board
138
2 Disassembly/Reassembly
139
Doors, Covers, and Exterior Parts: Identification and Removal Procedures
139
REMOVAL of Pwbs
142
Belt Installations
144
Paper Take-Up/Transport Sections
145
Removal of the Paper Take-Up Unit
145
Cleaning of the Paper Take-Up Rolls
146
Removal of the Paper Take-Up Rolls
146
Removal of the Suction Unit
146
Disassembly of the Suction Unit
147
Replacement of the Paper Lifting Springs (2Nd Drawer): 23 Cpm Copier Only
148
Disassembly of the Multi Bypass Table (15/18 Cpm Copier: OPTION
149
Optical Section
154
Removal of the Lens Drive Cable
154
Winding of the Lens Drive Cable
155
Removal of the Scanner
156
Removal of the Scanner Drive Cable
156
Cleaning of the Exposure Lamp
163
Cleaning of the 1St/2Nd/3Rd Mirrors
164
Cleaning of the Lens and 4Th Mirror
164
Cleaning of the Optical Section Cooling Fan Filter (15/18 Cpm Copier Only
164
Imaging Unit
165
Disassembly, Cleaning, Replacement and Starter Changing of the Imaging Unit
165
Cleaning of the Image Erase Lamp
169
Cleaning of the Main Erase Lamp
169
Pc Drum Charge Corona/Image Transfer Corona Unit
171
Cleaning of the PC Drum Charge Corona Housing
171
Cleaning of the Comb Electrode
172
Cleaning of the Image Transfer/Paper Separator Coronas Wires
172
Cleaning of the PC Drum Charge Corona Grid Mesh
172
Cleaning of the Image Transfer/Paper Separator Coronas Housing
173
Cleaning of the Lower Pre-Image Transfer Guide Plate
173
Replacement of the Ozone Filter
173
Fusing Unit
174
Removal of the Fusing Unit
174
Cleaning of the Pre-Fusing Guide Plate
175
Removal of the Upper Fusing Roller
175
Cleaning of the Fusing Thermistor
177
Cleaning of the Upper Fusing Roller
177
Cleaning of the Upper Paper Separator Fingers
177
Removal of the Lower Fusing Roller
177
Cleaning of the Lower Fusing Roller
178
Cleaning of the Lower Paper Separator Fingers
178
Disassembly of the Exit/Duplex Switching Unit (Option
179
3 Adjustment
183
Jigs and Tools Used
183
Adjustment Requirements List
184
Adjustment of Switches
185
Adjustment of Front Door Interlock Switch S21
185
Electrical/Image Adjustments
186
Adjustment of the Maximum Exposure Lamp Voltage for the Manual Mode
186
Adjustment of the Optimum Exposure Setting in the Manual Mode
189
Adjustment of the Optimum Exposure Setting in the Auto Mode
190
Adjustment of the ATDC Sensor
191
Adjustment of the Aperture Blades
192
Adjustment of the Multi Bypass Table Reference Position
193
Adjustment of the 1St/2Nd (23 Cpm Copier Only) Drawer Reference Position
194
Adjustment of the Paper Lifting Plate Springs (2Nd Drawer): 23 Cpm Copier Only
195
Adjustment of the Leading Edge Registration
196
Adjustment of the Image Leading Edge Erase Width
200
Adjustment of the Image Erase Lamp Position
202
Other Adjustments
203
Adjustment of the Scanner/Mirrors Carriage Position
203
Adjustment of the Gap between the Doctor Blade and Sleeve Roller
204
Adjustment of the Original Size Detecting Board
205
4 Miscellaneous
206
Installation of the Plug-In Counter Mounting Bracket (Option
206
Troubleshooting
208
1 Introduction
210
General Precautions
210
How to Use this Book
210
Reading the Text
210
2 I/O Port Check
211
Controlled Parts Check Procedure
211
Port Check List
212
3 Paper Transport Failure
220
Paper Misfeed
220
Misfeed Detected Types and Detection Timings
222
Misfeed Clearing Procedures
224
Copier Take-Up Misfeed
224
Take-Up Misfeed (23 Cpm Copier
227
Take-Up Misfeed (23 Cpm Copier
229
Bypass Port Misfeed
231
Transport/Separator Misfeed
233
Fusing/Exit Misfeed
235
Duplex Unit Vertical Transport/Storage Misfeed (23 Cpm Copier
237
Duplex Unit Take-Up Misfeed (23 Cpm Copier
240
4 Malfunctions
242
Self-Diagnostic Function
242
C0000: Main Drive Motor's Failure to Turn C0001: Main Drive Motor Turning at Abnormal Timing
242
C0010: PC Drive Motor's Failure to Turn C0011: PC Drive Motor Turning at Abnormal Timing
249
C004C: Cooling Fan Motor's Failure to Turn
250
C0070: Toner Replenishing Motor's Failure to Turn C0071: Toner Replenishing Motor Turning at Abnormal Timing
251
C0400: Exposure Lamp's Failure to Turn on C0410: Exposure Lamp Turning on at Abnormal Timing
252
C0500: Warm-Up Failure C0510: Abnormally Low Fusing Temperature C0520: Abnormally High Fusing Temperature
254
C0600: Scanner Motor Malfunction C0610: Lens Motor Malfunction C0620: Mirror Motor Malfunction
256
C0904: 3Rd Drawer Paper Lift-Up Motor Malfunction
258
C0950: 4Th Drawer Paper Lift-Up Sensor Malfunction
258
C0954: 4Th Drawer Paper Lift-Up Motor Malfunction
258
C0991: Main Tray Downward Motion Failure
260
C0992: Main Tray Downward Motion Failure
260
C0993: Main Tray Upward Motion Failure
260
C0994: Main Tray Elevator M26'S Failure to Turn
260
C0999: Shifter Return Failure
262
C099A: Shifter Return Failure
262
C099B: Shifter Transfer Failure
262
C099C: Shifter Motor M27'S Failure to Turn
262
C099E: Shift Gate Position Detecting Failure C099F: Shift Gate Position Detecting Failure C0996: 3Rd Drawer Lock Release Failure C0F79: Paper Empty Sensor Failure
264
C0D20: Duplex Unit Trailing Gate Unit Home Position Detection Failure C0D50: Duplex Unit Drive Motor's Failure to Turn C0D51: Duplex Unit Drive Motor Turning at Abnormal Timing
266
Detection Failure
266
C0F10: Faulty AE Sensor Level C0F30: ATDC Sensor Malfunction
268
C0F02: Original Size Detection Error (Defective CPU) C0FE2 to C0FFE: Original Size Detecting Sensor Failure
269
Power Is Not Turned on
270
E1, E2
272
5 Image Failures
273
Image Failure Troubleshooting
273
Initial Checks
273
Troubleshooting Procedures Classified by Image Failures
274
Black Copy
275
Blank Copy
275
Low Image Density
276
Foggy Background
277
Black Spots
278
Black Streaks or Bands
278
Blank Streaks or Bands
279
Smear on Back
280
Void Areas
280
Minolta EP1054 Service Manual (193 pages)
Brand:
Minolta
| Category:
Printer
| Size: 2 MB
Table of Contents
Ep1054/Ep1085/Ep2030 Dis/Reassembly
10
Field Service
1
Service Manual
1
Safety Precautions for Inspection and Service
2
Other Precautions
6
Used Batteries Precautions
7
Troubleshooting
8
Table of Contents
10
1 Service Instructions
12
INSTRUCTIONS for HANDLING the Pwbs with MOS Ics
12
Handling of the Pc Drum
12
Parts Which Must Not be Touched
15
Other Screws
15
Screws
15
Variable Resistors on Board
15
2 Disassembly/Reassembly
16
Doors, Covers, and Exterior Parts: Identification and Removal Procedures
16
REMOVAL of Pwbs
19
Belt Installations
21
Paper Take-Up/Transport Sections
22
Removal of the Paper Take-Up Unit
22
Cleaning of the Paper Take-Up Rolls
23
Removal of the Paper Take-Up Rolls
23
Removal of the Suction Unit
23
Disassembly of the Suction Unit
24
Replacement of the Paper Lifting Springs (2Nd Drawer): 23 Cpm Copier Only
25
Disassembly of the Multi Bypass Table (15/18 Cpm Copier: OPTION
26
Optical Section
31
Removal of the Lens Drive Cable
31
Winding of the Lens Drive Cable
32
Removal of the Scanner Drive Cable
33
Winding of the Scanner Drive Cable
36
Cleaning of the Exposure Lamp
40
Removal of the Scanner
40
Cleaning of the 1St/2Nd/3Rd Mirrors
41
Cleaning of the Lens and 4Th Mirror
41
Cleaning of the Optical Section Cooling Fan Filter (15/18 Cpm Copier Only
41
Imaging Unit
42
Disassembly, Cleaning, Replacement and Starter Changing of the Imaging Unit
42
Cleaning of the Image Erase Lamp
46
Cleaning of the Main Erase Lamp
46
Pc Drum Charge Corona/Image Transfer Corona Unit
48
Cleaning of the PC Drum Charge Corona Housing
48
Cleaning of the Comb Electrode
49
Cleaning of the Image Transfer/Paper Separator Coronas Wires
49
Cleaning of the PC Drum Charge Corona Grid Mesh
49
Cleaning of the Image Transfer/Paper Separator Coronas Housing
50
Cleaning of the Lower Pre-Image Transfer Guide Plate
50
Replacement of the Ozone Filter
50
Fusing Unit
51
Removal of the Fusing Unit
51
Cleaning of the Pre-Fusing Guide Plate
52
Removal of the Upper Fusing Roller
52
Cleaning of the Fusing Thermistor
54
Cleaning of the Upper Fusing Roller
54
Cleaning of the Upper Paper Separator Fingers
54
Removal of the Lower Fusing Roller
54
Cleaning of the Lower Fusing Roller
55
Cleaning of the Lower Paper Separator Fingers
55
Disassembly of the Exit/Duplex Switching Unit (Option
56
3 Adjustment
60
Jigs and Tools Used
60
Adjustment Requirements List
61
Adjustment of Switches
62
Adjustment of Front Door Interlock Switch S21
62
Electrical/Image Adjustments
63
Adjustment of the Maximum Exposure Lamp Voltage for the Manual Mode
63
Adjustment of the Optimum Exposure Setting in the Manual Mode
66
Adjustment of the Optimum Exposure Setting in the Auto Mode
67
Adjustment of the ATDC Sensor
68
Adjustment of the Aperture Blades
69
Adjustment of the Multi Bypass Table Reference Position
70
Adjustment of the 1St/2Nd (23 Cpm Copier Only) Drawer Reference Position
71
Adjustment of the Paper Lifting Plate Springs (2Nd Drawer): 23 Cpm Copier Only
72
Adjustment of the Leading Edge Registration
73
Adjustment of the Image Leading Edge Erase Width
77
Adjustment of the Image Erase Lamp Position
79
Other Adjustments
80
Adjustment of the Scanner/Mirrors Carriage Position
80
Adjustment of the Gap between the Doctor Blade and Sleeve Roller
81
Adjustment of the Original Size Detecting Board
82
4 Miscellaneous
83
Installation of the Plug-In Counter Mounting Bracket (Option
83
Ep1054/Ep1085/Ep2030 Switches on Pwbs/
85
1 PRECAUTIONS for HANDLING the Pwbs
86
Precautions for Transportation and Storage
86
Precautions for Replacement and Inspection
86
2 Control Panel Keys and Indicators
87
Cpm Copier
89
Cpm Copier
91
3 FUNCTIONS of SWITCHES and OTHER PARTS on Pwbs
93
PWB Location
93
Tech. Rep. Setting Switches Board
93
4 User Mode
94
Functions Available from the User Mode
95
User Mode Setting Procedure
95
User Mode Setting Details
96
5 Service Mode
101
Service Mode Function Tree
101
Entering the Service Mode
102
Settings in the Service Mode
103
Test
104
Tech. Rep. Choice
105
Altering Fixed Zoom Ratios (for 23 Cpm Copier Only
110
PM Counter and Ports/Options Counter
110
Paper Size Counter
111
Misfeed Counter
112
Malfunction Counter
113
Parts/Supplies Life Counter
114
Display
115
Paper Size Input (for 23 Cpm Copier Only
115
6 Adjust Mode
116
Functions Available in the Adjust Mode
116
Entering the Adjust Mode
116
Settings in the Adjust Mode
117
7 Function Setting Requirements at Replacement of Parts
119
Ep1054/Ep1085/Ep2030
121
1 Introduction
123
General Precautions
123
How to Use this Book
123
Reading the Text
123
2 I/O Port Check
124
Controlled Parts Check Procedure
124
3 Paper Transport Failure
133
Paper Misfeed
133
Misfeed Detected Types and Detection Timings
135
Misfeed Clearing Procedures
137
Copier Take-Up Misfeed
137
Take-Up Misfeed (23 Cpm Copier
140
Bypass Port Misfeed
144
Transport/Separator Misfeed
146
Fusing/Exit Misfeed
148
Duplex Unit Vertical Transport/Storage Misfeed (23 Cpm Copier
150
Duplex Unit Take-Up Misfeed (23 Cpm Copier
153
4 Malfunctions
155
Self-Diagnostic Function
155
Troubleshooting Procedures
161
C0000: Main Drive Motor's Failure to Turn C0001: Main Drive Motor Turning at Abnormal Timing
161
C0010: PC Drive Motor's Failure to Turn C0011: PC Drive Motor Turning at Abnormal Timing
162
C004C: Cooling Fan Motor's Failure to Turn
163
C0070: Toner Replenishing Motor's Failure to Turn C0071: Toner Replenishing Motor Turning at Abnormal Timing
164
C0400: Exposure Lamp's Failure to Turn on C0410: Exposure Lamp Turning on at Abnormal Timing
165
C0500: Warm-Up Failure C0510: Abnormally Low Fusing Temperature C0520: Abnormally High Fusing Temperature
167
C0600: Scanner Motor Malfunction C0610: Lens Motor Malfunction C0620: Mirror Motor Malfunction
169
C0904: 3Rd Drawer Paper Lift-Up Motor Malfunction
171
C0950: 4Th Drawer Paper Lift-Up Sensor Malfunction
171
C0954: 4Th Drawer Paper Lift-Up Motor Malfunction
171
C0991: Main Tray Downward Motion Failure
173
C0992: Main Tray Downward Motion Failure
173
C0993: Main Tray Upward Motion Failure
173
C0994: Main Tray Elevator M26'S Failure to Turn
173
C0999: Shifter Return Failure
175
C099A: Shifter Return Failure
175
C099B: Shifter Transfer Failure
175
C099C: Shifter Motor M27'S Failure to Turn
175
C099E: Shift Gate Position Detecting Failure C099F: Shift Gate Position Detecting Failure C0996: 3Rd Drawer Lock Release Failure C0F79: Paper Empty Sensor Failure
177
C0D20: Duplex Unit Trailing Gate Unit Home Position Detection Failure C0D50: Duplex Unit Drive Motor's Failure to Turn C0D51: Duplex Unit Drive Motor Turning at Abnormal Timing
179
Detection Failure
179
C0F10: Faulty AE Sensor Level C0F30: ATDC Sensor Malfunction
181
C0F02: Original Size Detection Error (Defective CPU) C0FE2 to C0FFE: Original Size Detecting Sensor Failure
182
Power Is Not Turned on
183
E1, E2
185
5 Image Failures
186
Image Failure Troubleshooting
186
Initial Checks
186
Troubleshooting Procedures Classified by Image Failures
187
Black Copy
188
Blank Copy
188
Low Image Density
189
Foggy Background
190
Black Spots
191
Black Streaks or Bands
191
Blank Streaks or Bands
192
Smear on Back
193
Void Areas
193
Advertisement
Minolta EP1054 Operator's Manual (96 pages)
Brand:
Minolta
| Category:
Copier
| Size: 1 MB
Table of Contents
Table of Contents
1
Using the Copier Properly
5
What Is an Energy Star Copier
7
CE Marking (Declaration of Conformity
8
Terms and Symbols for the Type of Originals and Copy Paper
9
Feeding Direction (Copy Paper Path
9
Width" and "Length
9
Terms and Symbols Used
10
1 Safety Notes
11
Installing the Copier
11
Installation Site
11
Power Source
11
Grounding
12
Space Requirements
12
Precautions for Use
13
Operating Environment
13
Using the Copier Properly
13
Care of Copier Supplies
14
Moving
14
Legal Restrictions on Copying
15
Financial Instruments
15
Legal Documents
15
General
15
2 Getting to Know Your Copier
17
System Overview
17
Multi Bypass Tray MB-4 <Option
17
Copier Parts and Accessories
18
Outside Copier
18
Inside Copier
19
Multi Bypass Tray MB-4
21
Control Panel Keys and Indicators
22
Control Panel
22
Display
24
Monitor Display
24
Paper Information Display
25
Zoom Ratio Indicator / Multi-Copy Display
25
Exposure Information Display
26
Turning on and OFF, and Resetting the Copier
27
Turning on and off
27
When the Copier Is Turned on
27
Minimizing the Warm-Up Time
28
Initial Mode and Panel Resetting
29
Auto Reset Function
30
3 Making Copies
31
Copying Overview
31
Copying Procedure
34
Placing Originals
34
Sheet Originals (Standard Size)
34
Highly Transparent Originals
34
Book Original
35
Checking the Copy Paper Size and Selecting the Paper Source
36
Selecting the Paper Source (Only When the Multi Bypass Tray Is Used)
36
Zoom Ratio
37
Fixed Zoom Ratios
37
Zoom Ratios
37
Selecting the Fixed Zoom Ratios
37
Setting a Zoom Ratio
38
Image Density
39
Types of Exposure Modes
39
Selecting the Auto Exposure Mode
40
Selecting the Manual Exposure Mode
40
Selecting the Photo Mode
40
Book Copying
41
Selecting the Book Copying Mode
41
Manual Bypass Copying
43
Using the Manual Bypass Tray
44
Using the Multi Bypass Tray (Option)
44
4 Auxiliary Functions
47
Checking the Total Number of Copies Mode
47
Types of Counters
47
Counter Display
47
Using the Meter Count Function
48
Toner Replenisher Function (Increasing the Image Density)
49
Drum Dehumidifier Function
50
User's Choice
52
Functions Available in User's Choice
52
Description of each User's Choice Function
52
Making the User's Choice Mode Settings
57
5 When an Indicator Lights up
61
Quick Reference for Indicator Lights
61
Warning Indicators
61
Detailed Instructions for Indicator Lights
62
Add Toner Indicator
62
Replacing the Toner Bottle
62
Add Paper Indicator
64
Adding Paper (Drawer)
64
Adding Paper (Multi Bypass Tray)
65
Closure Failure Indicator
66
Misfeed Indicator
67
Misfeed Clearing Procedure
67
Call-Tech.-Rep. Indicator
70
Resetting the Call-Tech.-Rep. Indicator
70
I.U. Service Life Indicator Lights up
71
Precautions for Handling
72
Removing the I. U. from the Copier
73
Unpacking the I. U
74
Setting up the I. U
74
Charging the Copier with Starter and Toner
76
6 Troubleshooting
81
When this Type of Copy Is Produced
81
The Copier Is Not Functioning as Designed
83
7 Specifications
85
Copier EP1085
85
Multi Bypass Tray MB-4
86
8 Miscellaneous
87
Care of the Copier
87
Daily Checks
87
Power Cord, Communications Cable, Ground Cable
87
Original Glass
87
Original Cover, Automatic Document Feeder
87
Copy Paper
88
Sound of Copier Operation
88
Copier Housing Temperature
88
Cleaning
88
Housing
88
Original Pad
88
Original Glass
89
Control Panel
89
Front Door
89
Corona Units
90
Paper Size and Zoom Ratio Table
91
Paper Size
91
Zoom Ratio Table (Original Size to Copy Paper Size)
92
Advertisement
Related Products
Minolta EP1030
Minolta EP1030F
Minolta CSPRO EP1031F
Minolta CSPRO EP1031
Minolta EP1050
Minolta EP1052
Minolta EP1080
Minolta EP1085
Minolta EP1083
Minolta EP4000
Minolta Categories
Digital Camera
Film Camera
Printer
Copier
All in One Printer
More Minolta Manuals
Login
Sign In
OR
Sign in with Facebook
Sign in with Google
Upload manual
Upload from disk
Upload from URL