Sign In
Upload
Manuals
Brands
Lenovo Manuals
Desktop
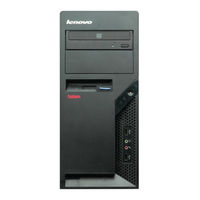
ThinkCentre 9786
Lenovo ThinkCentre 9786 Manuals
Manuals and User Guides for Lenovo ThinkCentre 9786. We have
3
Lenovo ThinkCentre 9786 manuals available for free PDF download: Hardware Maintenance Manual, Hardware Installation And Replacement Manual
Lenovo ThinkCentre 9786 Hardware Maintenance Manual (480 pages)
Lenovo Computer Hardware User Manual
Brand:
Lenovo
| Category:
Desktop
| Size: 8 MB
Table of Contents
Table of Contents
5
Chapter 1. About this Manual
7
Important Safety Information
7
Important Information about Replacing Rohs Compliant Frus
7
Chapter 2. Safety Information
9
General Safety
9
Electrical Safety
9
Voltage-Selection Switch
11
Safety Inspection Guide
11
Handling Electrostatic Discharge-Sensitive Devices
12
Grounding Requirements
12
Safety Notices (Multi-Lingual Translations)
12
Chapter 3. General Information
35
The Thinkvantage Productivity Center Program
35
Additional Information Resources
35
Specifications
35
For Machine Types: 7057, 7062, 7092, 9342, 9344, 9354, 9426, 9486, 9624, 9707, 9787, 9804, 9945
35
For Machine Types: 7061, 7090, 9353, 9421, 9485, 9623, 9625, 9705, 9786, 9795, 9935, 9946, 9953
35
Chapter 4. General Checkout
37
Problem Determination Tips
37
Chapter 5. Diagnostics
39
Lenovo System Toolbox
39
PC-Doctor for Windows PE
39
Running Diagnostics from the Rescue and Recovery Workspace
39
PC-Doctor for DOS
40
Creating a Diagnostic CD Image
40
Creating Diagnostic Diskettes
40
Running Diagnostics from the CD or Diskettes
40
Navigating through the Diagnostics Programs
41
Running Tests
41
Test Results
41
Viewing the Test Log
42
Chapter 6. Using the Setup Utility
45
Starting the Setup Utility Program
45
Viewing and Changing Settings
45
Using Passwords
45
Password Considerations
45
Copyright Lenovo 2008, 2010
45
User Password
46
Administrator Password
46
Setting, Changing, and Deleting a Password
46
Enabling or Disabling a Device
46
Selecting a Startup Device
47
Selecting a Temporary Startup Device
47
Selecting or Changing the Startup Device Sequence
47
Exiting from the Setup Utility Program
47
Chapter 7. Symptom-To-Fru Index
49
Hard Disk Drive Boot Error
49
Power Supply Problems
49
Diagnostic Error Codes
50
Beep Symptoms
67
POST Error Codes
68
Miscellaneous Error Messages
69
Undetermined Problems
71
Chapter 8. Replacing Frus (Types 7061, 7090, 9353, 9421, 9485, 9623, 9625, 9705, 9786, 9795, 9935, 9946, 9953)
73
Locating Controls and Connectors on the Front of Your Computer
73
Rear Connectors
73
Removing the Cover
74
Locations
75
Locating Parts on the System Board
77
Removing and Replacing the Front Bezel
77
Replacing the Power Supply
78
Replacing the System Board
79
Table of Contents
81
Replacing the Microprocessor
83
Thermal Grease Does Not Come in Contact with Anything
84
To Release the Microprocessor from the System Board Socket, Lift the Small Handle
84
Lift the Microprocessor Straight up and out of the Socket
84
Replacing a Memory Module
85
Replacing a PCI Adapter Card
86
Replacing the Hard Disk Drive
88
Replacing an Optical Drive
90
Replacing the Diskette Drive
91
Replacing the Rear Fan Assembly
92
Replacing the Front Fan Assembly
93
Replacing the Front Audio/Usb Assembly
95
Replacing the Power Switch/Led Assembly
95
Replacing the CMOS Battery
96
Completing the FRU Replacement
97
Chapter 9. Replacing Frus (Types 7057, 7062, 7092, 9342, 9344, 9354, 9426, 9486, 9624, 9707, 9787, 9804, 9945)
99
Rear Connectors
99
Removing the Cover
100
Locations
100
Locating Parts on the System Board
101
Accessing System Board Components and Drives
102
Replacing a Memory Module
103
Replacing the CMOS Battery
104
Replacing the Power Supply
105
Replacing the System Board
106
Remove the Retention Module from the Rear of the Failing System Board and Install It in the same Position on the New System Board
107
Replacing the Microprocessor
110
Replacing the Hard Disk Drive
112
Replacing an Optical Drive
114
Replacing the Diskette Drive
115
Replacing the Power Switch/Led Assembly
115
Replacing the Front Panel Card
116
Replacing the System Fan Assembly
117
Replacing a PCI Adapter Card
118
Completing the FRU Replacement
119
Chapter 10. FRU Lists
121
Machine Type 3656
121
Machine Type 3658
134
Machine Type 7057
147
Machine Type 7061
161
Machine Type 7062
174
Table of Contents
176
Machine Type 7090
188
Microprocessor, Phenom 9600B (2.30Ghz, 2M L2, 2M L3, 95W) Stepping B2 65Nm 45R6500 N (Models)
189
Microprocessor, Phenom 9650 (2.30Ghz, 2M L2, 2M L3, 95W) Stepping B3 65Nm 45R6498 N (Models)
189
Machine Type 7092
201
Microprocessor, Phenom 8450 (2.10Ghz, 1.5M L2, 2M L3, 95W) B3 65Nm (Models 45R6490 NCTO)
202
Microprocessor, Phenom X3 8600B (2.3Ghz, 1.5M L2, 2M L3, 95W) B3 65Nm (Models) 45R6494 N
202
Machine Type 9342
214
Microprocessor, Athlon LE-1660 (2.8 Ghz, 512K L2, 45W) G2 65Nm (Models CTO) 53Y7722 N
214
Microprocessor, Athlon X2 5600B (2.9 Ghz, 1M L2, 65W) G2 65Nm (Models CTO) 53Y7718 N
214
Microprocessor, Athlon64 X2 6000+ (3.1 Ghz, 1M L2, 89W) G2 65Nm (Models CTO) 53Y7720 N
214
DVD-ROM Drive - 16X/48X - SATA Vista & Non-Vista (Models)
215
DVD-ROM Drive - 16X/48X - with DVD Playback Software (Models)
215
Front Power/Led PC, Bracket, and Cable (All Models)
215
Hard Disk Drive, 80GB, 7200RPM, SATA (Models)
215
Microprocessor, Phenom X4 9750B (2.4 Ghz, 512K / 2M L2, 95W) B3 65Nm
215
Microprocessor, Sempron X2 2300 (2.2Ghz, 512K L2, 65W) G2 65Nm (Models CTO) 53Y7724 N
215
Diskette Drive, 3.5" 1.44MB 2 Mode FDD with Bezel and Cable (Models)
216
Hard Disk Drive, 160GB, 7200RPM, SATA
216
Hard Disk Drive, SATA 160GB 7200Rpm/3Gb/8Mb
216
Machine Type 9344
227
Machine Type 9353
240
Machine Type 9354
253
Machine Type 9421
266
Machine Type 9426
279
Machine Type 9485
292
Machine Type 9486
308
Machine Type 9623
324
Machine Type 9624
337
Machine Type 9625
350
Machine Type 9705
364
Machine Type 9707
377
Machine Type 9795
391
Machine Type 9804
404
Machine Type 9935
417
Machine Type 9945
431
Machine Type 9946
445
Machine Type 9953
458
Chapter 11. Additional Service Information
473
Security Features
473
Hardware Controlled Passwords
473
Operating System Password
473
Vital Product Data
473
BIOS Levels
473
Flash Update Procedures
473
Updating (Flashing) BIOS from a Diskette
474
Recovering from a POST/BIOS Update Failure
474
Power Management
474
Automatic Configuration and Power Interface (ACPI) BIOS
474
Automatic Power-On Features
474
Appendix A. Notices
477
Television Output Notice
478
Trademarks
478
Advertisement
Lenovo ThinkCentre 9786 Hardware Maintenance Manual (486 pages)
Brand:
Lenovo
| Category:
Desktop
| Size: 5 MB
Table of Contents
Table of Contents
5
Chapter 1. About this Manual
7
Important Safety Information
7
Important Information about Replacing Rohs Compliant Frus
8
Chapter 2. Safety Information
9
General Safety
9
Electrical Safety
9
Voltage-Selection Switch
11
Safety Inspection Guide
11
Handling Electrostatic Discharge-Sensitive Devices
12
Grounding Requirements
13
Safety Notices (Multi-Lingual Translations)
13
Chapter 3. General Information
45
The Thinkvantage Productivity Center Program
45
Additional Information Resources
45
Specifications
46
For Machine Types: 7057, 7062, 7092, 9342, 9344, 9354, 9426, 9486, 9624, 9707, 9787, 9804, 9945
46
For Machine Types: 7061, 7090, 9353, 9421, 9485, 9623, 9625, 9705, 9786, 9795, 9935, 9946, 9953
46
Chapter 4. General Checkout
49
Problem Determination Tips
49
Chapter 5. Diagnostics
51
Lenovo System Toolbox
51
PC-Doctor for Windows PE
51
Running Diagnostics from the Rescue and Recovery Workspace
51
PC-Doctor for DOS
52
Creating a Diagnostic CD Image
52
Creating Diagnostic Diskettes
52
Running Diagnostics from the CD or Diskettes
53
Navigating through the Diagnostics Programs
53
Running Tests
53
Viewing the Test Log
55
Chapter 6. Using the Setup Utility
57
Starting the Setup Utility Program
57
Viewing and Changing Settings
57
Using Passwords
57
Password Considerations
57
User Password
58
Administrator Password
58
Setting, Changing, and Deleting a Password
58
Enabling or Disabling a Device
58
Selecting a Startup Device
59
Selecting a Temporary Startup Device
59
Selecting or Changing the Startup Device Sequence
59
Exiting from the Setup Utility Program
60
Chapter 7. Symptom-To-FRU Index
61
Hard Disk Drive Boot Error
61
Power Supply Problems
61
Diagnostic Error Codes
62
Beep Symptoms
83
POST Error Codes
84
Miscellaneous Error Messages
86
Undetermined Problems
87
Chapter 8. Replacing Frus (Types 7061, 7090, 9353, 9421, 9485, 9623, 9625, 9705, 9786, 9795, 9935, 9946, 9953)
89
Locating Controls and Connectors on the Front of Your Computer
90
Rear Connectors
91
Removing the Cover
92
Locations
93
Locating Parts on the System Board
94
Removing and Replacing the Front Bezel
94
Replacing the Power Supply
95
Replacing the System Board
97
Replacing the Microprocessor
101
Replacing a Memory Module
104
Replacing a PCI Adapter Card
105
Replacing the Hard Disk Drive
107
Replacing an Optical Drive
110
Replacing the Diskette Drive
111
Replacing the Rear Fan Assembly
112
Replacing the Front Fan Assembly
114
Replacing the Front Audio/Usb Assembly
116
Replacing the Power Switch/Led Assembly
117
Replacing the CMOS Battery
117
Completing the FRU Replacement
118
Chapter 9. Replacing Frus (Types 7057, 7062, 7092, 9342, 9344, 9354, 9426, 9486, 9624, 9707, 9787, 9804, 9945)
121
Rear Connectors
122
Removing the Cover
123
Locations
124
Locating Parts on the System Board
125
Accessing System Board Components and Drives
125
Replacing a Memory Module
127
Replacing the CMOS Battery
129
Replacing the Power Supply
130
Replacing the System Board
132
Replacing the Microprocessor
135
Replacing the Hard Disk Drive
139
Replacing an Optical Drive
141
Replacing the Diskette Drive
142
Replacing the Power Switch/Led Assembly
143
Replacing the Front Panel Card
144
Replacing the System Fan Assembly
145
Replacing a PCI Adapter Card
146
Completing the FRU Replacement
147
Chapter 10. FRU Lists
149
Machine Type 3656
149
Machine Type 3658
162
Machine Type 7057
174
Machine Type 7061
187
Machine Type 7062
200
Machine Type 7090
213
Table of Contents
214
Machine Type 7092
225
Microprocessor, Phenom 8600B (2.30Ghz, 1.5M L2, 2M L3, 95W) Stepping B2 65Nm 45R6494 N
225
Microprocessor, Phenom 9550 (2.20Ghz, 2M L2, 2M L3, 95W) Stepping B3 65Nm 45R6496 N
226
Microprocessor, Phenom 9550 (2.20Ghz, 2M L2, 2M L3, 95W) Stepping B3 65Nm 53Y7709 N
226
Microprocessor, Phenom 9600B (2.30Ghz, 2M L2, 2M L3, 95W) Stepping B2 65Nm 45R6500 N (Models)
226
Microprocessor, Phenom 9650 (2.30Ghz, 2M L2, 2M L3, 95W) Stepping B3 65Nm 45R6498 N
226
Microprocessor, Phenom X4 9750B (2.4 Ghz, 512K / 2M L2, 95W) B3 65Nm 53Y7711 N
226
Machine Type 9342
237
Microprocessor, Athlon LE-1660 (2.8 Ghz, 512K L2, 45W) G2 65Nm (Models CTO) 53Y7722 N
237
Microprocessor, Athlon X2 5600B (2.9 Ghz, 1M L2, 65W) G2 65Nm (Models CTO) 53Y7718 N
237
Memory Module, 2GB PC2-5300 (667Mhz) DDR2 SDRAM (Models)
238
Microprocessor, Phenom X3 8600B (2.3Ghz, 1.5M L2, 2M L3, 95W) B3 65Nm 45R6494 N
238
Microprocessor, Sempron X2 2300 (2.2Ghz, 512K L2, 65W) G2 65Nm (Models CTO)
238
Memory Module, 2GB PC2-6400 (667Mhz) DDR2 SDRAM (Models)
239
Machine Type 9344
250
Machine Type 9353
262
Machine Type 9354
274
Machine Type 9421
286
Machine Type 9426
298
Machine Type 9485
310
Machine Type 9486
326
Machine Type 9623
342
Machine Type 9624
354
Machine Type 9625
366
Machine Type 9705
379
Machine Type 9707
392
Machine Type 9795
404
Machine Type 9804
416
Machine Type 9935
428
Machine Type 9945
441
Machine Type 9946
454
Machine Type 9953
466
Chapter 11. Additional Service Information
479
Security Features
479
Hardware Controlled Passwords
479
Operating System Password
479
Vital Product Data
479
BIOS Levels
479
Flash Update Procedures
479
Updating (Flashing) BIOS from a Diskette
480
Recovering from a POST/BIOS Update Failure
480
Power Management
481
Automatic Configuration and Power Interface (ACPI) BIOS
481
Automatic Power-On Features
481
Appendix. Notices
483
Television Output Notice
484
Trademarks
484
Lenovo ThinkCentre 9786 Hardware Installation And Replacement Manual (130 pages)
Brand:
Lenovo
| Category:
Desktop
| Size: 3 MB
Table of Contents
Table of Contents
5
Figures
7
Chapter 1. Important Safety Information
9
Chapter 2. Overview
11
Additional Information Resources
11
Handling Static-Sensitive Devices
12
Locations
13
Controls and Connectors
13
Locating Controls and Connectors on the Front of Your Computer
13
Locating Connectors on the Rear of Your Computer
14
Rear Connector Locations
14
Locating Components
16
Identifying Parts on the System Board
17
System Board Parts Locations
17
Chapter 3. Installing Options and Replacing Hardware
19
Installing External Options
19
Removing the Cover
19
Removing and Replacing the Front Bezel
20
Removing the Computer Cover
20
Installing Internal Options
21
Installing a Memory Module
21
Removing the Front Bezel
21
Installing PCI Adapters
22
Installing the Memory Module
22
Opening the Retainer Clips
22
Opening the Adapter Latch
23
Installing Internal Drives
25
Drive Bay Locations
26
Installing a Retainer Bracket
27
Locating the Spare Retainer Bracket
27
Installing a New Drive
28
Installing a Serial ATA Drive
28
Replacing the Battery
29
Battery Installation
29
Battery Removal
29
Replacing the Power Supply
30
Replacing the Heat Sink and Fan Assembly
31
Replacing the Heat Sink and Fan Assembly
32
Replacing the Primary Hard Disk Drive
33
Installing the Primary Hard Disk Drive into Bracket
35
Replacing the Secondary Hard Disk Drive
36
Installing the Primary Hard Disk Drive and Bracket
36
Removing Secondary Hard Disk Drive
37
Installing the Secondary Hard Disk Drive into
38
Replacing an Optical Drive
39
Installing the Secondary Hard Disk Drive and Drive Cage
39
Replacing the Diskette Drive
40
Removing the Optical Drive
40
Retainer Bracket for Optical Drive
40
Replacing a Memory Module
41
Removing the Diskette Drive
41
Retainer Bracket for Diskette Drive
41
Installing the Memory Module
42
Removing the Memory Module
42
Replacing a PCI Adapter
43
Removing the PCI Adapter
43
Replacing the Front Fan Assembly
45
Removing the Front Fan Assembly
45
Replacing the Rear Fan Assembly
46
Installing the Front Fan Assembly
46
Removing the Rear Fan Assembly
47
Replacing the Internal Speaker
48
Replacing the Rear Fan Assembly
48
Removing the Internal Speaker
49
Replacing the Keyboard
50
Replacing the Mouse
50
Keyboard Connectors, Standard and USB
50
Mouse Connectors, Standard and USB
51
Chapter 4. Completing the Parts Replacement
53
Replacing the Computer Cover
53
Lenovo 2005, 2008. Portions © IBM Corp
53
Obtaining Device Drivers
54
Chapter 5. Security Features
55
Integrated Cable Lock
55
Padlock
56
Password Protection
56
Erasing a Lost or Forgotten Password (Clearing CMOS)
56
Appendix. Notices
59
Television Output Notice
60
Trademarks
60
Table of Contents
67
Introduction
69
Chapter 1. Important Safety Information
71
Chapter 2. Arranging Your Workspace
73
Comfort
73
Glare and Lighting
73
Air Circulation
74
Electrical Outlets and Cable Lengths
74
Chapter 3. Setting up Your Computer
75
Installing the Vertical Stand
75
Connecting Your Computer
76
Turning on Computer Power
80
Completing Important Tasks
81
Finishing the Software Installation
81
Updating Your Operating System
81
Features
82
Installing External Options
82
Installing Other Operating Systems
82
Shutting down the Computer
82
Updating Your Antivirus Software
82
Specifications
85
Chapter 4. Software Overview
87
Software Provided with Your Windows Operating System
87
Software Provided by Lenovo
87
Chapter 5. Using the Setup Utility
89
Starting the Setup Utility Program
89
Using Passwords
89
Password Considerations
89
Administrator Password
90
Setting, Changing, and Deleting a Password
90
User Password
90
Viewing and Changing Settings
89
Using Security Profile by Device
90
Selecting a Startup Device
91
Selecting a Temporary Startup Device
91
Selecting or Changing the Startup Device Sequence
91
Exiting from the Setup Utility Program
92
Chapter 6. Updating System Programs
93
Using System Programs
93
Updating (Flashing) BIOS from a Diskette or CD-ROM
93
Updating (Flashing) BIOS from Your Operating System
94
Chapter 7. Troubleshooting and Diagnostics
95
Basic Troubleshooting
95
Diagnostic Programs
96
PC-Doctor for DOS
97
PC-Doctor for Windows
97
PC-Doctor for Windows PE
99
Cleaning the Mouse
99
Optical Mouse
99
Non-Optical Mouse
100
Chapter 8. Recovering Software
103
Creating and Using the Product Recovery Disc
103
Performing Backup and Recovery Operations
104
Using the Rescue and Recovery Workspace
105
Creating and Using Rescue Media
106
Creating and Using a Recovery Repair Diskette
107
Recovering or Installing Device Drivers
108
Setting a Rescue Device in the Startup Sequence
109
Solving Recovery Problems
109
Chapter 9. Getting Information, Help, and Service
111
Information Resources
111
Online Books Folder
111
Thinkvantage Productivity Center
111
Access Help
112
Safety and Warranty
112
Www.lenovo.com
112
Help and Service
113
Calling for Service
113
Using the Documentation and Diagnostic Programs
113
Purchasing Additional Services
114
Using Other Services
114
Appendix A. Manual Modem Commands
115
Basic at Commands
115
Extended at Commands
117
Mnp/V.42/V.42Bis/V.44 Commands
118
Fax Class 1 Commands
119
Fax Class 2 Commands
119
Voice Commands
120
Appendix B. Notices
123
Television Output Notice
124
Trademarks
124
Index
125
Advertisement
Advertisement
Related Products
Lenovo ThinkCentre 9784
Lenovo ThinkCentre 9788
Lenovo ThinkCentre 9785
Lenovo ThinkCentre 9789
Lenovo ThinkCentre 9787
Lenovo ThinkCentre 9728
Lenovo 9702A4U
Lenovo 9702B7U
Lenovo 9702F9U
Lenovo ThinkCentre 9707
Lenovo Categories
Laptop
Desktop
Server
Monitor
Tablet
More Lenovo Manuals
Login
Sign In
OR
Sign in with Facebook
Sign in with Google
Upload manual
Upload from disk
Upload from URL