Sign In
Upload
Manuals
Brands
Intel Manuals
Server
P4308IP4LHJC
Intel P4308IP4LHJC Manuals
Manuals and User Guides for Intel P4308IP4LHJC. We have
1
Intel P4308IP4LHJC manual available for free PDF download: Service Manual
Intel P4308IP4LHJC Service Manual (228 pages)
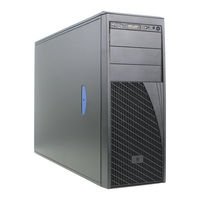
Server/Workstation System
Brand:
Intel
| Category:
Server
| Size: 8.71 MB
Table of Contents
Safety Information
3
Important Safety Instructions
3
Wichtige Sicherheitshinweise
3
Instrucciones de Seguridad Importantes
3
Preface
5
About this Manual
5
Manual Organization
5
Additional Information and Software
8
Table of Contents
9
Server Chassis Features
18
Figure 1. Front Closed Chassis View of Fixed HDD Chassis
18
Figure 2. Front Closed Chassis View of Hot-Swap HDD Chassis
18
Table 1. Breakdown of Intel
19
Table 2. Breakdown of Intel
19
Table 3. Intel Server System P4000IP Hot-Swap 3.5 Hdds Configuration Base Feature
19
Table 4. Intel Server System P4000IP Hot-Swap 2.5 Hdds Configuration Base Feature
20
Table 5. Intel Workstation System P4000CR Fixed 3.5 Hdds Configuration Base Feature
20
Component Identification
21
Intel Server System P4208IP4LHGC View
21
Intel Server System P4216IP4LHJC View
22
Figure 3. Internal Chassis View of Intel Server System P4208IP4LHGC
22
Intel Server System P4216IP4LHKC View
23
Figure 4. Internal Chassis View of Intel Server System P4216IP4LHJC
23
Intel Server System P4224IP4LHKC View
24
Figure 5. Internal Chassis View of Intel Server System P4216IP4LHKC
24
Intel Server System P4308IP4LHGC View
25
Figure 6. Internal Chassis View of Intel Server System P4224IP4LHKC
25
Intel Server System P4308IP4LHJC(L) View
26
Figure 7. Internal Chassis View of Intel Server System P4308IP4LHGC
26
Intel Server System P4308IP4LHKC View
27
Figure 8. Internal Chassis View of Intel Server System P4308IP4LHJC
27
Intel Workstation System P4304CR2LFGN View
28
Figure 9. Internal Chassis View of Intel Server System P4308IP4LHKC
28
Intel Workstation System P4304CR2LFJN(L) View
29
Figure 10. Internal Chassis View of Intel Workstation System P4304CR2LFGN
29
Intel Workstation System P4304CR2LFKN View
30
Figure 11. Internal Chassis View of Intel Workstation System P4304CR2LFJN
30
Figure 12. Internal Chassis View of Intel Workstation System P4304CR2LFKN
31
Figure 13. Front Panel Controls and Indicators
31
Front Panel
31
Table 6. Front Panel LED Functionality
31
Intel Remote Management Module 4
32
Rack-Mounted Systems
32
Figure 14. RMM4 Knockout
33
Figure 15. Mechanical Locks
33
Mechanical Locks
33
Hardware Installations and Upgrades
34
Before You Begin
34
Tools and Supplies Needed
34
System Reference
34
Cable Routing Recommendations
34
Figure 16. Cable Connections for 8X 3.5 Hot Swap Hard Drivers Configuration
35
Figure 17. Cable Connections for 8X 2.5 Hot Swap Hard Drivers Configuration
36
Figure 18. Cable Connections for 16 X 2.5 Hot Swap Hard Drivers Configuration
37
Figure 19. Cable Connections for 24 X 2.5 Hot Swap Hard Drivers Configuration
38
Removing and Installing the Chassis Cover
39
Removing the Chassis Cover
39
Installing the Chassis Cover
39
Figure 20. Removing the Chassis Cover
39
Removing and Installing the Front Bezel (Pedestal Only)
40
Removing the Front Bezel (Pedestal Only)
40
Figure 21. Installing the Chassis Cover
40
Installing the Front Bezel (Pedestal Only)
41
Removing And/Or Installing Airduct
41
Figure 22. Removing the Front Bezel
41
Figure 23. Installing the Front Bezel
41
Figure 24. Removing the Airduct
42
Installing the Airduct
42
Removing the Airduct
42
Removing and Installing Processor
43
Removing Processor Heatsink(S)
43
Figure 25. Installing the Airduct
43
Installing the Processor
44
Figure 26. Removing Processor Heatsink
44
Figure 27. Installing Processor - Open the Socket Lever
44
Figure 28. Installing Processor - Open the Load Plate
45
Figure 29. Installing Processor - Install the Processor
45
Figure 30. Installing Processor - Remove the Cover
45
Installing Processor Heatsink(S)
46
Figure 31. Installing Processor - Close the Load Plate
46
Figure 32. Installing Processor - Latch the Locking Lever
46
Installing and Removing Memory
47
Installing Memory
47
Figure 33. Installing Processor Heatsink
47
Figure 34. Installing Memory
47
Removing Memory
48
Replacing a Server/Workstation Board
48
Replacing the Fixed Fan
49
Removing the Fixed Fan
49
Figure 35. Disconnecting the Fan Power Cable from the Server Board
49
Installing the Fixed Fan
50
Figure 36. Removing Fixed System Fan from Chassis
50
Figure 37. Inserting the Fan Cable in the Corresponding Fan Bracket
50
Removing and Installing the Hot-Swap Fan
51
Removing the Hot-Swap Fan
51
Figure 38. Installing the Fixed Fan
51
Installing the Hot-Swap Fan
52
Figure 39. Removing Hot-Swap Fan
52
Figure 40. Installing Hot-Swap Fan
52
Installing and Removing a DVD or CD-ROM Drive
53
Installing a DVD or CD-ROM Drive
53
Removing a DVD or CD-ROM Drive
53
Figure 41. Removing EMI Shield
53
Figure 42. Installing DVD or CD-ROM Drive
53
Removing and Installing the Fixed HDD EMI Shield
54
Figure 43. Removing DVD or CD-ROM Drive
54
Figure 44. Re-Inserting Empty EMI Shield
54
Figure 45. Removing the Fixed HDD EMI Shield
55
Figure 46. Installing the Fixed HDD EMI Shield
55
Installing the Fixed HDD EMI Shield
55
Removing the Fixed HDD EMI Shield
55
Installing and Removing Fixed Hard Drive(S)
56
Installing Fixed Hard Drive(S)
56
Figure 47. Removing Fixed Hard Drive
56
Figure 48. Securing the 3.5" HDD on Fixed HDD Carrier Tray
57
Figure 49. Securing the 2.5" HDD on Fixed HDD Carrier Tray
57
Removing Fixed Hard Drive(S)
58
Figure 50. Inserting the HDD Carrier Tray
58
Figure 51. Removing Fixed Hard Drives
59
Figure 52. Removing the 3.5" HDD from Fixed HDD Tray
59
Figure 53. Removing the 2.5" HDD from Fixed HDD Tray
59
Removing and Installing 8X3.5" Hot-Swap Hard Drive Cage Assembly
60
Removing 8X3.5" Hot-Swap Hard Drive Cage Assembly
60
Figure 54. Reinstalling the HDD Carrier Tray
60
Installing 8X3.5" Hot-Swap Hard Drive Cage Assembly
61
Figure 55. Removing the 8X3.5" Hot-Swap HDD Cage Assembly
61
Figure 56. Installing the 8X3.5" Hot-Swap Hard Drive Cage Assembly
62
Figure 57. 8X3.5" Hot Swap Backplane Cable Connections
62
Removing and Installing 8X3.5" Hot-Swap Backplane
63
Removing 8X3.5" Hot-Swap Backplane
63
Figure 58. Removing 8X3.5" Hot-Swap Backplane
63
Installing 8X3.5" Hot-Swap Backplane
64
Figure 59. Installing 8X3.5" Hot-Swap Backplane
64
Removing and Installing First 8X2.5" Hot-Swap Hard Drive Cage Assembly
65
Removing 8X2.5" Hot-Swap Hard Drive Cage Assembly
65
Installing First 8X2.5" Hot-Swap Hard Drive Cage Assembly
65
Figure 60. Removing the 8X2.5" HDD Cage Assembly
65
Figure 61. Installing the 8X2.5" Hot-Swap Hard Drive Cage Assembly
66
Figure 62. 8X2.5" Hot Swap Backplane Cable Connections
66
Removing and Installing the Hot-Swap HDD EMI Shiled
67
Removing the Hot-Swap HDD EMI Shiled
67
Figure 63. Removing the Hot-Swap HDD EMI Shield
67
Installing the Hot-Swap HDD EMI Shiled
68
Removing and Installing Second 8X2.5" Hot-Swap Hard Disk Drive Cage Assembly
68
Removing Second 8X2.5" Hot-Swap Hard Disk Drive Cage Assembly
68
Figure 64. Installing the Hot-Swap HDD EMI Shield
68
Installing Bottom 8X2.5" Hot-Swap Hard Disk Drive Cage Assembly
69
Figure 65. Removing the Bottom 8X2.5" Hot-Swap HDD Cage Assembly
69
Figure 66. Installing the Bottom 8X2.5" Hot-Swap Hard Drive Cage Assembly
70
Figure 67. Two 8X2.5" Hot Swap Backplane Cable Connections
70
Removing and Installing Third 8X2.5" Hot-Swap Hard Disk Drive Cage Assembly
71
Removing Third 8X2.5" Hot-Swap Hard Disk Drive Cage Assembly
71
Installing Top 8X2.5" Hot-Swap Hard Disk Drive Cage Assembly
72
Figure 68. Removing the Top 8X2.5" Hot-Swap HDD Cage Assembly
72
Figure 69. Installing the Top 8X2.5" Hot-Swap Hard Drive Cage Assembly
73
Figure 70. Three 8X2.5" Hot Swap Backplane Cable Connections
73
Removing and Installing 8X2.5" Hot-Swap Backplane
74
Removing 8X2.5" Hot-Swap Backplane
74
Figure 71. Removing 8X2.5" Hot-Swap Backplane
74
Installing 8X2.5" Hot-Swap Backplane
75
Figure 72. Installing 8X2.5" Hot-Swap Backplane
75
Installing Hot-Swap Hard Drive
76
Installing Hot-Swap Hard Disk Drive into 3.5" Hard Drive Carrier
76
Figure 73. Installing Hard Disk Drive - Removing 3.5" HDD Carrier
76
For Installing 2.5" Hard Disk Drive as Option
77
Figure 74. Installing Hard Disk Drive - Removing 3.5" HDD Interface Bracket
77
Figure 75. Installing Hard Disk Drive - Installing 3.5" HDD
77
Figure 76. Installing Hard Disk Drive - Installing 2.5" HDD
77
Installing Hot-Swap Hard Disk Drive into 2.5" Hard Drive Carrier
78
Figure 77. Installing Hard Disk Drive - Inserting 3.5" HDD Assembly
78
Figure 78. Installing Hard Disk Drive - Removing 2.5" HDD Carrier
78
Figure 79. Installing Hard Disk Drive - Removing Plastic Drive Blank
79
Figure 80. Installing Hard Disk Drive - Installing 2.5" HDD
79
Figure 81. Installing Hard Disk Drive - Inserting 2.5" HDD Assembly
79
Installing PCI Add-In Board(S)
80
Figure 82. Removing the PCI Slot Shield
80
Figure 83. Rotate the PCI Retainer
81
Figure 84. Installing PCI Add-In Board
81
Figure 85. Installing PCI Add-In Board
81
Figure 86. Close the PCI Add-In Board Retaintion Device
82
Figure 87. Rotate the PCI Card Retainer
82
Optional Double Width Card Fixture
83
Figure 88. Installing the Double Width Card Fixture
83
Figure 89. Secure the Double Width Card
83
Installing and Removing the Intel
84
RAID C600 Upgrade Key
84
Installing the Intel RAID C600 Upgrade Key
84
Figure 90. Side View of a Double Width Card Extender Example
84
Figure 91. Top View of a Double Width Card Extender Example
84
Removing the Intel RAID C600 Upgrade Key
85
Installing and Removing the Intel Remote Management Module 4
85
Installing the Intel RMM4 Lite
85
Figure 92. Installing the Intel
85
Figure 93. Installing the Intel
85
Install the Intel RMM4 NIC
86
Removing the Intel RMM4 Lite
86
Removing the Intel RMM4 NIC
86
Installing and Removing the Intel RAID Smart Battery
86
Installing the Intel RAID Smart Battery
86
Figure 94. Installing the Intel
86
Removing the Intel ® RAID Smart Battery
87
Installing an Additional Hot-Swap Power Supply Module
87
Figure 95. Installing the Intel
87
Replacing a Hot Swap Power Supply Module
88
Figure 96. Removing Power Supply Filler Panel
88
Figure 97. Installing Additional Hot-Swap Power Supply Module
88
Figure 98. Removing Hot-Swap Power Supply Module from Chassis
88
Replacing the Power Distribution Board
89
Figure 99. Installing Hot-Swap Power Supply Module into Chassis
89
Figure 100. Removing Hot-Swap Power Supply Module from Chassis
89
Figure 101. Remove Power Distribution Board from Chassis
90
Figure 102. Removing the Power Distribution Board from Bracket
90
Figure 103. Sliding the New Power Distribution Board in Bracket
91
Figure 104. Securing the New Power Distribution Board in Bracket
91
Figure 105. Install the Power Distribution Board into Power Supply Cage
91
Removing and Installing the Top Cosmetic Cover
92
Removing the Top Cosmetic Cover
92
Figure 106. Installing Hot-Swap Power Supply Module into Chassis
92
Figure 107. Removing the Top Cosmetci Cover
92
Installing the Top Cosmetic Cover
93
Removing and Installing the Chassis Feet
93
Removing the Chassis Feet
93
Figure 108. Installing the Top Cosmetci Cover
93
Installing the Chassis Feet (Pedestal Configuration Only)
94
Figure 109. Removing the Chassis Feet
94
Figure 110. Installing the Chassis Feet
94
Removing and Installing the Front Panel Tray
95
Removing the Front Control Panel Tray
95
Figure 111. Disconnecting the Cables from the Server Board
95
Figure 112. Sliding the Front Panel Tray out from the Chassis
96
Figure 113. Disconnecting the Cables from Front Panel Board
96
Installing the Fron Panel Tray
97
Figure 114. Connecting the Cables to the Front Panel Board
97
Figure 115. Installing the Front Panel Tray in Chassis
97
Replacing the Front Panel Board
98
Figure 116. Connecting the Cables to Server Board the Front Panel Tray in Chassis
98
Figure 117. Removing the Front Panel Board
99
Figure 118. Removing and Installing the Cap on Front Panel Board
99
Figure 119. Installing the New Front Panel Board
99
Installing Alternate Serial Port
100
Installing And/Or Removing a Expander Card
100
Installing the Expander Card
100
Figure 120. Installing the Alternate Serial Port Knockout
100
Removing the Expander Card
101
Figure 121. Installing the Expander Card
101
Connecting and Disconnecting Cables to or from Server Workstation Board
102
Connecting Cables to Server/Workstation Board
102
Removing Cables from Server/Workstation Board
102
Figure 122. Removing the Expander Card
102
BIOS Setup Utilities
103
BIOS Setup Operation
103
Setup Page Layout
103
Entering BIOS Setup
104
Table 7. BIOS Setup Page Layout
104
Setup Navigation Keyboard Commands
105
Table 8. BIOS Setup: Keyboard Command Bar
105
Setup Screen Menu Selection Bar
106
BIOS Setup Utility Screens
106
Map of Screens and Functionality
107
Table 9. Screen Map
107
Main Screen (Tab)
108
Figure 123. Main Screen
109
Advanced Screen (Tab)
112
Figure 124. Advanced Screen
113
Processor Configuration
115
Figure 125. Processor Configuration Screen
117
Power & Performance
127
Figure 126. Power & Performance Screen
127
Memory Configuration
128
Figure 127. Memory Configuration Screen
129
Memory RAS and Performance Configuration
134
Figure 128. Memory RAS and Performance Configuration Screen
135
Mass Storage Controller Configuration
137
Figure 129. Mass Storage Controller Configuration Screen
138
PCI Configuration
144
Figure 130. PCI Configuration Screen
145
NIC Configuration
148
Figure 131. NIC Configuration Screen
152
Serial Port Configuration
159
Figure 132. Serial Port Configuration Screen
159
USB Configuration
161
Figure 133. USB Configuration Screen
162
System Acoustic and Performance Configuration
164
Figure 134. System Acoustic and Performance Configuration
165
Security Screen (Tab)
168
Figure 135. Security Screen
169
Server Management Screen (Tab)
172
Figure 136. Server Management Screen
175
Console Redirection
181
Figure 137. Console Redirection Screen
182
System Information
184
Figure 138. System Information Screen
185
BMC LAN Configuration
187
Figure 139. BMC LAN Configuration Screen
190
Boot Options Screen (Tab)
198
Figure 140. Boot Options Screen
200
CDROM Order
205
Hard Disk Order
206
Figure 141. CDROM Order Screen
206
Floppy Order
207
Figure 142. Hard Disk Order Screen
207
Network Device Order
208
Figure 143. Floppy Order Screen
208
Figure 144. Network Device Order Screen
208
BEV Device Order
209
Figure 145. BEV Device Order Screen
209
Add EFI Boot Option
210
Figure 146. Add EFI Boot Option Screen
210
Delete EFI Boot Option
211
Figure 147. Delete EFI Boot Option Screen
211
Boot Manager Screen (Tab)
212
Figure 148. Boot Manager Screen
212
Error Manager Screen (Tab)
213
Figure 149. Error Manager Screen
214
Save & Exit Screen (Tab)
215
Figure 150. Save & Exit Screen
215
Appendix A: Technical Reference
219
Power Supply Specification
219
750-W Hot-Swap Power Supply Input/Output Voltage
219
Table 10. AC Input Voltage Range for 750 PSU
219
Table 11. over Current Protection for 750 PSU
219
Table 12. over Voltage Protection (OVP) Limits for 750W PSU
219
Table 13. AC Input Voltage Range for 1200W PSU
219
1600-W Hot-Swap Power Supply Input/Output Voltages
220
Table 14. over Current Protection for 1200W PSU
220
Table 15. over Voltage Protection (OVP) Limits for 1200W PSU
220
Table 16. AC Input Voltage Range for 1600 PSU
220
Table 17. over Current Protection for 1600PSU
220
Table 18. over Voltage Protection (OVP) Limits for 1600W PSU
220
System Environmental Limits
221
Table 19. System Environmental Limits
221
Appendix B: Regulatory and Compliance Information
223
Appendix C: Getting Help
224
Warranty Information
224
Appendix D: Intel Server Issue Report Form
225
Intel Server System P4000IP and Intel Workstation System P4000CR Service Guide
226
Advertisement
Advertisement
Related Products
Intel P4308IP4LHJCL
Intel P4308IP4LHGC
Intel P4308IP4LHKC
Intel P4308SC2MHGC
Intel P4308CP4MHEN
Intel P4308CP4MHGC
Intel P4304SC2SFEN
Intel P4304BT series
Intel P4304XXSFCN
Intel P4304CR2LFJNL
Intel Categories
Motherboard
Computer Hardware
Server
Server Board
Desktop
More Intel Manuals
Login
Sign In
OR
Sign in with Facebook
Sign in with Google
Upload manual
Upload from disk
Upload from URL