Sign In
Upload
Manuals
Brands
HydroPoint Manuals
Controller
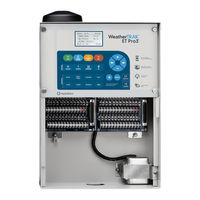
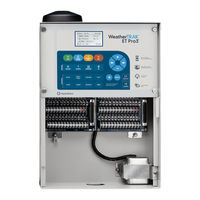
WeatherTRAK ET Pro3
HydroPoint WeatherTRAK ET Pro3 Manuals
Manuals and User Guides for HydroPoint WeatherTRAK ET Pro3. We have
3
HydroPoint WeatherTRAK ET Pro3 manuals available for free PDF download: Installation Manual, Upgrade Installation Manual, Bidding Specifications
HydroPoint WeatherTRAK ET Pro3 Upgrade Installation Manual (14 pages)
Brand:
HydroPoint
| Category:
Controller
| Size: 0 MB
Table of Contents
Table of Contents
2
Contents
3
Getting Started
3
Overview of the Steps for Included Equipment
3
Swm to Et Pro 3
3
Existing Equipment that will be Used
4
Tools Needed
4
Central Internetm
4
Getting Started with the Upgrade Instructions
4
Upgrade
4
(CIM)
4
Upgradeinstructions
5
Step 1 - Remove the Command
5
Step 2 - Disconnect the Power Cable from the Mini
5
Power
5
Chassis
5
Step 3 - Transfer the Station Keys
6
Step 4 - Disconnect Ther
6
Step 5 - Label Andd
6
Ain Sensor
6
Isconnect the Valve Wires
6
Step 6 - Remove the Weather
7
Hassis
7
Step 7 - Install the Neww
8
Chassis
8
Step 8 - Reconnect Thev
9
Step 9 - Install the Weather
9
Odule
9
Step 10 - Update Thed
10
Setting the Date
10
Enabling Automaticd
10
Alve Wires and Rain Sensor Trak Pro 3 Command Mate and Time
10
Ime Zone
10
Aylight Savings Time
10
Step12-Testing the Newweathertraketpro3Controller
11
Step11-Activatecontroller Withhydropoint
11
Valve Test
11
Ontroller with Hydro Point
11
Ontroller
11
Check
12
Checklists
13
Swm Checklist
13
Hecklist
13
Advertisement
HydroPoint WeatherTRAK ET Pro3 Installation Manual (14 pages)
Upgrade to OptiFlow XR
Brand:
HydroPoint
| Category:
Controller
| Size: 1 MB
Table of Contents
Table of Contents
2
Contents
3
Getting Started
3
Overview of the Steps for Upgrading from ET Pro3 to Optiflow XR
3
Included Equipment
4
Existing Equipment that will be Used
4
Tools Needed
4
Central Internet Management Service (CIM)
4
Getting Started with the Upgrade
4
Step 1 - Remove the Command Module and Disconnect Power
5
Upgrade Instructions
5
Step 2 - Disconnect Antenna and Ribbon Cable
6
Step 3 - Transfer the Station Keys
6
Step 4 - Disconnect the Rain Sensor
7
Step 5 - Label and Disconnect the Valve Wires
7
Step 6 - Remove the Weathertrak ET Pro3 Mini-Chassis
7
Step 7 - Install the New Weathertrak Optiflow XR Mini-Chassis
8
Step 8 - Reconnect the Valve Wires and Rain Sensor
9
Step 9 - Install the Weathertrak Optiflow XR Command Module
9
Step 10 - Update the Date and Time
10
Setting the Date
10
Setting the Time and Time Zone
10
Enabling Automatic Daylight Savings Time
10
Step 11 - Activate Controller with Hydropoint
11
Step 12 - Testing the New Weathertrak Optiflow XR Controller
11
Valve Test
11
Controller Configuration Check
12
Step 13 - Updating to Optiflow
12
Step 14 - Program Optiflow
12
Checklists
13
Weathertrak ET Pro3 Checklist
13
Weathertrak Optiflow XR Checklist
13
HydroPoint WeatherTRAK ET Pro3 Bidding Specifications (10 pages)
Brand:
HydroPoint
| Category:
Controller
| Size: 0 MB
Advertisement
Advertisement
Related Products
HydroPoint WeatherTRAK ET Pro2
HydroPoint WeatherTRAK ET Pro2 SWM
HydroPoint WeatherTRAK Chassis 7
HydroPoint WeatherTRAK ET Pro3 2-Wire
HydroPoint WeatherTRAK 2-Wire
HydroPoint WeatherTRAK ET Plus
HydroPoint WeatherTRAK Smart Yard
HydroPoint Categories
Controller
Measuring Instruments
Irrigation System
Weather Station
More HydroPoint Manuals
Login
Sign In
OR
Sign in with Facebook
Sign in with Google
Upload manual
Upload from disk
Upload from URL