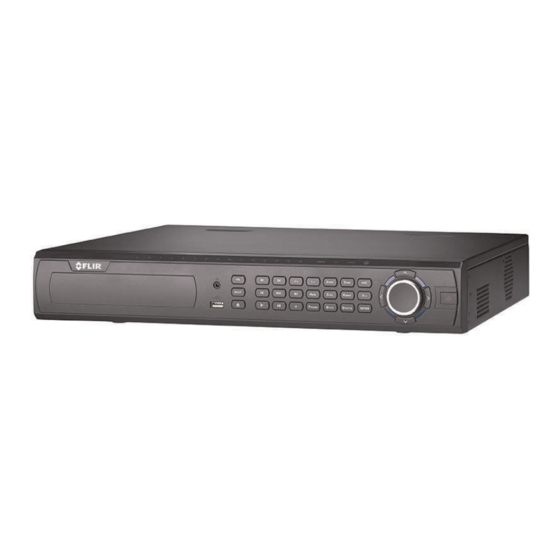
Sign In
Upload
Manuals
Brands
FLIR Manuals
DVR
DNR516
FLIR DNR516 Manuals
Manuals and User Guides for FLIR DNR516. We have
2
FLIR DNR516 manuals available for free PDF download: Instruction Manual
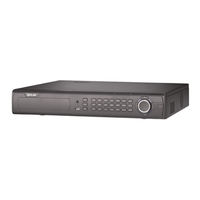
FLIR DNR516 Instruction Manual (198 pages)
Network Video Recorder DNR500 SERIES
Brand:
FLIR
| Category:
DVR
| Size: 29.69 MB
Table of Contents
Table of Contents
5
1 Important Safeguards
11
General Precautions
11
Installation
11
Service
13
Use
13
2 DNR500 Series Features
14
3 Getting Started (DNR500 Series)
15
4 DNR500 Series Series Front Panel
16
5 DNR500 Series Rear Panel
18
6 Basic Setup (DNR500 Series)
19
Step 1: Connect the IP Cameras
19
Step 2: Connect the Mouse
19
Step 3: Connect the Ethernet Cable
19
Step 4: Connect the Monitor
20
Step 5: Connect the Power Cable to Power the NVR
20
Step 6: Upgrade Firmware to Latest Version (if Available)
20
Step 7: Verify Camera Image
21
Step 8: Set the Time
21
Default System Password & Port Numbers
21
FLIR Cloud
21
Quick Access to System Information
22
Connecting Cameras to the Local Area Network (LAN)
23
7 Mouse Control
26
8 Remote Control
27
Setting the Remote Control Address
28
9 Using the System
29
On-Screen Display
29
Using the Quick Menu
30
Adjusting Camera Image Settings
30
Using the Navigation Bar
32
Using the Camera Toolbar
32
Using Quick Playback
32
Using Digital Zoom in Live Display
33
Using Real-Time Backup
33
Using the Virtual Keyboard
33
Adjusting Camera Zoom & Focus
34
10 Setting the Time
35
11 Recording
36
Video Recording Types
36
Main Stream and Sub Stream
36
Setting up Scheduled or Manual Recording
36
Configuring Hard Drive Overwrite
37
12 Search (Playback)
38
Playing Back Video from the Hard Drive
38
Playback Controls
39
Playing Back from a USB Drive
39
13 Backup
41
Formatting the USB Thumb Drive
41
Backing up Video
42
Using Video Clip Backup
42
Viewing Backup Files
43
Viewing Backup Files on PC
43
Viewing Backup Files on Mac
46
14 Managing Passwords and User Accounts
49
Changing Passwords
49
Adding Users
49
Modifying Users
50
Deleting Users
50
Account Groups
51
Adding Groups
51
Modifying Groups
52
Deleting Groups
52
15 Using the Main Menu
53
Camera
53
Remote Device
53
Viewing Camera Status
54
Viewing Camera Firmware Versions
54
Upgrading Camera Firmware
54
Recording
55
Configuring Recording Quality
55
Configuring Audio Recording
56
Configuring Snapshot Recording Settings
57
Creating Custom Channel Names
58
Info
59
HDD Info
59
Record Info
59
Version
60
Event Info
60
Online Users
61
Load
61
Test
62
Bps
62
Log
62
Setting
64
Network
64
Selecting DHCP or Static IP Address (TCP/IP)
64
Configuring System Ports (Connection)
65
Configuring DDNS Settings
66
Configuring Email Alerts
66
Configuring Switch Settings (Advanced)
67
Event
68
Configuring Motion Detection
68
Configuring Video Loss Settings
70
Configuring Alarm Input Devices
71
Controlling Alarm Output Devices
72
Configuring Hard Drive Warnings
73
Configuring Network Warnings
74
Storage
74
Configuring the Video Recording Schedule
75
Configuring Pre-Recording
75
Configuring the Snapshot Schedule
76
Configuring Holidays
77
Formatting the Hard Drive
78
Configuring Hard Drive Type
79
Installing Esata Hard Drives
79
Setting up Hard Drive Mirroring (Advanced)
80
Configuring Hard Drive Groups (Advanced)
82
Configuring General System Settings
83
Setting the Monitor Resolution (Display)
84
Saving Your System Configuration to a USB Thumb Drive
85
Setting the System to Factory Defaults
86
Upgrading Firmware from USB
87
Shutdown
89
16 Connecting to Your System over the Internet on PC or Mac
90
System Requirements
90
Step 1 of 3: Connect Your System to Your Router
90
Step 2 of 3: Obtain the System's Device ID
91
Step 3 of 3: Connect to the System over the Internet
91
17 Using FLIR Cloud™ Client for PC or Mac
95
Home Page
95
Live View
95
Live View Controls
96
Opening Live View in Multiple Monitors
97
Controlling PTZ Cameras
98
PTZ Presets
99
PTZ Tours
100
PTZ Pattern
101
PTZ Scan
102
PTZ Pan
102
Playback
102
Playback Controls
104
Downloading Video to Your Computer Hard Drive
105
Alarm
106
Log
106
E-Map
107
Devices
109
Device Config
110
Alarm CFG
111
Tour & Task
114
Account
115
Managing User Accounts
115
Managing Roles
117
General
118
Basic
118
File
118
Alarm Prompt
119
Version
120
18 Connecting to Your System Using Smartphone or Tablet Apps
121
Iphone
121
Prerequisites
121
Connecting to Your System on Iphone
121
Live View Interface
122
Controlling PTZ Cameras
123
Viewing Snapshots and Videos with Local Files
124
Using Playback Mode on Iphone
125
Enabling Push Notifications
126
Using the Event List
128
Using Favorites
129
Using the E-Map
130
Device Manager
132
Adding Devices Using an IP or DDNS Address (Advanced)
133
Ipad
135
Prerequisites
135
Connecting to Your System on an Ipad
135
Live View Interface
136
Controlling PTZ Cameras
137
Using Playback Mode on Ipad
138
Using Local File to View Manual Recordings
140
Enabling Push Notifications
141
Using the Event List
143
Using Favorites
144
Using the E-Map
145
Using the Device Manager
147
Adding Devices Using an IP or DDNS Address (Advanced)
147
Android
150
Prerequisites
150
Connecting to Your System on Android
150
Live View Interface
151
Controlling PTZ Cameras
152
Viewing Snapshots and Videos with Local Files
153
Using Playback Mode on Android
154
Enabling Push Notifications
155
Using the Event List
157
Using Favorites
157
Using the E-Map
159
Device Manager
161
Adding Devices Using an IP or DDNS Address (Advanced)
162
19 Remote Viewing on Internet Explorer
164
Prerequisites
164
IE Live Display Overview
165
Using Search Mode in IE (Playback)
166
20 RTSP Streaming (Advanced)
167
21 DDNS Setup (Advanced)
169
Accessing Your System Within a Local Network (LAN)
169
Step 1 of 3: Connect Your System to Your Router
169
Step 2 of 3: Obtain the System's Local IP Address
170
Step 3 of 3: Connect to the System's Local IP Address
170
DDNS Setup-Access Your System Remotely over the Internet
172
Step 1 of 4: Port Forwarding
172
Step 2 of 4: Create a DDNS Account
173
Step 3 of 4: Enable DDNS on the System
174
Step 4 of 4: Connect to the System's DDNS Address
175
22 Connecting a PTZ Camera (DNR500 Series)
179
Controlling a PTZ Camera (Local NVR)
180
Advanced PTZ Controls
181
Presets
182
Tours
182
Pattern
183
Auto Scan
183
23 Connecting an External Monitor (DNR500 Series)
185
24 DNR500 Series Hard Drive Installation
186
Installing a Hard Drive
186
Removing the Hard Drive
187
Formatting Hard Drives
188
25 Troubleshooting
190
26 DNR500 Series System Specifications
192
System
192
Inputs/Outputs
192
Display
192
Recording
192
Playback and Backup
193
Storage & Archive
193
Connectivity
193
General
194
Recording Resolution (Pixels) & Speed (FPS - Frames Per Second)
194
27 Notices
195
FCC Class a Notice
195
Advertisement
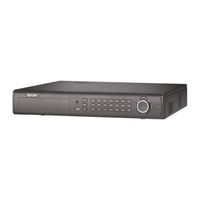
FLIR DNR516 Instruction Manual (196 pages)
Brand:
FLIR
| Category:
DVR
| Size: 6.13 MB
Table of Contents
Table of Contents
5
Important Safeguards
11
General Precautions
11
Installation
11
Service
13
Use
13
DNR500 Series Features
14
Getting Started (DNR500 Series)
15
DNR500 Series Series Front Panel
16
DNR500 Series Rear Panel
18
Basic Setup (DNR500 Series)
19
Step 1: Connect the IP Cameras
19
Step 2: Connect the Mouse
19
Step 3: Connect the Ethernet Cable
19
Step 4: Connect the Monitor
20
Step 5: Connect the Power Cable to Power the NVR
20
Step 6: Upgrade Firmware to Latest Version (if Available)
20
Step 7: Verify Camera Image
21
Step 8: Set the Time
21
Default System Password & Port Numbers
21
FLIR Cloud
21
Quick Access to System Information
22
Connecting Cameras to the Local Area Network (LAN)
23
Mouse Control
26
Remote Control
27
Setting the Remote Control Address
28
Using the System
29
On-Screen Display
29
Using the Quick Menu
30
Adjusting Camera Image Settings
30
Using the Navigation Bar
32
Using the Camera Toolbar
32
Using Quick Playback
32
Using Digital Zoom in Live Display
33
Using Real-Time Backup
33
Using the Virtual Keyboard
33
Adjusting Camera Zoom & Focus
34
Setting the Time
35
Recording
36
Video Recording Types
36
Main Stream and Sub Stream
36
Setting up Scheduled or Manual Recording
36
Configuring Hard Drive Overwrite
37
Search (Playback)
38
Playing Back Video from the Hard Drive
38
Playback Controls
39
Playing Back from a USB Drive
39
Backup
41
Formatting the USB Thumb Drive
41
Backing up Video
42
Using Video Clip Backup
42
Viewing Backup Files
43
Viewing Backup Files on PC
43
Viewing Backup Files on Mac
46
Managing Passwords and User Accounts
49
Changing Passwords
49
Adding Users
50
Modifying Users
50
Deleting Users
51
Account Groups
51
Adding Groups
51
Modifying Groups
52
Deleting Groups
52
Using the Main Menu
53
Camera
53
Remote Device
53
Viewing Camera Status
54
Viewing Camera Firmware Versions
54
Upgrading Camera Firmware
54
Recording
55
Configuring Recording Quality
55
Configuring Audio Recording
56
Configuring Snapshot Recording Settings
57
Creating Custom Channel Names
58
Info
59
HDD Info
59
Record Info
59
Version
60
Event Info
60
Online Users
61
Load
61
Test
62
Bps
62
Log
62
Setting
64
Network
64
Selecting DHCP or Static IP Address (TCP/IP)
64
Configuring System Ports (Connection)
65
Configuring DDNS Settings
66
Configuring Email Alerts
66
Configuring Switch Settings (Advanced)
67
Event
68
Configuring Motion Detection
68
Configuring Video Loss Settings
70
Configuring Alarm Input Devices
71
Controlling Alarm Output Devices
72
Configuring Hard Drive Warnings
73
Configuring Network Warnings
74
Storage
74
Configuring the Video Recording Schedule
75
Configuring Pre-Recording
75
Configuring the Snapshot Schedule
76
Configuring Holidays
77
Formatting the Hard Drive
78
Configuring Hard Drive Type
79
Installing Esata Hard Drives
79
Setting up Hard Drive Mirroring (Advanced)
80
Configuring Hard Drive Groups (Advanced)
82
Configuring General System Settings
83
Setting the Monitor Resolution (Display)
84
Saving Your System Configuration to a USB Thumb Drive
85
Setting the System to Factory Defaults
86
Upgrading Firmware from USB
87
Shutdown
89
Connecting to Your System over the Internet on PC or Mac
90
System Requirements
90
Step 1 of 3: Connect Your System to Your Router
90
Step 2 of 3: Obtain the System's Device ID
91
Step 3 of 3: Connect to the System over the Internet
91
Using FLIR Cloud™ Client for PC or Mac
95
Home Page
95
Live View
95
Live View Controls
96
Opening Live View in Multiple Monitors
97
Controlling PTZ Cameras
98
PTZ Presets
99
PTZ Tours
100
PTZ Pattern
101
PTZ Scan
102
PTZ Pan
102
Playback
102
Playback Controls
104
Downloading Video to Your Computer Hard Drive
105
Alarm
106
Log
107
E-Map
108
Devices
110
Device Config
111
Alarm CFG
111
Tour & Task
114
Account
115
Managing User Accounts
115
Managing Roles
117
General
118
Basic
118
File
118
Alarm Prompt
119
Version
120
Connecting to Your System Using Smartphone or Tablet Apps
121
Iphone
121
Prerequisites
121
Connecting to Your System on Iphone
121
Live View Interface
122
Controlling PTZ Cameras
123
Viewing Snapshots and Videos with Local Files
124
Using Playback Mode on Iphone
125
Enabling Push Notifications
126
Using the Event List
128
Using Favorites
129
Using the E-Map
130
Device Manager
132
Adding Devices Using an IP or DDNS Address (Advanced)
133
Ipad
135
Prerequisites
135
Connecting to Your System on an Ipad
135
Live View Interface
136
Controlling PTZ Cameras
137
Using Playback Mode on Ipad
138
Using Local File to View Manual Recordings
140
Enabling Push Notifications
141
Using the Event List
143
Using Favorites
144
Using the E-Map
145
Using the Device Manager
147
Adding Devices Using an IP or DDNS Address (Advanced)
147
Android
150
Prerequisites
150
Connecting to Your System on Android
150
Live View Interface
151
Controlling PTZ Cameras
152
Viewing Snapshots and Videos with Local Files
153
Using Playback Mode on Android
153
Enabling Push Notifications
155
Using the Event List
156
Using Favorites
156
Using the E-Map
158
Device Manager
159
Adding Devices Using an IP or DDNS Address (Advanced)
160
Remote Viewing on Internet Explorer
162
Prerequisites
162
IE Live Display Overview
163
Using Search Mode in IE (Playback)
164
RTSP Streaming (Advanced)
166
DDNS Setup (Advanced)
168
Accessing Your System Within a Local Network (LAN)
168
Step 1 of 3: Connect Your System to Your Router
168
Step 2 of 3: Obtain the System's Local IP Address
169
Step 3 of 3: Connect to the System's Local IP Address
169
DDNS Setup-Access Your System Remotely over the Internet
171
Step 1 of 4: Port Forwarding
172
Step 2 of 4: Create a DDNS Account
172
Step 3 of 4: Enable DDNS on the System
173
Step 4 of 4: Connect to the System's DDNS Address
174
Connecting a PTZ Camera (DNR500 Series)
178
Controlling a PTZ Camera (Local NVR)
180
Advanced PTZ Controls
180
Presets
181
Tours
181
Pattern
182
Auto Scan
182
Connecting an External Monitor (DNR500 Series)
184
DNR500 Series Hard Drive Installation
185
Installing a Hard Drive
185
Removing the Hard Drive
186
Formatting Hard Drives
187
Troubleshooting
189
DNR500 Series System Specifications
191
System
191
Inputs/Outputs
191
Display
191
Recording
191
Playback and Backup
192
Storage & Archive
192
Connectivity
192
General
193
Recording Resolution (Pixels) & Speed (FPS - Frames Per Second)
193
Notices
194
FCC Class a Notice
194
Advertisement
Related Products
FLIR DNR532
FLIR DNR500 Series
FLIR DNR516P16
FLIR DNR7326
FLIR DNR73212
FLIR DNR7086
FLIR DNR7083
FLIR DNR8648
FLIR DNR8644
FLIR DNR408P8
FLIR Categories
Thermal cameras
Security Camera
Measuring Instruments
Digital Camera
IP Camera
More FLIR Manuals
Login
Sign In
OR
Sign in with Facebook
Sign in with Google
Upload manual
Upload from disk
Upload from URL