Sign In
Upload
Manuals
Brands
Epson Manuals
Monitor
EB-1480Fi
Epson EB-1480Fi Manuals
Manuals and User Guides for Epson EB-1480Fi. We have
3
Epson EB-1480Fi manuals available for free PDF download: User Manual, Installation Manual
Epson EB-1480Fi User Manual (296 pages)
Brand:
Epson
| Category:
Projector
| Size: 8.12 MB
Table of Contents
Contents
2
Table of Contents
2
G G Related Links
8
Notations Used in this Guide
9
Using the Manual to Search for Information
9
Searching by Keyword
9
Jumping Directly from Bookmarks
9
Printing Only the Pages You Need
9
Getting the Latest Version of the Documents
10
Introduction to Your Projector
12
Projector Features
12
Long-Life Laser Light Source
12
Unique Interactive Functions
12
Quick and Easy Setup
13
Flexible Connectivity
13
Connect with Computers
13
Connect with Mobile Devices
14
Easy Operation from the Control Pad
14
Large-Scale Presentation from the Whiteboard
15
Projector Parts and Functions
16
Projector Parts - Front/Side
16
Projector Parts - Top/Side
17
Projector Parts - Interface
18
Projector Parts - Base
19
Projector Parts - Control Panel
20
Projector Parts - Remote Control
21
Projector Parts - Interactive Pens
22
Projector Parts - Pen Stand
23
Projector Parts - Control Pad
24
Projector Parts - Touch Unit
25
Safety Instructions for Magnet
26
Projector Placement
28
Projector Setup and Installation Options
28
Settings When Using the Interactive Features
29
Settings When Using the Touch Unit
30
Projector Connections
31
Connecting to a Computer
31
Connecting to a Computer for VGA Video and Audio
31
Connecting to a Computer for USB Video and Audio
32
Connecting to a Computer for HDMI Video and Audio
33
Connecting a Computer to the Control Pad
33
Connecting to a Mini PC Installed on a Wall Plate
34
Connecting a Computer for Use with PC Interactive Features
35
Connecting to Video Sources
35
Connecting to an HDMI Video Source
35
Connecting to a Composite Video Source
36
Connecting a Video Source to the Control Pad
36
Connecting to External USB Devices
37
USB Device Projection
37
Connecting to a USB Device
38
Connecting a USB Flash Drive to the Control Pad
38
Projector Connections
38
Disconnecting a USB Device
39
Connecting to a Document Camera
39
Connecting a Printer
39
Connecting to External Output Devices
39
Connecting to an External HDMI Monitor
39
Connecting to a VGA Monitor
40
Connecting to External Speakers
41
Connecting a Microphone
41
Connecting Multiple Projectors of the same Model
42
Menu Settings for Multiple Projector Connections
43
Installing Batteries in the Remote Control
45
Installing Batteries in the Pens
46
Installing Batteries Inthe Pens
47
Remote Control Operation
47
Using Basic Projector Features
48
Turning on the Projector
49
Home Screen
50
G G Related Links
50
Turning on the Projector
50
Turning off the Projector
51
Setting the Date and Time
52
Selecting the Language for the Projector Menus
54
Projection Modes
55
Changing the Projection Mode Using the Remote Control
55
Changing the Projection Mode Using the Menus
55
Setting the Screen Type
57
Adjusting the Image Position Using Screen Position
57
Focusing the Image
59
Image Shape
61
Correcting the Image Shape with the Keystone Buttons
61
Correcting the Image Shape with Quick Corner
62
Correcting Image Shape with Arc Correction
64
Correcting Image Shape with Point Correction
66
Loading Image Shape Setting from Memory
68
Correcting Image Shape with Corner Markers
68
Resizing the Image with the Buttons
70
Adjusting the Image Position
71
Adjusting the Image Position
72
Resizingthe Imagewith the Buttons
72
Selecting an Image Source
72
Selecting an Image Source
73
Changing the Image Aspect Ratio
74
Available Image Aspect Ratios
74
Projected Image Appearance with each Aspect Mode
75
Image Aspect Ratio
75
Image Aspect Ratio
74
Adjusting Image Quality (Color Mode)
78
Changing the Color Mode
78
Available Color Modes
78
Turning on Automatic Luminance Adjustment
78
Adjusting the Image Color
80
Adjusting the Hue, Saturation, and Brightness
80
Adjusting the Gamma
81
Adjusting the Brightness
83
Constant Brightness Usage Hours
84
Light Source Life Span
85
Controlling the Volume with the Volume Buttons
86
Inverting the Audio Channels
87
Using the Interactive Features
88
Interactive Feature Modes
89
Preparing before Using Interactive Features
91
Safety Instructions for Interactive Features
91
Using the Interactive Pens
91
Using Interactive Touch Operations with Your Finger
93
Safety Instructions for Interactive Touch Operations
94
Whiteboard Screens (Whiteboard Mode)
96
Safety Instructions for Whiteboard Mode
96
Starting Whiteboard Mode
96
Whiteboard Mode Toolbar
97
Importing Images in Whiteboard Mode
99
Compatible File Types for Opening in Whiteboard Mode
101
Draw on the Projected Image Using Annotation Mode
102
Draw on the Projected Image Using Annotation Mode
102
Starting Annotation Mode
102
Annotation Mode Toolbar
103
Contents
106
Sharing Drawings
106
Sending Drawing Contents Via Email
106
Creating an Address Book
107
Sharing Drawings
107
Available Directory Service
108
Saving Drawing Contents
108
Available File Format in Whiteboard Mode
110
Printing Drawing Contents
110
Available Printer Control Commands in Whiteboard Mode
111
Control Computer Features from a Projected Screen (Computer Interactive Mode)
112
Computer Interactive Mode System Requirements
112
Using Computer Interactive Mode
113
Adjusting the Pen Operation Area
113
Installing Easy Interactive Driver on Mac
115
Controlling a Document Camera
116
Selecting Network Device Display
117
Using the Interactive Features over a Network
119
Precautions When Connecting to a Projector on a Different Subnet
119
Using Split Screen Projection
120
Adjusting Projector Features
121
Projecting Multiple Images Simultaneously
122
Unsupported Input Source Combinations for Split Screen Projection
124
Split Screen Projection Restrictions
124
Projecting a Pcfreepresentation
125
Projecting a PC Free Presentation
125
Supported PC Free File Types
125
Precautions on PC Free Projection
125
Starting a PC Free Slide Show
126
Starting a PC Free Movie Presentation
127
PC Free Display Options
128
Shutting off the Image and Sound Temporarily
130
Stopping Video Action Temporarily
131
Zooming Images
132
Saving a User's Logo Image
133
Saving a User Pattern
135
Saving Settings to Memory and Using Saved Settings
137
Using Multiple Projectors
138
Projector Identification System for Multiple Projector Control
138
Setting the Projector ID
138
Selecting the Projector You Want to Operate
139
Adjusting Color Uniformity
140
Blending the Image Edges
142
Matching the Image Colors
144
Adjusting the Black Level
145
Modifying the Black Level Adjustment Area
147
Adjusting RGBCMY
148
Scaling an Image
149
Projector Security Features
152
Password Security Types
152
Setting a Password
152
Selecting Password Security Types
153
Entering a Password to Use the Projector
154
Locking the Projector's Buttons
154
Unlocking the Projector's Buttons
155
Installing a Security Cable
155
Using the Projector on a Network
157
Using the Projector on Anetwork
158
Connecting to a Wired Network
158
Selecting Wired Network Settings
158
Wired Network Projection
158
Contents
162
Wireless Network Projection
162
Safety Instructions for Built-In Wireless LAN Module
162
Connection Methods for Wireless Network Projection
162
Installing the Wireless LAN Module
163
Selecting Wireless Network Settings Manually
164
Selecting Wireless Network Settings in Windows
167
Selecting Wireless Network Settings in Mac
167
Setting up Wireless Network Security for Simple AP Mode
167
Setting up Wireless Network Security for Infrastructure Mode
168
Supported Client and CA Certificates
170
Using a QR Code to Connect a Mobile Device
170
Using a USB Key to Connect a Windows Computer
171
Getting the Latest Version of the Documents
171
Wireless Network Projection from a Mobile Device (Screen Mirroring)
172
Selecting Screen Mirroring Settings
172
Connecting Using Screen Mirroring with the Miracast Function
174
Connecting Using Screen Mirroring in Windows 10
175
Connecting Using Screen Mirroring in Windows 8.1
175
Secure HTTP
177
Importing a Web Server Certificate Using the Menus
177
Supported Web Server Certificates
178
Screen Sharing
179
Preparing for Screen Sharing
179
Sharing the Screen
180
Receiving Shared Screen Images
181
Monitoring and Controlling the Projector
182
Epson Projector Management
183
Controlling a Networked Projector Using a Web Browser
184
Controlling a Networked Projector Using Aweb Browser
185
Epsonprojector Management
185
Web Control Options
185
Registering Digital Certificates from a Web Browser
189
Setting up Projector Network E-Mail Alerts
190
Network Projector E-Mail Alert Messages
190
Setting up Monitoring Using SNMP
191
Using ESC/VP21 Commands
192
ESC/VP21 Command List
192
Cable Layouts
192
Pjlink Support
193
Crestron Connected Support
194
Setting up Crestron Connected Support
194
Controlling a Networked Projector Using Crestron Connected
194
Crestron Connected Operation Window
196
Crestron Connected Tools Window
197
Setting Projector Event Schedules
199
Adjusting the Menu Settings
202
Using the Projector's Menus
203
Using the Displayed Keyboard
204
Available Text Using the Displayed Keyboard
204
Image Quality Settings - Image Menu
205
Input Signal Settings - Signal I/O Menu
207
Projector Installation Settings - Installation Menu
209
Projector Display Settings - Display Menu
211
Projector Feature Settings - Operation Menu
213
Projector Administration Settings - Management Menu
215
Projector Administration Settings - Management Menu
216
Projector Administration Settings -Management Menu
217
Event ID Code List
217
Projector Network Settings - Network Menu
219
Projector Network Settings -Network Menu
220
Network Menu - Network Settings Menu
220
Projector Network Settings - Network Menu
220
Network Menu - Wireless LAN Menu
221
Network Menu - Wired LAN Menu
223
Network Menu - Mail Notification Menu
224
Network Menu - Projector Control Menu
224
Contents
225
Network Menu - Network Projection Settings
225
Projector Pen and Touch Setup Settings - Pen/Touch Menu
227
Projector Interactive Settings - Interactive Menu
229
Interactive Menu - Print Menu
229
Interactive Menu - Save Menu
230
Projector Interactive Settings - Interactive Menu
230
Interactive Menu - Mail Menu
231
Interactive Menu - Directory Menu
231
Multiple Projector Operation Settings - Multi-Projection Menu
233
Multiple Projector Operation Settings - Multi-Projection Menu
234
Image Quality Memory Settings - Memory Menu
235
Projector Setup Settings - ECO Menu
236
Projector Initial Settings and Reset Options - Initial/All Settings Menu
237
Copying Menu Settings between Projectors (Batch Setup)
238
Transferring Settings from a USB Flash Drive
238
Transferring Settings from a Computer
239
Batch Setup Error Notification
240
Maintaining the Projector
241
Projector Maintenance
242
Cleaning the Lens
243
Cleaning the Projector Case
244
Air Filter and Vent Maintenance
245
Cleaning the Air Filter
245
Replacing the Air Filter
247
Replacing the Interactive Pen Tip
249
Replacing the Soft Pen Tip
249
Replacing the Soft Pen Tip with the Hard Pen Tip
250
Solving Problems
251
Projection Problems
252
Projector Indicator Status
253
Solving Image or Sound Problems
255
Solutions When no Image Appears
255
Solutions When Image Is Incorrect Using the USB Display Function
255
Solutions When "No Signal" Message Appears
256
Displaying from a Laptop
256
Displaying from a Mac Laptop
256
Solutions When "Not Supported" Message Appears
257
Solutions When Only a Partial Image Appears
257
Solutions When the Image Is Not Rectangular
257
Solutions When the Image Contains Noise or Static
258
Solutions When the Image Is Fuzzy or Blurry
258
Solutions When the Image Brightness or Colors Are Incorrect
259
Solutions When an Afterimage Remains on the Projected Image
259
Solutions to Sound Problems
259
Solutions to Microphone Problems
260
Solutions When Image File Names Are Not Displayed Correctly in PC Free
260
Solving Projector or Remote Control Operation Problems
261
Solutions to Projector Power or Shut-Off Problems
261
Solutions to Problems with the Remote Control
261
Solutions to Password Problems
262
Solution When "The Battery that Saves Your Clock Settings Is Running Low" Message Appears
262
Solutions When "Error Occurred in the Easy Interactive Function" Message
263
Appears
263
Solutions When the Interactive Pens Do Not Work
263
Solutions When You Cannot Operate a Computer from the Projected Screen
264
Solutions When the Interactive Pen Position Is Not Accurate
264
Solutions When the Interactive Pens Are Slow or Difficult to Use
264
Solutions When the Interactive Touch Operation Does Not Work
264
Solutions for Problems with Capturing, Printing, Saving, or Scanning
265
Solutions When the Time Is Incorrect in Whiteboard Settings
265
Solutions When Whiteboard Mode Does Not Start
266
Solving Interactive Features Problems
263
Solving Network Problems
267
Solutions When Wireless Authentication Fails
267
Solutions When You Cannot Access the Projector through the Web
267
Solutions When Network Alert E-Mails Are Not Received
267
Solutions When the Image Contains Static During Network Projection
268
Solutions When You Cannot Connect Using Screen Mirroring
268
Solutions When the Image or Sound Contains Static During Screen Mirroring Connection
268
Solutions When the Projected Screen Is Not Shared Correctly
269
Solving HDMI Link Problems
270
Solutions When HDMI Link Does Not Function
270
Appendix
271
Optional Accessories and Replacement Parts
272
Screens
272
Cables
272
Mounts
272
For Interactive Feature
272
External Devices
272
Replacement Parts
273
For Wireless Connection
273
Compatible Accessories from Other Projectors
273
Screen Size and Projection Distance
274
Screensizeand Projection Distance
276
Supported Monitor Display Resolutions
276
Projector Specifications
281
Projector Specifications
282
Connector Specifications
282
External Dimensions
283
USB Display System Requirements
285
Easy Interactive Driver System Requirements
286
List of Safety Symbols and Instructions
287
Laser Safety Information
289
Laser Warning Labels
289
Glossary
291
Notices
293
FCC Compliance Statement
293
Indication of the Manufacturer and the Importer in Accordance with Requirements of EU Directive
294
Restriction of Use
295
Operating System References
295
Trademarks
295
Copyright Notice
296
Copyright Attribution
296
Advertisement
Epson EB-1480Fi Installation Manual (142 pages)
Brand:
Epson
| Category:
Monitor
| Size: 6.95 MB
Table of Contents
About this Installation Guide
2
Contents of this Guide
2
Table of Contents
3
Introduction
5
Using the Product Safely
5
Safety Indications
5
Explanation of Symbols
5
Package Contents
6
Wall Mount
6
Main Mount
6
Accessories
7
Touch Unit
8
Items to Prepare in Addition to Items Supplied with the Product
9
Touch Unit Bracket
9
Control Pad
10
Items to Prepare in Addition to Items Supplied with the Product
10
Pen Stand
10
Items to Prepare in Addition to Items Supplied with the Product
11
Installation Work Flow
12
When Installing Multiple Projectors
13
Figures of Installation Dimensions
14
Connecting the Touch Unit and the Control Pad
16
Connection Figure
16
Connecting Multiple Projectors
17
When Using the Interactive Function
17
When Not Using the Interactive Function
17
Installing the Wall Mount
19
Cautions on Installing the Wall Mount
19
Cautions on the Installation Location of
23
The Wall Mount
23
Wall Mount Specifications
25
External Dimensions
26
Adjustment Range
28
Vertical Slide
28
Horizontal Slide
29
Forward/Backward Slide
29
Installation Procedure for the Wall
30
Mini PC Installation Plate
30
Mount
30
Installing the Bracket
32
Determining the Installation Position (Projection Distance Tables)
32
Attaching the Adjustment Unit to the Projector
44
Install the Wall Plate on the Wall
46
Attaching the Setting Plate to the Wall Plate
48
Attaching the Adjustment Unit to the Setting Plate
52
Attaching Peripheral Devices
53
Adjusting the Position of the Projected Image
56
Preparations before Adjusting
57
Auto Screen Adjustment
59
Performing Mechanical Adjustment Using the Setting Plate Installation Guide
62
Adjusting Using the Projector Menus
65
Attaching the Covers
71
Attaching a Security Cable
73
Installing the Control Pad
74
Notes on the Control Pad
74
For Canadian Users
77
Control Pad Specifications
78
External Dimensions
78
Cable Routing Holes
78
Installing the Control Pad
80
Installing the Pen Stand
83
Notes on the Pen Stand
83
Pen Stand Specifications
84
External Dimensions
84
Installing the Pen Stand
85
When Securing with Magnets
85
When Securing with Screws
86
Adjusting the Interactive Pen
87
Calibrating the Interactive Pen
87
Manual Calibration
87
Auto Calibration
89
Installing the Touch Unit
91
Notes on Handling the Touch Unit
91
For Canadian Users
92
Touch Unit Installation Location
93
Notes on the Touch Unit Bracket
94
Notes on the Laser
95
Attached Labels
95
Laser Diffusion Port
95
Touch Unit Specifications
97
External Dimensions
97
Touch Unit Bracket Specifications
98
External Dimensions
98
Adjustment Range
99
Installing the Touch Unit
100
Installing the Infrared Deflectors
100
Installing the Touch Unit
101
When Installing on the Projection Surface Without Using the Touch Unit Bracket
101
When Using the Touch Unit Bracket to Install Outside of the Projection Surface
104
Attaching a Security Cable
109
Turning on the Touch Unit
110
Adjusting the Angle of the Laser (Touch Unit Auto Setup)
111
When Auto Adjustment Fails
117
Calibrating the Touch Operation Position
120
Setting the Projector
123
Batch Setup Function
123
Setup Using a USB Flash Drive
123
Saving Settings to the USB Flash Drive
123
Copying Saved Settings to Other Projectors
124
Setup by Connecting the Computer and Projector with a USB Cable
125
Saving Settings to a Computer
125
Copying Saved Settings to Other Projectors
126
When Setup Fails
128
Installing Multiple Projectors
129
Projection)
129
Setting the Projector ID
129
Multi-Projection Connection Settings
131
When Using the Interactive Functions
131
When Not Using the Interactive Functions
133
HDMI Link Settings
134
Adjusting the Image in Multi-Projection
135
Projector Sync. Settings (Only When Using Interactive Functions)
136
EDID Settings (Only When Using Interactive Functions)
137
Appendix
139
List of Safety Symbols
139
General Notice
142
Epson EB-1480Fi Installation Manual (111 pages)
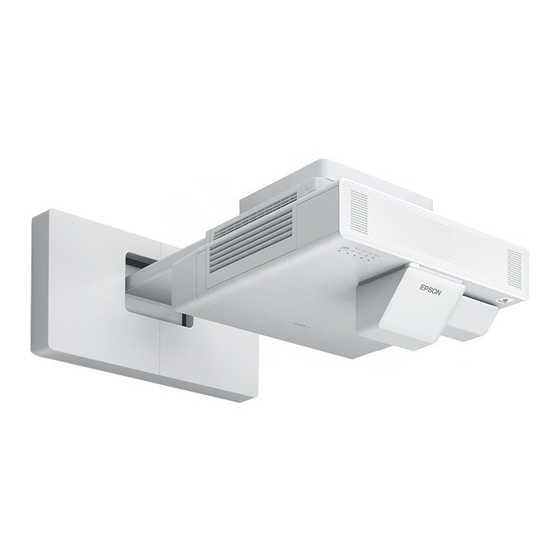
Ultra-short throw projector with Touch Unit and touch unit bracket
Brand:
Epson
| Category:
Projector
| Size: 5.79 MB
Table of Contents
About this Installation Guide
2
Contents of this Guide
2
Table of Contents
3
Introduction
5
Using the Product Safely
5
Safety Indications
5
Explanation of Symbols
5
Package Contents
6
Wall Mount
6
Main Mount
6
Accessories
7
Touch Unit (Optional)
7
Touch Unit Bracket (Optional)
8
Pen Stand
9
Necessary Items
9
Installation Work Flow
10
Figures of Installation Dimensions
11
Connecting Multiple Projectors
12
Connection Figure
12
Cautions on Installing the Wall Mount
13
Cautions on the Installation Location of
17
The Wall Mount
17
Wall Mount Specifications
19
About Replacement Installations
19
External Dimensions
20
Adjustment Range
21
Vertical Slide
21
Horizontal Slide
21
Forward/Backward Slide
21
Installing Accessories
22
Installation Procedure for the Wall
23
Mount
23
Installing the Bracket
24
Determining the Installation Position (Projection Distance Tables)
24
Removing the Currently Installed Projector and Wall Mount
33
Attaching the Adjustment Unit to the Projector
35
Attaching the Setting Plate to the Wall Plate
36
Attaching the Adjustment Unit to the Setting Plate
41
Attaching Peripheral Devices
42
Adjusting the Position of the Projected Image
42
Preparations before Adjusting
43
Auto Screen Adjustment
45
Performing Mechanical Adjustment Using the Setting Plate Installation Guide
48
Adjusting Using the Projector Menus
52
Attaching the Covers
58
Attaching a Security Cable
60
Installing the Pen Stand
61
Notes on the Pen Stand
61
Pen Stand Specifications
62
External Dimensions
62
Installing the Pen Stand
63
When Securing with Magnets
63
When Securing with Screws
64
Adjusting the Interactive Pen
66
Calibrating the Interactive Pen
66
Manual Calibration
66
Auto Calibration
68
Installing the Touch Unit
70
Notes on Handling the Touch Unit
70
For Canadian Users
71
Touch Unit Installation Location
72
Notes on the Touch Unit Bracket
73
Notes on the Laser
74
Attached Labels
74
Laser Diffusion Port
74
Touch Unit Specifications
76
External Dimensions
76
Touch Unit Bracket Specifications
77
External Dimensions
77
Adjustment Range
78
When Using an Older Model of Touch
79
Unit
79
Installing the Touch Unit
80
Installing the Infrared Deflectors
80
Installing the Touch Unit
81
When Installing on the Projection Surface Without Using the Touch Unit Bracket
81
When Using the Touch Unit Bracket to Install Outside of the Projection Surface
84
Attaching a Security Cable
89
Turning on the Touch Unit
90
Adjusting the Angle of the Laser (Touch Unit Auto Setup)
91
When Auto Adjustment Fails
96
Calibrating the Touch Operation Position
99
Setting the Projector
102
Batch Setup Function
102
Setup Using a USB Flash Drive
102
Saving Settings to the USB Flash Drive
102
Copying Saved Settings to Other Projectors
103
Setup by Connecting the Computer and Projector with a USB Cable
104
Saving Settings to a Computer
104
Copying Saved Settings to Other Projectors
105
When Setup Fails
107
Appendix
108
List of Safety Symbols
108
General Notice
111
Advertisement
Advertisement
Related Products
Epson EB-1485Fi
Epson EMP-S42
Epson EMP-TW 20
Epson ELPFT01
Epson ELPMB63
Epson ELPHD02
Epson EB-1400Wi
Epson MeetingMate EB-1410Wi
Epson EB-1420Wi
Epson EB-1430Wi
Epson Categories
Printer
Projector
All in One Printer
Scanner
Printer Accessories
More Epson Manuals
Login
Sign In
OR
Sign in with Facebook
Sign in with Google
Upload manual
Upload from disk
Upload from URL