Sign In
Upload
Manuals
Brands
Avocent Manuals
Switch
DSR Series DSR8035DAC
User Manuals: Avocent DSR Series DSR8035DAC IP Switch
Manuals and User Guides for Avocent DSR Series DSR8035DAC IP Switch. We have
3
Avocent DSR Series DSR8035DAC IP Switch manuals available for free PDF download: Installer/User Manual, Release Note
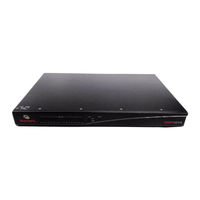
Avocent DSR Series DSR8035DAC Installer/User Manual (138 pages)
Avocent DSR Series DSR1010: User Guide
Brand:
Avocent
| Category:
Switch
| Size: 2 MB
Table of Contents
Dsr Switch
3
Dangerous Voltage
4
Power off
4
Table of Contents
5
List of Figures
9
Chapter 1: Product Overview
13
Features and Benefits
13
Reduce Cable Bulk
13
Control of Virtual Media-Capable Appliances (Select Models)
14
Access the DSR Switch Via a Standard TCP/IP Network
14
Dsview ® 3 Management Software Plug-In
14
Figure 1.1: Example DSR2035/8035 Switch Configuration
15
Table 1.1: Descriptions for Figure 1.1
15
Chapter 2: Installation
17
DSR Switch Connectivity
17
Installation Overview
17
Figure 2.1: Basic DSR Switch Configuration (DSR8035 Switch Shown)
18
Getting Started
19
Supplied with the DSR Switch
19
Table 2.1: Descriptions for Figure 2.1
19
Setting up Your Network
20
Rack Mounting a DSR Switch
20
Rack Mounting Safety Considerations
20
To Install the Rack Mounting Bracket
21
Figure 2.2: DSR Switch Mounting Diagram
21
Connecting the DSR Switch Hardware
21
To Connect and Power up Your DSR Switch
21
To Connect Local Virtual Media
22
Configuring the DSR Switch
23
Setting up the Built-In Web Server
23
Setting up the Dsview 3 Software
23
Connecting to the On-Board Web Interface through a Firewall
23
Table 2.2: TCP Ports and Functions for the DSR Switch On-Board Web Interface
23
Figure 2.3: Typical DSR Switch Firewall Configuration
24
Table 2.3: Descriptions for Figure 2.3
24
To Configure the Firewall
24
Verifying the Connections
25
DSR Switch
25
IQ and Serial IQ Modules
25
Adjusting Mouse Settings on Target Devices
25
Chapter 3: Local Port Operation
27
Basic Operations
27
Viewing and Selecting Ports and Servers
27
Selecting a Target Device
27
Soft Switching
28
Viewing the Status of Your DSR Switching System
28
Table 3.1: OSCAR Interface Status Symbols
28
Navigating the OSCAR Interface
29
Table 3.2: OSCAR Interface Navigation Basics
29
Main Dialog Box Functions
30
To Access the OSCAR Interface Main Dialog Box
30
Figure 3.1: OSCAR Interface Main Dialog Box
31
Setting Virtual Media Options
31
Table 3.3: Main Dialog Box Functions
31
Table 3.4: Virtual Media Options
31
Figure 3.2: OSCAR Interface Virtual Media Dialog Box
32
Managing a KVM Session
32
To Set Virtual Media Options
32
Setup Dialog Box Functions
33
Table 3.5: Setup Features to Configure the OSCAR Interface
33
To Access the OSCAR Interface Setup Dialog Box
33
Changing the Display Behavior
34
Figure 3.3: OSCAR Interface Setup Dialog Box
34
Figure 3.4: OSCAR Interface Menu Dialog Box
34
Controlling the Status Flag
35
To Change How the OSCAR Interface Is Invoked
35
To Access the OSCAR Interface Flag Dialog Box
35
Figure 3.5: OSCAR Interface Flag Dialog Box
36
Figure 3.6: Position Flag
36
Selecting Target Devices for Broadcasting
37
To Access the OSCAR Interface Broadcast Dialog Box
37
Selecting Target Devices for Scan Mode
38
Figure 3.8: OSCAR Interface Scan Dialog Box
38
Setting Local Port Screen Saver Options
39
To Access the OSCAR Interface Screen Saver Dialog Box
39
Setting the Keyboard Country Code
40
Figure 3.9: OSCAR Interface Screen Saver Dialog Box
40
Figure 3.10: OSCAR Interface Keyboard Dialog Box
41
Configuring Network Settings
42
Figure 3.11: OSCAR Interface Network Dialog Box
42
To Configure the IP Address
43
Figure 3.12: OSCAR Interface IP Setup Dialog Box
43
Configuring the Dsview 3 Server IP Address
43
Assigning Device Types
44
Figure 3.13: OSCAR Interface Dsview IP Dialog Box
44
Figure 3.14: OSCAR Interface Devices Dialog Box
44
To Assign a Device Type
45
Figure 3.15: OSCAR Interface Device Modify Dialog Box
45
Assigning Target Device Names
45
To Access the OSCAR Interface Names Dialog Box
45
Figure 3.16: OSCAR Interface Names Dialog Box
46
To Assign Names to Target Devices
46
Figure 3.17: OSCAR Interface Name Modify Dialog Box
46
To List Target Devices Alphabetically by Name
47
Commands Dialog Box Functions
47
Table 3.7: Commands to Manage Routine Tasks for Your Target Devices
47
To Access the OSCAR Interface Commands Dialog Box
47
Enabling or Disabling Broadcasting
48
Enabling or Disabling Scan Mode
48
Figure 3.18: OSCAR Interface Commands Dialog Box
48
Figure 3.19: OSCAR Interface User Status Dialog Box
49
To Disconnect a User
49
To View Current User Connections
49
Viewing and Disconnecting User Connections
49
Displaying Version Information
50
Figure 3.20: OSCAR Interface Disconnect Dialog Box
50
To Display Version Information
50
Figure 3.21: OSCAR Interface Version Dialog Box
51
Figure 3.22: DSRIQ Selection Dialog Box
51
Figure 3.23: DSRIQ Version Dialog Box
52
Resetting Your PS/2 Keyboard and Mouse
52
To Reset the PS/2 Mouse and Keyboard Values
52
Figure 3.24: OSCAR Interface Ping Dialog Box
53
Sending a Ping Request
53
Chapter 4: Web Interface Operations
55
Overview of the DSR Switch On-Board Web Interface
55
Table 4.1: On-Board Web Interface Supported Operating Systems and Browsers
55
Viewing and Selecting Ports and Servers
56
The DSR Explorer Window
56
Using the Side Navigation Bar
57
Figure 4.1: Avocent DSR Explorer Window
57
Table 4.2: Descriptions for Figure 4.1
57
Using the Top Option Bar
58
Launching a KVM Session
58
Managing the DSR Switch On-Board Web Interface
59
Upgrading IQ Modules
59
Managing USB Speed
60
Rebooting the Appliance
60
Managing Local Accounts
60
Access Levels
60
Table 4.3: Allowed Operations by Access Level
61
To Add a New User Account (Administrator Only)
61
To Delete a User Account (Administrator Only)
61
Preemption Levels
61
To Change the Default Preemption Level (Administrator Only)
62
Configuring Virtual Media
62
Virtual Media Session Settings
62
Table 4.4: Virtual Media Session Settings
62
Figure 4.2: On-Board Web Interface Appliance Virtual Media Session Settings Screen
63
Managing Device Properties
64
Viewing and Changing Appliance Configuration Information
64
Table 4.5: Viewing Appliance Information
64
Power Controlling Target Devices
65
To View Device Details Regarding the Connected SPC Device
65
Configuring LDAP
66
LDAP Overview Parameters
66
LDAP Search Parameters
67
Figure 4.3: LDAP Overview Page in the On-Board Web Interface
67
Figure 4.4: LDAP Search Page in the On-Board Web Interface
68
LDAP Query Parameters
69
Appliance and Target Device Query Modes
70
Figure 4.5: LDAP Query Page in the On-Board Web Interface
70
Figure 4.6: Active Directory - KVM User
71
Figure 4.7: Active Directory - KVM Appliance Admin
72
Setting up Active Directory for Performing Queries
73
Figure 4.8: Active Directory - Define Groups
73
Chapter 5: The Video Viewer
75
The Video Viewer Window
75
Launching a KVM Session
76
Session Time-Out
76
To Enable, Disable or Configure the Session Time-Out
76
Video Viewer Window Features
76
Figure 5.1: Video Viewer Window (Normal Window Mode)
77
Table 5.1: Descriptions for Figure 5.1
77
Adjusting the View
78
To Align the Mouse Cursors
79
To Refresh the Screen
79
Changing the Toolbar
78
Setting the Window Size
78
Additional Video Adjustment
80
Adjusting Color Depth
80
Figure 5.2: Manual Video Adjust Dialog Box
81
Table 5.2: Descriptions for Figure 5.2
81
Target Video Settings
81
Automatic Video Adjustment
82
Block Noise Threshold and Pixel Noise Threshold
82
Contrast and Brightness
82
Detection Thresholds
82
Adjusting Mouse Options
83
Cursor Type
83
Figure 5.3: Video Viewer Window with Local and Remote Cursors Displayed
83
To Change the Mouse Cursor Setting
84
To Enter Single Cursor Mode
84
To Exit Single Cursor Mode
84
Refresh Image
83
Video Test Pattern
83
Table 5.3: Descriptions for Figure 5.3
84
Mouse Alignment and Synchronization
85
Mouse Scaling
85
Vendor-Specific Video Settings
85
To Realign the Mouse
86
Avocent Mouse Sync
86
Figure 5.4: Video Viewer Session Options Dialog Box
86
Using Virtual Media
87
Requirements
87
Sharing and Preemption Considerations
87
Virtual Media Dialog Box
88
Opening a Virtual Media Session
88
Figure 5.5: Video Viewer Virtual Media Dialog Box
89
Closing a Virtual Media Session
91
Using Keyboard Pass-Through
91
To Specify Keyboard Pass-Through
91
Using Macros
92
Saving the View
92
Closing a Video Viewer Window Session
92
Chapter 6: Terminal Operations
93
The Console Menu
93
Network Configuration
93
Figure 6.1: Console Main Menu
94
Figure 6.2: Network Configuration Menu
94
Other Console Main Menu Options
95
Security Configuration
95
Firmware Management
96
Enable Debug Messages
96
Restore Factory Defaults
96
Reset Appliance
96
Exit
96
Appendices
97
Appendix A: Flash Upgrades
97
Using the Dsview 3 Software
97
Using the Console Menu Interface
97
Recovering from a Failed Flash Upgrade
98
Using the On-Board Web Interface
98
To Upgrade the DSR Switch Firmware
98
Appendix B: Using the DSR Remote Operations Software
100
Figure B.1: Using the DSR Remote Operations Software with a DSR Switch
101
Table B.1: Descriptions for Figure B.1
101
Before Using the DSR Remote Operations Software
102
Installing the DSR Remote Operations Software
102
To Exit the DSR Remote Operations Software
103
To Start the DSR Remote Operations Software
103
Window Features
103
Figure B.2: DSR Remote Operations Window
104
Table B.2: Descriptions for Figure B.2
104
Servers View
104
Table B.3: DSR Remote Operations Content Area Icons (Servers View)
105
Table B.4: DSR Remote Operations Content Area Icons (Power View)
105
Version View
105
Rebooting a Switch
106
Managing Servers
106
Power Control of Devices Attached to Power Device Sockets
106
Appendix C: Using Serial IQ Modules
108
Serial IQ Module Modes
108
Configuring the Serial IQ Module
108
Creating a Serial IQ Module Macro
110
Using History Mode
110
To Use History Mode
111
Table C.1: Serial IQ Module Pinouts
111
Appendix D: UTP Cabling
112
UTP Copper Cabling
112
Table D.1: UTP Wiring Standards
112
Cabling Installation, Maintenance and Safety Tips
113
Appendix E: Cable Pinout Information
114
Figure E.1: Modem Jack
114
Figure E.2: Console/Setup Jack
114
Table E.1: Descriptions for Figure E.1
114
Figure E.3: SPC Jack
115
Table E.2: Descriptions for Figure E.2
115
Table E.3: Descriptions for Figure E.3
115
Appendix F: Technical Specifications
116
Table F.1: DSR1020/2020/4020/8020 Switch Product Specifications
116
Table F.2: DSR1021/1022 Switch Product Specifications
118
Table F.3: DSR1024 Switch Product Specifications
120
Table F.4: DSR1030/2030/4030/8030 Switch Product Specifications
122
Table F.5: DSR1031 Switch Product Specifications
124
Table F.6: DSR2035/8035 Switch Product Specifications
126
Appendix G: Sun Advanced Key Emulation
129
Table G.1: Sun Key Emulation
129
Special Considerations for Japanese Sun USB and Korean Sun USB Keyboards (USB IQ Modules Only)
130
Table G.2: PS/2-To-USB Keyboard Mappings
130
Appendix H: Technical Support
131
Index
133
Advertisement
Avocent DSR Series DSR8035DAC Release Note (3 pages)
Avocent DSR Series DSR1010: Release Note Version 3.3.0.7, 3.3.0.8, or 3.6.3.7
Brand:
Avocent
| Category:
Switch
| Size: 0 MB
Table of Contents
Update Instructions
1
Appliance Firmware Version and Language Support Information
1
Enhancements
2
Fixes
2
Known Issues
2
FLASH Update Failure Recovery
3
Avocent DSR Series DSR8035DAC Release Note (3 pages)
Version 3.x.x.17
Brand:
Avocent
| Category:
Switch
| Size: 0 MB
Table of Contents
Update Instructions
1
Appliance Firmware Version and Language Support Information
1
Enhancements
2
Fixes
3
Known Issues
3
FLASH Update Failure Recovery
3
Advertisement
Advertisement
Related Products
Avocent DSR Series DSR8035
Avocent DSR Series DSR8030
Avocent DSR Series DSR8020
Avocent DSR Series DSR2035
Avocent DSR Series DSR4160
Avocent DSR Series DSR1021
Avocent DSR Series DSR1030
Avocent DSR Series DSR4030
Avocent DSR 1024
Avocent DSR Series DSR1031
Avocent Categories
Switch
Extender
Network Hardware
Server
Software
More Avocent Manuals
Login
Sign In
OR
Sign in with Facebook
Sign in with Google
Upload manual
Upload from disk
Upload from URL