Sign In
Upload
Manuals
Brands
Allen-Bradley Manuals
Controller
SLC 500 Series
Allen-Bradley SLC 500 Series Manuals
Manuals and User Guides for Allen-Bradley SLC 500 Series. We have
6
Allen-Bradley SLC 500 Series manuals available for free PDF download: Reference Manual, Manual, Quick Start Manual, Migration Manual, Installation Instructions Manual
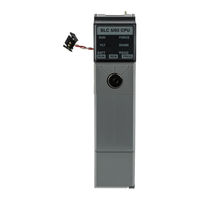
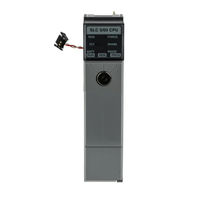
Allen-Bradley SLC 500 Series Reference Manual (694 pages)
Brand:
Allen-Bradley
| Category:
Controller
| Size: 7.17 MB
Table of Contents
Notes
5
Table of Contents
5
Table of Contents
20
Preface
23
Purpose of this Manual
23
Related Documentation
24
Who Should Use this Manual
23
Common Techniques Used in this Manual
24
Chapter 1 File Structure
25
Processor Files
25
Output and Input Data Files (Files O0: and I1:)
26
Bit Data File (B3:)
27
Status File (File S2:)
27
Timer Data File (T4:)
28
Addressing Structure
29
Counter Data File Elements (C5:)
30
Addressing Structure
31
Entering Parameters
31
Control Data File (R6:)
32
Integer Data File (N7:)
34
Float Data File (F8:)
35
Basic Instructions
37
About the Basic Instructions
38
Bit Instructions Overview
38
Chapter 2
38
Examine if Closed (XIC)
39
Examine if Open (XIO)
39
Output Energize (OTE)
40
Output Latch (OTL) and Output Unlatch (OTU)
40
Using OTL
40
Using OTU
41
One-Shot Rising (OSR)
41
Entering Parameters
41
Timer Instructions Overview
43
Entering Parameters
43
Timer On-Delay (TON)
45
Using Status Bits
45
Timer Off-Delay (TOF)
46
Using Status Bits
46
Retentive Timer (RTO)
47
Using Status Bits
48
Count up (CTU)
49
Using Status Bits
50
Counter Instructions Overview
49
How Counters Work
49
Count down (CTD)
50
Using Status Bits
51
High-Speed Counter (HSC)
51
High-Speed Counter Data Elements
52
High-Speed Counter Operation
53
Reset (RES)
56
About the Comparison Instructions
57
Chapter 3
57
Comparison Instructions
57
Comparison Instructions Overview
58
Using Indexed Word Addresses
58
Using Indirect Word Addresses
58
Equal (EQU)
58
Not Equal (NEQ)
58
Greater than (GRT)
59
Less than (LES)
59
Less than or Equal (LEQ)
59
Greater than or Equal (GEQ)
60
Masked Comparison for Equal (MEQ)
60
Entering Parameters
60
Limit Test (LIM)
61
Entering Parameters
61
Math Instructions
63
About the Math Instructions
64
Chapter 4
64
Math Instructions Overview
64
Entering Parameters
64
Using Indexed Word Addresses
64
Using Indirect Word Addresses
64
Updates to Arithmetic Status Bits
65
Overflow Trap Bit, S:5/0
65
Updates to the Math Register, S:13 and S:14
65
Using Floating Point Data File (F8:)
66
Add (ADD)
67
Updates to Arithmetic Status Bits
67
Subtract (SUB)
67
32-Bit Addition and Subtraction
68
Math Overflow Selection Bit S:2/14
68
Multiply (MUL)
70
Updates to Arithmetic Status Bits
70
Updates to the Math Register, S:13 and S:14
71
Divide (DIV)
71
Updates to Arithmetic Status Bits
71
Updates to the Math Registers, S:13 and S:14
72
Double Divide (DDV)
73
Updates to Arithmetic Status Bits
73
Updates to the Math Registers, S:13 and S:14
73
Clear (CLR)
74
Updates to Arithmetic Status Bits
74
Square Root (SQR)
74
Scale with Parameters (SCP)
75
Entering Parameters
75
Updates to Arithmetic Status Bits
76
Application Examples
76
Scale Data (SCL)
77
Entering Parameters
78
Updates to Arithmetic Status Bits
78
Application Example 1 - Converting 4 to 20 Ma Analog Input Signal to PID Process Variable
79
Application Example 2 - Scaling an Analog Input to Control an Analog Output
80
Ramp Instruction (RMP)
82
Instruction Operation
84
RMP Equation
85
Continuous Operation
85
Absolute (ABS)
86
Entering Parameters
86
Updates to Arithmetic Status Bits
86
Compute (CPT)
87
Entering Parameters
87
Updates to Arithmetic Status Bits
88
Application Example
88
Swap (SWP)
90
Entering Parameters
90
Arc Cosine (ACS)
91
Arc Sine (ASN)
91
Updates to Arithmetic Status Bits
91
Arc Tangent (ATN)
92
Updates to Arithmetic Status Bits
92
Cosine (COS)
92
Log to the Base 10 (LOG)
93
Natural Log (LN)
93
Updates to Arithmetic Status Bits
93
Sine (SIN)
94
Updates to Arithmetic Status Bits
94
Tangent (TAN)
94
To the Power of y (XPY)
95
Updates to Arithmetic Status Bits
95
Data Handling Instructions
97
Chapter 5 Convert to BCD (TOD)
98
Updates to Arithmetic Status Bits
98
Updates to the Math Register, S:13 and S:14
99
Convert from BCD (FRD)
101
Updates to Arithmetic Status Bits
101
Changes to the Math Register, S:13 and S:14
102
Radian to Degrees (DEG)
104
Entering Parameters
104
Updates to Arithmetic Status Bits
105
Degrees to Radians (RAD)
105
Entering Parameters
105
Updates to Arithmetic Status Bits
106
Decode 4 to 1 of 16 (DCD)
106
Entering Parameters
107
Encode 1 of 16 to 4 (ENC)
107
Entering Parameters
108
Updates to Arithmetic Status Bits
108
Copy File (COP) and Fill File (FLL) Instructions
109
Using COP
109
Using FLL
110
Move and Logical Instructions Overview
112
Entering Parameters
112
Using Indexed Word Addresses
112
Updates to Arithmetic Status Bits
112
Using Indirect Word Addresses
112
Updates to the Math Register, S:13 and S:14
113
Entering Mask Values
113
Move (MOV)
113
Entering Parameters
113
Updates to Arithmetic Status Bits
113
Masked Move (MVM)
114
Entering Parameters
114
Updates to Arithmetic Status Bits
114
And (AND)
116
Updates to Arithmetic Status Bits
116
Or (OR)
117
Updates to Arithmetic Status Bits
117
Exclusive or (XOR)
118
Updates to Arithmetic Status Bits
118
Not (NOT)
119
Updates to Arithmetic Status Bits
119
Negate (NEG)
120
Updates to Arithmetic Status Bits
120
FIFO and LIFO Instructions Overview
121
Entering Parameters
121
Effects on Index Register S:24
122
FIFO Load (FFL) and FIFO Unload (FFU)
122
FFL Instruction Operation
123
FFU Instruction Operation
123
LIFO Load (LFL) and LIFO Unload (LFU)
124
LFL Instruction Operation
125
LFU Instruction Operation
125
About the Program Flow Control Instructions
127
Chapter 6
127
Program Flow Instructions
127
Jump to Label (JMP) and Label (LBL)
128
Entering Parameters
128
Using JMP
128
Using LBL
129
Jump to Subroutine (JSR), Subroutine (SBR), and Return (RET)
129
Nesting Subroutine Files
130
Using JSR
130
Using SBR
131
Using RET
131
Master Control Reset (MCR)
132
Processor Operation
132
Temporary End (TND)
133
Immediate Input with Mask (IIM)
134
Entering Parameters
135
Suspend (SUS)
134
Entering Parameters
134
Immediate Output with Mask (IOM)
135
I/O Refresh (REF)
136
Using an SLC 5/02 Processor
136
Using SLC 5/03 and Higher Processors
136
About the Application Specific Instructions
138
Application Specific Instructions
138
Bit Shift Instructions Overview
138
Entering Parameters
138
Effects on Index Register S:24
140
Chapter 7
138
Bit Shift Left (BSL)
140
Bit Shift Right (BSR)
141
Use BSR
141
Sequencer Instructions Overview
141
Effects on Index Register S:24
141
Applications Requiring more than 16 Bits
142
Sequencer Output (SQO) Sequencer Compare (SQC)
142
Enter Parameters
142
Use SQO
144
Use SQC
146
Sequencer Load (SQL)
148
Enter Parameters
148
Operation
150
Read High-Speed Clock and Compute Time Difference Overview
151
RHC Instruction Operation
151
TDF Instruction Operation
152
Compute Time Difference Instruction (TDF)
153
Read High-Speed Clock Instruction (RHC)
153
Enter Parameters
153
File Bit Comparison (FBC) and Diagnostic Detect (DDT)
154
Select the Search Mode
154
Enter Parameters
156
Use Status Bits
157
Read Program Checksum (RPC)
159
Enter Parameters
159
Block Transfer Instructions
162
Chapter 8
162
RIO Block Transfer General Functional Overview
162
Entering Parameters for BTR and BTW
162
Control Status Bits
163
Instruction Operation
167
Programming Examples
168
Comparison to the PLC-5 BTR and BTW
171
Chapter 9
173
Overview
173
Proportional Integral Derivative Instruction
173
The PID Concept
173
The PID Equation
174
The PID Instruction
175
Entering Parameters
175
PID Control Block Layout
177
Controller Gain (Kc)
178
Reset Term (Ti)
178
Rate Term (Td)
179
Feed Forward/Bias
179
Mode (TM)
179
Loop Update
180
Deadband
180
Scaled Error
181
Auto / Manual (AM)
181
Control (CM)
182
Deadband (DB)
182
Reset and Gain Enhancement Bit (RG)
182
Setpoint Scaling (SC)
183
Loop Update Time too Fast (TF)
183
Derivative Rate Action Bit (DA)
184
Output Alarm Upper Limit (UL)
184
Output Alarm Lower Limit (LL)
184
Setpoint out of Range (SP)
185
PV out of Range (PV)
185
PID Done (DN)
185
PID Rational Approximation Bit (RA)
186
PID Enable (EN)
186
Integral Sum
186
Input Parameters
187
Setpoint (SP)
187
Scaled Process Variable (SPV)
188
Setpoint Maximum Scaled (SMAX)
188
Setpoint Minimum Scaled (SMIN)
189
Output Parameters
190
Control Variable (CV)
190
Control Variable Percent (CV%)
191
Output Limiting Enable (OL)
191
Output Maximum (CVH)
192
Output Minimum (CVL)
192
Runtime Errors
193
PID and Analog I/O Scaling
195
Using the SCL Instruction
196
Using the SCP Instruction
196
Application Notes
199
Input/Output Ranges
199
Scaling to Engineering Units
199
Output Alarms
200
Output Limiting with Anti-Reset Windup
201
The Manual Mode
201
PID Rungstate
202
Time Proportioning Outputs
202
ASCII Instruction Overview
206
ASCII Instructions
206
Chapter 10
206
Protocol Parameter Overview
206
Entering Parameters
209
Test ASCII Buffer for Line (ABL)
210
Entering Parameters
210
Number of ASCII Characters in Buffer (ACB)
211
Entering Parameters
211
String to Integer (ACI)
212
ASCII Clear Receive And/Or Transmit Buffer (ACL)
213
Entering Parameters
214
String Concatenate (ACN)
215
Entering Parameters
215
String Extract (AEX)
216
Entering Parameters
216
ASCII Handshake Lines (AHL)
217
Entering Parameters
217
Integer to String (AIC)
218
ASCII Read Characters (ARD)
219
Entering Parameters
219
Timing Diagram for a Successful ARD, ARL, AWA, and AWT Instructions
220
ASCII Read Line (ARL)
221
Entering Parameters
221
String Search (ASC)
222
Entering Parameters
222
ASCII String Compare (ASR)
223
Entering Parameters
223
ASCII Write with Append (AWA)
224
Entering Parameters
224
Using Inline Indirection
225
ASCII Write (AWT)
226
Entering Parameters
226
ASCII Instruction Error Codes
228
ASCII Conversion Table
229
Chapter 11 User Fault Routine Overview
234
Status File Data Saved
235
Creating a User Fault Subroutine
235
User Interrupt Routine Application Example
236
Understanding Interrupt Routines
234
Selectable Timed Interrupt Overview
240
Basic Programming Procedure for the STI Function
240
Operation
241
STI Subroutine Content
241
Interrupt Latency and Interrupt Occurrences
241
Interrupt Priorities
243
Status File Data Saved
243
STI Parameters
244
STD and STE Instructions
248
Selectable Timed Disable - STD
248
Selectable Timed Enable - STE
248
STD/STE Zone Example
248
Selectable Timed Start (STS)
249
Discrete Input Interrupt Overview
250
Basic Programming Procedure for the DII Function
250
Operation
251
Counter Mode
251
Event Mode
252
DII Subroutine Content
252
Interrupt Latency and Interrupt Occurrences
253
Interrupt Priorities
254
Status File Data Saved
254
Reconfigurability
254
DII Parameters
255
Discrete Input Interrupt Application Example
257
I/O Interrupt Overview (ISR)
259
Function
259
Operation
259
Interrupt Subroutine (ISR) Content
260
Interrupt Latency and Interrupt Occurrences
260
Interrupt Priorities
261
Status File Data Saved
262
I/O Interrupt Parameters
262
I/O Interrupt Disable (IID) and I/O Interrupt Enable (IIE)
264
IID Operation
264
IIE Operation
265
IID/IIE Zone Example
265
Interrupt Subroutine (INT)
266
Reset Pending Interrupt (RPI)
266
Entering Parameters
266
SLC Communication Instructions
267
About the Communication Instructions
268
Chapter 12
268
Service Communications (SVC)
269
Use an SLC 5/02 Processor
269
Use SLC 5/03 and Higher Processors
269
Channel Servicing
270
Message Instruction Overview
271
MSG Instruction Operation
271
MSG Instruction Configuration Options
277
MSG Instruction Parameters
277
MSG Instruction Setup Screen Parameters
279
MSG Instruction Setup Screen Status Bits
293
MSG Instruction Control Block
296
Status Bit Sequencing for SLC 5/03, SLC 5/04, and SLC 5/05 MSG Instruction
303
Rung Goes True
303
Next End of Scan
305
Successful Receipt of Packet
305
An ACK Is Not Received
306
Target Node Sends a Reply Packet
306
MSG Instruction Error Codes
307
Explicit Message Instruction Overview
310
Controlnet Explicit Message (CEM)
311
CEM Instruction Parameters
311
CEM Instruction Setup Screen Parameters
312
Devicenet Explicit Message (DEM)
318
DEM Instruction Parameters
318
DEM Instruction Setup Screen Parameters
318
Ethernet/Ip Explicit Message (EEM)
324
EEM Instruction Parameters
324
EEM Instruction Setup Screen Parameters
324
Communication Driver Overview
332
Chapter 13 DH-485 Communications
334
DH-485 Network Protocol
334
DH-485 Network Considerations
335
Data Highway Plus Communications
340
Configuring Channel 1 for DH
342
DH+ Channel Status
343
Global Status Word Overview
348
Ethernet Communications
352
SLC 5/05 Performance Considerations
352
SLC 5/05 and PC Connections to the Ethernet Network
353
Configuring Channel 1 for Ethernet
354
Ethernet Channel Status
358
Configuration Via BOOTP
361
Using the Rockwell BOOTP Utility
363
SLC 5/05 Embedded Web Server Capability
365
Module Information
365
TCP/IP Configuration
366
Diagnostic Information
367
Data Table Memory Map
368
Data Table Monitor
370
User Provided Pages
371
DF1 Full-Duplex Communications
379
Configuring Channel 0 for DF1 Full-Duplex
379
DF1 Full-Duplex Channel Status
383
DF1 Half-Duplex Communications
385
DF1 Half-Duplex Master Broadcast
385
DF1 Half-Duplex Slave Broadcast
385
Configuring Channel 0 for Standard Polling Mode DF1 Half-Duplex Master
386
Minimum DF1 Half-Duplex Master Channel 0 ACK Timeout
391
Determining Minimum Master ACK Timeout
392
Monitor Active Stations
393
Configuring Channel 0 for Message-Based Polling Mode DF1
393
Half-Duplex Master
393
DF1 Half-Duplex Master Channel Status
398
Configuring Channel 0 for DF1 Half-Duplex Slave
399
Configuring Channel 0 Poll Timeout
403
DF1 Half-Duplex Slave Channel Status
404
DF1 Radio Modem Communications
406
DF1 Radio Modem System Limitations
407
Configuring Channel 0 for DF1 Radio Modem
408
DF1 Radio Modem Channel Status
411
Configuring the Store & Forward Table
412
Using Modems that Support DF1 Communication Protocols
414
Dial-Up Phone Modems
414
Leased-Line Modems
414
Radio Modems
415
Line Drivers
415
Modem Control Line Operation in SLC 5/03, SLC 5/04 and
416
DF1 Full-Duplex
416
DF1 Half-Duplex Slave
416
DF1 Half-Duplex Master
417
DF1 Radio Modem
418
Modbus RTU Master
418
RTS Send Delay and RTS off Delay Parameters
419
Modbus RTU Protocol
420
Modbus RTU Master
420
Configuring a Channel for Modbus RTU Master
421
Modbus RTU Master Channel Status
424
Modbus Commands
426
Modbus Error Codes
427
ASCII Communications
428
Configuring Channel 0 for ASCII Communications
428
Chapter 14
431
Remote I/O Passthru
431
SLC Passthru Communications
431
Channel-To-Channel Passthru
432
Additional SLC 5/03 Passthru Status Bits
434
Using Rslinx Classic, Version 2.50 and Higher, with SLC 5/03
435
Passthru
435
SLC 5/03 Passthru Error Codes
437
Using Rslinx Classic, Version 2.50 and Higher, with SLC 5/04
438
Passthru
438
Creating and Filling out the Passthru Routing Table File
439
Using Rslinx Classic, Version 2.50 and Higher, with SLC 5/05
441
Passthru
441
SLC 5/05 Passthru Error Codes
443
Optimizing Rslinx Channel 1 to DF1 Half-Duplex Master/Df1
443
Radio Modem Passthru
443
Devicenet Passthru
432
Chapter 15 Local Versus Remote Type Message
447
Local Message
447
Remote Message
447
Messaging Examples
447
Remote Terminology
448
Remote Bridge Address
448
Remote Station Address
448
Remote Bridge Link ID
448
SLC 5/03 Passthru Examples
449
Passthru Example: DF1 to DH-485
449
Passthru Example: DH-485 to DF1
452
SLC 5/04 Passthru Examples
458
Passthru Example: DF1 to DH
458
Passthru Example: DH+ to DF1
461
Passthru Example: DH-485 to DH
462
SLC 5/05 Passthru Examples
464
Passthru Example: DF1 to Ethernet
464
SLC 5/05 (IP Address 100.100.115.9) Bridge
466
Passthru Routing Table
467
Passthru Example: Ethernet to DF1
468
Passthru Example: DH-485 to Ethernet
469
Passthru Example: Ethernet to DH-485
470
Remote Examples
471
Remote Example: Network Overview
471
Network Message Example: SLC 5/04 to SLC 5/02 Via DHRIO and KA5
472
Network Message Example: SLC 5/04 to SLC 5/03 Via DHRIO and KA5
473
Network Message Example: SLC 5/04 to SLC
475
Network Message Example: SLC 5/04 to SLC
476
Network Message Example: SLC 5/04 to SLC 5/05 Via DHRIO and ENET
477
Network Message Example: SLC 5/05 to SLC 5/04 Via ENET and DHRIO
478
Network Message Example: SLC 5/05 to SLC 5/03 Via ENET, CNB and KFC
479
Network Message Example: SLC 5/05 to SLC 5/03 Via ENET, DHRIO and KA5
480
Chapter 16 Automatically Clear Faults
483
SLC Processors
483
Troubleshooting Faults
483
Manually Clear Faults
484
Use the Fault Routine
484
SLC Processor Faults
485
Powerup Errors
485
Going-To-Run Errors
486
Run Errors
488
User Program Instruction Errors
491
I/O Errors
493
Troubleshoot SLC 5/03 and Higher Processors
497
Powerup LED Display
497
Identify Processor Errors While Downloading an Operating System
497
Appendix A
499
Original Release
499
Enhancements
499
OS300, Series A, FRN 1
499
Released: March 1994
499
Released: August 1994
500
Enhancements
500
OS302, Series C, FRN
504
OS401, Series C, FRN
504
OS501, Series C, FRN
504
Enhancements
504
OS302, Series C, FRN 3
505
OS401, Series C, FRN 3
505
OS501, Series C, FRN 3
505
Enhancements
505
OS302, Series C, FRN 4
509
OS401, Series C, FRN 4
509
OS501, Series C, FRN 4
509
Enhancements
509
Appendix B
521
Status File Overview
521
Status File Details
524
Conventions Used in the Displays
524
Advertisement
Allen-Bradley SLC 500 Series Manual (270 pages)
Brand:
Allen-Bradley
| Category:
Controller
| Size: 1.87 MB
Table of Contents
Project Setup
1
Port Button
2
Protocol Button
2
Protected Files
2
Connection
2
Baud Rate
2
HMI-CAB-C83 Cable
3
SLC 500 Network Connection for Programming Equipment (DH485)
3
HMI-CAB-C84 Cable
4
SLC 500 Network Connection Using 1747 AIC Link Couplers (DH485)
4
SLC 5/03 and SLC 5/04 Channel 0 Connection
5
Connecting to a 1747 AIC Module (DH485)
5
HMI-CAB-C52 Cable
6
SLC 5/03 and SLC 5/04 DH485 Connections
6
Setup for Using a SLC 5/03 and SLC 5/04 Channel 0
6
SLC 5/04 Data Highway Plus
7
SLC 5/04 DH+ Connection
7
Tag Variables for DH485 Protocol
8
Tag Variables for DH+ Protocol
8
Tag Variable Table
9
Network Performance
10
DH-485 Cable
10
DH-485 Connections
10
Setup for Using an A-B SLC 500 DF1
11
Project Setup Dialog Box
12
Serial Port Parameters
12
Parity None Stop Bits
12
Allen-Bradley Micrologix 1000
13
HMI-CAB-C106 Cable
14
Advanced Interface Converter AIC+
15
Example Configurations
16
HMI-CAB-C117 Cable
18
Connecting to a PLC-2 Program Port
20
Hmi-Cab-C90
20
Setup for Using an A-B PLC-2 Program Port
21
PLC2 Variable Names
22
WUB - Word Unsigned Binary
22
WSD - Word Signed Decimal (BCD)
23
WUD - Word Unsigned Decimal (BCD)
24
LHD - Extended Precision (BCD)
24
WSO - Word Signed Octal
24
LSD - Long Word Signed Decimal
25
MSG - ASCII Text Message
25
LSDF - Long Word Signed Decimal Fixed Point
26
WTC - Word Timer Counter
27
Reading PLC-2 Data Highway Variables
27
HMI-CAB-C107 RS422 Cable
28
HMI-CAB-C53/A RS232 Cable
28
PLC-5 DF1 Single Point Connection
28
A-B Channel 0 Setup
29
Connecting to A-B 1770 KF2 Module
29
HMI-CAB-C51 Cable
29
Setup for Using an AB PLC5 DF1
29
A-B PLC-5 Data Highway Plus
32
Connection to Data Highway Plus
33
Setup for Using Data Highway Plus
34
Configuring Dipswitches on the 1770-KF2, Series B Modules
35
Configuring Dipswitches on the 1785-KE Series B Module
35
Configuring Dipswitches on the 1771-KE or 1771-KF Module
36
A-B PLC-5 Tag Variables
37
I/O Addressing
38
Status File Addressing
38
This Cable Is Used to Connect the Target Display to a Micrologix
40
Allen-Bradley Remote I/O
42
Observation Mode
44
Word
44
Emulate Mode
45
Remote I/O Tag Variable Table
45
Discrete I/O or Block Transfer
46
Rack Addresses
46
Using Emulate Mode
46
Configuring for Block Transfer Operations
47
Block Transfer Files
50
Block Transfer Operations
50
Reading Word Data in BTW Files
51
Reading Bit Data in BTW Files
52
Writing Word Data to BTR Files
52
Block Transfer Tag Name Summary
53
Writing Bit Data to BTR Files
53
Error Codes
54
Optional Data File Names
54
Pass through Mode
55
Pass through Setup
56
Block Transfer Address
57
DH+ Card Name/Destination DH+ Node
57
Download Method
57
PT.INI File
57
Config.sys
58
Download
58
Ioport=250
58
Aromat
59
Aromat FP1 (MEWNET)
59
Configuration
59
Cable
60
ASCII Protocol
61
Setup for Using ASCII Protocol
61
Single Drop
61
Internal Tags
63
Single Drop Limits
63
Triggering a Panel
63
Reading Variables
64
Untriggering a Panel
64
Writing to Variables
65
Setting the Time and Date
66
Writing Text Characters
66
Panel Design
68
Panel Components and Internal Tags
69
Setup the Host
69
Testing the ASCII Protocol
70
Write Command
71
Reading and Writing Multiple Tags
73
Error Messages
74
B&R
75
Connecting a Target Display to a B&R Minicontrol
75
HMI-CAB-C98 Cable
75
Mccp30, Mccp31, Mccp32
75
Handshake None
76
B&R Tag Variable Table
77
Canopen
78
Protocol Setup
78
Addressing
79
Configure I/O
79
Inputs/Outputs
79
Word Storage Format
79
Double Word Storage Format
80
Power on State
80
Setup Network
82
Byte Addressing
83
Tag Variables
83
Word Addressing
84
PLC Comm Errors
86
Devicenet
87
Input Byte at Byte 37 (LSB of Word
93
ASCII Flex Protocol
95
Demo Panel
96
Sample Project
96
Edit Sequence
98
Hardware Connection
101
Does Controller Echo Commands
103
Does Controller Echo XON/XOFF
103
Generate Error Code for Invalid Message
103
Global Parameters
103
Error Message Destination
104
Poll Delay/Send Delay
104
Prompt Characters/End of Packet Char/Initialization Sequence
104
Reply Time out
104
Byte
105
Edit Sequences
105
New Sequence
105
Sequence Name
105
Send Command
106
Receive Command
106
Prompted Send Command
106
Unsolicited Receive Command
106
Limits
107
Poll
107
Button Press/Button Release
107
Associate Registers
107
Setup Options
108
Tag Table
109
Syntax Used in the String Commands
109
Embedded Register Fields
109
Byte Literals
109
Handling Unsolicited Sequences
110
Memory Used Calculation
110
String Literals
110
Setup for Using a Mitsubishi a PLC
116
HMI-CAB-C53 Cable
116
Mitsubishi a Series
116
Handshake None
117
Setting the Mitsubishi Transmission Control Protocol
118
Mitsubishi Serial Communications Parameters
118
Mitsubishi Station Number
118
RS422 Cable Drawing
119
Mitsubishi A1S Computer Link Module
119
Mitsubishi Tag Variable Names, a Series
119
HMI-CAB-C91/B Cable
120
Setup for Using a Mitsubishi FX PLC
120
Connecting to a Mitsubishi FX
120
Mitsubishi FX Series
120
Handshake None
121
Mitsubishi FX Tag Variable Table
122
Mitsubishi MELSEC-A Program Port
123
Serial Port Parameters for the Display
123
Handshake None
123
Modicon Modbus
125
Modicon 884 or 984A, B, or X Processor
125
HMI-CAB-C53/A Cable
125
Modicon Slot Mount 984 PLC
126
Connecting a Modicon Slot Mount 984 PLC
126
HMI-CAB-C58/A Cable
126
Setup for Using an 884 or 984 PLC
127
HMI-CAB-C102/A Cable
127
Handshake None
128
Modbus Plus
130
Setup for Using Modbus Plus
131
Modbus Plus Tag Variables
132
Route Strings
133
Modbus Slave
134
Panel Trigger Tag and Watchdog Register
134
Handshake None
134
Serial Port Pin Assignment
135
Modbus Slave Tag Variables
135
Modbus Slave Diagram
136
Connecting to an OMRON C20H PLC
137
HMI-CAB-C67/A Cable
137
Connecting to an Omron C200H PLC
138
OMRON C200H-LK201/202 Host Link Adapter
138
Setup for Using an OMRON PLC
139
Handshake None
140
Omron Tag Variable Table
141
Omron CV
142
Connecting to an Omron CV1000 PLC
142
Handshake None
142
Omron CV Tag Variable Table
143
PLC Direct
144
DL305 Directnet
144
DL330 and DL330P with D3-232-DCU
145
Handshake None
145
DL340 Cable
146
DL350 Cable
146
DL305 Tag Variable Table
147
Direct 405/205 Directnet
148
Setup for Using a DL405/205 Directnet PLC
148
DL240 Cable
149
Handshake None
149
DL430/440 with D4-DCM Data Communication Module
150
Dl430/440
150
DL250 Cable
150
DL450 Cable
151
DL405/205 Tag Variable Table
152
Profibus
154
GSD Files
158
Profibus DP Protocol Dialog Box
158
Ident Number
159
GSD File Format
159
GSD File Installation
159
Cables
160
Shielding
160
Connectors
161
Ferrite Cores
161
Reliance Automate
164
Automate 15, 20, 30/30E, 40/40E
164
Automate Processors
164
Automate Processor Port Connection
165
Automate Serial Communications Processor
165
Automate R-Net Gateway
166
Setup for Using a Reliance Automate PLC
167
RELIANCE Tag Variable Table
168
Handshake None
168
Destination ID
169
Register and Point Ranges
169
Timeout Delay
169
Registers and Points
169
Destination Slot
170
Gateway on
170
Gateway Max Nodes
170
Gateway Configure
170
Sattcon 05-35
171
Siemens
172
Ti Ccm2 305/405
172
Connecting to Simatic TI 405 CCM2
172
Setup for Using a Simatic TI 405 PLC
173
Simatic TI 405 Tag Variable Table
174
Handshake None
174
Simatic TI 305 Tag Variable Table
177
Simatic TI500 Program Port
178
Connecting to Simatic TI 535 Program Port
179
Setup for Using a Simatic TI 500 PLC
181
Handshake None
181
Simatic TI Tag Variable Names
182
Model 560/565 "S" Register Names
183
Simatic S Series
184
Connecting a Simatic S5-95U PLC
184
Handshake None
185
Setup for Using a Simatic S5 Series PLC
185
Siemens S5 Series Tag Variables
186
Siemens S7-200
188
Handshake None
188
Siemens S7300 MPI
190
Handshake None
190
Communication Setup
191
Simatic 3964R
192
Setup for Using Simatic S5 RK 512 Computer Link
192
Handshake None
193
RK 512 Computer Link with 3964R Procedure
194
Simatic 3964R Tag Variables
195
Static Parameter Set
195
Assigning Parameters to DX 2
195
GE Fanuc SNP
197
GE Fanuc 90-30, 90-70
197
GE Fanuc Single Point Connection (90-30, 90-70)
197
GE 90-30 CMM Module
198
Setup for Using a GE Fanuc Series 90 PLC
199
Handshake None
199
GE SNP Tag Variables
200
GE 90/30 CMM Module Setup
200
Geccm
202
Setup for Using a GE GENIUS Option Module
204
GE Genius
204
Quickpanel Bus Addr
205
PLC Bus Addr
205
CPU Type
205
Baud Rate
205
Send Global Data
206
Reference Address
206
Enable Datagrams
206
Receive Global Data
206
Cable Connection
207
Series 6 or 90/XX Plc’s
210
Global Data Operational Specifications
210
Connecting Two Quickpanels and a Series 6 PLC
211
Setting up the Quickpanels
212
Configuring a GE 90/70
213
Configuring the Bus Controller for Global Data
215
Configuring the Quickpanels on a Bus
215
Selecting a Device Number
215
Selecting the Device Type
216
Receiving Global Data from a Quickpanel
216
Using the Quickpanel with Series 90/30 PLC
217
Module-Specific Data
218
Module SBA (Serial Bus Address)
218
Input Def
219
Device SBA
219
Status
219
Device-Specific Data
219
Generic Devices
220
Device Type (Quickpanel)
220
Troubleshooting
221
GE Fanuc SNPX
222
Handshake None
223
Connecting a Target Display to GE SERIES SNP
224
HMI-CAB-C82 Cable
224
Multi-Drop Cable Connection
225
GE SNPX Tag Variables
226
Hitachi H Series
228
Hitachi S10
230
HMI-CAB-C115 Cable
230
Handshake None
230
Working Configuration
231
Hitachi S10 Tag Variable Table
231
Connecting to an IDEC Link Adapter
234
Setup for Using an IDEC PLC
235
Handshake None
235
IDEC Micro-1 Tag Variable Table
237
Idec Micro3 Serial Protocol
238
HMI-CAB-C109 Cable
238
IDEC Micro3 Tag Variables
239
Interbus-S
240
Interbus Network Description
240
Interbus Protocol
240
I/O Network Operations
240
Interbus-S DP Protocol Dialog Box
245
Keyence Port 1
249
Keyence KV-L2
249
Keyence Program Port
251
Keyence KV-L2, KV-10R
251
Program Port Cable
252
Connecting the Quickpanel to a Model 300 Processor
253
Square-D
253
Connecting a Display to a Network Interface Module
254
Selecting the Square-D Device Number
254
Determining the Route Numbers
254
Remote Network Interface Connections
255
Route Setup
256
Setup for Using Square-D PLC
256
HMI-CAB-C94 Cable
256
Handshake None
257
Square-D Variable Names
258
Bit Configuration
259
M20/40 Computer Link Switch Settings
260
Connecting a Target Display to a Toshiba M20/40
260
Toshiba
260
Connecting a Target Display to a Toshiba EX100
261
EX100 Computer Link Switch Settings
261
HMI-CAB-C96 Cable
261
Connecting a Target Display to a Toshiba T2 PLC
262
Setup for Using Toshiba Plcs
262
Handshake None
263
Toshiba Tag Variables
264
Toyopuc PC1
267
Toyopuc Tag Variables
267
Toyopuc-2
268
Allen-Bradley SLC 500 Series Quick Start Manual (70 pages)
Ethernet
Brand:
Allen-Bradley
| Category:
Computer Hardware
| Size: 0.56 MB
Table of Contents
Quick Start
1
Table of Contents
3
Purpose of this Manual
5
Related Documentation
6
Who Should Use this Manual
5
Allen-Bradley Support
7
Local Product Support
7
Technical Product Assistance
7
Your Questions or Comments on this Manual
8
Conventions Used in this Manual
7
Chapter 1 SLC 5/05 Ethernet Processor
9
SLC 5/05 Processors and Ethernet Communication
9
Passthru Feature
10
SLC 5/05 Performance Considerations
10
Hardware Features
10
Processor Status LED Operation
11
Keyswitch Operation
12
RUN Position
12
PROG Position
12
REM Position
12
Chapter 2 Setting up the SLC and PC
13
Required Tools and Equipment
13
Install the Power Supply
13
Install the Processor
15
Apply Power to the Processor
16
Ethernet Network Topology
16
Ethernet Channel 1 8-Pin 10Base-T Connector
17
Cables
17
Load Your Programming Software
17
Chapter 3 Configuring the Ethernet
19
Configuration Methods
19
Configuration Using Rslogix500 Programming Software
20
Define SLC 5/05 Processor and I/O Modules
20
Create Program and Configure Comms Drivers
23
Download the Program
24
Switch to the Ethernet Network and Go ONLINE
25
Configuration Via BOOTP
25
Using Dos/Windows BOOTP
26
Install the Dos/Windows BOOTP Server
27
Edit the Dos/Windows BOOTP Configuration File
27
Run the Boot Server Utility
29
Running the DOS-Based Utility
29
Running the Windows-Based Utility
30
Chapter 4 Communicating on the
31
Ethernet Connections
31
MSG Instruction
32
Limitation for Manipulating the Control Block Bits
32
Control Block Layouts
33
MSG Instruction Control Block
34
Interpreting MSG Error Codes
36
Interpreting Ethernet Status Data
38
Using Subnet Masks and Gateways
40
Manually Configuring Channel 1 for Processors on Subnets
41
Using BOOTP to Configure Channel 1 for Processors on Subnets
42
Advertisement
Allen-Bradley SLC 500 Series Migration Manual (60 pages)
Brand:
Allen-Bradley
| Category:
Controller
| Size: 9.06 MB
Table of Contents
Important User Information
2
Table of Contents
3
New and Updated Information
5
About this Publication
7
Audience
7
Required Software
7
Additional Resources
8
Chapter 1
11
Product Lifecycle Status Website
11
SLC 500 System
12
Compactlogix 5370 Controllers
12
Compactlogix 5380 Controllers
12
Compact I/O Modules
13
Compact 5000 I/O Modules
13
Power Considerations
14
SLC 500 Controllers
14
Compactlogix 5380 Controllers
14
Sensor/Actuator Power for Compactlogix 5380
15
Upgrade to a Compactlogix 5370 Controller
17
Chapter 2 Upgrade to a Compactlogix 5380 Controller
18
Upgrade an SLC I/O Installation by Replacing It with Compact I/O
19
Chapter 3 Upgrade an SLC I/O Installation by Replacing It with Compact 5000 I/O
23
Replace an SLC 500 I/O with a Compact I/O
27
Appendix A
44
Replace an SLC 500 I/O with a Compact 5000 I/O
44
Allen-Bradley SLC 500 Series Installation Instructions Manual (20 pages)
Thermocouple/mV Analog Input Module
Brand:
Allen-Bradley
| Category:
I/O Systems
| Size: 0.34 MB
Table of Contents
Table of Contents
1
Hazardous Location Considerations
2
Environnements Dangereux
2
Module Overview
3
Input Ranges
3
Hardware Features
4
Installing and Wiring Your Module
5
Electrostatic Damage
6
Required Tools and Equipment
6
Power Requirements
6
Considerations for a Modular System
7
Considerations for a Fixed Controller
7
Selecting a Chassis Slot
7
Module Installation and Removal
8
Terminal Block Removal
9
Cold Junction Compensation (CJC)
10
Wiring Guidelines
10
Thermocouple Junctions
11
Preparing and Wiring the Cables
14
Module Specifications
17
For more Information
20
Allen-Bradley SLC 500 Series Installation Instructions Manual (28 pages)
Programmable Controller Rack Interconnect Cables
Brand:
Allen-Bradley
| Category:
Controller
| Size: 0.49 MB
Table of Contents
Table of Contents
1
English Section
3
Français
7
Deutscher Abschnitt
11
Sezione in Italiano
15
Sección en Español
19
Japanese Section
23
Advertisement
Related Products
Allen-Bradley SLC 500
Allen-Bradley SMC-50
Allen-Bradley SLC 5/05 series
ALLEN BRADLEY SLC 5/02
ALLEN BRADLEY SLC 5/01
Allen Bradley SLC 500 DeviceNet
Allen-Bradley SLC 5/04
Allen-Bradley SLC 5/03
Allen-Bradley SLC 5/05
Allen-Bradley SLC 500 BASIC
Allen-Bradley Categories
Control Unit
Controller
I/O Systems
Power Supply
Switch
More Allen-Bradley Manuals
Login
Sign In
OR
Sign in with Facebook
Sign in with Google
Upload manual
Upload from disk
Upload from URL