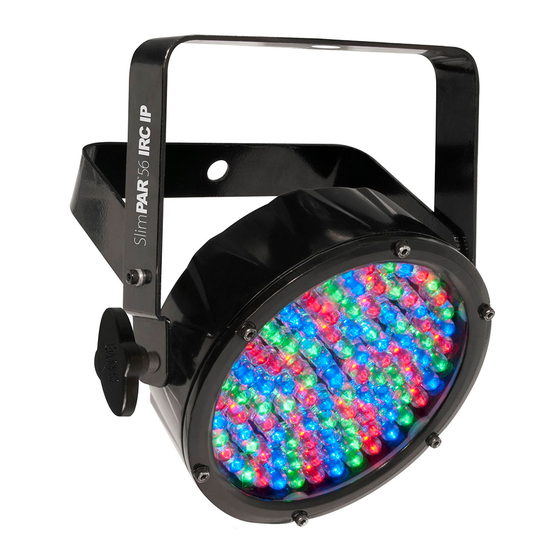
Chauvet SlimPar 56 IRC IP User Manual
Hide thumbs
Also See for SlimPar 56 IRC IP:
- User manual (16 pages) ,
- Quick reference manual (40 pages) ,
- Quick reference manual (37 pages)
Table of Contents
Advertisement
Quick Links
Download this manual
See also:
Quick Reference Manual
Advertisement
Table of Contents

Summary of Contents for Chauvet SlimPar 56 IRC IP
- Page 1 User Manual...
-
Page 2: Table Of Contents
ABLE OF ONTENTS 1. Before You Begin ................3 What Is Included ....................3 Unpacking Instructions ..................3 Claims ........................3 Text Conventions ....................3 Icons ........................3 Disclaimer ......................3 Product at a Glance ..................4 Safety Notes ...................... 4 2. -
Page 3: Before You Begin
Chauvet. Failure to do so in a timely manner may invalidate your claim with the carrier. In addition, keep the container and all the packing material for inspection. -
Page 4: Product At A Glance
Product at a Use on Dimmer Auto Programs Outdoor Use Auto-ranging Power Supply Glance Sound Activated Replaceable Fuse User Serviceable Master/Slave Duty Cycle Safety Notes Please read the following Safety Notes carefully before working with the product. The Notes include important safety information about installation, usage, and maintenance. ·... -
Page 5: Introduction
2. I NTRODUCTION Product Overview LED Display Power In Power Out DMX In/Out SlimPAR™ 56 IRC IP User Manual (Rev. 2) Page 5 of 18... -
Page 6: Product Dimensions
Product Dimensions Page 6 of 18 SlimPAR™ 56 IRC IP User Manual (Rev. 2) -
Page 7: Setup
The power linking information above corresponds to the North American version of the product ONLY! If using the product in other markets, you must consult with the local Chauvet distributor as power linking connectors and requirements may differ in your country or region. -
Page 8: Mounting
Mounting Before mounting the product, read and follow the safety recommendations indicated in Safety Notes. Orientation The SlimPAR™ 56 IRC IP may be mounted in any position; however, make sure adequate ventilation is provided around the product. · Rigging Before deciding on a location for the product, always make sure there is easy access to the product for maintenance and programming purposes. -
Page 9: Operation
4. O PERATION Control Panel To access the control panel functions, use the four buttons located underneath the display. Please refer to the Product Overview to see the button locations on the control Operation panel. Button Function Press to find an operation mode or to back out of the current menu <MENU>... -
Page 10: Configuration (Dmx)
Configuration Set the product in DMX mode to control with a DMX controller. Connect the product to a suitable power outlet. (DMX) Turn the product on. Connect a DMX cable from the DMX output of the DMX controller to the DMX input socket on the product. -
Page 11: Dmx Channel Assignments And Values
DMX Channel Assignments and Values Channel Function Value Setting 3-CH 000 ó 255 0–100% 000 ó 255 0–100% Green 000 ó 255 0–100% Blue Channel Function Value Setting 7-CH 000 ó 255 0–100% 000 ó 255 0–100% Green 000 ó 255 0–100% Blue 000 ó... -
Page 12: Configuration (Standalone)
Configuration Set the product in one of the standalone modes to control without a DMX controller. Connect the product to a suitable power outlet. (Standalone) Turn the product on. Never connect a product that is operating in any standalone mode to a DMX string connected to a DMX controller. -
Page 13: Master/Slave Mode
Master/Slave The Master/Slave mode allows a single SlimPAR™ 56 IRC IP unit (the “master”) to control the actions of one or more SlimPAR™ 56 IRC IP units (the “slaves”) without the Mode need of a DMX controller. Once set and connected, the slave units will operate in unison with the master unit. -
Page 14: Irc-6 (Infrared Remote Control) Operation
IRC-6 (Infrared Remote Control) Operation Note: Make sure to point the IRC-6 directly at the receiver on the product. Automatic Mode Automatic Mode will enable you to run the automatic programs on the product. To turn on Automatic Mode: Press <AUTO> on the IRC-6. Press <+>... -
Page 15: Technical Information
5. T ECHNICAL NFORMATION Product Dust build up reduces light output performance and can cause overheating. This can lead to reduction of the light source’s life. To maintain optimum performance and Maintenance minimize wear, you should clean your lighting products at least twice a month. However, be aware that usage and environmental conditions could be contributing factors to increase the cleaning frequency. -
Page 16: Technical Specifications
6. T ECHNICAL PECIFICATIONS Dimensions and Length Width Height Weight Weight 9.3 in (236 mm) 8 in (203 mm) 3.2 in (82 mm) 4.1 lb (1.9 kg) Note: Dimensions in inches rounded to the nearest decimal digit. Power Supply Type Range Voltage Selection Power... -
Page 17: Returns
If you are located in Mexico, contact Chauvet Mexico. · If you are located in Benelux, contact Chauvet Europe BVBA. · If you are located in any other country, DO NOT contact Chauvet. Instead, contact your local distributor. See www.chauvetlighting.com for distributors outside the U.S., UK, Ireland, Mexico, or Benelux. -
Page 18: Contact Us
(954) 577-4455 Email: tech@chauvetlighting.com Fax: (954) 929-5560 Toll free: (800) 762-1084 World Wide Web www.chauvetlighting.com UNITED KINGDOM AND IRELAND - Chauvet Europe Ltd. General Information Technical Support Address: Unit 1C Email: uktech@chauvetlighting.com Brookhill Road Industrial Estate Pinxton, Nottingham, UK World Wide Web www.chauvetlighting.co.uk...


Need help?
Do you have a question about the SlimPar 56 IRC IP and is the answer not in the manual?
Questions and answers