
Subscribe to Our Youtube Channel
Related Manuals for AS MOTOR Ride-on Allmaher AS 940 Sherpa 4WD+


Summary of Contents for AS MOTOR Ride-on Allmaher AS 940 Sherpa 4WD+
-
Page 1: Operating Instructions
Operating Instructions Ride-on Allmäher® AS 940 Sherpa 4WD + AS 940 Sherpa 4WD XL From serial number: 021914110001, Sherpa 4WD XL: 026414110001 Issued: 13 February 2015, V23.0 EN-Translation of the Original Operating Instructions... -
Page 2: Preface
Preface Intended use The device is intended for cutting and mulching Please fill in all data referring to your device. When ordering spare parts, provide your deal- grass or similar vegetation in agriculture, for- er with the device and engine number. estry, and landscape conservation. -
Page 3: Table Of Contents
Contents Engaging the blade ........ 17 Preface ............. Oil pressure switch ......... 17 Intended use ..........Towing ............17 Driving ............17 Explanation of the symbols ....dummy Inhalts verz eichnis Brakes (devices with foot brake) .... 18 Symbols in the instructions ....Driving ........... -
Page 4: Explanation Of The Symbols
dummy Inhalts verz eichnis Explanation of the symbols Prior to any repair and mainte- nance work, remove the ignition key. Symbols in the instructions In these operating instructions, the following symbols are used to denote special dangers. Warning. These symbols denote special Clean the ventilation grid! dangers. -
Page 5: Safety Instructions
Safe handling of fuel Safety instructions Get informed! Danger! Fuel is toxic and highly inflamma- For your safety, read these operating instruc- ble. tions with care. Familiarize yourself with the Danger of fire and explosion! control elements and the proper use of the Keep the fuel away from ignition device. -
Page 6: Check The Device Prior To Use
– when you drive on surfaces other than In case of skin contact, immediately wash with grass. water and soap. Change your soiled clothing as soon as you can. Switch off the engine and wait until the blade comes to a standstill and remove the ignition Measures in case of a fire key, In case of a fire, use foam, dry powder extin-... -
Page 7: Use Caution When Mowing
Caution when mowing slopes Use caution when mowing Danger! Risk of injury If the device, while in use, stops in Stay within shouting distance to other people steep terrain or the engine cuts out, who can help you in case of an emergency. the device can roll away. -
Page 8: Caution When Using Accessories
– Hold the steering wheel tightly so that the – Engine device does not swerve. – Silencer (manifold, guard, clearances) Only park the device on flat surfaces. – Battery The drive has good braking efficiency which – Area around the fuel tank can only provide sufficient grip on a non-slip surface. -
Page 9: Use Caution During Maintenance And Repair
Use caution during maintenance and repair Only carry out maintenance work as described in these operating instructions. Have an au- thorised service centre carry out all other work. Only use the knives and spare parts authorized by “AS-Motor Germany”. Unauthorized knives and spare parts can cause severe injuries. -
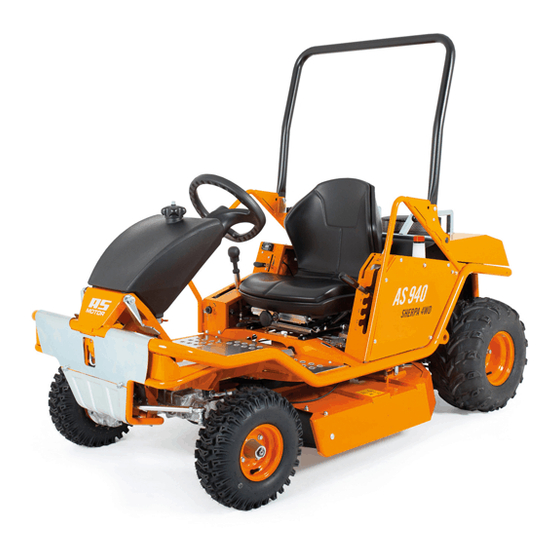
Page 10: Device Description
Device description Tank cap Tank ventilation Type plate On-board supply socket Protection skirt Transport rack Rollbar Type plate Ventilation grid 10 Silencer grid 11 Oil surge tank 12 Gearbox fan 13 Unlocking device drive 14 Ejection rubber 15 Side plates impact protection 16 Fuel valve... -
Page 11: Control Elements
Control lever at seat Control elements Front area Blade clutch lever (1) The blade clutch lever is a protective device. When you declutch the blade, the blade Differential lock (1) comes to a standstill within 5 seconds. With the left foot pedal, actuate the differential Declutching the blade: lock. -
Page 12: Drive/Idle Mode
Seat suspension (7) Accelerator lever with choke (6) The seat suspension can be adjusted to the Via the accelerator lever, you change the driver’s weight. engine speed and control the engine perfor- mance. When you want to start the device Heavier drivers: Turn clock- when the engine is cold, move the accelerator wise. -
Page 13: Rollbar
Putting up the rollbar 1. Pull out the lever (1). 2. Put up the rollbar (2). 3. Swivel the lever down and engage the lever. leer er Abs atz Transport Transport the device on a freight vehicle or a trailer which is designed for a carrying capacity of at least as great as the empty weight of the device. -
Page 14: Assembly
Caution! To prevent damages to the de- Loading vice, we recommend to fasten the straps Use suitable ramps for loading that exactly as shown in the illustration. Do not – can carry the empty weight of the de- overtighten the straps. vice + 100 kg. -
Page 15: Information On Mowing
3. Screw the nut (2) onto the screw (1). mow the terrain once again in the opposite direction. 4. Fit the cap (4). leer er Abs atz leer er Abs atz Prior to starting Information on mowing Prior to mowing, check your device for com- Checking the oil level pleteness, proper functioning, and cleanliness. -
Page 16: Adjusting The Seat Suspension
Adjusting the seat suspension Starting To provide the ultimate seating comfort, spring Danger! deflection should be fully utilized, if possible. During startup, there is a risk of Adjust the handwheel so that the seat does not injury caused by the rotating blade. contact the floor during normal operation. -
Page 17: Engaging The Blade
10. Only for cold start: The oil pressure switch switches off the engine Move the accelerator lever to middle posi- when damage to the engine may occur due to tion. lack of oil pressure. This may occur when: 11. For mowing, set the accelerator lever to the –... -
Page 18: Brakes (Devices With Foot Brake)
Brakes (devices with foot brake) Differential lock The differential lock connects the two rear Warning! wheels rigidly to each other. This improves The brake does not work if you traction. Actuate the differential lock when a continue to hold the drive lever wheel slips. -
Page 19: Maintenance And Cleaning
Maintenance and cleaning warranty. Operational safety is endangered as Regular maintenance keeps your device ready well. for use. Contact your authorised service centre for If you do not observe the maintenance notices, checkup if you detect problems during mainte- faults may occur that are not covered by the nance. - Page 20 ■ ▲ Bowden cables Check for proper function and ease of movement. □ ▲ Acceleration lever Check for proper function. ■ ▲ Chassis and im- Check for rust and fissures and check the welding seams. pact protection ■ ▲ Are all protective devices and covers in place, fastened correctly and properly functioning? ■...
-
Page 21: Preparations
In case of leaks, contact an authorised service Preparations centre. Prior to all maintenance and cleaning work: Check the safety switches for proper function. 1. Let the device cool down for at least It must not be possible to start the engine 20 minutes. -
Page 22: Checking The Blade
Changing the blade Checking the blade Danger! Improperly mounted and main- tained blades pose a severe injury hazard. Work at the blade shall only be performed by an authorised service centre. Wear sturdy gloves when you check the blades. Cutting blades (5) The cutting blades should move easily. -
Page 23: Maintaining The Engine
Checking the condition of the cutting blade Keep the screws - engine cover (ventilation grid), - silencer (protective grid) and Danger! - cooling fins of the engine When a screw head is worn, the clean at all times. cutting blades can become loose. Opening the engine cover Check all screws used for fastening the cutting blades! -
Page 24: Checking The Spark Plug
Checking the spark plug Caution! When the battery is connected, there is a risk of short circuit. Danger! Do not put tools or metal objects The ignition system generates an onto the battery. Observe the as- electromagnetic field. sembly order when connecting and Wearers of pacemakers must not disconnecting the battery. -
Page 25: Storage
Always eliminate all problems of the device before you store it so that the device is always in a safe-to-operate state. Let the engine cool down before you store the device in closed rooms. Also observe the notices on storage in the attached operating instructions by the engine manufacturer. -
Page 26: Spare Parts
AS 940 Sherpa 4WD: Spare parts – AS standard tyres (small wheels) The reliable and safe operation of the device – AS accessories: G06921014 / E09305 (big also depends on the quality of the spare parts wheels) used. Only use original spare parts and acces- –... -
Page 27: Troubleshooting
Troubleshooting The following table contains the most frequent problems and their elimination. If more problems occur, contact the closest authorised service centre. You can find an authorised service centre on our home page www.as-motor.de. Problem Possible cause Remedy – Move drive lever to neutral position. Starter does not turn Safety switches are not actu- ated. - Page 28 Spark plugs are sooted, dam- Clean spark plugs and check electrode aged, or incorrect electrode gap (see also Maintenance and clean- gap. ing). Replace spark plugs if necessary. Housing of the mower is See also Maintenance and cleaning. jammed. No oil pressure: Check engine oil level, refill.
- Page 29 Silencer is defective. Authorised service centre. Hydrostatic drive is overheat- Cool down (see also Maintenance and cleaning). Engine is smoking Air filter is soiled or drenched Maintain or replace air filter (see also with oil. Maintenance and cleaning). Oil level is too high. Have authorised service centre lower the oil level to the marking.
- Page 30 The engine does not Switching off system is defec- Close the fuel valve. switch off tive. Authorised service centre. The tires become flat Thorns or sharp objects dam- If necessary, use tire protection gel age the tires. (authorised service centre).
-
Page 31: Technical Data
Technical data Type AS 940 Sherpa 4WD AS 940 Sherpa 4WD XL AS 940 Sherpa 4WD with big wheels as accesso- ries Range of application (temperature) 0 - 30 °C For temperatures below 5 °C, observe the engine manufacturer's information regarding the engine oil. Engine, type Two cylinder four stroke OHV engine Manufacturer... - Page 32 Measures and weights Weight 290 kg 298 kg Transport size with packaging L/W/H 195/111/112 cm 195/111/112 cm Max. tyre dimensions L/W/H 191/98/152 cm 191/106/156 cm Height when rollbar is folded down ca 100 cm ca 103 cm 100 kg max. towing load 25 kg max.
-
Page 33: Accessories
Accessories Steering wheel knob: G06980011 E09327 Trailer: G06800003 E09311 Trailer hitch: G06900002 E09323 Snow remover blade without adaptor: G06837006 E09306 Adaptor snow remover blade AS 940: G06937014 E09307 Adaptor snow blade AS 940 with weatherproof cabin: G06900005 E09329 Weatherproof cabin: G06928001 E09326 Snow chains front:... -
Page 34: Declaration Of Conformity
Declar ati on of c onfor mity AS-Motor Germany GmbH & Co. KG Ellwanger Straße 15 D-74424 Bühlertann www.as-motor.de Declaration of conformity We declare that the grassland mower type AS 940 Sherpa 4WD with serial number starting from 021914110001 as well as type AS 940 Sherpa 4WD XL with serial number starting from 026414110001... - Page 35 Umbruc h...
- Page 36 Mar keti ng AS-Motor Germany GmbH & Co. KG Ellwanger Straße 15 D-74424 Bühlertann www.as-motor.de Professional technology for gardens and landscapes Allmäher® Manoeuvrable meadow mower for extensive green area care. The Allmäher reliably shreds metre-high grass, undergrowth, and weeds. Ride-on Allmäher® Ease of use and high area coverage all combined in a compact ride-on mower.
Need help?
Do you have a question about the Ride-on Allmaher AS 940 Sherpa 4WD+ and is the answer not in the manual?
Questions and answers