Table of Contents
Advertisement
Quick Links
Advertisement
Table of Contents
Troubleshooting

Related Manuals for Stoelting E131I2


Summary of Contents for Stoelting E131I2
- Page 1 Model E/F131 I2 OPERATORS MANUAL Manual No. 513674 Rev.2...
- Page 3 If problems develop or questions arise in connection with installation, operation, or servicing of the machine, contact the com- pany at the following location: STOELTING 502 Hwy. 67 Kiel, WI 53042 © 2014 Stoelting, LLC, All Rights Reserved...
-
Page 4: Safety Information
CAUTION If you need to replace a part, use genuine Stoelting The signal word “CAUTION” indicates a potentially parts with the correct part number or an equivalent hazardous situation, which, if not avoided, may result part. -
Page 5: Table Of Contents
TABLE OF CONTENTS Section Description Page Description and Specifi cations Description ....................1 Specifi cations ..................... 1 Installation Instructions Safety Precautions ..................3 Shipment and Transit .................. 3 Machine Installation ..................3 IntelliTec2™ Setup ..................4 Initial Set-Up and Operation Operator’s Safety Precautions .............. -
Page 7: Description
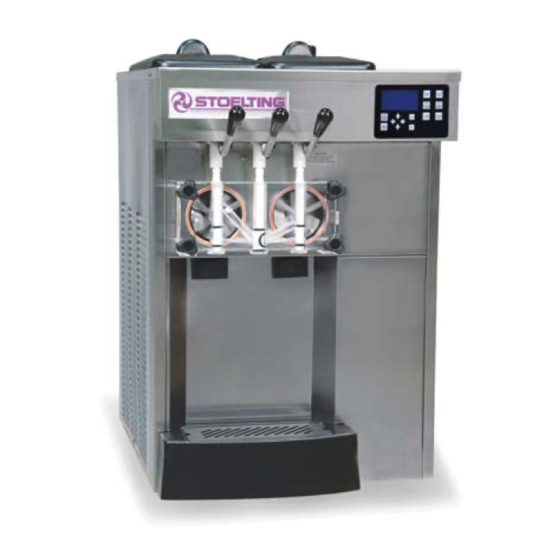
This manual is designed to assist qualifi ed service per- sonnel and operators in the installation, operation and maintenance of the Stoelting E131I2 and F131I2 gravity machines. Figure 1-1 Model F131 I2 1.2 SPECIFICATIONS Figure 1-2 Specifi... - Page 8 Air cooled units require 3” (7,6 cm) air space on both sides Plumbing Fittings Water cooled units require 3/8” N.P.T. water and drain fi ttings. Hopper Volume Two - 3 gallon (11,35 liters) Freezing Cylinder Two - 0.85 gallon (3,22 liters) Volume Owner’s Manual #513674 Rev.2 E131I2 & F131I2 Model Machines...
-
Page 9: Installation Instructions
The plug connected to the machine is customer must place claim for damages and/or shortages either a NEMA 6-20P or L15-20P. Check the in shipment with the carrier. Stoelting, Inc. cannot make nameplate on your machine for proper supply. The any claims against the carrier. -
Page 10: Intellitec2™ Setup
Press the right arrow, SET, and then the SEL button. Figure 2-4 Press the left arrow button to go back to the Current Status screen and remove the USB fl ash drive. Owner’s Manual #513674 Rev.2 E131I2 & F131I2 Model Machines... - Page 11 If the product is too fi rm, decrease the CutIn Consist Offset. After the consistency is set, press the left arrow button once so that the Modify Operating Settings screen is displayed. Owner’s Manual #513674 Rev.2 E131I2 & F131I2 Model Machines...
- Page 12 Owner’s Manual #513674 Rev.2 E131I2 & F131I2 Model Machines...
-
Page 13: Initial Set-Up And Operation
IntelliTec2™ Control (See Figure 3-2) Dispense Rate Adjustor Figure 3-1 Machine Controls Owner’s Manual #513674 Rev.2 E131I2 & F131I2 Model Machines... -
Page 14: Disassembly Of Machine Parts
Pour the sanitizer into the hopper. Using brushes provided, scrub the hopper. After 5 minutes, drain the sanitizer out of the freezing cylinder. Owner’s Manual #513674 Rev.2 E131I2 & F131I2 Model Machines... -
Page 15: Cleaning Disassembled Parts
fi nish. Use a soft cloth or sponge to apply the solution. For best results, wipe with the grain of the steel. Clean the rear seal surface from inside of the freezing cylinder. Figure 3-5 Rear Seal Assembly Owner’s Manual #513674 Rev.2 E131I2 & F131I2 Model Machines... -
Page 16: Assembling Machine
The United States Department of Agriculture and the Food and Drug Administration require that all cleaning and sanitizing solutions used with food processing equipment be certifi ed for this use. Figure 3-6 Lubricate Rear Seal Owner’s Manual #513674 Rev.2 E131I2 & F131I2 Model Machines... -
Page 17: Freeze Down And Operation
Using a sanitized soft bristle brush (or equivalent) dipped in sanitizing solution, clean the hopper sides, mix inlet regulator and underside of the hopper cover. Owner’s Manual #513674 Rev.2 E131I2 & F131I2 Model Machines... -
Page 18: Fine Consistency Adjustment
fi nished product that is unsatisfactory. To retard bacteria growth in dairy based mixes, the best storage temperature range is between 33° to 38°F (0.5° to 3.3° C). Owner’s Manual #513674 Rev.2 E131I2 & F131I2 Model Machines... -
Page 19: Maintenance And Adjustments
Monthly checks Check the condenser fi lter for dirt and clean if necessary. Quarterly Checks Check drive belts for wear and tighten belts if Figure 4-1 Belt Tension Adjustment necessary. Owner’s Manual #513674 Rev.2 E131I2 & F131I2 Model Machines... -
Page 20: Extended Storage
Disconnect the water outlet fi tting. Press the Main Power On/Off button to turn the machine off. Disconnect the machine from the source of electrical supply. Owner’s Manual #513674 Rev.2 E131I2 & F131I2 Model Machines... -
Page 21: Troubleshooting
To return the machine to normal operation, any error If the error persists after attempting to clear it, causing condition must be corrected and the power to contact your Authorized Stoelting Distributor for the affected freezing cylinder must be cycled. Turn the further assistance. - Page 22 The Left Hopper Sensor Error (E12) indicates if off then back on. If the error persists, contact a failure of the hopper sensor or if the sensor is your Authorized Stoelting Distributor for further out of range. If the control panel displays an E12, assistance.
-
Page 23: Troubleshooting - Machine
3 Replace o-rings. Front door leaks. 4 O-rings or spigot installed wrong. 4 Remove spigot and check o-ring. 5 Inner spigot hole in front door nicked 5 Replace front door. or scratched. Owner’s Manual #513674 Rev.2 E131I2 & F131I2 Model Machines... - Page 24 Owner’s Manual #513674 Rev.2 E131I2 & F131I2 Model Machines...
-
Page 25: Replacement Parts
Decal - Adequate Ventilation 3” 324594 Decal - Attention Heat Sensitive 324686 Decal - Danger Automatic Start 324803 Decal - Domed Stoelting Logo (Large) (Header Panel) 324909 Decal - USB Port 324922 Decal - Assembly Check 324940 Decal - Thermistor ID... -
Page 26: Auger Shaft And Faceplate Parts
6.2 AUGER SHAFT AND FACEPLATE PARTS 694255 381804 149003 666786 624678-5 4157952 (E131) 4157968 (F131) 3170644 625133 2149243-01 2177428 624677-5 2187812 2187811 624598-5 624664-5 624614-5 744271 744262 744260-SV Owner’s Manual #513674 Rev.2 E131I2 & F131I2 Model Machines... - Page 27 Extension - Spigot - 3.2” 2177428 Door w/Pins 2187811 Spigot Body - Center 2187812 Spigot Body - Outer 3170644 Support - Front Auger 4157952 Auger Shaft 2 (E131) 4157968 Auger Shaft 2 (F131) Owner’s Manual #513674 Rev.2 E131I2 & F131I2 Model Machines...
- Page 28 Owner’s Manual #513674 Rev.2 E131I2 & F131I2 Model Machines...
- Page 29 THE REMEDIES SET FORTH IN THIS WARRANTY SHALL BE THE SOLE LIABILITY STOELTING AND THE EXCLUSIVE REMEDY OF BUYER WITH RESPECT TO EQUIPMENT SUPPLIED BY STOELTING; AND IN NO EVENT SHALL STOELTING BE LIABLE FOR ANY INCIDENTAL OR CONSEQUENTIAL DAMAGES, WHETHER FOR BREACH OF WARRANTY OR OTHER CONTRACT BREACH, NEGLIGENCE OR OTHER TORT, OR ON ANY STRICT LIABILITY THEORY.
Need help?
Do you have a question about the E131I2 and is the answer not in the manual?
Questions and answers