
Related Manuals for Winnebago Era Touring coach


Summary of Contents for Winnebago Era Touring coach
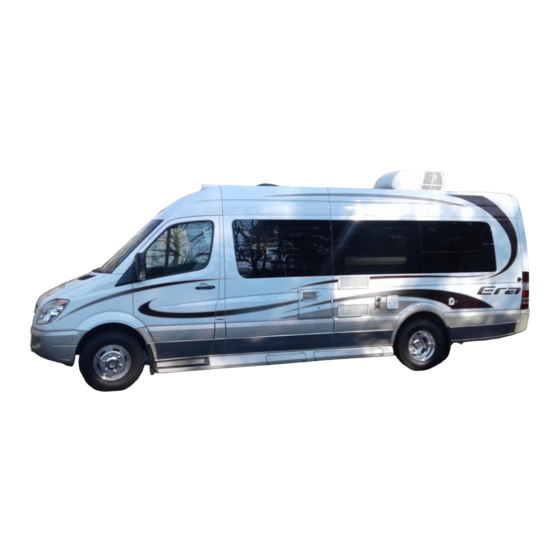
- Page 1 Rev. 1417140701 Part No. 161500-14-001 Copyright 2013 Winnebago Industries, Inc. All rights reserved.
-
Page 3: Table Of Contents
TABLE OF CONTENTS 1 – INTRODUCTION About this Manual ..........................1-1 Safety Messages Used in this Manual ....................1-1 Pre-Delivery Inspection ........................1-2 Front Axle Tire Alignment ....................... 1-2 Service and Assistance ........................1-2 Reporting Safety Defects ........................1-2 Occupant and Cargo Carrying Capacity Label ................. 1-3 Vehicle Certification Label ....................... - Page 4 Table Of Contents Remote Keyless Entry ........................3-6 Hazard Warning Flashers ........................3-6 Air Conditioner/Heater – Automotive (Dash) .................. 3-6 Radio In-Dash/Rearview Monitor System ..................3-6 Infotainment Center/GPS ........................3-8 Battery Boost Switch ........................3-9 Engine Cooling System ........................3-10 Diesel Exhaust Fluid Fill ........................
- Page 5 Table Of Contents House/Coach Battery Disconnect Switch ..................6-6 Battery Access ..........................6-7 Battery Care ............................6-8 Circuit Breakers and Fuses – House 12-Volt DC ................6-9 7 – PLUMBING Fresh Water System .......................... 7-1 Water Pump ............................7-3 Cold Water Filter ..........................7-5 Disinfecting Your Fresh Water System ....................
- Page 6 Table Of Contents Exterior Graphic Care ........................10-3 Plastic Parts – Cleaning ........................10-3 Exterior Lights ..........................10-4 Interior Soft Goods ......................... 10-4 Cabinetry – Cleaning ........................10-5 Solid Surface Countertop – Corian® ....................10-5 Tables and Countertops ........................10-6 Galley Sink .............................
-
Page 7: Introduction
The instructions included in this manual are intended as a guide, and in no way DANGER indicates a hazardous situation extend the responsibilities of Winnebago which, if not avoided, will result in death or Industries beyond the standard written serious personal injury. -
Page 8: Pre-Delivery Inspection
National Highway Traffic Safety Administration delivery inspection of the chassis and all (NHTSA) in addition to notifying Winnebago motorhome components. Industries, Inc. As a part of the pre-delivery inspection... -
Page 9: Occupant And Cargo Carrying Capacity Label
SECTION 1 – INTRODUCTION or go to their website at http://www.safercar.gov or write to: Administrator, NHTSA 1200 New Jersey Avenue S.E. Washington, D.C. 20590 You can also obtain other information about motor vehicle safety from the NHTSA website at http://www.safercar.gov OCCUPANT AND CARGO CARRYING CAPACITY LABEL This label is affixed in the driver’s area next to... -
Page 10: Vehicle Certification Label
These pressure levels must be maintained to assure proper handling, safety, 2. Chassis manufacture date. and fuel economy. 3. Month and year of manufacture at Winnebago ® 9. Rear Axle Wheel Configuration: Single or Industries Dual as it relates to the inflation. -
Page 11: Specifications And Capacities
(26.4 gal) Notes: All information is based upon the most recent data available. Visit the Winnebago Industries, Inc. web page – www.winnebagoind.com – for the most current product information. The height of each model is measured to the top of the tallest standard feature and is based on the curb weight of a typically equipped unit. -
Page 12: Owner And Vehicle Information
Motorhome Serial Number ___________________________________________________________ Chassis Vehicle Identification No. (VIN) ________________________________________________ Vehicle Mileage at Delivery __________________________________________________________ Selling Dealer Name ________________________________________________________________ Address __________________________________________________________________________ __________________________________________________________________________ ® YOUR WINNEBAGO INDUSTRIES DEALER /SERVICE CENTER Name ____________________________________________________________________________ Address __________________________________________________________________________ __________________________________________________________________________ Contact ____________________________________________Phone ________________________ CHASSIS SERVICE CENTER... -
Page 13: Safety And Precautions
SECTION 2 – SAFETY AND PRECAUTIONS GENERAL WARNINGS DRIVING SAFETY • Only seats equipped with seat belts are to be occupied while the vehicle is moving. WA RNING • Make sure all passengers have seat belts fastened. Lap belts should fit low on the hips and upper thighs. -
Page 14: Fuel And Propane Gas
SECTION 2 – SAFETY AND PRECAUTIONS • Do not operate the cruise control on icy or • All pilot lights must be extinguished and extremely wet roads, winding roads, in heavy appliances turned off while refilling the fuel traffic, or in any other traffic situation where tank or propane gas tank. -
Page 15: Propane Gas Leaks
SECTION 2 – SAFETY AND PRECAUTIONS PROPANE GAS LEAK DETECTOR WA RNING Your coach is equipped with a Propane Gas Leak Detector, similar to the one shown below. Gas cooking appliances need fresh air for The leak detector sounds an alarm if an unsafe safe operation. -
Page 16: Carbon Monoxide Warning
® Winnebago Industries dealer. fuel. It will detect CO gas from any combustion source such as the furnace, gas range/oven, water... -
Page 17: Smoke Alarm
RV application. We when needed. When using the fire recommend obtaining a replacement from your extinguisher, aim the spray at the base of ® Winnebago Industries dealer. the fire. Further Information See the manufacturer’s information in your... -
Page 18: Electrical
Extinguisher, the replacement must be the same type and size as the one originally supplied in MAINTENANCE your coach. We recommend obtaining a replacement only from your Winnebago • Do not remove the radiator cap while engine ® Industries dealer or a reliable RV parts supplier. -
Page 19: Power Sofas And Beds
SECTION 2 – SAFETY AND PRECAUTIONS • To open the passenger side sliding door, push effects of exposure to formaldehyde. Inadequate down on the release button on the left-hand ventilation may allow formaldehyde and other side of the door while pushing door outward contaminants to accumulate in indoor air. -
Page 20: Roadside Emergency
SECTION 2 – SAFETY AND PRECAUTIONS thoroughly and quickly. Avoid grease buildup If Winnebago Industries determines that mold near the stove or sink. Clean the exhaust fan is present due to conditions it determines is not a above the stove often. -
Page 21: Wheel Trim - Standard
® Winnebago Industries does not assume Check for valve stem location and the valve responsibility for damage incurred while towing stem clearance notch (located on the back side of this vehicle. - Page 22 SECTION 2 – SAFETY AND PRECAUTIONS Chassis Supplied Wheel and Center Cover Valve Stem Clearance Notch When re-installing the front liner, make sure to align the stem clearance notch on the back of the liner with the valve stem. Valve Stem WA RNING If the notch is not aligned with the valve stem, the valve stem may be damaged...
-
Page 23: Wheels - Stylized Aluminum
SECTION 2 – SAFETY AND PRECAUTIONS Further Information WHEELS – STYLIZED See the chassis manufacturer’s user guide ALUMINUM provided in your InfoCase for complete ® (Mercedes-Benz Sprinter Chassis) instructions and re-torque information. – If Equipped The Alloy Wheels, hub covers, and push on WA RNING nut covers are mounted with the chassis supplied lug nuts which are concealed by push on nut... - Page 24 SECTION 2 – SAFETY AND PRECAUTIONS Removing the Wheel Note: Reference the chassis manufacturer’s user guide provided in your InfoCase for complete instructions and cautions on changing a wheel. 1. Once the vehicle is prepared for wheel removal, obtain the adapter from the co-driver Six Chassis Supplied Lug Nuts with attached foot well compartment and engage the adapter washers (located in the co-driver foot well...
-
Page 25: Jump Starting
SECTION 2 – SAFETY AND PRECAUTIONS ENGINE OVERHEAT If you see or hear steam escaping from the engine compartment or have any other reason to suspect an extreme engine overheating condition, pull the vehicle over to the roadside as soon as it is safe to do so, stop the engine, and get all passengers out of the vehicle. -
Page 27: Driving Your Motorhome
SECTION 3 – DRIVING YOUR MOTORHOME The information in this section refers only to SEATS - COMPANION features installed or adapted to the dash and driver compartment area by Winnebago -If Equipped ® Industries . It also includes passenger seating in Removing Companion Seats the living area of the coach. - Page 28 SECTION 3 – DRIVING YOUR MOTORHOME • With the seat tilted slightly rearward, lower the Pedestal/Seat Assembly Rear Hooks into the pockets in the floor plate. Rear Hooks (insert into floor plate pockets) • Tip the seat rearward until the lock pin clears Floor Plate the floor plate locking ramp, then re-lock the Locking Arm to avoid bending.
-
Page 29: Seat Belts
SECTION 3 – DRIVING YOUR MOTORHOME 1- Insert tab into buckle slot until it “clicks” and is locked 3- Press to release 2- Pull strap to tighten Adjustment NOTE: Anytime that the Companion Seat is in the vehicle, it must be in position with the To lengthen belt, swivel the tab end at a right Locking Arm in the LOCKED position, angle to belt and pull strap to desired length. -
Page 30: Child Restraints
SECTION 3 – DRIVING YOUR MOTORHOME Lap/Shoulder Belts CHILD RESTRAINTS Fastening A properly installed and secured child Hold the belt just behind the tongue. Next, restraint system can help reduce the chance or bring the belt across the body and insert the severity of personal injury to a child in an tongue into the buckle until the latch engages. - Page 31 SECTION 3 – DRIVING YOUR MOTORHOME 2. Tether Shoulder or Lap Belt Tether Anchor Loop (Located on back side of companion seat base) 3. Route the shoulder or lap belt through the child seat. Fasten the shoulder or lap belt and pull snug.
-
Page 32: Keys
SECTION 3 – DRIVING YOUR MOTORHOME Further Information KEYS See your chassis manual for instructions on Your motorhome is supplied with several activating, operating, and canceling hazard keys. In addition to the chassis manufacturer’s warning flashers. ignition key, you receive keys for the entrance door and exterior compartment doors. - Page 33 SECTION 3 – DRIVING YOUR MOTORHOME USB Cable (Located in compartment above dash radio) -Typical Installation Basic Operating Instructions See the manufacturer’s information in your • 1 - RESET - Press to reset the microprocessor. InfoCase for operating instructions. • 3 - +/- (Volume) - Press to set the volume.
-
Page 34: Infotainment Center/Gps
SECTION 3 – DRIVING YOUR MOTORHOME • Menu • Eject • CD/DVD • Navigation card slot • Navigation Radio Power Switch (Located on dash) • Press HOUSE to listen to the radio while parked • Camera without the ignition key on. •... -
Page 35: Battery Boost Switch
SECTION 3 – DRIVING YOUR MOTORHOME Satellite Radio ® Your coach is equipped with a SiriusXM satellite radio receiver that plays through your radio. See the receiver manufacturer’s information in your InfoCase for programming and operating instructions. iPod Connection Your coach is equipped with an iPod Radio Power Switch connection (located in the dash compartment (Located on lower dash area) -
Page 36: Engine Cooling System
SECTION 3 – DRIVING YOUR MOTORHOME Battery Boost Switch (Located on lower dash area) • Press and Hold in the ON position while turning Diesel Exhaust Fluid Fill ignition key for emergency starting power. (Located under front hood) -Typical installation shown ENGINE COOLING SYSTEM Further Information Do not remove the radiator cap while engine... -
Page 37: Valve Stem Access
SECTION 3 – DRIVING YOUR MOTORHOME VALVE STEM ACCESS ® (Mercedes-Benz Sprinter Chassis) Front Wheel Valve Stem Access on 18-Hole Steel Wheel with Push-On Full Wheel Trim –If Equipped 1. Obtain a double angle push/pull truck tire gauge. 6. When tire pressure testing is complete, reinstall the valve stem cap (with the cap still retained in the hose extension end). - Page 38 SECTION 3 – DRIVING YOUR MOTORHOME end, remove valve stem cap, insert valve stem extension into hose extension, and Inner reinstall valve stem extension onto valve rear stem until snug. dual Hose Pull off hose extension and re-insert extension valve stem cap into end of hose. 5.
-
Page 39: Tires
SECTION 3 – DRIVING YOUR MOTORHOME checked and adjusted after you have fully loaded the motorhome according to your personal needs. Thereafter, the alignment should be periodically inspected to help prevent uneven tire wear. Any excessive or abnormal tire wear may indicate worn or misaligned suspension or steering, unbalanced tire, or other tire/suspension problem. -
Page 41: Appliances And Systems
SECTION 4 – APPLIANCES AND SYSTEMS The appliances installed in your motorhome are manufactured by reputable RV appliance makers and have been tested by independent laboratories to meet all applicable standards and codes set for RV appliances. See Section 2 - Safety and Precautions of this manual for any safety and precautions you need to take regarding the operation of your appliances. -
Page 42: Refrigerator
SECTION 4 – APPLIANCES AND SYSTEMS Leveling Before operating the refrigerator when the motorhome is stationary, place a small level on the bottom of the refrigerator and make certain the unit is level. If over 1/2 of the bubble is inside the circle in any direction, the coach is level enough for continuous operation of the Refrigerator Operating Controls... -
Page 43: Refrigerator Service Access Compartment
SECTION 4 – APPLIANCES AND SYSTEMS • After 10 seconds the settings will dim. The green light indicates the refrigerator is still functioning. • To check the settings push the on/off switch again. The currently active settings will light Selecting a Source •... -
Page 44: Refrigerator Service Access Compartment
SECTION 4 – APPLIANCES AND SYSTEMS • Latch Open Refrigerator Access Compartment *Shown with cover removed • Latch -Typical View Closed REFRIGERATOR SERVICE ACCESS COMPARTMENT (Exterior) *Model 70X The exterior refrigerator service compartment allows access to the rear of the refrigerator for inspection, maintenance, and service. -
Page 45: Microwave Oven
SECTION 4 – APPLIANCES AND SYSTEMS Unlike homes, the amount of oxygen supply is limited due to the size of the recreational vehicle, and proper ventilation when using the cooking appliances avoids dangers of asphyxiation. It is especially important that cooking appliances not be used for comfort heating, as the danger of asphyxiation is greater when the appliance is used for long periods of time. -
Page 46: Systems Monitor Panel
SECTION 4 – APPLIANCES AND SYSTEMS Water And Holding Tank Levels Press and Hold the Levels Test switch to show approximate level on the monitor lights. Microwave Oven (Brand, model, and appearance shown may vary from your model) -Typical View The approximate fluid levels are measured by electronic sensors on the sides of the tanks. -
Page 47: Water Heater - Gas/ Electric
SECTION 4 – APPLIANCES AND SYSTEMS Propane Gas Level Press and Hold the Levels Test switch to show approximate propane tank level. The propane level is registered by a sending unit on the tank. The gauge mounted on the side of the tank will give a more accurate indication of actual tank level if needed. -
Page 48: Pressure-Temperature Relief Valve
SECTION 4 – APPLIANCES AND SYSTEMS Further Information mode and must be restarted. If this happens, turn the Water Heater switch off for about 5 minutes, See the Water Heater manufacturer’s then turn it back on. operation manual provided in your InfoCase for complete operating instructions, safety warnings, and maintenance information. -
Page 49: Propane Gas Furnace
SECTION 4 – APPLIANCES AND SYSTEMS To Replace the Air Gap: Thermostat/Switch 1. Turn off the Water Heater switch and • Move from OFF to desired temperature for furnace operation incoming water supply (city water and/or demand pump). 2. Open a faucet in the motorhome to relieve water pressure. -
Page 50: Roof Air Conditioning - With Heat Pump
SECTION 4 – APPLIANCES AND SYSTEMS To Shut Down To operate the heat pump • Move Thermostat switch to OFF position. • Turn the selector switch to the “High Heat” position, which allows the fan to operate at • Close Propane Gas Tank valve if coach will be high speed with maximum heat output. -
Page 51: Roof Air Conditioning - With Heat Strip
SECTION 4 – APPLIANCES AND SYSTEMS ROOF AIR CONDITIONING - WITH HEAT STRIP –If Equipped Your coach may be equipped with an air Check your Air Filter source heat strip built into the air conditioning system. Because the heat strip operates on Closed or blocked vents and a dirty air filter electricity, it provides economical heat inside can hinder the efficiency of a heat strip. -
Page 52: Air Conditioner Filter
SECTION 4 – APPLIANCES AND SYSTEMS the cooling mode, it will continue to cycle the compressor on and off until the selector switch is turned to another operation mode. • Position the louvers to the desired direction the discharge air is to flow. During Cooler Nights When outdoor temperatures drop in the evening or at night below 75 degrees F, the... -
Page 53: Propane Gas
SECTION 5 – PROPANE GAS PROPANE GAS SUPPLY WA RNING The propane gas system supplies fuel for the gas range/oven, water heater, furnace, and refrigerator (while in gas mode). When used and Do not alter or remove propane tank handled properly, this system is safe and valves or gauge. -
Page 54: Safe Use Of The Propane Gas System
SECTION 5 – PROPANE GAS Butane burns about 30 percent hotter than propane and can overheat some DANGER appliances, particularly refrigerators, and cause permanent damage. Other appliances designed to operate on All pilot lights, appliances, and their propane can become sooted and lose igniters (see operating instructions) shall efficiency by using butane fuel. -
Page 55: Propane Gas Warnings And Precautions
SECTION 5 – PROPANE GAS system components should be performed only by your dealer or a qualified propane gas DANGER service center. • Never attempt to connect natural gas to the propane gas system. IF YOU SMELL PROPANE • Have the entire propane gas system inspected 1. -
Page 56: Propane Gas Pressure Regulator
SECTION 5 – PROPANE GAS • Never use an open flame to test for propane gas leaks. Replace all protective covers and caps on propane system after filling. Make sure valve is closed and door latched securely. • Portable fuel-burning equipment, including wood and charcoal grills and stoves, shall not be used inside the recreational vehicle. -
Page 57: Propane Vaporization In Cold Weather
SECTION 5 – PROPANE GAS If regulator freeze-up should occur, you may attempt to thaw the regulator using a light bulb. DO NOT USE AN OPEN FLAME OR HEAT LAMP. If moisture begins to cause problems, have your propane gas dealer inject a small amount of dry methyl alcohol in your tank (approximately one ounce to 20 pounds or one pint to 100 gallons) to help guard against regulator freeze-... -
Page 59: Electrical
SECTION 6 – ELECTRICAL Your coach is equipped with an electrical the power converter automatically changes a system consisting of two separate voltages: portion of the 120-volt current to 12-volt DC current. All equipment in the motorhome that is • 12-volt DC system (battery current);... -
Page 60: Power Center
SECTION 6 – ELECTRICAL To connect to an external power source, plug the adapter end into the sidewall plug-in (located WA RNING above the rear driver side wheel) and the receptacle end to a suitable power outlet box. Service inlet access must be closed when utility connections are not in use. -
Page 61: Circuit Breakers - House 120-Volt Ac
SECTION 6 – ELECTRICAL Certain circuits, however, remain unchanged overheated. This can result from operating above for use by items which require 120-volt current, its maximum limit for an extended period of time such as the air conditioner(s), the refrigerator in or by obstruction of ventilation to unit. -
Page 62: Electrical Outlets - House 120-Volt Ac
SECTION 6 – ELECTRICAL NOTE: Typical view of breaker panel. Breaker • Push to Reset arrangement may vary according to circuit after appliance and equipment options. Fuses monthly testing and breakers are labeled on panel. or ground fault tripping. ELECTRICAL OUTLETS – HOUSE 120-VOLT AC A number of standard household electrical outlets are provided throughout the coach for... -
Page 63: Electrical System - House 12-Volt Dc
SECTION 6 – ELECTRICAL Operation Warnings and Cautions generator 10 seconds after the generator is started. The 10-second delay allows the generator to start easily without the burden of electrical loads. WA RNING Generator Basic Operation The exhaust of all internal combustion Generator switch is located on the Systems engines contains carbon monoxide (CO). -
Page 64: House/Coach Battery Disconnect Switch
SECTION 6 – ELECTRICAL Converter Always leave this switch ON while using the coach. See “Power Center.” NOTE: Some electronic displays and memory Chassis Battery functions may need to be reset after The chassis battery is used to operate the power has been reconnected. -
Page 65: Battery Access
SECTION 6 – ELECTRICAL Chassis Battery BATTERY ACCESS The chassis (starting) battery is located in a compartment “well” in the floor beneath carpet ahead of the driver seat. NOTICE Always refasten battery retainers when returning a battery to the compartment. House Battery The house battery is accessible from outside of the vehicle behind rear passenger side tires. -
Page 66: Battery Care
SECTION 6 – ELECTRICAL BATTERY CARE WA RNING Lead-acid type batteries are electro-chemical devices for storing and releasing electrical charge. As such, they are simply an electrical This vehicle, like other vehicles, may reservoir, not an electrical source. As soon as contain small amounts of one or more energy is removed from the battery, it should be substances which are listed by the state... -
Page 67: Circuit Breakers And Fuses - House 12-Volt Dc
If your coach is going to be unoccupied for year. ® two weeks or more, Winnebago Industries • Check the battery fluid level every month, or recommends disconnecting the chassis battery in more often in hot weather. -
Page 68: Battery Charge Meter
SECTION 6 – ELECTRICAL Automotive Chassis 12-Volt CIrcuit Breakers (Located on outboard side of passenger seat) House 12-Volt Fuses * Shown with cover removed (Located on right-hand -Typical View side of Power Converter) -Typical View The fuse panel accepts only blade type plug-in fuses. -
Page 69: Plumbing
SECTION 7 – PLUMBING FRESH WATER SYSTEM The Fresh Water System provides water to the galley sink, shower, bathroom lavatory, toilet, and water heater. Water may be supplied by either of two sources: • A fresh water tank and water pump located within the motorhome, or •... - Page 70 SECTION 7 – PLUMBING Fresh Water Valve Fresh Water Valve (Located in water service center) (Located in water service center) -Typical View -Typical View 4. Turn city water supply ON. Using City Water 5. Use the level display on the monitor panel to When connected to an outside source of water, oversee filling of the tank, or when the tank is the water bypasses the water pump and storage...
-
Page 71: Water Pump
SECTION 7 – PLUMBING Using Tank Water (Gravity Fill) NOTE: Ensure the Fresh Water valve is in NORMAL position to use the water • Turn Water Pump switch ON. While the pump. If the valve is in Tank Fill position, switch is on, the water pump will the pump will run continuously without automatically supply tank water as needed. -
Page 72: Water Pump Switch
SECTION 7 – PLUMBING Initial Waterline Priming 1. Ensure that all water drain valves are closed, including water heater valve. 2. Turn Water Pump switch to “OFF” position. 3. Fill water tank. 4. Open all faucets, hot and cold. 5. Turn ON the Water Pump switch. 6. -
Page 73: Cold Water Filter
SECTION 7 – PLUMBING Replacing the Cold Water Filter Cartridge You should replace the filter cartridge every season and when water flow from the faucet is too slow for convenience. The cartridge must be replaced at least every 12 months. •... -
Page 74: Disinfecting Your Fresh Water System
SECTION 7 – PLUMBING of tank capacity. This procedure will result in a residual chlorine concentration of 50 ppm in the water system. If a 100 ppm concentration is desired as discussed in Step 4, use 1/2 cup of household bleach with 1 gallon of water to prepare the chlorine solution. -
Page 75: Shower Hose Vacuum Breaker
SECTION 7 – PLUMBING SHOWER HOSE VACUUM TOILET BREAKER -If Equipped The toilet in your motorhome is very similar After using the shower, you may notice water to the household type, except that it is designed to dripping from the shower faucet assembly. The use only a small amount of water per flush. -
Page 76: Dumping Holding Tanks
SECTION 7 – PLUMBING appropriate waste water disposal site. This means 3. Place the outlet end of sewage drain hose into you can use the toilet, sinks, and shower even in disposal opening. areas where utility hookups are not available. 4. -
Page 77: Waste Water System - Waste Pump (Model 70X)
SECTION 7 – PLUMBING Using On-Site Sewer Hook-Ups tank contains the waste water from the galley sink and shower, and may include bathroom The sewage drain hose may remain attached to lavatory. the sewage drain outlet while the motorhome is See “Specifications”... - Page 78 SECTION 7 – PLUMBING Sewage Drain Hose (Located in water service center) -Typical View Black Waste Tank Drain Valve 2. Place the outlet end of sewage drain hose into (Located in water service center) disposal opening. 3. Turn sewage drain hose valve CLOCKWISE to OPEN.
-
Page 79: Waterline And Tank Drain Valves
SECTION 7 – PLUMBING WA RNING Service inlet access must be closed when utility connections are not in use. When using a sewer hook-up, keep the dump valves closed until a tank becomes full or when preparing to leave the site. This keeps the solids Gray Waste Tank Drain Valve in suspension, allowing them to be carried out (Located in water service center) -
Page 80: Water Heater Bypass Valve
SECTION 7 – PLUMBING D R A I N D R A I N C L O S E C L O S E L I N E - E N D V A L V E I N - L I N E V A L V E Waterline Drain Valves (Typical) -
Page 81: Winterizing Procedure
SECTION 7 – PLUMBING Leave bypass valve handle in NORMAL FLOW position if draining water and blowing out waterlines. Place in BYPASS position ONLY when using antifreeze solution in waterlines. WINTERIZING PROCEDURE You can winterize the water and plumbing system of your coach using one of the following two methods: •... - Page 82 A “blow-out” plug can be purchased at any closed. ® Do not add automotive antifreeze or Winnebago Industries dealer. caustic chemicals such as bleach or laundry detergents into the toilet bowl or holding tanks. Although these products...
- Page 83 SECTION 7 – PLUMBING Dump and Clean Holding Tanks Leave the Water Heater Bypass valve handle in NORMAL FLOW position if draining water 16. Completely drain the waste water holding and blowing out waterlines. Place in BYPASS tanks at an approved waste disposal site. position ONLY when using antifreeze solution in Drain the sewage (black) tank first so the waterlines.
- Page 84 SECTION 7 – PLUMBING • Winterization Port Set Up Winterization Valves 2. Turn the Water Heater Bypass valve to • Antifreeze Siphon Tube BYPASS position. (See “Water System Drain Valve Locations” chart at the end of this section for location on your model). Antifreeze Siphon Tube/Winterization Port (Located near the sliding entrance door) 4.
- Page 85 SECTION 7 – PLUMBING Fill Lines 5. Turn the Water Pump switch ON. 6. Open each hot and cold water faucet handle/ knob in the coach - one at a time each in turn until antifreeze solution just begins to flow from the faucet, then close.
- Page 86 SECTION 7 – PLUMBING • Open Sewage Drain Hose valve. • Press and Hold the Waste Pump switch for approximately 5-10 seconds to get antifreeze into the pump. • Close Black Waste Tank Drain and Sewage Drain Hose valves. 7-18...
-
Page 87: Water System Drain Valve Locations
SECTION 7 – PLUMBING WATER SYSTEM DRAIN VALVE LOCATIONS Model System Drain Valve Locations BM170X Waterline Drain • Three (3) drain valves in water service center. Valves • Open exterior shower faucet and lay shower head on ground. Place the tip of your finger inside the city water connection and gently press the backflow valve (small “button”... -
Page 89: Entertainment
SECTION 8 – ENTERTAINMENT TV (12-VOLT LED) TV – INDOOR/OUTDOOR (MODEL 70A) The LED flat panel TV is powered by 12-volt DC current. Your coach is featured with swivel TV The 12-volt current is supplied from the house mechanism, which allows you to watch TV batteries (or from the power converter when inside or outside your vehicle. -
Page 90: Tv - Swivel (Model 70X)
SECTION 8 – ENTERTAINMENT NOTE: Ensure TV is in the stored position AUDIO-VIDEO SYSTEM BASIC (facing interior of coach) before closing OPERATION the sliding entrance door to avoid property damage. NOTE: For your convenience, we have also Further Information included a handy, tear-out version of this “A/V System Basic Operation”... -
Page 91: Exterior Speakers
SECTION 8 – ENTERTAINMENT Set TV Video Input 2. Turn the TV ON. 3. Press the AUX button (located just below the • Turn TV and DVD player ON. display on the face of the DVD player.) This • Press the MODE button on the TV or the will route the TV stereo sound output through SOURCE button on the DVD player remote the DVD player and out to the Deluxe Sound... -
Page 92: Tv Antenna - Digital
SECTION 8 – ENTERTAINMENT Digital Antenna Power Switch Exterior Speaker Switch (Located in an overhead cabinet or “Speaker C” mounted on a wall near the TV) (Located on the interior stereo radio) 2. Turn ON the Signal Meter Power switch (located on the side of the Signal Meter). -
Page 93: Tv Signal Amplifier
SECTION 8 – ENTERTAINMENT 6. Rotate antenna to illuminate the last flickering LED light. 7. Repeat Steps 5 and 6 to pinpoint signal reception. NOTE: Refer to television manufacturer’s instructions to scan for available channels. Further Information See the antenna manufacturer’s user guide provided in your InfoCase for complete operating and maintenance information. -
Page 95: Furniture And Softgoods
SECTION 9 – FURNITURE AND SOFTGOODS SLEEPING FACILITIES WA RNING Sleeping facilities are not intended for use while vehicle is in motion. For safety, passengers must use safety belted seating positions while vehicle is in motion. • Reverse steps to convert back into twin beds. TWIN/FULL-SIZE BED CONVERSION SOFA/BED CONVERSION... - Page 96 SECTION 9 – FURNITURE AND SOFTGOODS 3. Disengage security lock (located beneath countertop extension). 6. Adjoin cushion extension hooks with metal receivers on edge of sofa seat, ensuring proper engagement. 7. Lower cushion extension to rest on countertop extension support. Bed is now ready for use.
-
Page 97: Sofa/Bed Conversion (Model 70X)
SECTION 9 – FURNITURE AND SOFTGOODS • Press and Hold the DOWN arrow on the electric couch switch (located on cabinet wall ahead of the couch) until couch is fully extended, then release. • Retract countertop top extension to stored position. -
Page 98: Dinette Conversion
SECTION 9 – FURNITURE AND SOFTGOODS DINETTE CONVERSION Model 70A • Lift rear bed board to the open position. Bed Extension 1. Remove dinette table top from beneath sofa. 2. Remove seat bench cushions and place table between bench frames. •... - Page 99 SECTION 9 – FURNITURE AND SOFTGOODS • Place dinette table top securely on dinette table leg. • Insert dinette table leg into metal receiver on the floor. NOTE: Driver and passenger cab seats may be rotated for additional seating (see NOTE: Your coach may be equipped with two following photo).
-
Page 100: Wardrobe Cabinet - Removable
SECTION 9 – FURNITURE AND SOFTGOODS 2. Release Wardrobe Cabinet from floor plate by • Reverse steps to store table. rotating the Locking Arm fully COUNTER- CLOCKWISE to the unlocked position. WARDROBE CABINET - REMOVABLE -If Equipped Your coach may be equipped with a removable Wardrobe Cabinet for additional storage space. - Page 101 SECTION 9 – FURNITURE AND SOFTGOODS 2. Install Wardrobe Cabinet (with bottom wood panel removed) over floor plate, ensuring that the four (4) floor plate bolts are aligned with the holes inside the Wardrobe Cabinet floor. NOTE: Use care when removing cabinet from vehicle to avoid possible property damage.
-
Page 102: Roller Shades
No matter which species you choose for your new Winnebago Industries motorhome cabinetry, please keep in mind that no two pieces of wood are exactly the same. -
Page 103: Maintenance And Storage
• Have the sealant replaced if you notice any of vehicle can cause damaging rust or corrosion on the above. Your local Winnebago Industries steel or aluminum parts and can add needless dealer has the correct and necessary parts and weight to the vehicle. -
Page 104: Exterior Finish
SECTION 10 – MAINTENANCE AND STORAGE undercarriage regularly with water, especially NOTE: Avoid aiming water flow from a hose or horizontal surfaces, cavities, and other areas spray from high-pressure washing where mud and other deposits may collect. equipment into any appliance intake because damage or difficulty in operating appliances may occur. -
Page 105: Exterior Graphic Care
SECTION 10 – MAINTENANCE AND STORAGE NOTE: If you use a polish or a cleaning compound that does not contain a wax NOTICE preservative, we recommend reapplying a coat of hard wax after cleaning or polishing the finish. Do not use citrus-based cleaners on polycarbonate finishes. -
Page 106: Exterior Lights
EXTERIOR LIGHTS motorhome is parked for an extended ® period of time. Most Winnebago Industries vehicles have polycarbonate lenses on exterior lamps, which are very sensitive to a variety of chemical WA RNING solvents and cleaners. -
Page 107: Cabinetry - Cleaning
SECTION 10 – MAINTENANCE AND STORAGE Vinyl simulated wood panels may be cleaned with a mild, water-based cleaner and a soft cloth. UltraLeather Cleaning Chart Do not use solvents on vinyl wood panels. Detergent/ Cleaner/ Type of Stain Water Degreaser NOTE: Many cabinetry and furniture items ... -
Page 108: Tables And Countertops
SECTION 10 – MAINTENANCE AND STORAGE To remove cuts and scratches, use a more GALLEY SINK ® aggressive cleaning powder such as Comet moistened steel wool soap pad, or green scouring Stainless Steel pad. We recommend that you finish the entire Care and Cleaning Instructions surface using the same cleaning material and scrubbing method to maintain a uniform... -
Page 109: Vinyl Flooring
SECTION 10 – MAINTENANCE AND STORAGE Treatment of Stains VINYL FLOORING Acids, alkali, alcoholic beverages, coffee, soft drinks, ketchup, fruit, fruit juices, food, Care and Maintenance vegetables, mustard, ink, and iodine: You can easily maintain the beauty of your • Remove the stain with lukewarm water and a vinyl flooring with little effort, by following cloth or sponge. -
Page 110: Doors And Windows
SECTION 10 – MAINTENANCE AND STORAGE Tub and Shower Walls 5. Fully charge the batteries. Batteries must have at least 80% charge to survive The tub and shower walls in the bathroom freezing temperatures and long period of should be cleaned with mild soap and warm non-use. -
Page 111: Vehicle Storage - Removal
SECTION 10 – MAINTENANCE AND STORAGE If you are storing your vehicle through the 15. Replace batteries, if necessary, and check out winter, or in cold climates, extra preparations electrical system to make sure all lights and must be made to protect equipment and systems electrical components operate. -
Page 112: Coach Maintenance Chart
SECTION 10 – MAINTENANCE AND STORAGE COACH MAINTENANCE CHART These recommendations apply for normal recreational use. Heavy duty or full-time use may require more frequent maintenance intervals. Always use specified sections or manufacturer’s guide for further information and instructions. Propane Gas System ... - Page 113 SECTION 10 – MAINTENANCE AND STORAGE COACH MAINTENANCE CHART These recommendations apply for normal recreational use. Heavy duty or full-time use may require more frequent maintenance intervals. Always use specified sections or manufacturer’s guide for further information and instructions. Safety Equipment Check operation of the following items: ...
- Page 114 SECTION 10 – MAINTENANCE AND STORAGE COACH MAINTENANCE CHART These recommendations apply for normal recreational use. Heavy duty or full-time use may require more frequent maintenance intervals. Always use specified sections or manufacturer’s guide for further information and instructions. Sealants ...
-
Page 115: Miscellaneous
SECTION 11 – MISCELLANEOUS NOTE: We recommend that you dump all LOADING THE VEHICLE holding tanks before traveling to avoid carrying unnecessary weight. NOTE: Your motorhome’s load capacity is designated by weight, not by volume, so you cannot necessarily use all available space when loading your motorhome. - Page 116 SECTION 11 – MISCELLANEOUS Corner Weighing (Side-to-Side) You will first drive only your front wheels onto the scale pad, then drive ahead so that the The most accurate method of weighing a whole vehicle is on the scale, then finally pull off motorhome is to weigh each “corner”...
-
Page 117: Car Or Trailer Towing
SECTION 11 – MISCELLANEOUS axle is 12,000 lbs., then the load on each rear dual Because of individual vehicle use and loading set (left rear duals or right rear duals) should not habits, we recommend weighing the vehicle exceed 6,000 lbs. while fully loaded to avoid exceeding any of the listed Gross Weight Ratings. -
Page 118: Trailer Wiring Connector
SECTION 11 – MISCELLANEOUS Check state regulations on trailer weight and TRAILER WIRING trailer brake requirements to be sure you select CONNECTOR the right equipment before towing. Before descending a steep or long grade when Your coach is pre-wired for trailer or car towing a trailer, reduce speed and shift into a towing lights with a 7-pin socket. -
Page 119: Windows
Class 3 hitch may have a –If Equipped label limiting vertical tongue load to 350 The vent dome is raised and lowered using the lbs. All Winnebago Industries models Dome Crank knob on the fan. equipped with a Class IV hitch have a 11-5... -
Page 120: Power Roof Ventilator
SECTION 11 – MISCELLANEOUS The turbine fan will start automatically as the 5. If you want the vent dome raised without the vent is raised, and stop as the vent is lowered. fan running, turn Off either the Fan Power switch or Fan Speed knob (0-Off ). -
Page 121: Soap Dispenser
SECTION 11 – MISCELLANEOUS SOAP DISPENSER The Soap Dispenser in your vehicle is a handy, central location for your lotions, soaps, shampoos, and conditioners. Refilling the dispenser is quick and easy. When the level indicator window shows that the liquid is running low, unlock and open the dispenser shell, unsnap the lid of the desired chamber, and refill. -
Page 122: Slide-Out Compartment Tray
SECTION 11 – MISCELLANEOUS 2. Extend slide tray. 3. Press release button (located on bottom of dispenser) to open. 3. To store, push slide tray in until it “clicks” into locked position. AWNING – POWER –If Equipped The Power Awning switch and Awning Light SLIDE-OUT COMPARTMENT switch is located near the porch light. -
Page 123: Effects Of Prolonged Occupancy
SECTION 11 – MISCELLANEOUS Operating the Awning Note: The awning opens and closes with a steep pitch. On low profile vans, the leading edge of the awning may hit the top of the sliding door if the door is open while extending or retracting the awning. -
Page 124: Humidity And Condensation
SECTION 11 – MISCELLANEOUS Humidity and Condensation Moisture condensing on the inside of windows is a visible indication that there is too much humidity inside the coach. Excessive moisture can cause water stains or mildew, which can damage interior items such as upholstery and cabinets. - Page 125 INDEX About this Manual ..........................1-1 Air Conditioner Filter ........................... 4-12 Air Conditioner/Heater – Automotive (Dash) ..................3-6 Audio-Video System Basic Operation ....................8-2 Awning – Power ........................... 11-8 Bathroom .............................. 10-7 Battery Access ............................6-7 Battery Boost Switch ..........................3-9 Battery Care ............................
- Page 126 Index Fire Extinguisher ............................. 2-5 Formaldehyde Information ........................2-7 Fresh Water System ..........................7-1 Front Axle Tire Alignment ........................1-2 Fuel and Propane Gas ..........................2-2 Galley Sink ............................10-6 General Warnings ........................... 2-1 Ground Fault Circuit Interrupter ......................6-4 Hazard Warning Flashers ........................
- Page 127 Index Reporting Safety Defects ........................1-2 Roadside Emergency ..........................2-8 Roller Shades ............................9-8 Roof ..............................10-1 Roof Air Conditioning - with Heat Pump ..................... 4-10 Roof Air Conditioning - with Heat Strip ....................4-11 Roof Air Conditioning System ......................4-11 Safe Use of the Propane Gas System ......................
- Page 128 Index Water Heater - Gas/ Electric ........................4-7 Water Heater Bypass Valve ........................7-12 Water Pump ............................7-3 Water System Drain Valve Locations ....................7-19 Waterline and Tank Drain Valves ......................7-11 Weighing Your Loaded Vehicle ......................11-1 Wheel Trim – Standard ........................... 2-9 Wheels –...
Need help?
Do you have a question about the Era Touring coach and is the answer not in the manual?
Questions and answers