Table of Contents
Advertisement
Quick Links
Contents
Contents
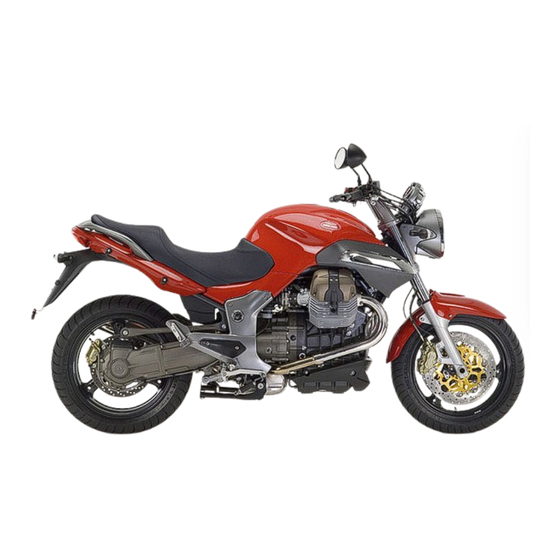
Breva
1100
Breva
1100
Aspects and vehicle characteristics
Aspects and vehicle characteristics
General data
Dashboard and immobilizer
Electronic Injection, description and functioning
Electronic injection, description and functioning
Engine
Engine
New electro
New electro
Diagnosis
Diagnosis
Balancing throttle bodies
Balancing throttle bodies
-
mechanical components
-
mechanical components
-
-
Axone
1
Advertisement
Table of Contents

Related Manuals for MOTO GUZZI Breva 1100


Summary of Contents for MOTO GUZZI Breva 1100
- Page 1 Contents Contents Breva 1100 Breva 1100 Aspects and vehicle characteristics Aspects and vehicle characteristics General data General data Dashboard and immobilizer Dashboard and immobilizer Electronic injection, description and functioning Electronic injection, description and functioning Engine Engine New electro mechanical components New electro mechanical components Diagnosis...
- Page 2 Aspect vehicle characteristics Aspect vehicle characteristics...
- Page 3 Aspect vehicle characteristics Aspect vehicle characteristics Total view of vehicle : dimensions...
- Page 4 Aspect vehicle characteristics Aspect vehicle characteristics General data General data Weight: 248 Kg Output: max. KW 63,0 at 7500 rpm Torque: Nm 85,0 a 6800 rpm Maximum speed in 6th gear 210 Km/h Front tire: 120/70 ZR17 (58W) pressure 1/2 persons 250kPa±10 Rear tire: 180/55 ZR17 (73W) pressure 1/2 persons 280kPa±10 Injection/ignition system MAGNETI MARELLI Computer IAW 5AM2 with map alfa/n...
- Page 5 Aspect vehicle characteristics Aspect vehicle characteristics Frame ZGULP...
- Page 6 Aspect vehicle characteristics Aspect vehicle characteristics Fuel tank Fuel pump 23 l ± 0,5 l Capacity Material Nylon...
- Page 7 Aspect vehicle characteristics Aspect vehicle characteristics Front brakes Rear brakes Double calipers and discs...
- Page 8 Aspect vehicle characteristics Aspect vehicle characteristics Additional equipment Accessories (optional): Accessories (optional): - Windscreen Carrying Case adjustable height Carrying Case adjustable height Side Side bags bags Alarm systems available Alarm systems available...
- Page 9 Dashboard Dashboard...
- Page 10 Dashboard : identifying areas Dashboard : identifying areas Rev counter Positioned at the left, final range 10.000 rpm. At the end of the scale is a red warning light (Led) without monogram to indicate to shift gear when surpassing a preset level rpm.
- Page 11 Dashboard : identifying areas Dashboard : identifying areas Speedometer at the center Fuel level indicator Under the fuel warning light sits a red warning light without pictogram (Led) for the eventual alarm system Multifunctional Display Multifunctional Display...
-
Page 12: Fuel Level Indicator
Dashboard : identifying areas Dashboard : identifying areas Fuel level indicator The dashboard is connected to a variable resistor. Measurements that fall out of the normal operating range are considered as faults and are signalled by the diagnostics. The indications show at the instrument panel at the right and the spare indicator underneath. - Page 13 Dashboard : identifying areas Dashboard : identifying areas Led indicators From left to right: - Indicator green, left hand indicator - Indicator orange, ABS faulty (CURRENTLY NOT ACTIVE) - Indicator red, Alarm: engine oil pressure problem, EFI and w/ vehicle OFF indicator immobilizer.
- Page 14 Dashboard: indicators and lights Dashboard: indicators and lights Direction indicators. • The dashboards controls the indicator lights, as well for the single indications left and right as for the combined circuits for the “Hazard” function. • Indications for problems with circuits ( bulb burnt or short circuited) by doubling the flashing frequency of the warning light and with indication on the dashboard left or right Activation/deactivation of the Hazard function...
- Page 15 Dashboard: selections Dashboard: selections The commands to move between various dashboards functions are obtained by a three position selector at the light switch at the left hand steering handle. The selector has following three positions: - Trip 1 - Trip 2 - Mode In the first position will show the data of TRIP1, In the second the data of TRIP2...
- Page 16 Dashboard: display Dashboard: display Basic information •On the display appear as well the basic information as the information activated by the selector position. These are: •Clock. Clock settings can be 12 or 24 hour indications, where 12 hour indications show AM or PM. •Odometer.
- Page 17 Dashboard: display Dashboard: display Handles heater (OPTIONAL) With engine running, by pressing insisting at command handles heating, an icon will show at the display that substitutes the selected trip indication. That will be transferred to the central part of the display. With every short pulse a three positions bar will grow indicating the power level present in the handles heating.
- Page 18 Dashboard: immobilizer Dashboard: immobilizer The immobilizer system is integrated in the electronic dashboard. At key-to-ON the dashboard will read the key code. If the code corresponds to the one memorized, the dashboard will activate the initial check and will allow the ECU for engine starting, via the CAN Bus line.
- Page 19 Dashboard : display Dashboard : display Trip 1-2 In these two positions of the display are demonstrated the data relevant for trips 1 and 2. In the central area is constantly displayed the partial distance covered while in the lower portion the following data will be shown in rotation: •Trip time •Average Fuel consumption of the trip •Current consumption...
- Page 20 Dashboard : MODE Dashboard : MODE Mode in this position you can select the other functions of the dashboard with the vehicle stopped and thus with speed equal to Zero with every short pulse of the switch SET you can see in sequence the following functions: stopwatch battery voltage Menu...
- Page 21 Dashboard :Menu Dashboard :Menu Access to this function is only possible with the vehicle stopped .The graphic of this menu is as follows: To move your selection down-wards,a short pulse of the switch is sufficient Pressing the switch down for longer gives the confirmation of your selection of the relative item.
- Page 22 Dashboard : Settings Dashboard : Settings SETTINGS When the settings menu is selected, which can also be done by the driver or bike owner, a drop-down menu shows: Exit Adjust Clock Change gear shift rpm °C/°F 12H/24/ Led immobiliser (turn off when installing the optional alarm system) Change code Recover code For detailed functioning please read with attention the workshop manuals...
- Page 23 Dashboard : Settings Dashboard : Settings Change CODE In case one remembers its own code is sufficient to insert it and in sequence we will insert the new code which will automatically be memorised. In case of a new vehicle the user code is: 00000 In case of a new vehicle the user code is: 00000 Recover CODE In case one does not remember it own code and wishes to modify it, it is requested to...
- Page 24 To enter in this menu, that will operate on the diagnostic functions and therefore the technical assistance access is reserved to the , a code is requested. Appears the text: INSERT SERVICE CODE 36421 For the Breva 1100 this is: The functions in this menu are: Exit Faults ECU Faults dashboard Cancel Fault codes...
- Page 25 Dashboard : DIAGNOSTICS Dashboard : DIAGNOSTICS FAULTS ECU . The dashboard receives from the central computer only actual faults Description Error code Error throttle valve C.C. Vcc ECU 10 Error throttle valve C.C. Gnd ECU 11 Error Engine temperature C.C. Vcc ECU 14 Error Engine temperature C.C Gnd ECU 15...
- Page 26 Dashboard : DIAGNOSTICS Dashboard : DIAGNOSTICS FAULTS ECU . The dashboard receives from the central computer only actual faults Description Error code Error Local Loop-back ECU 37 Error relay starter C.C. Vcc ECU 44 Error relay starter C.C. ground ECU 45 Error cannister C.C Vcc ECU 46 Error cannister C.C.
- Page 27 Dashboard : DIAGNOSTICS Dashboard : DIAGNOSTICS DASHBOARD ERRORS In this mode a table lists eventual mistakes of the immobiliser and its connected sensors. The error codes are explained as follows Description Error code Immobiliser fault: key code read but not recognised DSB 01 Immobiliser fault: key code not read (key not present or transponder broken)
- Page 28 Dashboard : DIAGNOSTICS Dashboard : DIAGNOSTICS CANCEL ERRORS With this option only dashboard faults are erased. A final confirmation will be requested Reset service This function allows to reset the service interval indicator. For the end of line testing purposes this operation also has the possibility for one time only to set the odometer to zero if done within the first 200 kilometers...
- Page 29 The white connector is underneath the saddle besides the fuse box close to the diagnostic connector of the injection system. To connect Axone it is necessary to use the connector Ditech which is present at the confection of Axone 2000 Aprilia- Moto Guzzi...
- Page 30 Dashboard : DIAGNOSTICS Dashboard : DIAGNOSTICS Function MODIFY KEYS This function can be used: 1) in case of key loss, the dealer can cancel the lost key 2) to activate up to 4 keys 3) if necessary use a new key ignition lock and memorise a new set of keys.
- Page 31 Dashboard : DIAGNOSTICS Dashboard : DIAGNOSTICS Function CHANGE KEYS In case of the use of a new ignition key set, details of the procedure are as follows: Once turned the key to ON the dashboard not recognising the key will ask for the user code: insert the user code. At this point one can enter in MENU, DIAGNOSIS( inserting the service code) CHANGE KEYS and start the procedure of memorising the new keys.
- Page 32 Dashboard : DIAGNOSTICS Dashboard : DIAGNOSTICS Indication of service interval When nearing service interval mileage a small wrench will appear in the display. This will be at the same position as the ice symbol. This indicator can be reset starting 300 kilometers prior to the service interval, in this 300 kilometer range the indicator will normally blink five seconds and then go off.
- Page 33 Dashboard : visualise warnings Dashboard : visualise warnings The dashboard shows to the driver in the lower portion of its display the following alarms by keeping the red warning light on: Oil level SERVICE Errors from computer or dashboard Communication faults with the ECU example:...
- Page 34 Dashboard: DIAGNOSTICS Dashboard: DIAGNOSTICS Engine oil sensor faults The dashboard will reveal oil pressure faults as well as sensor faults. The oil sensor fault is detected with engine stopped and key in on position, if the sensor is not conducting (open circuit). This fault is indicated by lightening the warning “service”...
- Page 35 Dashboard : Dashboard : connections connections PIN SERVIZIO PIN SERVIZIO +KEY +BATTERY COMAND RH INDICATOR COMAND LH INDICATOR OIL SENSOR RESET INDICATORI/LED ANTITHEFT BEAM LIGHTS IN HAZARD LED ANTI THEFT (if connected) SELECT 1 SELECT 3 SELECT 2 SENSOR GROUND FUEL LEVEL SENSOR GENERAL GROUND AIR TEMPERATURE SENSOR...
- Page 36 Engine Engine...
- Page 37 Engine: principle characteristics Engine: principle characteristics Max output. KW 63,0 at 7500 rpm Torque: Nm 85,0 at 6800 rpm Idle speed: 1100 ± 100 giri/min Intake valve lift: 10,74 mm Exhaust valve lift: 10,74 mm Gap (clearance) intake valve 0,15 ± 0,02 (inspect at 1000 km and every 10.000 km) Gap (clearance) exhaust valve 0,2 ±...
- Page 38 Engine: principle characteristics Engine: principle characteristics From a technical point of view the engine is very similar to the one already installed to the V11. A series of optimisations and improvements of single components have been Implemented. Principal novelties are: •...
- Page 39 Engine: Lubrication group Engine: Lubrication group The circuit is partially redesigned. The pressure valve is now installed prior to the filter, in case of over pressure (valve opened), circulates the oil to the intake of the oil pump instead of release the oil to the crankcase, avoiding unwanted emulsing.
- Page 40 Engine: Lubrication group Engine: Lubrication group Recommended Engine Oil: Agip RACING 4T 5W-40 Recommended Gear box Oil : Agip ROTRA MP/S 85 W 140 Cardan Oil : TRUCK GEAR 85 W 140 Do not insert Chemical additives Nor non recommended Oils...
- Page 41 Engine: Lubrication group Engine: Lubrication group Circuit with oil pressure valve open Thermostatic valve filter Oil cooler To the banks Pump delivery Oil pressure valve Pump intake From the strainer...
- Page 42 Engine: Lubrication group Engine: Lubrication group Thermostatic valve Oil pressure valve filter To the rear banks oil cooler strainer...
- Page 43 Engine: Lubrication group Engine: Lubrication group oil cooler strainer To rear banks filter...
- Page 44 Engine: oil filter Engine: oil filter Oil filter...
- Page 45 Engine: gearbox Engine: gearbox 6 speed gearbox with straight sliding gears and flexible coupling The gears are mounted on roller bearings The new pre-selector allows for a softer shift thanks to the desmodromic drum mounted on bearings The flexible coupling contains an undulated washer that needs to dampen the vibrations at idle (noisy) while the 8 cup springs allow a gradual transmission of the engine torque as well in engagement as disengagement.
- Page 46 Engine: gearbox Engine: gearbox Desmodromic drum preselector Secundary shaft Friction push rod 3 forks Friction shaft Primary shaft...
- Page 47 Engine: gearbox Engine: gearbox Undulated washer Primary reduction idle gear with helical teeth...
- Page 48 Engine: gearbox Engine: gearbox Attention, the neutral switch needs To be removed before extracting The desmodromic drum when Disassembling. In phase of Reassembly it should be installed At the end of the procedure Oil level is not checked based on a level measurement, but on the correct amount: 500 cc...
- Page 49 Transmission gear Transmission gear...
- Page 50 Transmission gear principle Transmission gear principle characteristics characteristics...
- Page 51 Pinion housing Pinion housing Oil bleeder plug Characteristics: Check and change oil Oil filler and level plug Oil drain plug...
- Page 52 Pinion housing : oil Pinion housing : oil...
- Page 53 Transmission gear disassembly Transmission gear disassembly assembly assembly assembly disassembly operations related replacement of the rubber assembly disassembly operations related replacement of the rubber covers 6 and 14 and the washer covers 6 and 14 and the washer...
- Page 54 Transmission gear disassembly Transmission gear disassembly assembly assembly...
- Page 55 Transmission gear disassembly Transmission gear disassembly assembly assembly Relative rotating axle replaceable only the 2 bearings with universal Relative rotating axle replaceable only the 2 bearings with universal pullers pullers ° ° Reassembly effected heating both bearings Reassembly effected heating both bearings...
- Page 56 Transmission gear disassembly Transmission gear disassembly assembly assembly pignon group only replace sealer with respective holder pignon group only replace sealer with respective holder...
- Page 57 Transmission gear disassembly Transmission gear disassembly assembly assembly support group completely replaceable support group completely replaceable...
- Page 58 Transmission gear : special tools Transmission gear : special tools Support housing Tampone tenuta asse ruota Manico Tampone snodo sferico Spanner sealer pignon Tampone tenuta ghiera pignone Support transmission gear...
- Page 59 Electronic injection Electronic injection...
- Page 60 Electronic injection 5AM 2 Electronic injection 5AM 2 DESCRIPTION INJECTION-IGNITION SYSTEM General information on injection-ignition system The injection and ignition system with electronic integrated control allow to optimize performance and operation of the engine, reducing the specific consumption and polluting elements in the exhaust gas. With these systems, as a matter of fact, is guaranteed an optimal report between air and fuel and ignition timing advance management...
- Page 61 Electronic injection Electronic injection Effect of the relation air to fuel and ignition timing advance The correct management of the relation between air and fuel and the ignition timing advance is the basis of the optimal functioning of the engine. The ideal relation between air and fuel is the stechiometric relation in weight, which determines the complete combustion insufficient air or air in access will create a rich or lean mixture, which will influence...
- Page 62 Electronic injection Electronic injection The computer is an electronic unit of the digital type with microprocessor .To realize optimal functioning of the engine, via a series of sensors, functioning and condition of the engine are continuously monitored. The principal sensors are: Engine RPM sensor measures the number of revolutions of the engine and the phase of each...
- Page 63 Electronic injection 5AM 2 Electronic injection 5AM 2 Actuator control is determined by the information received from the sensors: - amount of fuel injected to each cylinder in sequential mode and not parallel, by controlling the opening time of the injectors and thus also injection timing is referred to the intake stroke of each cylinder - ignition timing advance (ignition coil) Principal novelty on the system of injection with computer Marelli 5AM 2l lies in...
- Page 64 Electronic injection Electronic injection : fuel circuit : fuel circuit Fuel tank: capacity l 23 ± 0,5 l The fuel pump group that is positioned in the fuel tank contains: - fuel level indicator sensor - fuel filter - fuel pressure regulator nominal pressure value 3bar - power supply 12V...
- Page 65 Electronic injection Electronic injection : fuel circuit : fuel circuit Injectors The command sent by the computer is of the pulsating type. This will determine the movement of the center part of the solenoid, revealing the opening of the injector With a constant fuel pressure determined by the regulator, present on the pump, of 3±0,2 the quantity injected depends exclusively...
- Page 66 Electronic injection fuel circuit Electronic injection fuel circuit Pay attention to the position of the fuel tube from fuel tank to injectors that needs to run aside the air filter not underneath...
- Page 67 Electronic injection : intake air Electronic injection : intake air Air temperature sensor NTC installed in air filter housing °c kohm 100.950 9.750 5.970 3.750 2.420 1.600 0.280...
- Page 68 Electronic injection : intake air Electronic injection : intake air Potentiometer throttle valve This sensor informs the computer about the position of the throttle valve. The mechanical degrees are transferred into an electrical signal under the form of voltage. In function of this signal the computer foresees to adjust the time of injection to optimize the stechiometric report.
- Page 69 Electronic injection :computer 5AM 2 Electronic injection :computer 5AM 2 Located in front underneath the fuel tank has to connectors Connector A - from 1 to 38 pin Connector B - from 1 to 38 pin...
- Page 70 Electronic injection :computer 5AM 2 Electronic injection :computer 5AM 2 Connections Engine Computer 20 power supply 5V (sensors NTC) 3 TPS signal Connector A 23 neutral signal 5 Engine temperature sensor 25 RPM sensor signal 9 stepper motor + 28 Injector cylinder lh. 10 command ignition coil rh.
- Page 71 Electronic injection :computer 5AM 2 Electronic injection :computer 5AM 2 Connections Engine Computer 1 start relay command pin 85 20 CAN – H (ccm/dashboard) 22 oxygen sensor signal Connector B 4 protected power-supply from dash board 24 speed sensor signal in 6 secondary relay command pin 86 7 k-line (reprogramming dashboard) 27 “engine kill”...
- Page 72 COMPONENTS – IGNITION COMPONENTS – IGNITION The system used is of the inductive type The computer works with following parameters: - Engine load, - Engine temperature, - Injection time: determines the command of ignition advance Primary: to measure between pin 1and 15. value: 0,9 a 1,1 Ω...
- Page 73 COMPONENTS – IGNITION COMPONENTS – IGNITION Spark plug cap and spark plug Engine equipped with double ignition Production make position 1 PMR8B position 2 BPR6ES Cap resistances 5 k Ω To avoid fast wear of the platinum electrodes of the internal plug, it is important not to switch The high tension cables on the bobine (cable with red marking –...
- Page 74 COMPONENTS – ELECTRICS COMPONENTS – ELECTRICS Speed sensor Located at front fork: inductive active type Connector with 3 pin: Power-supply 12V Outgoing signal from pin 24 connector B ground Resistance Resistance With connector disconnected With connector disconnected between pin 2 e 3 between pin 2 e 3 Ω...
- Page 75 COMPONENTS – ELECTRICS COMPONENTS – ELECTRICS Engine temperature sensor This sensor is supplied with 5V has NTC characteristic, sends to the computer a variable signal in function of the temperature, to manage stochiometric report during engine warm-up °C °C KΩ KΩ...
- Page 76 COMPONENTS – ELECTRICS COMPONENTS – ELECTRICS Crankshaft position sensor RPM and alignment sensor, measures engine RPM and position of each cylinder with respect to TDC. A sensor with connector with tree wires.: pin positive tension pin negative tension pin shield wire Ω...
-
Page 77: Idle Speed Control
COMPONENTS – ELECTRICS COMPONENTS – ELECTRICS Idle speed control The computer in order to increase the amount of by-pass air, with in consequence the increase of engine rpm at idle, uses a stepper motor. Its function consists of a displacement of the central axis which by its rotational movement opens and closes the bypass, thus allowing air to by-pass the throttle valve. - Page 78 COMPONENTS – ELECTRICS COMPONENTS – ELECTRICS Emission control To obtain an ideal mixture it is necessary that the amount of intake air for the combustion is in equal measure to the theoretical amount needed for a complete combustion of the fuel injected in the intake manifold - λ...
- Page 79 COMPONENTS – ELECTRICS COMPONENTS – ELECTRICS Lambda Sensor In contact with exhaust gas, the oxygen sensor generates an electrical signal of which the value represents the amount of oxygen present in the exhaust gas itself. Because the censor and needs to reach a temperature of about 350°C to function correctly, in order to avoid thermal shock at cold engine condition, the computer foresees in sensor heating.
- Page 80 COMPONENTS – ELECTRICS COMPONENTS – ELECTRICS Three-way catalytic converter This component is used to reduce three principal polluting elements: - Carbon Monoxide = CO - Raw hydrocarbons = HC - Nitrogen oxides = NO the internal construction consists of a metallics support in which is deposited a substrate of a chemical material that under operating temperature initialise a catalytic process, transforming CO in CO2, HC and NOx in water vapour and N2.
- Page 81 COMPONENTS – ELECTROMECHANICS COMPONENTS – ELECTROMECHANICS Relays (under the seat) A = Secondary injection relay B = Lights relay C = Start relay D = Main injection relay Battery (under the seat) YTX 20 CH-BS 18A/h Maintenance Free...
- Page 82 COMPONENTS – ELECTROMECHANICS COMPONENTS – ELECTROMECHANICS Engine oil pressure sensor This sensor per default is shorted to ground. With the engine running the pressure existing in the lubrication system will interrupt the contact, signaled by pin 3 of the gray connector in the dashboard Neutral sensor Also this sensor per default is shorted to ground.
- Page 83 COMPONENTS – ELECTROMECHANICS COMPONENTS – ELECTROMECHANICS Starter motor The activation of this actuator is realized solenoid commanded computer: - Key ON - Security switches line in continuity - Start switch on This command remains present in the computer for 10 seconds; only when 400 engine rpm are achieved the signal is automatically deactivated.
- Page 84 COMPONENTS – ELECTROMECHANICS COMPONENTS – ELECTROMECHANICS Alternator Fulcrum screw Belt tensioner characteristics: 12V nominal Max load 40A (550W) Initial load > 1110 rpm Regulator 14,2 to14,8V 5000 rpm 10A- 25°C Range Temp. – 30 a 90° Belt replacement every 50.000 km...
- Page 85 COMPONENTS – ELECTROMECHANICS COMPONENTS – ELECTROMECHANICS Procedure for the alternator belt tensioning To set the correct tensioning of the belt it is “belt necessary to use the specific tool: tensioner tool”. and torque wrench •Fix the fulcrum screws of the alternator (M10) at approximately 10 Nm •Put tension to the belt according to the value described in the workshop manual (different...
- Page 86 Security systems Security systems The security system exists of the following components: • Fall sensor • Clutch sensor • Neutral sensor • Stand sensor All of these sensors are directly connected to the computer which in function of the signals received from these components allow the functioning of the engine and its start-up Fall sensor This sensor correctly positioned and with the engine running is in open contact.
- Page 87 Security systems Security systems LOGIC LATERAL STAND/CLUTCH FOR BREVA 1100 01.03.04 GEAR STAND CLUTCH IGNITION STARTING STAND WARN.LIGHT ENGINE ENGAGED DISENGAGED NEUTRAL POSSIBLE ENGAGED DOWN FUNCTIONS DISENGAGED ENGAGED DISENGAGED GEAR NOT POSSIBLE ENGAGED DOES NOT DOWN DISENGAGED FUNCTION GEAR: Neutral pos ition means contact clos ed. In gear means contact opened...
- Page 88 ENGINE DIAGNOSIS ENGINE DIAGNOSIS Diagnostic connector Besides the possibility to effectuate the diagnosis of the engine ECU via the dashboard in position “diagnostics” faults ACT, the diagnostic connector is available under the seat next to the fuse box. This connection allows to control with Axone in section parameters eventual reprogramming of the computer (currently not foreseen) and...
- Page 89 AXONE AXONE...
- Page 90 AXONE AXONE Software Axone Software Axone The new software 5.0.4 for Axone will permit the connection the ECU The new software 5.0.4 for Axone will permit the connection the ECU Select AUTODIAGNOSI, BREVA, 1100, and confirm following Axone instruction Select AUTODIAGNOSI, BREVA, 1100, and confirm following...
- Page 91 AXONE AXONE Throttle valve zero position learning procedure Is performed in following circumstances: • Throttle valve body and or sensor replacement, • Computer replacement or cylinder balancing Select in the screen ADJUSTING PARAMETERS The parameter LEARNING THROTTLE POSITION SENSOR • How do we verify correct implementation? In the screen parameters engine I should see : throttle position 4,7±0,2 °...
- Page 92 AXONE AXONE Recovery function In case any of the following sensor signals is disturbed the computer continues operation with replacement values. Dashboard and Axone in any case are showing the malfunction. 25 °C Air temperature: 30 °C , with linear increase parallel to air temp. Engine temperature: Barometric pressure: 1010 hPa...
- Page 93 AXONE AXONE Sonda Lambda: To verify if the computer uses the lambda sensor feedback signal can be seen in Screen Components status The parameter STATUS LAMBDA: should indicate CLOSED. This condition can be verified at idle, only when all following conditions are met : Air temperature above 18 °C Engine temperature above 18 °C Engine has operated for approximately 2-3 minutes...
- Page 94 AXONE: active screens AXONE: active screens ISO screen • Visualise actual mapping present in computer Engine parameter screen Visualise the usual engine parameters. New are the parameters for the stepper motor • STEPPER C.L. indicates the step number set by the computer •...
- Page 95 AXONE: active screens AXONE: active screens Component status screen: It is possible to visualise the component status for the security components and other systems, like the lambda sensor and rpm sensor • FALL SENSOR: If vehicle is fallen over it shows TIP OVER •...
- Page 96 AXONE: active screens AXONE: active screens Screen component activation • From this screen I can activate a series of components • The CANCEL ERRORS will only delete errors from the engine computer memory Screen error visualisation: For the majority of detected errors, once selected the error and pressing the enter button on Axone, one will see a detailed description of the error.
- Page 97 THROTTLE BALANCING THROTTLE BALANCING Procedure of adjustment and controlling throttle bodies Connect Axone to the diagnostic connector of the vehicle and to its battery and follow the indications given by Axone Connect the vacuum meter to the two intake collectors Connect Axone and follow indications Put the key to ON Make sure there are no faults present in the computer.
- Page 98 THROTTLE ALIGNMENT THROTTLE ALIGNMENT Assure that the LH throttle is resting at the stopper Note: Don’t move absolutely the throttle stopper, to avoid the need of throttle body replacement. Throttle stopper Select the parameter “Self learning of the throttle” in the screen Regulating Parameters Turn the key to OFF for 30s Turn the key to ON to reestablish the connection with Axone Check that the value indicated “Throttle”...
- Page 99 THROTTLE ALIGNMENT THROTTLE ALIGNMENT Completely close the by-pass screws Start the engine and warm up to 60° Run the engine at 2000/3000 rpm and with the vacuum meter, check if there is a correct difference of vacuum between the two cylinders of maximum 1 cm Hg (1,33 kPa). point 1 If this is the case continue at point 2...
- Page 100 ALLINEAMENTO FARFALLE ALLINEAMENTO FARFALLE Adjust adjuster on the throttle Adjust adjuster on the throttle bodies bodies connecting connecting reduce the reduce the vacuum difference between left vacuum difference between left right right Apply Apply again again the procedure the procedure “...
- Page 101 SPECIAL TOOLS: new SPECIAL TOOLS: new codice nome attrezzo note 1 05,94,86,30 belt tens ioner tool oil return ring protection cone front cover ins ertion cone 2 05,91,17,30 on cover 4 teeth, d.38 mm. Als o us able 3 05,91,26,30 dis mantling clutch tool for damper adjus tment: equal to RSV 1000 code 8140191 4 05,91,25,30 gearbox opener...
- Page 102 SPECIAL TOOLS: existing SPECIAL TOOLS: existing codice nome attrezzo note verificare se va bene questo Attrezzino rimozione anelli forcella 30949700 del V11 va bene quello dell'RSV 1000 ghiera sterzo D.48 mm codice 8140190 Chiave per smontaggio coperchietto sulla coppa attrezzo effettuato per V11 10 01 92 91 00 e filtro 11 14 92 96 00 Supporto per scatola cambio...
- Page 103 EWD : DASHBOARD EWD : DASHBOARD TRIP 1 TRIP 2 dashboard cruscotto MODE 21 22 23 24 25 26 27 28 293031 32 33 34 3536 37 38 39 40 1 2 3 4 5 6 7 8 9 10 11 12 13 14 15 16 171819 20 pin 1 da ccm PIN 1 of ccm connettore B...
- Page 104 EWD : ALTERNATOR EWD : ALTERNATOR Wiring diagram alternator Wiring diagram alternator IG SW Ponte di Statore Bridge of Graetz no lamp Rotore Batteria carico presente in ( I ) Load present in (I) sull’impianto elettrico to electrical system...
- Page 105 EWD: SECURITY SYSTEM EWD: SECURITY SYSTEM BREVA 1100 Logica di sicurezza Security logic Dashboard Cruscotto nero grigio Black Gray Ro/GM Ar/V 15/54 Ro/M M/Vi Ro/G AZ/AR 27 28 Legenda 2 Clutch switch 31 Oil pressure warning Interruttore frizione Bulbo pressione olio...
- Page 106 EWD: ENGINE ECU EWD: ENGINE ECU Impianto elettrico electronic injection gestione: iniezione accensione. and ignition system Marelli 5AM 2 Moto Guzzi Breva 1100 Legenda: 1) Fuel pump 1) Pompa benzina 2) Secundary injection relay 2) Relè secondario iniezione 3) Relè principale...
Need help?
Do you have a question about the Breva 1100 and is the answer not in the manual?
Questions and answers