Advertisement
User manual
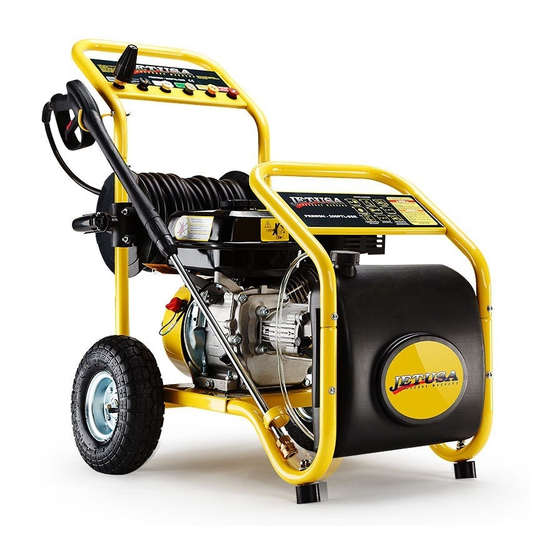
Pressure Washer Range
Read and follow all safety
WARNING!
warnings and instructions carefully before
using this machine. Failure to follow the
warnings and instructions may result in
electric shock, fire and/or serious injury.
Save this manual for future reference.
Products covered by this
ATTENTION!
manual will vary in appearance, assembly,
inclusions, description and packaging.
NOTE! This manual covers multiple styles
of pressure washers as well as options /
accessories that may not be suitable for
the machine you have purchased.
Advertisement
Table of Contents

Summary of Contents for Jet PRSWSH-1316PTL
- Page 1 User manual Pressure Washer Range Read and follow all safety WARNING! warnings and instructions carefully before using this machine. Failure to follow the warnings and instructions may result in electric shock, fire and/or serious injury. Save this manual for future reference. Products covered by this ATTENTION! manual will vary in appearance, assembly,...
-
Page 2: Table Of Contents
Index Safety Warnings ..............................2 General Safety Warnings ..........................2 Parts Diagram ..............................5 Engine Basics ..............................5 Water Pump – (machines smaller than 10hp) ....................6 Water Pump – (machines 10hp and above) ....................6 Ignition & Decompression (if equipped) ......................6 Assembly ................................ -
Page 3: Safety Warnings
Safety Warnings naked flame or sparks. Always stop the solvents. Always keep the machine General Safety Warnings engine or disconnect from mains before clean, especially, the fuel tank, its cleaning / clearing a blockage or surroundings, and the air cleaner. After It is important you read checking, maintaining or working on the the engine has stopped, the engine and... - Page 4 The jet must safety devices, high pressure WARNING! High pressure not be directed at persons, hoses, trigger gun.
- Page 5 180714125800...
-
Page 6: Parts Diagram
Parts Diagram Engine Basics Rear View Top View View from side View from side (Diesel model only) Air Cleaner (see also 11) 10. Spark Plug (if equipped) 19. Engine Oil filler cap Throttle lever(see also 12) 11. Air Cleaner (see also 1) (Petrol engines) Choke lever 12. -
Page 7: Water Pump - (Machines Smaller Than 10Hp)
Water Pump – (machines smaller than 10hp) 24. Detergent Injector connector 29. Detergent tank connector 32. Pressure limit adjustment (do not 25. Self-Suction Bleeder valve 30. Plug for optional self-suction adjust factory setting) 26. Detergent tank bleeder valve. 33. Water inlet quick connector 27. -
Page 8: Assembly
Assembly 10hp+ machines only - Fitting the vent plug INFORMATION! The shipping plug is a sealed plug used to prevent oil leaking during shipping and must be replaced with the vent plug before use. The “vent plug” allows any pressure that builds up to escape while in use. DO NOT operate this machine until the shipping plug has been removed and the “vent plug”... - Page 9 Fitting the Wheels and rubber feet (if equipped) NOTE! Some models come with Rubber feet already fixed to the frame. The following step must be completed for each of the two wheel/axle sets. Attach axle to wheels (some models are different) 1.
- Page 10 Fitting the handle and hose holder (if equipped) NOTE! Some models come fitted with a hose reel. Handle (if equipped) Push the handle down into the tube ends on the pressure washer frame as illustrated below. Hose Holder (if equipped) 1.
- Page 11 Assembling the Gun (trigger) and Lance (tubing) IMPORTANT! Included hoses, connectors and tips vary depending on model. The “drain cleaning tip” and the “small connector” is only available for some models and may be pre-assembled in some cases. ...
- Page 12 Assembling the Gun and Lance connections A. Attach one end of the high pressure hose to the handle of the gun/trigger (A). B. Attach the silver lance tube to the front of the gun/trigger (B). 1. Trigger/Gun 2. High pressure hose 3.
- Page 13 Fitting the Hose connections WARNING! Do not use hot water. Using hot water will damage your machine and void all warranty. Self-Suction Bleeder Garden hose connector High Pressure valve (w ater in) connection (water out) Detergent injection inlet High pressure hose 1.
-
Page 14: Before Use
Before Use WARNING! Lock the wand securely or it could be ejected under high pressure when operating the gun, possibly causing injury or damage. WARNING! Add engine oil to the correct level before operation. Failure to add engine oil will destroy the engine. Engine damage caused by lack of oil is not covered under warranty. - Page 15 ATTENTION! Your pressure ATTENTION! Your pressure WARNING! DO NOT operate this washer “ENGINE” IS NOT washer “PUMP” is shipped with machine until the “shipping plug” has been removed and the “vent shipped with oil, you must add oil; there is no need to add oil to plug”...
- Page 16 Adding Fuel available pump Diesel. Only use WARNING! Do not use fuel ATTENION! Before refuelling substitutes such as ethanol, the correct type of fuel for your ensure the engine is switched off engine. methanol or biofuel in your and has cooled engine, using such fuel will cause damage and void any applicable ATTENTION! Be sure to confirm...
- Page 17 Using the Quick connect nozzles if pressure spray or detergent is CAUTION! Turn engine off when likely to affect the surface. charging nozzles. CAUTION! Pull the nozzle to make sure it is seated properly WARNING! High pressure spray before operating your unit. CAUTION! Injury/damage risk: can damage some surfaces.
- Page 18 IMPORTANT! If a nozzle becomes blocked, use some wire to clear the blockage. The nozzle must be removed from the machine before attempting to clear the blockage to prevent injury. Detergent injection CAUTION! Some machines have been designed for use with liquid detergents Never use the following in your pressure washer;...
-
Page 19: Starting The Engine
Starting the engine CAUTION! The starter grip can be drawn back very CAUTION! Do not allow the starter grip to snap back. quickly before you can release it. This may pull your Return it slowly by hand. hand forcefully toward the engine and cause an injury. Petrol Four Stroke Engines 1. -
Page 20: Diesel Four Stroke Engines
Diesel Four Stroke Engines Side of Engine Top of Engine 1. Turn the “Fuel Valve” (A) to “ON”. 2. Turn fuel pump to “RUN” position. 3. Turn the “Ignition Key” “ON” (if equipped) or the engine switch to “ON”. a. Key Start (if equipped): If the battery has enough charge, use the ignition key to start the engine by holding the key in the “Start”... -
Page 21: Maintenance
Maintenance Pump maintenance (smaller models under 10hp only) The smaller pump types are a sealed unit and do not require maintenance. Any attempts to service or alter the pump may damage your pressure washer and void your product warranty. Pump maintenance (10hp+ models only) NOTE! For models fitted with the oil sight glass the oil should line up with the dot on the sight glass window (see parts diagram). - Page 22 Replace Engine Oil Drain the oil while engine is still warm to assure rapid and complete draining. 1. Remove the drain plug, and then drain the oil. 2. Refill with the recommended oil to the specified. 3. Reinstall the drain plug and tighten securely. Replace the Pump Oil (10hp+ machines only) 1.
- Page 23 Maintenance cont.. 180714125800...
- Page 24 180714125800...
-
Page 25: Transporting/Storage
Transporting/Storage 1. Disconnect detergent connection (if equipped). 2. Turn on the machine for a few seconds and press the spray gun trigger to release pressure until the water which had remained in the pump exits, turn off immediately. 3. Disconnect all water connections. 4. -
Page 26: Specifications
Specifications PRSWSH-1316PTL Manufacturer: JETUSA Power Equipment Engine Type: 4-Stroke OHV Engine Engine Displacement: 87cc Engine Output: 2.6HP / 3600 rpm Fuel Type: 95+ Non-ethanol unleaded Petrol Max/Peak Pressure: 1900PSI Continuous Working Pressure: 1300PSI Starting Method: Recoil Engine Oil Type: 10W30 / 10W40 / 15W30 / 15W40. - Page 27 PRWPTL600USAACAB Manufacturer: JETUSA Power Equipment Engine Type: 4-Stroke OHV Engine Engine Displacement: 208cc Engine Output: (5.25 kw) 8HP / 3600 rpm Fuel Type: 95+ Non-ethanol unleaded Petrol Max/Peak Pressure: 3950PSI Continuous Working Pressure: 3000PSI Starting Method: Recoil Engine Oil Type: 10W30 / 10W40 / 15W30 / 15W40. Pump Type: Sealed Non-Serviceable Pump Oil Type: 80W-90, SAE 90 or 85W-90 Gear Oil Max Water Temp: (40 Degrees C)
- Page 28 PRWPTLJETA630 ENGINE Type: 4-Stroke OHV Engine Displacement: 210cc Max. Output: 8HP / 3600rpm Fuel Type: Regular Unleaded 95 +RON Starting System: Recoil Pull Start PRESSURE WASHER Max Pressure: 4600PSI (317Bar) Continuous Pressure: 3000PSI (207Bar) This is the output pressure the washer can supply continuously Pump Type: Axial Brass Titanium series Flow: 10L/min...
- Page 29 PRWPTLJETA660 ENGINE Type: 4-Stroke OHV Engine Displacement: 210cc Max. Output: 8HP / 3600rpm Fuel Type: Regular Unleaded 95 +RON Starting System: Recoil Pull Start PRESSURE WASHER Max Pressure: 4600PSI (317Bar) Continuous Pressure: 3000PSI (207Bar) This is the output pressure the washer can supply continuously Pump Type: Axial Brass Titanium series Flow: 10L/min Hose Length: 30m...
Need help?
Do you have a question about the PRSWSH-1316PTL and is the answer not in the manual?
Questions and answers