Marantz VC5200 User Manual
Dvd player
Hide thumbs
Also See for VC5200:
- Service manual (58 pages) ,
- Specifications (2 pages) ,
- Quick start manual (2 pages)
Table of Contents
Advertisement
Quick Links
Advertisement
Table of Contents

Related Manuals for Marantz VC5200


Summary of Contents for Marantz VC5200
- Page 1 Model VC5200 User Guide DVD Player...
-
Page 2: Introduction
PAGE 2 INTRODUCTION Safety Precautions CAUTION RISK OF ELECTRIC SHOCK DO NOT OPEN RISQUE DE CHOC ELECTRIQUE NE AVERTISSEMENT PAS OUVRIR CAUTION : TO REDUCE THE RISK OF ELECTRIC SHOCK, DO NOT REMOVE COVER (OR BACK). NO USER SERVICEABLE PARTS INSIDE. REFER SERVICING TO QUALIFIED SERVICE PERSONNEL. -
Page 3: Important Safety Instructions
IMPORTANT SAFETY INSTRUCTIONS CAUTION: PLEASE READ AND OBSERVE ALL WARNINGS AND INSTRUCTIONS IN THIS OWNER’S MANUAL AND THOSE MARKED ON THE UNIT. RETAIN THIS BOOKLET FOR FUTURE REFERENCE. This set has been designed and manufactured to assure personal safety. Improper use can result in electric shock or fire hazard. - Page 4 PAGE 4 INTRODUCTION IMPORTANT SAFETY INSTRUCTIONS (Cont’d) 13. Accessories Do not place this product on an unstable cart, stand, tripod, bracket, or table. The product may fall, causing serious injury to a child or adult, and serious damage to the product.
-
Page 5: Table Of Contents
Table of Contents Introduction Safety Precautions ......2 IMPORTANT SAFETY INSTRUCTIONS ..3-4 Table of Contents . -
Page 6: Precautions
When the DVD player is not in use, be sure to remove the disc and turn off the power. If you do not use the DVD player for a long period, the unit may not function properly in the future. Turn on and use the DVD player occasionally. -
Page 7: Notes On Discs
About This Owner’s Manual This owner’s manual explains the basic instructions of this DVD player. Some DVD video discs have functions that may not be explained in this owner’s manual. Therefore, some instructions may differ from this owner’s manual, and there may be extra... -
Page 8: Identification Of Controls
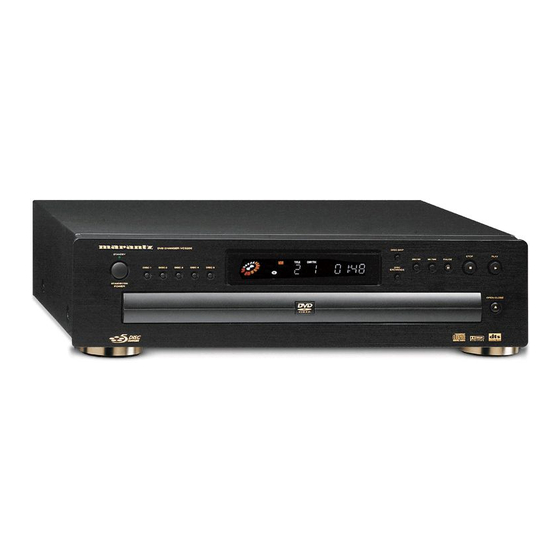
PAGE 8 INTRODUCTION Identification of Controls Front Panel POWER indicator Remote sensor POWER button DISC SELECT (1 – 5) buttons Disc tray Display Window MP3 indicator Operating Video CD indicator status CD indicator indicator MP3 VCD Disc 1–5 indicators Angle icon indicator Display window DISC SKIP button DISC EXCHANGE button... -
Page 9: Rear Panel
Identification of Controls (Cont’d) Rear Panel POWER CORD Connect to an AC 120V, 60Hz outlet only. INTRODUCTION VIDEO OUT jack COMPONENT VIDEO OUT/ PROGRESSIVE SCAN jacks S-VIDEO OUT jack VIDEO OUTPUT SELECT switch COAXIAL DIGITAL AUDIO OUT jack AUDIO OUT (L/R) 1, 2 jacks OPTICAL DIGITAL AUDIO OUT jack Remove the dust protection cap from the connector and connect the optical digital cable (not supplied) -
Page 10: Remote Control
PAGE 10 INTRODUCTION Identification of Controls (Cont’d) REMOTE CONTROL You will find instructions for each of the remote control functions in the appropriate sections of this instruc- tion manual. POWER button REPEAT button SETUP button SUBTITLE button AUDIO button ***TOP MENU button SELECT/ENTER button OSD button ZOOM button... -
Page 11: Identification Of Controls
Do not expose the remote sensor of the DVD player to a strong light source such as direct sunlight or illumination. If you do so, you may not be able to operate the DVD player with the remote control. Notes on the remote control Point the remote control at the remote sensor on the DVD player. -
Page 12: Connections
Notes Refer to the owner’s manual of your TV as well. Before you connect the DVD player to your TV, be sure to turn off the power and unplug both units from the wall outlet before making any connections. Connect the DVD player to your TV directly. If you connect the DVD player to a VCR, the playback picture will be distorted because DVD video discs are copy protected. -
Page 13: Connecting To A Tv Equipped With Component Video Inputs
Notes Refer to the owner’s manual of your TV as well. Before you connect the DVD player to your TV, be sure to turn off the power and unplug both units from the wall outlet before making any connections. Actual labels for component video inputs may vary depending on the TV manufacturer. (ex. Y, R-Y, B-Y or Y, C In some TVs or monitors, the color levels of the playback picture may be reduced slightly or the tint may change. -
Page 14: Connecting To An Audio System
Before you connect the DVD player to other equipment, be sure to turn off the power and unplug all of the equipment from the wall outlet before making any connections. If you place the DVD player near a tuner or radio, the radio broadcast sound might be distorted. In this case, move the DVD play- er away from the tuner and radio. -
Page 15: Connecting To Optional Audio System
Refer to the owner’s manual of your audio equipment as well. Before you connect the DVD player to other equipment, be sure to turn off the power and unplug all of the equipment from the wall outlet before making any connections. -
Page 16: Enjoying Dolby Pro Logic Surround Sound
Warning Do not set the Digital Audio Output of this DVD player to “Dolby Digital” unless you are connecting the DIGITAL OUT jack of this DVD player to an AV decoder that has the Dolby Digital decoding function. High volume sound may damage your hearing as well as the speakers (Refer to “Selecting Digital Audio Output”... -
Page 17: Connecting To Optional Audio System
Refer to the owner’s manual of your receiver as well. Before you connect the DVD player to other equipment, be sure to turn off the power and unplug all of the equipment from the wall outlet before making any connections. -
Page 18: Basic Operation
If you insert an audio CD, the CD indicator lights up on the display. The title number does not appear. After playing back all of the chapters in the title, the DVD player automatically stops and returns to the menu screen. - Page 19 SKIP on the remote control once or more, or press DISC SELECT (1 - 5) on the front panel. Also you can select a disc in the DVD player directly by using the remote control, press DISC SKIP and then press a number button (1-5) on the remote control within one second.
-
Page 20: Stopping Play
The screen saver picture appears when you leave the DVD player in stop mode for about 5 minutes. Automatic power off function After the Screen Saver has been engaged for about 5 minutes, the DVD player will automatically turn itself off. -
Page 21: Basic Playback
Basic Playback (Cont’d) DISC SKIP DISC EXCHANGE POWER OPEN/CLOSE OPEN/ CLOSE SETUP REPEAT RANDOM AUDIO SUBTITLE ANGLE SURR. TOP MENU MENU SELECT /ENTER RETURN ZOOM MARKER — SEARCH DISC SKIP DISC SKIP SCAN SKIP PLAY PLAY STOP PAUSE SLOW CLEAR PROGRAM BASIC OPERATION Exchanging Discs during Playback... -
Page 22: Special Playback
PAGE 22 BASIC OPERATION Special Playback POWER OPEN/CLOSE SETUP REPEAT RANDOM AUDIO SUBTITLE ANGLE SURR. TOP MENU MENU SELECT /ENTER RETURN ZOOM MARKER — SEARCH DISC SKIP SCAN SKIP PLAY PLAY STOP STOP PAUSE SLOW PAUSE CLEAR PROGRAM Still Picture (Pause) Press PAUSE during playback. -
Page 23: To Scan At Fast Forward Or Fast Reverse Playback
To return to normal playback, press PLAY. Note SLOW The DVD player does not play back sound during the high speed reverse and forward playback of DVD video discs. However, the DVD player plays back sound during fast forward or fast reverse playback of audio CDs. -
Page 24: Operation Using Gui Menu Icons
PAGE 24 OPERATION USING GUI MENU ICONS General Information about GUI Menu Icons This unit features GUI Menu Icons showing disc information (title/chapter/track number, elapsed playing time, audio/subtitle language, angle, and sound) and player information (repeat play, play mode, marker, etc.). -
Page 25: Detailed Description Of Each Gui Menu Icon
Detailed Description of each GUI Menu Icon You can view information about a disc and its operational status on the TV screen. Press OSD during playback. [TV screen] DVD GUI To show the current title number and to jump to the desired title number To show the current chapter number and to jump to the desired chapter number To show the elapsed time... -
Page 26: Advanced Operation
PAGE 26 ADVANCED OPERATION Using a Title Menu Some movie discs may contain two or more titles. If the disc has a title menu recorded on it, the TOP MENU button can be used to select the movie title. (The details of operation differ depending on the disc used.) Selecting a title may not be possible on certain DVD discs. -
Page 27: Changing Subtitle Language
Changing Subtitle Language It is possible to change the subtitle language to a different language from the one selected at the initial settings. (See page 36 for further info.) This operation works only with discs on which multiple subtitle languages are recorded. SETUP REPEAT RANDOM... -
Page 28: Viewing From Another Angle
PAGE 28 ADVANCED OPERATION Viewing from another Angle Some DVDs may contain scenes which have been shot simultaneously from a number of different angles. For these discs, the same scene can be viewed from each of these different angles using the ANGLE but- ton. -
Page 29: Repeat Play
Repeat Play Repeating viewing (listening) Press REPEAT during playback. Each time this button is pressed, the TV screen changes as shown below and the disc will repeat a chapter or title (DVD) or a track (CD/Video CD). • DVD Repeat of chapter being CHAPT played... -
Page 30: Storing Markers In Memory To Be Viewed (Listened To) Again
PAGE 30 ADVANCED OPERATION Storing Markers in Memory to be Viewed (Listened to) again Storing a MARKER in the DVD memory is similar to marking your page in a book. It allows you to quickly return to any point on the disc. POWER OPEN/CLOSE SETUP... -
Page 31: Zoom Feature
Audio CD and Video CD. Random does not work with DVD movie discs. You can playback titles or tracks in random order. (Random playback) The DVD player automatically selects the titles on a DVD video karaoke disc only and plays them back randomly. POWER... -
Page 32: Program Play
PAGE 32 ADVANCED OPERATION Program Play The player plays the tracks on the disc in the order you specify. Note: Program play function is possible only with audio CDs. It does not work with DVD movie discs and Video CDs (Version 2.0). POWER OPEN/CLOSE SETUP... -
Page 33: Playback With Mp3
Playback with MP3 TOP MENU SELECT /ENTER ZOOM MARKER — SEARCH DISC SKIP SCAN SKIP PLAY STOP To play an MP3 file repeatedly If you press REPEAT once during play, the cur- rent MP3 file will play repeatedly. If you press REPEAT twice during play, the all MP3 files on the disc will play repeatedly. - Page 34 PAGE 34 ADVANCED OPERATION Playback with MP3 (Cont’d) TOP MENU MENU SELECT /ENTER RETURN ZOOM MARKER — SEARCH DISC SKIP SCAN SKIP PLAY STOP PAUSE SLOW CLEAR PROGRAM To play an MP3 file repeatedly If you press REPEAT button once during play, the current MP3 file will play repeatedly.
-
Page 35: Initial Settings
Selection of Initial Settings Once the initial settings have been completed, the player can always be operated under the same conditions (especially with DVD discs). The settings will be retained in the memory until they are changed, even if the power is switched off. -
Page 36: Selecting Disc Languages
PAGE 36 INITIAL SETTINGS Selecting Disc Languages This is to select the audio soundtrack language, subtitle language and the language used in title menus or DVD menus which will always be used for every disc to be played back. When you play back a DVD video disc, the DVD player automatically displays the pre-selected subtitle language if it is included on the disc. -
Page 37: Selecting Rating Level And Password
DVDs with ratings higher than your selection will be blocked, unless the correct password is entered again. For example: if you change the level to “5”, the DVD player will not play discs with ratings of “6”, “7” or “8” unless the correct password is entered on the remote control. - Page 38 PAGE 38 INITIAL SETTINGS Selecting Rating Level and Password (Cont’d) POWER OPEN/CLOSE SETUP REPEAT RANDOM AUDIO SUBTITLE ANGLE SURR. TOP MENU MENU 1, 2 SELECT /ENTER RETURN ZOOM MARKER — SEARCH DISC SKIP SCAN SKIP PLAY STOP PAUSE SLOW CLEAR PROGRAM To clear your 4-digit password If you forget your password, to clear the...
-
Page 39: Selecting Tv Aspect
Selecting TV Aspect Select the appropriate screen type according to your TV set; conventional size screen (4:3) or wide-screen (16:9). POWER OPEN/CLOSE SETUP REPEAT RANDOM AUDIO SUBTITLE ANGLE SURR. TOP MENU MENU 1, 2 SELECT /ENTER RETURN ZOOM MARKER — SEARCH DISC SKIP SCAN SKIP... -
Page 40: Selecting Menu Language
Digital Audio Output 5.1 Speaker Setup Others • This DVD player support two remote control codes : C1 and • When the unit is shipped from the factory, the remote code is set to C1. • To change the remote control cods, press and hold CLEAR button for at least five seconds. -
Page 41: Selecting Progressive Scan
Others Off: If you are using the COMPONENT VIDEO OUT jacks, but are connecting the DVD player to a standard (analog) television, set the Progressive mode to “Off”. If you are using the COMPONENT VIDEO OUT jacks for connection to a TV that is compatible with a pro- gressive scan signal, set the Progressive mode to “On”. -
Page 42: Selecting Digital Audio Output
PAGE 42 INITIAL SETTINGS Selecting Digital Audio Output Each DVD disc has a variety of audio output options. Set the player’s Digital Audio Output according to the type of audio system you use. POWER OPEN/CLOSE SETUP REPEAT RANDOM AUDIO SUBTITLE ANGLE SURR. -
Page 43: Others
Others The DRC, Vocal, PBC and Video settings can be changed. POWER OPEN/CLOSE SETUP REPEAT RANDOM AUDIO SUBTITLE ANGLE SURR. TOP MENU MENU 1, 2 SELECT /ENTER RETURN ZOOM MARKER — SEARCH DISC SKIP SCAN SKIP PLAY STOP PAUSE SLOW CLEAR PROGRAM About DRC (Dynamic Range Compression) -
Page 44: Table Of Languages And Their Abbreviations
PAGE 44 INITIAL SETTINGS Table of Language and Their Abbreviations Enter the appropriate code number for the initial settings “Audio”, “Subtitle” and/or “Menu” (See page 36). Code Language Code 6565 Afar 7079 6566 Abkhazian 7082 6570 Afrikaans 7089 6577 Ameharic 7165 6582 Arabic... -
Page 45: Reference
Management Information that is recorded on a DVD disc. If the Region number described on the DVD disc does not correspond to the Region number of this DVD player, this DVD player cannot play that disc. The Region number of this DVD player is 1. -
Page 46: Before Calling Service Personnel
• Turn on the equipment connected with the audio cable. • Set the Digital Audio Output to the correct position, then turn on the DVD player again by pressing the POWER button. • Clean the disc. • Insert a disc. (Check that the DVD, or audio CD indicator in the DVD display is lit.) -
Page 47: Specifications
Specifications DVD player/Outputs/Supplied Accessories Power supply Power consumption Weight External dimensions (W X H X D) Signal system Laser Frequency range (audio) Signal-to-noise ratio (audio) Dynamic range (audio) Harmonic distortion (audio) Wow and flutter Operating conditions Video output S-video output...
Need help?
Do you have a question about the VC5200 and is the answer not in the manual?
Questions and answers