Marantz DV6400 Service Manual
Super audio cd/dvd player
Hide thumbs
Also See for DV6400:
- User manual (34 pages) ,
- Specifications (1 page) ,
- User manual (32 pages)
Table of Contents
Advertisement
Service
Manual
DV6400
DV4400
SECTION ....................................................................................................................................PAGE
TECHNICAL SPECIFICATIONS .................................................................................................. 1-1-1
SERVICE HINTS AND TOOLS .................................................................................................... 1-2-1
WARNING AND LASER SAFETY INSTRUCTIONS ................................................................... 1-2-2
LASER BEAM SAFETY PRECAUTIONS .................................................................................... 1-2-3
IMPORTANT SAFETY PRECAUTIONS ...................................................................................... 1-3-1
STANDARD NOTES FOR SERVICING ....................................................................................... 1-4-1
CABINET DISASSEMBLY INSTRUCTIONS................................................................................ 1-5-1
TROUBLESHOOTING ................................................................................................................. 1-6-1
BLOCK DIAGRAMS..................................................................................................................... 1-7-1
SCHEMATIC DIAGRAMS / CBA'S AND TEST POINTS.............................................................. 1-8-1
WAVEFORMS.............................................................................................................................. 1-9-1
WIRING DIAGRAMS ................................................................................................................. 1-10-1
FIRMWARE RENEWAL MODE ................................................................................................. 1-11-1
LEAD IDENTIFICATIONS .......................................................................................................... 1-12-1
EXPLODED VIEWS ................................................................................................................... 1-13-1
PARTS LIST [DV4400] ............................................................................................................... 1-14-1
PARTS LIST [DV6400] ............................................................................................................... 1-15-1
Please use this service manual with referring to the user guide ( D.F.U. ) without fail.
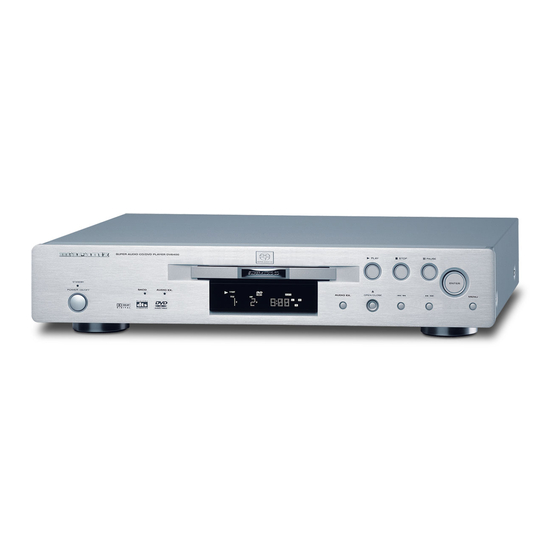
Super Audio CD / DVD Player
SUPER AUDIO CD / DVD PLAYER DV6400
SUPER AUDIO
SUPER AUDIO
AUDIO
AUDIO
CD
CD
EX.
EX.
DVD PLAYER DV4400
TABLE OF CONTENTS
DV4400 / DV6400
DV6400 /
N1B/N1S
DV4400 /
N1B/N1S
DVD Player
Part no. 44AW855010
First Issue 2003.10
ecm
Advertisement
Table of Contents

Related Manuals for Marantz DV6400


Summary of Contents for Marantz DV6400
-
Page 1: Table Of Contents
Service DV6400 / N1B/N1S Manual Super Audio CD / DVD Player DV4400 / N1B/N1S DVD Player DV6400 SUPER AUDIO CD / DVD PLAYER DV6400 SUPER AUDIO SUPER AUDIO AUDIO AUDIO DV4400 DVD PLAYER DV4400 TABLE OF CONTENTS SECTION ............................PAGE TECHNICAL SPECIFICATIONS ....................1-1-1 SERVICE HINTS AND TOOLS .................... - Page 2 Parts for your MARANTZ equipment are generally available to our National Marantz Subsidiary or Agent. ORDERING PARTS : Parts can be ordered either by mail or by Fax.. In both cases, the correct part number has to be specifi ed.
-
Page 3: Technical Specifications
TECHNICAL SPECIFICATIONS [ DV4400 ] SIGNAL SYSTEM PAL color APPLICABLE DISCS (1) DVD-Video Discs 1-layer 12cm single-sided discs, 2-layer 12cm single-sided discs, 2-layer 12cm double-sided discs (1 layer per side) Contacts, signal levels and impedances 1-layer 8cm single-sided discs, 2-layer 8cm single-sided discs, 2-layer 8cm double-sided discs (1 layer per side) Contact 1 (2) DVD-R/DVD-RW... - Page 4 [ DV4400 ] Playable Discs Disc Types The following discs can be played back on this [ DVD-Video ] DVD player. Data on a DVD is divided into sections called "titles," and then into subsections called "chapters," each of which is given a title or chapter number.
- Page 5 TECHNICAL SPECIFICATIONS [ DV6400 ] SIGNAL SYSTEM PAL color APPLICABLE DISCS (1) DVD-Audio/DVD-Video Discs 1-layer 12cm single-sided discs, 2-layer 12cm single-sided discs, 2-layer 12cm double-sided discs (1 layer per side) Contacts, signal levels and impedances 1-layer 8cm single-sided discs, 2-layer 8cm single-sided...
- Page 6 [ DV6400 ] Playable Discs Disc Types The following discs can be played back on this [ DVD-Audio ] DVD player. DVD-Audios are divided into several large sections called “groups” and smaller sections called “tracks.” Numbers are alloted to these sections. These numbers are called “group...
-
Page 7: Service Hints And Tools
SERVICE HINTS AND TOOLS SERVICE HINTS SERVICE TOOLS Audio signals disc 4822 397 30184 Disc without errors (SBC444)+ Disc with DO errors, black spots and fingerprints (SBC444A) 4822 397 30245 Disc (65 min 1kHz) without no pause 4822 397 30155 Max. -
Page 8: Warning And Laser Safety Instructions
WARNING AND LASER SAFETY INSTRUCTIONS WARNING WAARSCHUWING All ICs and many other semi-conductors are Alle IC’s en vele andere halfgeleiders zijn susceptible to electrostatic discharges (ESD). gevoelig voor elektrostatische ontladingen Careless handling during repair can reduce (ESD). life drastically. Onzorgvuldig behandelen tijdens reparatie When repairing, make sure that you are kan de levensduur drastisch doen connected with the same potential as the... -
Page 9: Laser Beam Safety Precautions
LASER BEAM SAFETY PRECAUTIONS This DVD player uses a pickup that emits a laser beam. Do not look directly at the laser beam coming from the pickup or allow it to strike against your skin. The laser beam is emitted from the location shown in the figure. When checking the laser diode, be sure to keep your eyes at least 30cm away from the pickup lens when the diode is turned on. -
Page 10: Important Safety Precautions
IMPORTANT SAFETY PRECAUTIONS Product Safety Notice I. Also check areas surrounding repaired locations. J. Be careful that foreign objects (screws, solder Some electrical and mechanical parts have special droplets, etc.) do not remain inside the set. safety-related characteristics which are often not evi- K. -
Page 11: Safety Check After Servicing
Safety Check after Servicing Examine the area surrounding the repaired location for damage or deterioration. Observe that screws, parts, Chassis or Secondary Conductor and wires have been returned to their original posi- tions. Afterwards, do the following tests and confirm the specified values to verify compliance with safety Primary Circuit Terminals standards. -
Page 12: Standard Notes For Servicing
STANDARD NOTES FOR SERVICING Circuit Board Indications How to Remove / Install Flat Pack-IC 1. The output pin of the 3 pin Regulator ICs is indi- 1. Removal cated as shown. With Hot-Air Flat Pack-IC Desoldering Machine:. (1) Prepare the hot-air flat pack-IC desoldering Top View Bottom View machine, then apply hot air to the Flat Pack-IC... - Page 13 With Soldering Iron: (4) Bottom of the flat pack-IC is fixed with glue to the CBA; when removing entire flat pack-IC, first apply (1) Using desoldering braid, remove the solder from all soldering iron to center of the flat pack-IC and heat pins of the flat pack-IC.
- Page 14 2. Installation Instructions for Handling Semi-conductors (1) Using desoldering braid, remove the solder from the foil of each pin of the flat pack-IC on the CBA Electrostatic breakdown of the semi-conductors may so you can install a replacement flat pack-IC more occur due to a potential difference caused by electro- easily.
-
Page 15: Cabinet Disassembly Instructions
CABINET DISASSEMBLY INSTRUCTIONS [ DV4400/N1B, DV4400/N1S ] REMOVAL REMOVE/*UNHOOK/ LOC. PART 1. Disassembly Flowchart Fig. UNLOCK/RELEASE/ Note This flowchart indicates the disassembly steps to gain UNPLUG/DESOLDER access to item(s) to be serviced. When reassembling, (S-9), *2(L-4), [10] Switch CBA D7 follow the steps in reverse order. - Page 16 2-2. Short the three short lands of FPC cable with sol- der before removing the FFC cable (CN201) from Insulation Sheet (S-2) it. If you disconnect the FFC cable (CN201), the (S-2) laser diode of pickup will be destroyed. (Fig. D6) CAUTION 3: When reassembling, confirm the FFC cable (CN201) is connected completely.
- Page 17 (S-6) [6] DVD (S-5) Mecha CN201 (S-7) CN301 [7] DVD Main CBA Unit DVD Mecha Short the three short lands by soldering [8] DVD Main CBA Holder Connector View for A CN1001 CN1601 Fig. D5 Slide Short the three short lands by soldering FPC Cable Pickup Unit...
- Page 18 [10] Switch CBA [11] LED CBA (S-9) (S-10) (S-8) [9] AV CBA (S-8) (S-8) Desolder (L-5) CN6001 (L-5) [12] LED CBA Holder (L-4) Fig. D7 HOW TO MANUAL EJECT 1. Remove the Top Case. 2. Rotate the roulette in the direction of the arrow as shown below.
- Page 19 [ DV6400/N1B, DV6400/N1S ] REMOVAL REMOVE/*UNHOOK/ LOC. PART 1. Disassembly Flowchart Fig. UNLOCK/RELEASE/ Note This flowchart indicates the disassembly steps to gain UNPLUG/DESOLDER access to item(s) to be serviced. When reassembling, DVD Main [10] D12 (S-19) follow the steps in reverse order. Bend, route, and CBA Holder dress the cables as they were originally.
- Page 20 To avoid damage of pickup follow these procedures. 2-1. Disconnect connector (CN301). Remove three Insulation Sheet (S-12) screws (S-15) and lift the DVD Mecha. (Fig. D12) (S-12) 2-2. Short the three short lands of FPC cable with sol- der before removing the FFC cable (CN201) from it.
- Page 21 (S-17) [7] Shield Plate (S-16) CN7102 CN7151 CN7101 [8] SACD CBA DVD Mecha (S-18) [6] DVD Short the three short lands by soldering (S-15) Mecha CN201 CN301 (L-9) [9] DVD Main CBA Unit (S-19) Connector (L-9) View for A (L-9) [10] DVD Main CBA Holder Slide...
- Page 22 [12] Switch CBA [13] LED CBA (S-21) (S-22) (S-20) [11] AV CBA (S-20) (S-20) Desolder (L-11) CN6001 (L-11) [14] LED CBA Holder (L-10) Fig. D14 HOW TO MANUAL EJECT 1. Remove the Top Case. 2. Rotate the roulette in the direction of the arrow as shown below.
-
Page 23: Troubleshooting
TROUBLESHOOTING FLOW CHART NO.1 The power cannot be turned on. Is the fuse normal? See FLOW CHART No.2 <The fuse blows out.> Is normal state restored when once unplugged Check if there is any leak or shor-circuiting on the power cord is plugged again after several seconds? primary circuit component, and service it if defective. - Page 24 FLOW CHART NO.6 P-ON+12V is not outputted. Check D1030, D1048, D1053, C1035, C1048, L1009 Is 14V voltage supplied to the emitter of Q1002? and the periphery circuit, and service it if defective. Check Q1016 and PWRCON line and service it if Is the voltage of base on Q1002 lower than the defective.
- Page 25 FLOW CHART NO.12 The fluorescent display tube does not light up. Is 5V voltage supplied to Pin(13) and Check the P-ON+5V line and service it if detective. Pin(43) of IC6001? Is the voltage of approximately -24V to -28V Check the -FL (-28V) line and service it if detective. supplied to Pin(30) of IC6001? Is there 500kHz oscillation at Pin(5) of IC6001? Check R6001, IC6001 and their periphery, and...
- Page 26 FLOW CHART NO.14 No operation is possible from the remote control unit. Operation is possible from the DVD, but no operation is possible from the remote control unit. Check EV+5V line and service it if detective. Is 5V voltage supplied to the Pin(3) terminal of the infrared remote control receiver (RM2001)? Is the "L"...
- Page 27 FLOW CHART NO.18 [No Disc] indicated. (When the focus servo is not functioning.) Replace the DVD Main CBA. No improvement can be found. Original DVD Main CBA is poor. Replace the DVD Mecha. FLOW CHART NO.19 [No Disc] indicated. (When the laser beam does not light up.) Replace the DVD Main CBA.
- Page 28 FLOW CHART NO.21 Picture does not appear normally. Set the disc on the disc tray, and playback. Replace the DVD Main CBA or DVD Mecha. Are the video signals outputted to each pin of CN1601 on the AV CBA? CN1601 1PIN CN1601 9PIN...
- Page 29 FLOW CHART NO.22 Audio is not outputted to JK6103 normally. Set the disc on the disc tray, and playback. Replace the DVD Main CBA or DVD Mecha. Are the analog audio signals outputted to each pin of CN1601 on AV CBA? CN1601 13PIN AUDIO-L CN1601 15PIN AUDIO-R Check each line between each pin of CN1601...
- Page 30 FLOW CHART NO.23 (FOR DV6400/N1B, DV6400/N1S) Audio is not outputted to JK7101 normally. (1) Set the disc (with 5.1ch Audio) on the disc tray, and playback. Are the PCM data signals outputted to each pin Replace the DVD Main CBA Unit or DVD Mecha.
- Page 31 FLOW CHART NO.24 (FOR DV6400/N1B, DV6400/N1S) Audio is not outputted to JK7101 normally. (2) Set the disc (with Super Audio) on the disc tray, and playback. Are the PCM data signals inputted to each pin Replace the DVD Main CBA Unit or DVD Mecha.
- Page 32 Are the analog audio signals outputted to each pin of IC7301, IC7401 and IC7501? Replace ICs (IC7301, IC7401 or IC7501). IC7301 1,7PIN FRONT(L/R) IC7401 1,7PIN SORROUND(L/R) IC7501 1,7PIN CENTER/SUBWOOFER Do the mute signals of each line (as shown below) become to "H" level? FRONT(L) →...
-
Page 33: Block Diagrams
BLOCK DIAGRAMS System Control/Servo Block Diagram ( DV4400/N1B, DV4400/N1S ) IC2002 ENERGY STAR MICROCONTROLLER SLED SERVO SIGNAL SPINDLE SERVO SIGNAL FOCUS SERVO SIGNAL TRACKING SERVO SIGNAL PWSW PWSW POWER SUPPLY Q2007 IC101 BLOCK (MICRO CONTROLLER) PWRCON PWRCON DIAGRAM RM2001 EXT CLOCK REMOTE CLK33M REMOTE-IN... - Page 34 Digital Signal Process Block Diagram ( DV4400/N1B, DV4400/N1S ) DATA(AUDIO) SIGNAL DATA(VIDEO/AUDIO) SIGNAL VIDEO SIGNAL FOCUS SERVO SIGNAL TRACKING SERVO SIGNAL IC102 (SDRAM) IC101 (MICRO CONTROLLER) SDRAM ADDRESS(0-10) SDRAM ADDRESS(0-10) DATA SDRAM EXTERNAL MEMORY DECODER INST. DECODER STREAM SDRAM DATA(0-31) SDRAM DATA(0-31) DATA PIXEL...
- Page 35 Video / Audio Block Diagram ( DV4400/N1B, DV4400/N1S ) DATA(AUDIO) SIGNAL AUDIO SIGNAL VIDEO SIGNAL IC6101 (VIDEO DRIVER) WF 2 CN601 CN1601 VIDEO-Y JK1401 VIDEO-Y DRIVER VIDEO-C S-VIDEO VIDEO-C WF 3 FROM DIGITAL VIDEO-R/Cr JK6103 SIGNAL PROCESS VIDEO-R/Cr VIDEO-G DRIVER BLOCK DIAGRAM COMPOSITE VIDEO-G...
- Page 36 Power Supply Block Diagram ( DV4400/N1B, DV4400/N1S ) CAUTION ! Fixed voltage ( or Auto voltage selectable ) power supply circuit is used in this unit. CAUTION If Main Fuse (F1001) is blown, check to see that all components in the power supply NOTE : FOR CONTINUED PROTECTION AGAINST FIRE HAZARD, circuit are not defective before you connect the AC plug to the AC power supply.
- Page 37 BLOCK DIAGRAMS System Control/Servo Block Diagram ( DV6400/N1B, DV6400/N1S ) DATA(AUDIO) SIGNAL SLED SERVO SIGNAL SPINDLE SERVO SIGNAL FOCUS SERVO SIGNAL TRACKING SERVO SIGNAL IC101 IC2002 (MICRO CONTROLLER) ENERGY STAR CN901 MICROCONTROLLER 2ch-L/6ch-H 2ch-L/6ch-H ADAC-ML1 ADAC-ML1 PWSW PWSW POWER A-MUTE2...
- Page 38 Digital Signal Process Block Diagram ( DV6400/N1B, DV6400/N1S ) DATA(VIDEO) SIGNAL DATA(AUDIO) SIGNAL DATA(VIDEO/AUDIO) SIGNAL VIDEO SIGNAL FOCUS SERVO SIGNAL TRACKING SERVO SIGNAL +3.3V IC901 (OP AMP) IC101 (MICRO CONTROLLER) IC102 (SDRAM) V-REF(B) ANALOG MONITOR SDRAM ADDRESS(0-10) SDRAM ADDRESS(0-10) DATA...
- Page 39 Video / Audio Block Diagram ( DV6400/N1B, DV6400/N1S ) DATA(AUDIO) SIGNAL AUDIO SIGNAL VIDEO SIGNAL JK1401 S-VIDEO OUT IC6101 (VIDEO DRIVER) CN601 CN1601 VIDEO-Y VIDEO-Y DRIVER DIGITAL VIDEO-C SIGNAL VIDEO-C W F 3 VIDEO-R/Cr PROCESS VIDEO-R/Cr JK6103 BLOCK VIDEO-G VIDEO-G...
- Page 40 SACD Block Diagram ( DV6400/N1B, DV6400/N1S ) DATA(AUDIO) SIGNAL AUDIO SIGNAL IC7111 (AND GATE) IC7251 (SACD MULTI CHANNEL SIGNAL PROCESS) IC7252 (SD-RAM) CN7151 SACD CBA 11 XSHD XSHD ADDRESS BUS 148,149,151,152, 19-24, 10 XSRQ XSRQ ADDRESS (0-11) 154-157,159-162 27-32 12 SDCK...
- Page 41 Power Supply Block Diagram ( DV6400/N1B, DV6400/N1S ) CAUTION ! Fixed voltage ( or Auto voltage selectable ) power supply circuit is used in this unit. NOTE : If Main Fuse (F1001) is blown, check to see that all components in the power supply...
-
Page 42: Schematic Diagrams / Cba's And Test Points
SCHEMATIC DIAGRAMS / CBA’S AND TEST POINTS Standard Notes Notes: WARNING 1. Do not use the part number shown on these draw- ings for ordering. The correct part number is shown Many electrical and mechanical parts in this chassis in the parts list, and may be slightly different or have special characteristics. - Page 43 LIST OF CAUTION, NOTES, AND SYMBOLS USED IN THE SCHEMATIC DIAGRAMS ON THE FOLLOWING PAGES: 1. CAUTION: FOR CONTINUED PROTECTION AGAINST FIRE HAZARD, REPLACE ONLY WITH THE SAME TYPE FUSE. 2. CAUTION: Fixed Voltage (or Auto voltage selectable) power supply circuit is used in this unit. If Main Fuse (F1001) is blown, first check to see that all components in the power supply circuit are not defec- tive before you connect the AC plug to the AC power supply.
- Page 44 DVD Main 1/3 Schematic Diagram ( DV4400/N1B, DV4400/N1S ) 1-8-3 1-8-4 E57M2SCD1...
- Page 45 DVD Main 2/3 Schematic Diagram ( DV4400/N1B, DV4400/N1S ) 1-8-5 E57M2SCD2 1-8-6...
- Page 46 IC101 VOLTAGE CHART ( DV4400/N1B, DV4400/N1S ) PIN.NO PLAY STOP PIN.NO PLAY STOP PIN.NO PLAY STOP PIN.NO PLAY STOP PIN.NO PLAY STOP PIN.NO PLAY STOP PIN.NO PLAY STOP PIN.NO PLAY STOP ----- ----- ----- ----- ----- ----- ----- ----- ----- ----- ----- -----...
- Page 47 DVD Main 3/3 Schematic Diagram ( DV4400/N1B, DV4400/N1S ) 1-8-9 E57M2SCD3 1-8-10...
- Page 48 AV 1/3 Schematic Diagram ( DV4400/N1B, DV4400/N1S ) CAUTION ! CAUTION NOTE : Fixed voltage ( or Auto voltage selectable ) power supply circuit is used in this unit. If Main Fuse (F1001) is blown, check to see that all components in the power supply FOR CONTINUED PROTECTION AGAINST FIRE HAZARD, THE VOLTAGE FOR PARTS IN HOT CIRCUIT IS MEASURED USING circuit are not defective before you connect the AC plug to the AC power supply.
- Page 49 AV 2/3 Schematic Diagram ( DV4400/N1B, DV4400/N1S ) 1-8-13 E57M2SCAV2 1-8-14...
- Page 50 AV 3/3,Function, Switch & LED Schematic Diagram ( DV4400/N1B, DV4400/N1S ) STANDBY TITLE CHP. TRK. REPEAT FL2001 MATRIX CHART STANDBY REPEAT TITLE CHP. TRK. 1-8-15 1-8-16 E57M2SCAV3...
- Page 51 DVD Main 1/3 Schematic Diagram ( DV6400/N1B, DV6400/N1S ) 1-8-17 E57M7SCD1 1-8-18...
- Page 52 DVD Main 2/3 Schematic Diagram ( DV6400/N1B, DV6400/N1S ) 1-8-19 1-8-20 E57M7SCD2...
- Page 53 IC101 VOLTAGE CHART ( DV6400/N1B, DV6400/N1S ) PIN.NO PLAY STOP PIN.NO PLAY STOP PIN.NO PLAY STOP PIN.NO PLAY STOP PIN.NO PLAY STOP PIN.NO PLAY STOP PIN.NO PLAY STOP PIN.NO PLAY STOP ----- ----- ----- ----- ----- ----- ----- ----- -----...
- Page 54 DVD Main 3/3 Schematic Diagram ( DV6400/N1B, DV6400/N1S ) 1-8-23 1-8-24 E57M7SCD3...
- Page 55 AV 1/3 Schematic Diagram ( DV6400/N1B, DV6400/N1S ) CAUTION ! CAUTION NOTE : Fixed voltage ( or Auto voltage selectable ) power supply circuit is used in this unit. If Main Fuse (F1001) is blown, check to see that all components in the power supply...
- Page 56 AV 2/3 Schematic Diagram ( DV6400/N1B, DV6400/N1S ) 1-8-27 1-8-28 E57M7SCAV2...
- Page 57 AV 3/3,Function, Switch & LED Schematic Diagram ( DV6400/N1B, DV6400/N1S ) STANDBY TITLE CHP. TRK. REPEAT FL2001 MATRIX CHART STANDBY REPEAT TITLE CHP. TRK. 1-8-29 E57M7SCAV3 1-8-30...
- Page 58 SACD 1/2 Schematic Diagram ( DV6400/N1B, DV6400/N1S ) E57M7SCSA1 1-8-31 1-8-32...
- Page 59 SACD 2/2 Schematic Diagram ( DV6400/N1B, DV6400/N1S ) 1-8-33 1-8-34 E57M7SCSA2...
- Page 60 AV CBA Top View ( DV4400/N1B, DV4400/N1S, DV6400/N1B, DV6400/N1S ) CAUTION ! CAUTION Fixed voltage ( or Auto voltage selectable ) power supply circuit is used in this unit. NOTE : If Main Fuse (F1001) is blown, check to see that all components in the power supply...
- Page 61 AV CBA Bottom View ( DV4400/N1B, DV4400/N1S, DV6400/N1B, DV6400/N1S ) CAUTION ! Fixed voltage ( or Auto voltage selectable ) power supply circuit is used in this unit. CAUTION If Main Fuse (F1001) is blown, check to see that all components in the power supply...
- Page 62 LED CBA Top View LED CBA Bottom View ( DV4400/N1B, DV4400/N1S, DV6400/N1B, DV6400/N1S ) ( DV4400/N1B, DV4400/N1S, DV6400/N1B, DV6400/N1S ) BE57E2F01016-C Switch CBA Top/Bottom View ( DV4400/N1B, DV4400/N1S, DV6400/N1B, DV6400/N1S ) Switch CBA Top View Switch CBA Bottom View BE57E2F01016-B 1-8-39...
- Page 63 Function CBA Top View Function CBA Bottom View ( DV4400/N1B, DV4400/N1S, DV6400/N1B, DV6400/N1S ) ( DV4400/N1B, DV4400/N1S, DV6400/N1B, DV6400/N1S ) 1-8-41 BE57M7F01011 1-8-42...
- Page 64 SACD CBA Top View ( DV6400/N1B, DV6400/N1S ) 1-8-43 1-8-44 BE57D1F02011...
- Page 65 SACD CBA Bottom View ( DV6400/N1B, DV6400/N1S ) 1-8-45 BE57D1F02011 1-8-46...
-
Page 66: Waveforms
WAVEFORMS Pin 1 of CN1601 Pin 15 of CN1601 NOTE: Input CD: 1kHz PLAY (WF4~WF6) DVD: POWER ON (STOP) MODE (WF1~WF3) VIDEO-Y 0.2V 20µsec AUDIO-R 0.5msec Pin 9 of CN1601 Pin 18 of CN1601 VIDEO-C 0.2V 20µsec SPDIF 0.1µsec Pin 31 of IC6101 VIDEO-CVBS 0.5V 20µsec... - Page 67 WIRING DIAGRAM ( DV4400/N1B, DV4400/N1S ) VIDEO AUDIO-L AUDIO-R DIGITAL S-VIDEO VIDEO-Y VIDEO-Cb VIDEO-Cr AC CORD AUDIO OUT CN2002 W2002 CN6401 SCART JACK AD-KEY KEY-2 KEY-1 KEY-3 KEY-4 AV CBA FUNCTION CBA KEY-8 (BE57E2F01016-A) (BE57M7F01011) KEY-7 KEY-6 KEY-5(NU) CN1001 CN1601 CN401 CN601 W6001...
- Page 68 WIRING DIAGRAM ( DV6400/N1B, DV6400/N1S ) S-VIDEO VIDEO-Y VIDEO-Cb VIDEO-Cr VIDEO AUDIO-L AUDIO-R DIGITAL OPTICAL AC CORD AUDIO OUT AUDIO OUT W2002 CN2002 CN6401 CN7101 W1603 CN1603 AD-KEY P-ON+5V SCART JACK KEY-2 KEY-1 P-ON+9V AV CBA KEY-3 (BE57E2F01016-A) KEY-4 P-ON+3.3V...
-
Page 69: Firmware Renewal Mode
FIRMWARE RENEWAL MODE 1. Turn the power on and remove the disc on the tray. 5. After programming is finished, the tray opens auto- 2. To put the DVD player into version up mode, press matically. Fig. e appears on the screen and the [9], [8], [7], [6], and [SEARCH MODE] buttons on checksum in (*3) of Fig. -
Page 70: Lead Identifications
LEAD IDENTIFICATIONS 2SK3566 2SC2785 (H) 2SA1015-Y (TPE2) KTC3199 (GR) KTA1266 (Y) 2SC2412K T146S KRA110M KTC3198 (Y) KRA105S-RTK KTA1267 (Y) 2SC2120-Y(TPE2) KTC3875GR-RTK BN1L3Z (P) KTC3205 (Y) 2SC2236-Y-TPE6,C 2SA966(Y) E C B E C B G D S NJM4558D KIA4558P MM1567AJ KIA431-AT NJM4580MTE1 NC7SZ08P5X CXD2753R... -
Page 71: Exploded Views
EXPLODED VIEWS Cabinet [ DV4400/N1B, DV4400/N1S ] 2L011 See Electrical Parts List for parts with this mark. 2L011 Some Ref. Numbers are not in sequence. 2L021 2L021 2L011 DVD Main 2L105 2L031 CBA Unit JK6101 2B19 W1601 2B23 2L031 2B20 2B36 JK6102 W1001... - Page 72 [ DV6400/N1B, DV6400/N1S ] 2L105 2L105 2B12 2L011 2L104 2L011 W7102 2L021 2L021 SACD CBA W7151 W1601 2L011 2L105 W1603 DVD Main 2L031 CBA Unit 2B19 JK6101 2L031 2B36 2B20 JK6102 2B23 W1001 JK6103 2L031 JK1202 2L101 IC1204 W6001 2L051...
- Page 73 Packing Unit 1-13-3 E57M2EX...
-
Page 74: Parts List [Dv4400]
0.01µF/250V K OR 0.01µF/275V K CT2E103DC011 OR OR 0.01µF/250V M CT2E103HJE05 OR CT2E103MS037 C1001 /N/S *DF100360R *DF100360R FILM CAP. 0.047µF/250V K OR M CT2E473DC011 OR CT2E473MS037 NOTE : "nsp" PART IS LISTED FOR REFERENCE ONLY, MARANTZ WILL NOT SUPPLY THESE PARTS. 1-14-1... - Page 75 T1001 /F/U *TP000070R TRANSF. PULSE TRANS CSA-SW0215B LTT00CPSA132 T1001 /N *TS002050R *TS002050R TRANSF. MAINS TRANSFORMER LTT00EPSA141 CSA-SW0215C T1001 /S *TS002070R TRANSF. MAINS TRANSFORMER LTT00ZPSA144 CSA-SW0308A NOTE : "nsp" PART IS LISTED FOR REFERENCE ONLY, MARANTZ WILL NOT SUPPLY THESE PARTS. 1-14-2...
-
Page 76: Parts List [Dv6400]
45AW801010 CARTON BOX GIFT BOX CARTON E57M7ED 0VM306632 S1 /S 45AW801020 CARTON BOX GIFT BOX CARTON E57M8PD 0VM306702 45AW809010 CUSHION CUSHION (UK) E57M5UD 0VM101327 NOTE : "nsp" PART IS LISTED FOR REFERENCE ONLY, MARANTZ WILL NOT SUPPLY THESE PARTS. 1-15-1... - Page 77 MAINS TRANSFORMER LTT00EPSA141 CSA-SW0215C T1001 /S *TS002070R TRANSF. MAINS TRANSFORMER LTT00ZPSA144 CSA-SW0308A SACD CBA JK7101 *YT003450R *YT003450R TERMINAL CINCH JACK 6PIN MSD-246V-38 JXRL060LY091 GILT NOTE : "nsp" PART IS LISTED FOR REFERENCE ONLY, MARANTZ WILL NOT SUPPLY THESE PARTS. 1-15-2...
Need help?
Do you have a question about the DV6400 and is the answer not in the manual?
Questions and answers