Table of Contents
Advertisement
Installation and Servicing
G . C . 3 7 3 1 4 1 5
G l o w - w o r m B a c k B o i l e r U n i t o n l y
References in these instructions to British Standards and Statutory
Regulations/Requirements apply only to the United Kingdom.
One Contact Local Service
Supplied By www.heating spares.co Tel. 0161 620 6677
Instructions
T o b e l e f t w i t h t h e u s e r
F o r u s e w i t h
a s p e c i a l l y d e s i g n e d
For Ireland the rules in force must be used.
This is a Cat I
2H
Customer Services:
Tel: (01773) 828100
Fax: (01773) 828070
G . C . 3 7 3 1 4 1 4
Appliance
Hepworth Heating Ltd.,
Nottingham Road, Belper, Derbyshire. DE56 1JT
General/Sales enquiries :
Tel: (01773) 824141 Fax: (01773) 820569
221098C.01.99
BS 6332
BS 5258
Advertisement
Table of Contents

Related Manuals for Glow-worm Opulence 2 BBU


Summary of Contents for Glow-worm Opulence 2 BBU
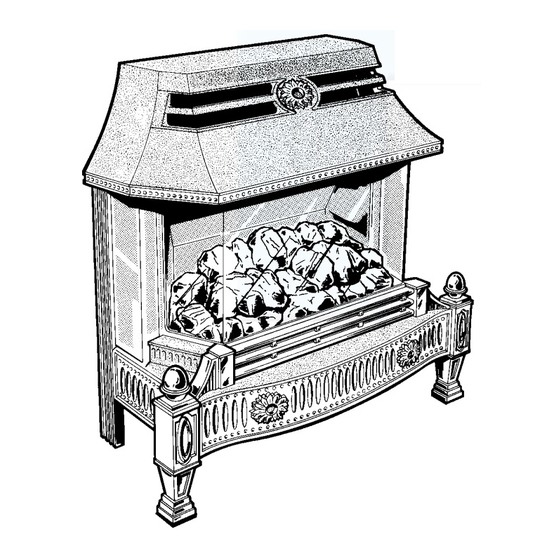
- Page 1 221098C.01.99 Installation and Servicing Instructions T o b e l e f t w i t h t h e u s e r G . C . 3 7 3 1 4 1 4 G . C . 3 7 3 1 4 1 5 F o r u s e w i t h a s p e c i a l l y d e s i g n e d G l o w - w o r m B a c k B o i l e r U n i t o n l y...
- Page 2 1 G e n e r a l Sheet Metal Parts If this fire front is to be fitted to a Glow-worm back boiler WITHOUT a combustion products discharge WARNING. When installing or servicing this fire front safety device please read the supplementary instructions care should be taken when handling metal parts at the back of this booklet.
- Page 3 1 G e n e r a l FLAT AREA FIRE FIXING FACE 289mm 289mm 327mm 327mm 339mm 351mm 351mm 339mm Diagram 1.1 1.3 Data Gas connection- from the service cock Total weight - 49kg Injector - upper Bray 18/180 - lower Bray 18/320 Burner pressure setting...
- Page 4 1.5 Clearances 1.4 Fire Front Location Restrictions must not be placed around the assembled This fire front can only be fitted to a Glow-worm 45/2 or fire front, see diagram 1.2. 56/2 back boiler unit which itself has been installed in...
- Page 5 2 T y p e s o f I n s t a l l a t i o n a n d F l u e 2.4 Flue Note. Refer to Section 2 in the Back Boiler Installation Book before starting. The back boiler flue collector assembly accepts the fire front flue spigot.
- Page 6 3 F i r e F r o n t P r e p a r a t i o n FIRE BODY PACK FIRE BODY ASSEMBLY WALL SEALING PLATE FLUE SPIGOT LITERATURE COMBUSTION CHAMBER FUEL BOTTOM PLATE EFFECT OPULENCE CASING PACK OPUS CASING PACK CANOPY CANOPY...
- Page 7 3 F i r e F r o n t P r e p a r a t i o n SCREW FRONT LEG M5x30 LEVELLING SCREW SCREW SIDE M5x14 CASTINGS SCREW UPPER WALL M5x40 MOUNTING ANCHOR UPPER WALL MOUNTING SCREW FRONT LEG M5x8...
- Page 8 3 F i r e F r o n t P r e p a r a t i o n 3.1 Unpacking The fire front is delivered in two packs, one contains the body assembly, fuel effect pieces and supply tube pack. The other contains the fire front castings, side panels, plinth and loose items pack.
- Page 9 3 F i r e F r o n t P r e p a r a t i o n Firefront sensing tube *'C' = Distance from fire fixing wall face to datums Shorten the plain end of the fire front sensing tube by on back boiler air duct.
- Page 10 4 I n s t a l l a t i o n 4.1 Battery SECURING Remove the fire front from the base tray. SCREW Take the battery from the fittings pack and fit as shown in 9V ALKALINE diagram 4.1, make sure the terminals are correctly fitted. BATTERY SECURING 4.2 Positioning the Fire Front...
- Page 11 4 I n s t a l l a t i o n MARK FRONT FRONT FIXING FIXING SCREW SPIGOT HOLES SPIGOT BACK BOILER DUCT FLUE FLUE FIRE FRONT COLLECTOR COLLECTOR ASSEMBLY ASSEMBLY FIRE FRONT Diagram 4.4 SENSING TUBE OLIVE TUBING SECURING SCREW (2)
- Page 12 4 I n s t a l l a t i o n MOUNTING FIRE FRONT BRACKET TUBE NUT SENSING TUBE TUBE NUT SECURING SCREW (2) 40mm SECURING SCREW (2) Diagram 4.8 ANCHOR LOCK NUT (A) UNION NUT (B) Diagram 4.7 JOINT (C) 4.3 Gas Connection Place the tubing nut and olive, from the loose items...
- Page 13 4 I n s t a l l a t i o n UPPER SIDE UPPER SIDE FIBRE RETAINING RETAINING R.H. SIDE FIBRE WASHER LOCATING PIN SCREW SCREW PANEL WASHER AND HOLE GAS CONTROL KNOB R.H. SIDE PANEL L.H. SIDE LOCATING PIN PANEL AND HOLE...
- Page 14 5 L i g h t i n g , T e s t i n g a n d F i t t i n g o f I n t e r n a l P a r t s 5.1 Lighting and Testing PRESSURE Make sure that the electrical supply to the back boiler is...
- Page 15 5 L i g h t i n g , T e s t i n g a n d F i t t i n g o f I n t e r n a l P a r t s FUEL EFFECT PIECES LOCATIONS BOTTOM PLATE...
- Page 16 5 L i g h t i n g , T e s t i n g a n d F i t t i n g o f I n t e r n a l P a r t s FUEL EFFECT PIECE POSITION 1 FUEL EFFECT PIECE POSITION 4 LOCATION...
- Page 17 5 L i g h t i n g , T e s t i n g a n d F i t t i n g o f I n t e r n a l P a r t s 5.3 Decorative Castings Fit the front casting as diagram 5.12, decorative side castings as diagram 5.13, front legs and feet as diagram...
- Page 18 5 L i g h t i n g , T e s t i n g a n d F i t t i n g o f I n t e r n a l P a r t s 5.4 Heat Settings Light the fire front burner as the relevant part of Section 5.1.
- Page 19 5 L i g h t i n g , T e s t i n g a n d F i t t i n g o f I n t e r n a l P a r t s 5.5 Test for Clearance of Products Notes: WARNING: Take care, the appliance will get hot...
- Page 20 5 L i g h t i n g , T e s t i n g a n d F i t t i n g o f I n t e r n a l P a r t s 5.6 Plinth Fitting Fit the controls cover plinth onto the guides and push it back as far as it will go, see diagram 5.19.
- Page 21 7 S e r v i c i n g Notes (a) To ensure the continued efficient and safe operation of the appliance it is recommended that it is checked and serviced at regular intervals. The frequency of servicing will depend upon the particular installation and usage, but in general once a year should be enough.
- Page 22 7 S e r v i c i n g Disconnect the supply pipe unions at the injectors also L.H. BURNER R.H. BURNER the union connection at front, see diagram 7.5. SECURING SCREW SECURING SCREW Remove the two burner securing screws, see diagram 7.5.
- Page 23 7 S e r v i c i n g 7.4 Combustion Products Discharge Safety Device Remove the burner refer to Section 7.3. TUBE Check the condition of the electrode and thermocouple, with a soft brush, see diagram 7.8. Make sure the electrode is in line with the earth post and spark gap is as in diagram 7.9.
- Page 24 7 S e r v i c i n g ELECTRODE GAS TAP MOUNTING EARTH BRACKET SECURING SPARK GAP POST SCREW + 1.0 - 0.5 MICRO SWITCH ELECTRICAL CONNECTIONS EARTH ELECTRODE POST INSULATION MICRO SWITCH TOP VIEW NUT (2) ELECTRODE GAS TAP MOUNTING BRACKET...
- Page 25 7 S e r v i c i n g GAS TAP SECURING SCREWS THERMOCOUPLE Diagram 7.12 Diagram 7.11 GAS TAP BODY GAS TAP BRACKET AND NITING PLATE PLUG ASSEMBLY 'O' RING WASHER SPRING SECURING SCREW Diagram 7.13 221098C Supplied By www.heating spares.co Tel. 0161 620 6677...
- Page 26 8 F a u l t F i n d i n g ELECTRODE ELECTRODE MICRO SWITCH MICRO SWITCH SPARK GENERATOR Diagram 8.2 8.1 Fire Front Ignition Remove decorative castings, glass panel and fuel bed, refer to appropriate parts of Section 7. Refer to diagram 8.3.
- Page 27 8 F a u l t F i n d i n g START HERE FIRE WILL NOT LIGHT Check that gas is available Does the pilot light using a match ? Turn off appliance tap, turn on appliance tap. Change pilot filter Does the fire light ? Ensure gap is within specified...
- Page 28 8 F a u l t F i n d i n g Disconnect appliance thermocouple from the gas tap. Check that all connections are clean and in good condition. Fit test meter interrupter into the magnet unit. Fit appliance thermocouple into the test meter interrupter.
- Page 29 8 F a u l t F i n d i n g 8.3 Thermocouple To test a thermocouple, a meter with a range of 0 to 30mV is required together with a thermocouple interrupter test unit, similar to a British Gas Multimeter 6 unit.
- Page 30 9 R e p l a c e m e n t o f P a r t s Notes: (a) Make sure that the fire is cold before replacing any SECURING parts. SCREW (b) Replacement of parts must be carried out by a 9V ALKALINE competent person.
- Page 31 9 R e p l a c e m e n t o f P a r t s GAS TAP BRACKET AND NITING PLATE ASSEMBLY FILTER GAS TAP CROSS SECTION VIEW FILTER Diagram 9.2 9.1 Burner 9.5 Ignition Lead Refer to Section 7.3.
- Page 32 10 S p a r e P a r t s When replacement parts are required please apply to The GC No.37 314 14, Opus, 37 314 15 Opulence, and your local supplier. the serial number, to be found on the chassis, visible when front casting is removed.
- Page 33 10 S p a r e P a r t s Diagram 10.1 221098C Supplied By www.heating spares.co Tel. 0161 620 6677...
- Page 34 “Off” to be against the pointer. As these fire fronts may be fitted to Glow-worm 45, 56, 45R and 56R back boiler units WITHOUT a combustion Push in and slightly turn gas control knob “A”...
- Page 35 11 S u p p l e m e n t a r y I n s t a l l a t i o n I n s t r u c t i o n s INSET: Showing a Combustion Products Discharge Safety Device fitted.
- Page 36 C o n t r o l o f S u b s t a n c e s H a z a r d o u s t o H e a l t h Information for the Installer and Service Engineer. Under Section 6 of the Health and Safety at Work Act 1974, we are required to provide information on substances hazardous to health.
Need help?
Do you have a question about the Opulence 2 BBU and is the answer not in the manual?
Questions and answers