Table of Contents
Advertisement
Quick Links
Advertisement
Table of Contents

Related Manuals for Amina AIW750E


Summary of Contents for Amina AIW750E
- Page 1 Installation Guide AIW750E V1.2 May 2013 High-end Invisible Loudspeaker...
- Page 2 Caution: Read before installing this product To ensure optimal performance, please Ensure that all installation mounting > > read this guide carefully and keep in a surfaces are able to support the weight safe place for future reference. of the product. >...
-
Page 3: Table Of Contents
Installing the BackboxCV345 & BackboxCV200 Installing the BackboxCV345 & BackboxCV200 Plastering and decorating Plastering and decorating Testing the speakers Setup tips Setup tips Setup tips Further details Troubleshooting Specifications / AIW750E & APU750 Spacesaver information Warranty & copyright information Contact information... -
Page 4: Message From The Managing Director
Congratulations and thank you for purchasing an Amina Technologies Evolution Series high performance invisible loudspeaker. At Amina we are proud of being at the forefront of flat panel loudspeaker technology. All the components that make up your Evolution Series loudspeaker have been developed specifically to provide the ultimate in sound quality and reliability, while allowing you to decorate, furnish and enjoy your home in any way you wish without any visible “clutter”... -
Page 5: Included In The Carton / Packaging / Fixing Options
CAUTION: Take care when removing the speakers from the carton. The packaging for the AIW750E loudspeaker has been carefully designed to protect the product during transit. Please retain it in the unlikely event you need to return the product to your dealer or manufacturer. Please recycle the packaging should you wish to dispose of it. -
Page 6: Cutting The Plasterboard (Drywall)
Preparing the wall/ceiling and fixing the product Cutting the plasterboard (drywall) Locate joist/stud work When you have chosen your speaker cut a small hole in plasterboard locations, before cutting a hole in the to check stud location plasterboard it is important that you locate the position of the joists/studs. - Page 7 Installing the BackboxCV345 & CV200 Locate cable and position backbox Side View Pull the speaker cable through the rubber grommet in the top side of the backbox and ensure speaker cables are pulled through with a manageable length available. Apply the Backbox through the hole at an angle until the end cheeks rest against the back side of the plasterboard.
- Page 8 Ensure the speaker face is flush with the front of the plasterboard and that everything is firmly held in position. Shims may be necessary. Amina backboxes (BackboxCV345 and CV200) are designed for 12.5mm (1/2”) plasterboard. Shims can be supplied to adapt the backbox for different plasterboard thicknesses.
-
Page 9: Plastering And Decorating
Important: Amina recommends you leave the 1 coat of PVA to completely dry. Once dry, add another single coat of PVA immediately prior to plastering. - Page 10 Plastering and decorating continued... Apply joint tape Apply professional plasterboard joint scrim (Amina recommend use of a self adhesive fibreglass scrim tape) over the joint between the speaker and the surrounding wall. Plastering Use standard finishing plaster for large areas. For patch plastering use a repair plaster or joint compound such as British Gypsum Easi-fill®...
-
Page 11: Testing The Speakers
If there is little or no difference between these two sounds it is almost certain the plaster coat is too thick. This will compromise the speaker performance. Amina have a lot more information available from its technical help desk for those w ishing to measure frequency response curves at different stages of the installation. -
Page 12: Setup Tips
> The AIW750E is a planar device and this feature is further enhanced when it is flush mounted into your wall or ceiling. Being planar (or flat) means that the audio’s arrival time to the listener is the same for all frequencies, i.e. there is very little phase distortion. -
Page 13: Setup Tips
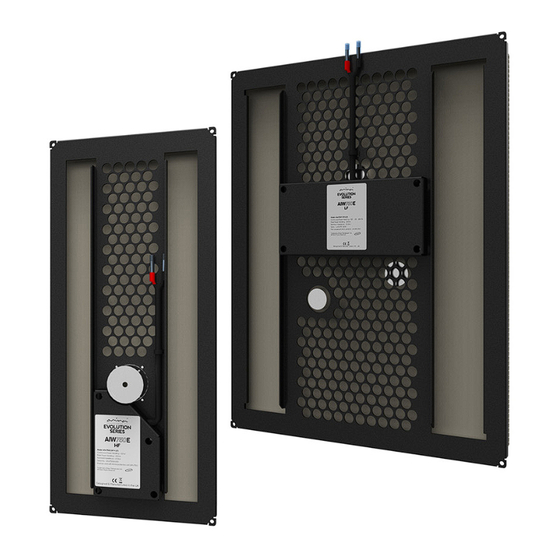
Setup tips continued... > Speaker Orientation The AIW750E can be installed either in portrait or landscape orientations, but has been optimised for portrait orientaion and for the HF and LF panels to be positioned one above the other. > For critical listening in ceilings, e.g. a 5.1 surround system, ensure that the orientation of all speakers is the same relative to the main listening position and that the top of the HF speaker is positioned closer to the walls. - Page 14 > Boundary Loading It is possible to increase the low frequency output of the AIW750E by positioning them close (50mm - 150mm) to the corners of a room. The recommended setup on the previous page show the LF panel in both cases being either close to the floor or ceiling.
-
Page 15: Further Details
Further details Maintenance and cleaning Once your AIW750E speaker is plastered into your wall or ceiling, it requires no physical maintenance. Your wall or ceiling can be cleaned with products appropriate to the finish finally applied to the plaster surface. -
Page 16: Troubleshooting
If so, the product may need to be returned to Amina for repair or replacement. If the nominal impedance at the end of the cable is very different to the impedance at the speaker, check your cables. -
Page 17: Specifications
2-way crossover, 2nd order type with adjustable mid/treble output level Fuse protection Self-resetting, current sensing type Compatability Suitable for use with Amina AIW750E only Number of channels Connection type Input – 1x Springcon® 2 pole connector / Output – 1x Springcon® 4 pole connector... -
Page 18: Spacesaver Information
Before installing your AIW series loudspeaker please refer to the The other method is to again pull the W: www.amina.co.uk in position. Installation Guide for full details. Contacting Amina in the United States P: 1-866 462 6462 F: 1-888-329 2491 Contact E: sales@aminatechnologies.com W: www.aminatechnologies.com... -
Page 19: 6 Warranty & Copyright Information
At the end of the speakers useful life and in compliance with the European directive on waste electrical and electronic equipment (WEEE), this product is to be returned to your supplier, or directly to Amina for recycling. If you have any questions please con- tact Amina Technologies Ltd. -
Page 20: Contact Information
Amina Technologies Ltd (International) Cirrus House, Glebe Road, Huntingdon Cambridge, PE29 7DL, UK T: +44 (0) 1480 354390 E: inspired@amina.co.uk W: www.amina.co.uk Contacting Amina in the United States P 1-866 462 6462 F 1-888 329 2491 E: sales@aminatechnologies.com W: www.aminatechnologies.com... - Page 21 Notes...
- Page 22 Contact Information Amina Technologies Ltd Cirrus House, Glebe Road Huntingdon, Cambs, PE29 7DL England T: + 44 1480 354390 / F: + 44 1480 356564...
Need help?
Do you have a question about the AIW750E and is the answer not in the manual?
Questions and answers