
Subscribe to Our Youtube Channel
Related Manuals for Amina AIW150E


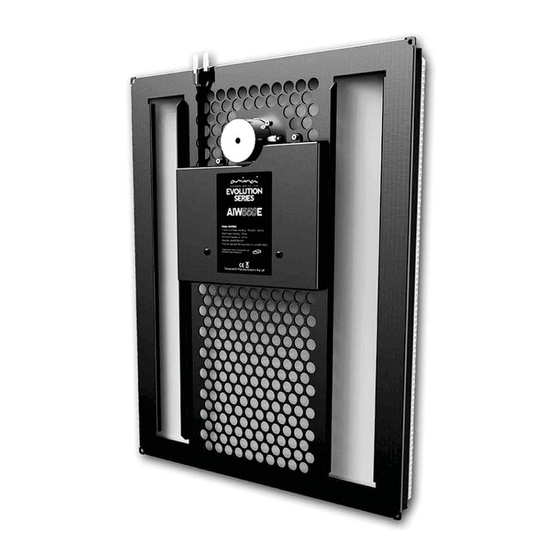
Summary of Contents for Amina AIW150E
- Page 1 Installation Guide AIW150E/AIW350E V1.1 August 201 2 AIW550E Invisible Loudspeaker...
- Page 2 Caution: Read before installing this product > T o ensure optimal performance, please read > Ensure that all installation mounting surfaces this guide carefully and keep in a safe place are able to support the weight of the for future reference. product.
-
Page 3: Table Of Contents
Contents Message from the Managing Director Sect ion Included in the carton / Packaging T esting How to use this manual T esting the speakers Installation overview diagram Sect ion Finishing Sect ion Preparing the wall / ceiling and Plastering and decorating steps 1 + 2 fixing the product Cavity Installation steps 1 + 2 Plastering and decorating steps 3, 4 + 5... - Page 4 Congratulations and thank you for purchasing an Amina T echnologies Evolution Series high performance invisible loudspeaker. At Amina we are proud of being at the forefront of flat panel loudspeaker technology. All the components that make up your Evolution Series loudspeaker have been developed specifically to provide the ultimate in sound quality and reliability, while allowing you to decorate, furnish and enjoy your home in any way you wish without any visible “clutter”...
- Page 5 Included in the carton Please check that your carton contains the correct accessories. Model Number Single Pair AIW150E / 1x Loudspeaker panel 2x Loudspeaker panel AIW350E / 1x APU (Protection unit) 1x APU (Protection unit) AIW350E/S200 / 1x Spacesaver template...
- Page 6 For other construction types please contact Amina. Cavity wall or ceiling This is the most common type of installation and requires you to use the Amina BackboxFS or our basic fixing block kit (both BackboxFS and the basic fixing block kit are sold separately). Whenever possible we recommend you use the BackboxFS as the Evolution Series loudspeaker has been tuned to work optimally in this setup.
- Page 7 Installation overview Section Preparing the wall / ceiling and fixing the product Cavity Cavity installation Solid structure installation with with backbox installation For new builds or full refurbishment fixing blocks with backbox where sound transmission Typically a new build For new builds or needs to be reduced or full refurbishment full refurbs...
-
Page 8: Preparing The Wall/Ceiling And Fixing The Product
Preparing the wall/ceiling and fixing the product Cavity installation with fixing blocks T ypically a new build or fu ll refurbishment, wall or ceiling. Uses fixing blocks (sold seperat ely) Locate joist/stud work When you have chosen your speaker cut a small locations, before cutting a hole in the hole in plasterboard to check stud location... - Page 9 Cavity installation with fixing blocks continued... Install speaker cable and insert insulation Ensure all speaker cables are pulled through to the speaker location with plenty of slack. This will make it easier to connect the cable to the speaker later on in the installation process.
- Page 10 Cavity installation with fixing blocks continued... Connect the Evolution Series speaker Connect the speaker cable to the speaker using a high quality crimping tool. Your Evolution Series speaker is fitted with blue butt splice crimp connectors which are suitable for speaker cable thicknesses of 1.5mm - 2.5mm (16 - 14AWG).
-
Page 11: Cavity Installation With Backbox Steps 1
Cavity installation with backbox For New Builds or full refurbishment where sound transmission needs to be reduced. Locate cable and position backbox Side View Choose speaker location and create aperture by following steps 01 + 02 on page 05. (remember to keep the 455mm x 350mm (18”... - Page 12 Shims may be necessary. (See section B) Amina backboxes (Backbox FS and FSS) are designed for 12.5mm (1/2”) plasterboard. Shims can be supplied to adapt the backbox for different plasterboard thicknesses.
-
Page 13: 0 Solid Wall Installation With Backbox Steps 1
Solid wall installation with backbox For new builds or fu ll refurbs. Create aperture in brickwork Using the combination of an angle grinder and a jackhammer drill, create a cavity of 460mm x 355mm (18 ” x 13 ”) within the 2/16 31/32 brickwork. -
Page 14: 2 Solid Wall Installation With Backbox Step
Solid wall installation with backbox continued... Install backbox render yet to be applied Make a small hole in one of the rubber grommets and pull the speaker cable through it and into the backbox. There are Mineral Wool four slots in the base of the backbox and using suitable screws (not supplied), fix the backbox to the brickwork within the cavity. - Page 15 Solid wall installation with backbox continued... Secure the speaker Top View Ensure the speaker cable is laid behind the Brickwork/concrete mineral wool and cannot rest against the speaker itself. Remove the backing paper from the 6 adhesive pads on the backbox mounting Render tabs, carefully position the speaker onto the support tabs and apply moderate pressure.
- Page 16 T o patch plaster: Skim across the speaker front and blend with the existing finished plaster. Amina recommend British Gypsum Easi-fill® which allows a smooth accurate finish using fine sandpaper or a wet sponge. shims 30-50mm 3/16 - 2”...
- Page 17 Speaker alignment required for plastering plasterboard Using a 2-3mm shim set (contact your Amina supplier) applied between the back of the speaker and the mounting surface of the existing plaster backbox (or fixing blocks), the front face of...
- Page 18 Speaker alignment required for plastering plasterboard Using a 2-3mm shim set (contact your Amina supplier) applied between the back of the speaker and the mounting surface of the existing plaster backbox (or fixing blocks), the front face of...
- Page 19 3/16 - 2” T o patch plaster: Apply a 2mm skim across the speaker front and blend with the drywall. Amina recommend British Gypsum Easi-fill® which allows a smooth accurate finish using fine sandpaper or a wet sponge. shims (if required)
- Page 20 Allow a much larger area around the speaker (approx. 1m (39”)) to be skimmed. This 1-2mm (5/64”) thick skim is then feathered outward at the edges and blended into the drywall. Amina recommend British Gypsum Easi-fill®. Cont inue to sect ion...
- Page 21 This will compromise the speaker performance. Amina hav e a lot more informat ion available from its t echnical help desk for those w ishing to measure frequency response curv es at different stages of the installat ion.
-
Page 22: Finishing
Important: Amina recommends you leave the 1 coat of PV A to completely dry. Once dry, add another single coat of PV A immediately prior to plastering. - Page 23 Note: Amina have separate guides for information about installing the product behind other materials and surfaces such as wooden panels, acrylic and melamine laminates. Contact Amina if you require any of this additional information (page 28)
-
Page 24: Setup Tips
The Evolution Series are suitable for both wall and ceiling installations. When the most uniform audio coverage in a room is required, space the speakers evenly in the ceiling. However if the room has a height greater than 6m (19’) Amina suggests installing them in the walls at a height of around 1.8m (6’). >... - Page 25 From a system compatibility point of view your Evolution Series (and its accompanying APU protection unit) can be treated like any conventional 4 - 8 Ohm loudspeaker. Amina recommend you use a good quality amplifier so as to avoid driving them with high levels of distortion which at best will provide poor sound quality and at worse may permanently damage the loudspeaker.
-
Page 26: Further Details
BackBox in place as these can be used to support a small section of plasterboard when making good the wall/ceiling. If the product needs repairing, please return it to your supplier or Amina T echnologies Ltd again leaving as much plaster on the panel surface as possible. Once repaired, the product can be refixed into position following appropriate installation steps detailed earlier within the manual. -
Page 27: Troubleshooting
If so, the product may need to be returned to Amina for repair or replacement. If the nominal impedance at the end of the cable is very different to the impedance at the speaker, check your cables. - Page 28 Twin blue butt-splice crimp terminal (suitable for 1.5mm2 - 2.5mm2 / 16-14AWG cable thickness) In-line protection unit APU150 APU350 APU550 Fixing requirement Amina BackboxFS / BackboxSW / Basic fixing kit Power Handling 15W (cont) ; 30W (peak) 30W (cont) ; 60W (peak) 50W (cont) ; 100W (peak) Manufacturer warranty...
-
Page 29: Spacesaver Information
Cirrus House, Glebe Road, Huntingdon Cambridge, PE29 7DL, UK T: +44 (0) 1480 354390 F: +44 (0) 1480 356564 E: inspired@amina.co.uk W: www.amina.co.uk Contacting Amina in the United States in position. P: 1-866 462 6462 F: 1-888-329 2491 E: sales@aminatechnologies.com W: www.aminatechnologies.com 350mm ”) -
Page 30: Warranty & Copyright Information
At the end of the speakers useful life and in compliance with the European directive on waste electrical and electronic equipment (WEEE), this product is to be returned to your supplier, or directly to Amina for recycling. If you have any questions please contact Amina T echnologies Ltd. -
Page 31: Contact Information
Contact Information Amina T echnologies Ltd International Cirrus House, Glebe Road, Huntingdon Cambridge, PE29 7DL, UK T: +44 (0) 1480 354390 F: +44 (0) 1480 356564 E: inspired@amina.co.uk W: www.amina.co.uk Contacting us in the United States P 1-866 462 6462 F 1-888-329 2491 E: sales@aminatechnologies.com... - Page 32 Amina T echnologies Ltd Cirrus House, Glebe Road Huntingdon, Cambs, PE29 7DL England T: + 44 1480 354390 / F: + 44 1480 356564...
Need help?
Do you have a question about the AIW150E and is the answer not in the manual?
Questions and answers